Filters allow you to decide when and whether a specific answer is sent to users.
When to use Filters
Filters enable you to decide what type of bot responses and actions are triggered depending on the user information your bot collects. For example, based on the applied filter, you can show a different message to a person who is a returning customer or the one that entered your website through a specific URL.
How filters work
There are four different types of Filters:
-
Attribute — enables you to use default or custom attributes.
-
Score — uses the confidence score value to decide what action or response should the bot trigger.
-
Message — triggers the action based on user input.
Note: You can apply multiple filters to a single response or action. Responses or actions are shown to the users only if the criteria in the filters are met.
How to use Filters
Let’s say you work in a publishing company that sells course books online. You want to use a chatbot to help your customers, in this case, students and teachers, find proper books.
You need to create different conversation paths for customers looking for students' books & users who are looking for teaching resources.
-
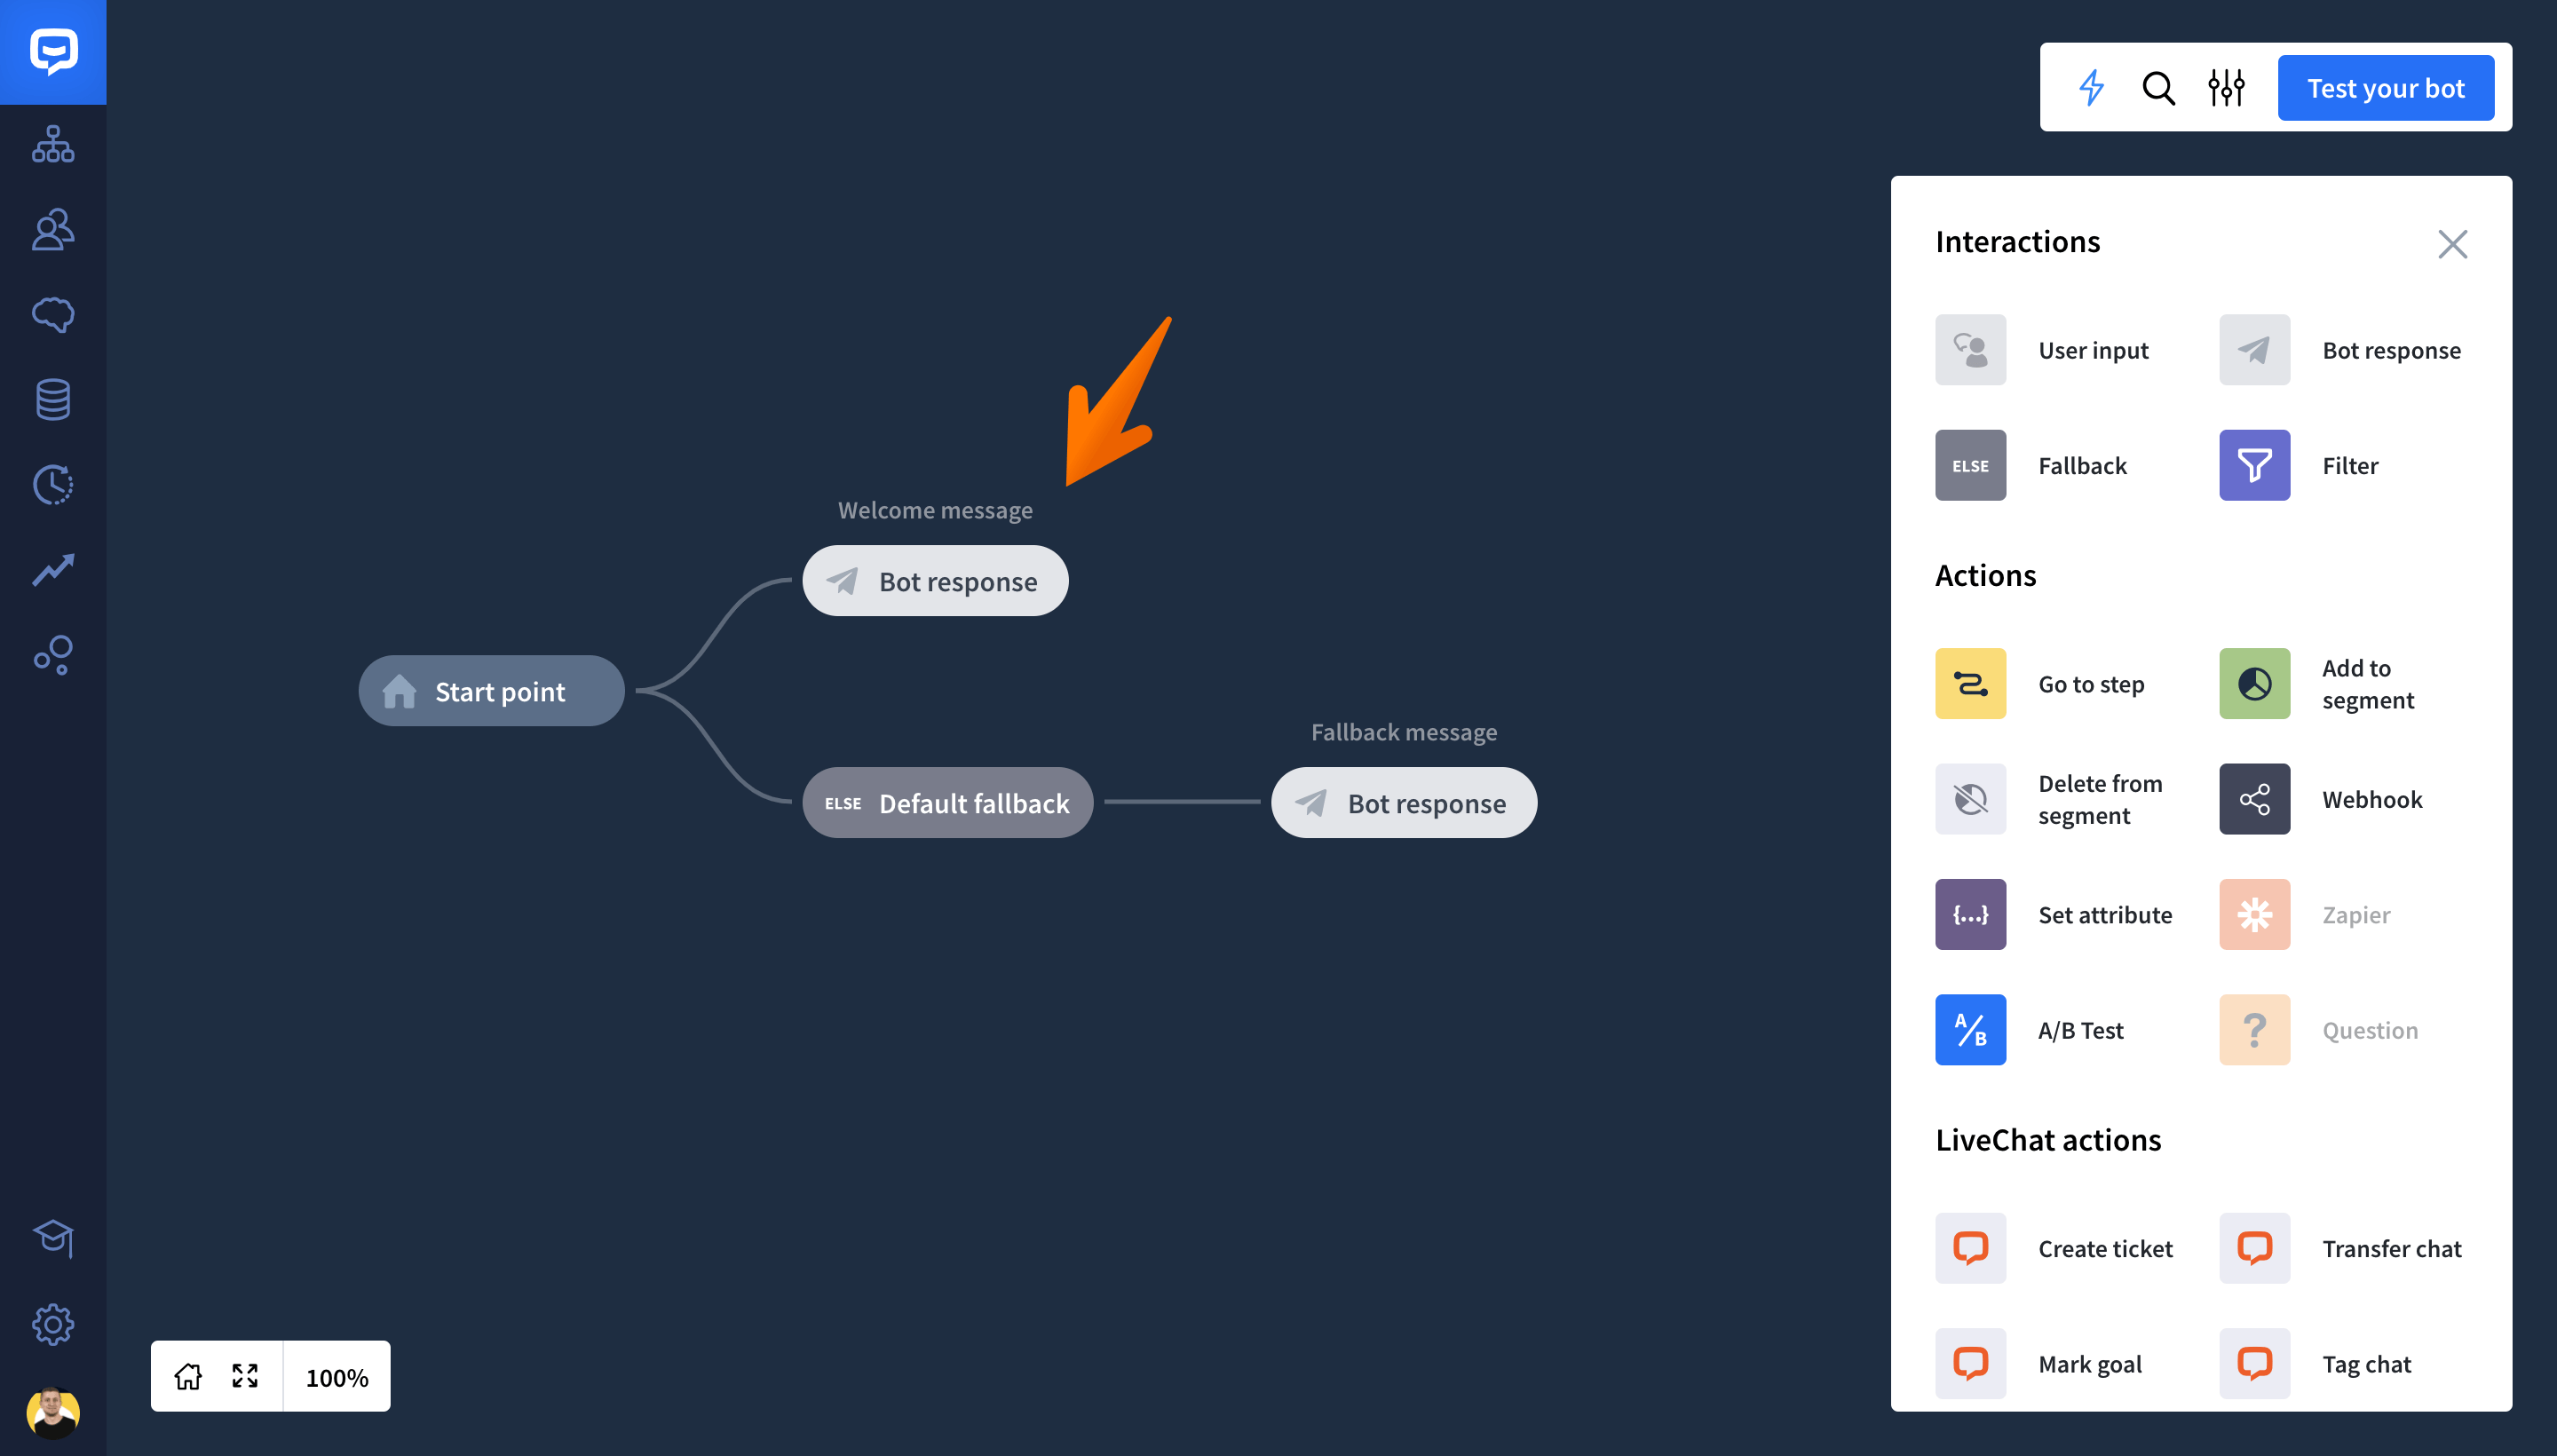
Click on the Bot response block to open its edit window**.**
-
Write in your welcome message. Close the window. The change will be saved automatically.

-
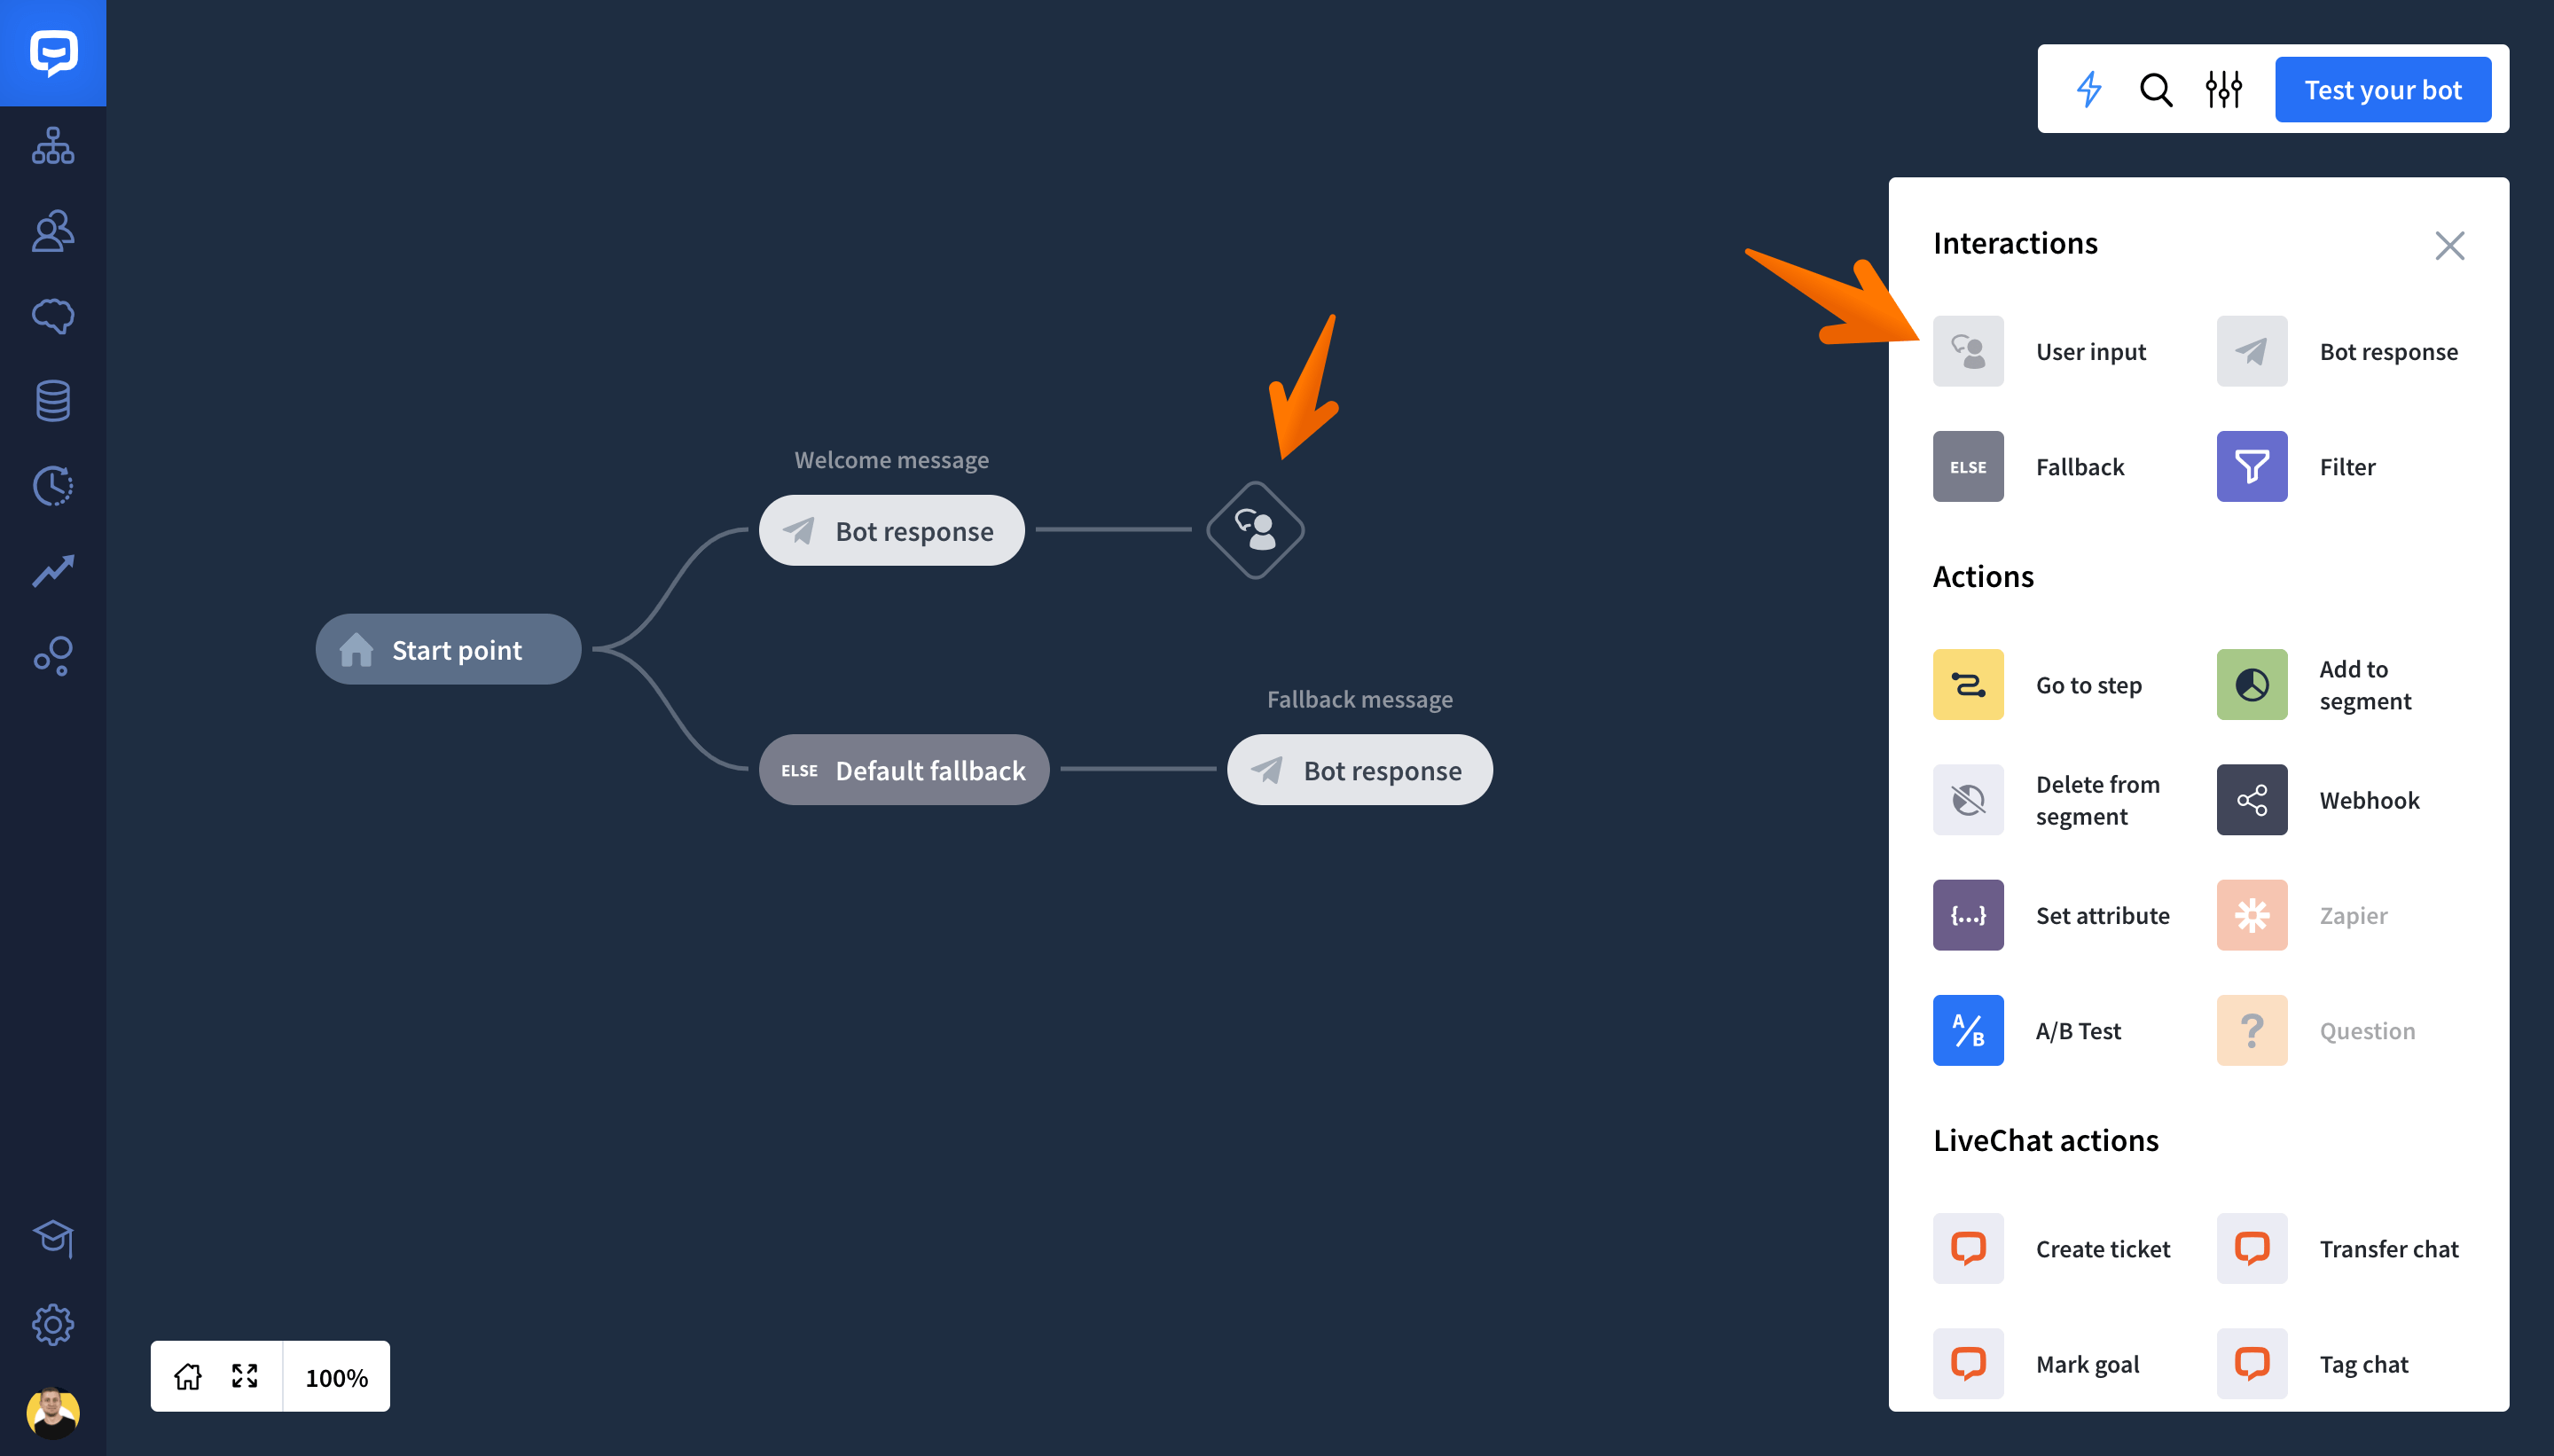
Drag the User input block and drop it after the Bot response.
-
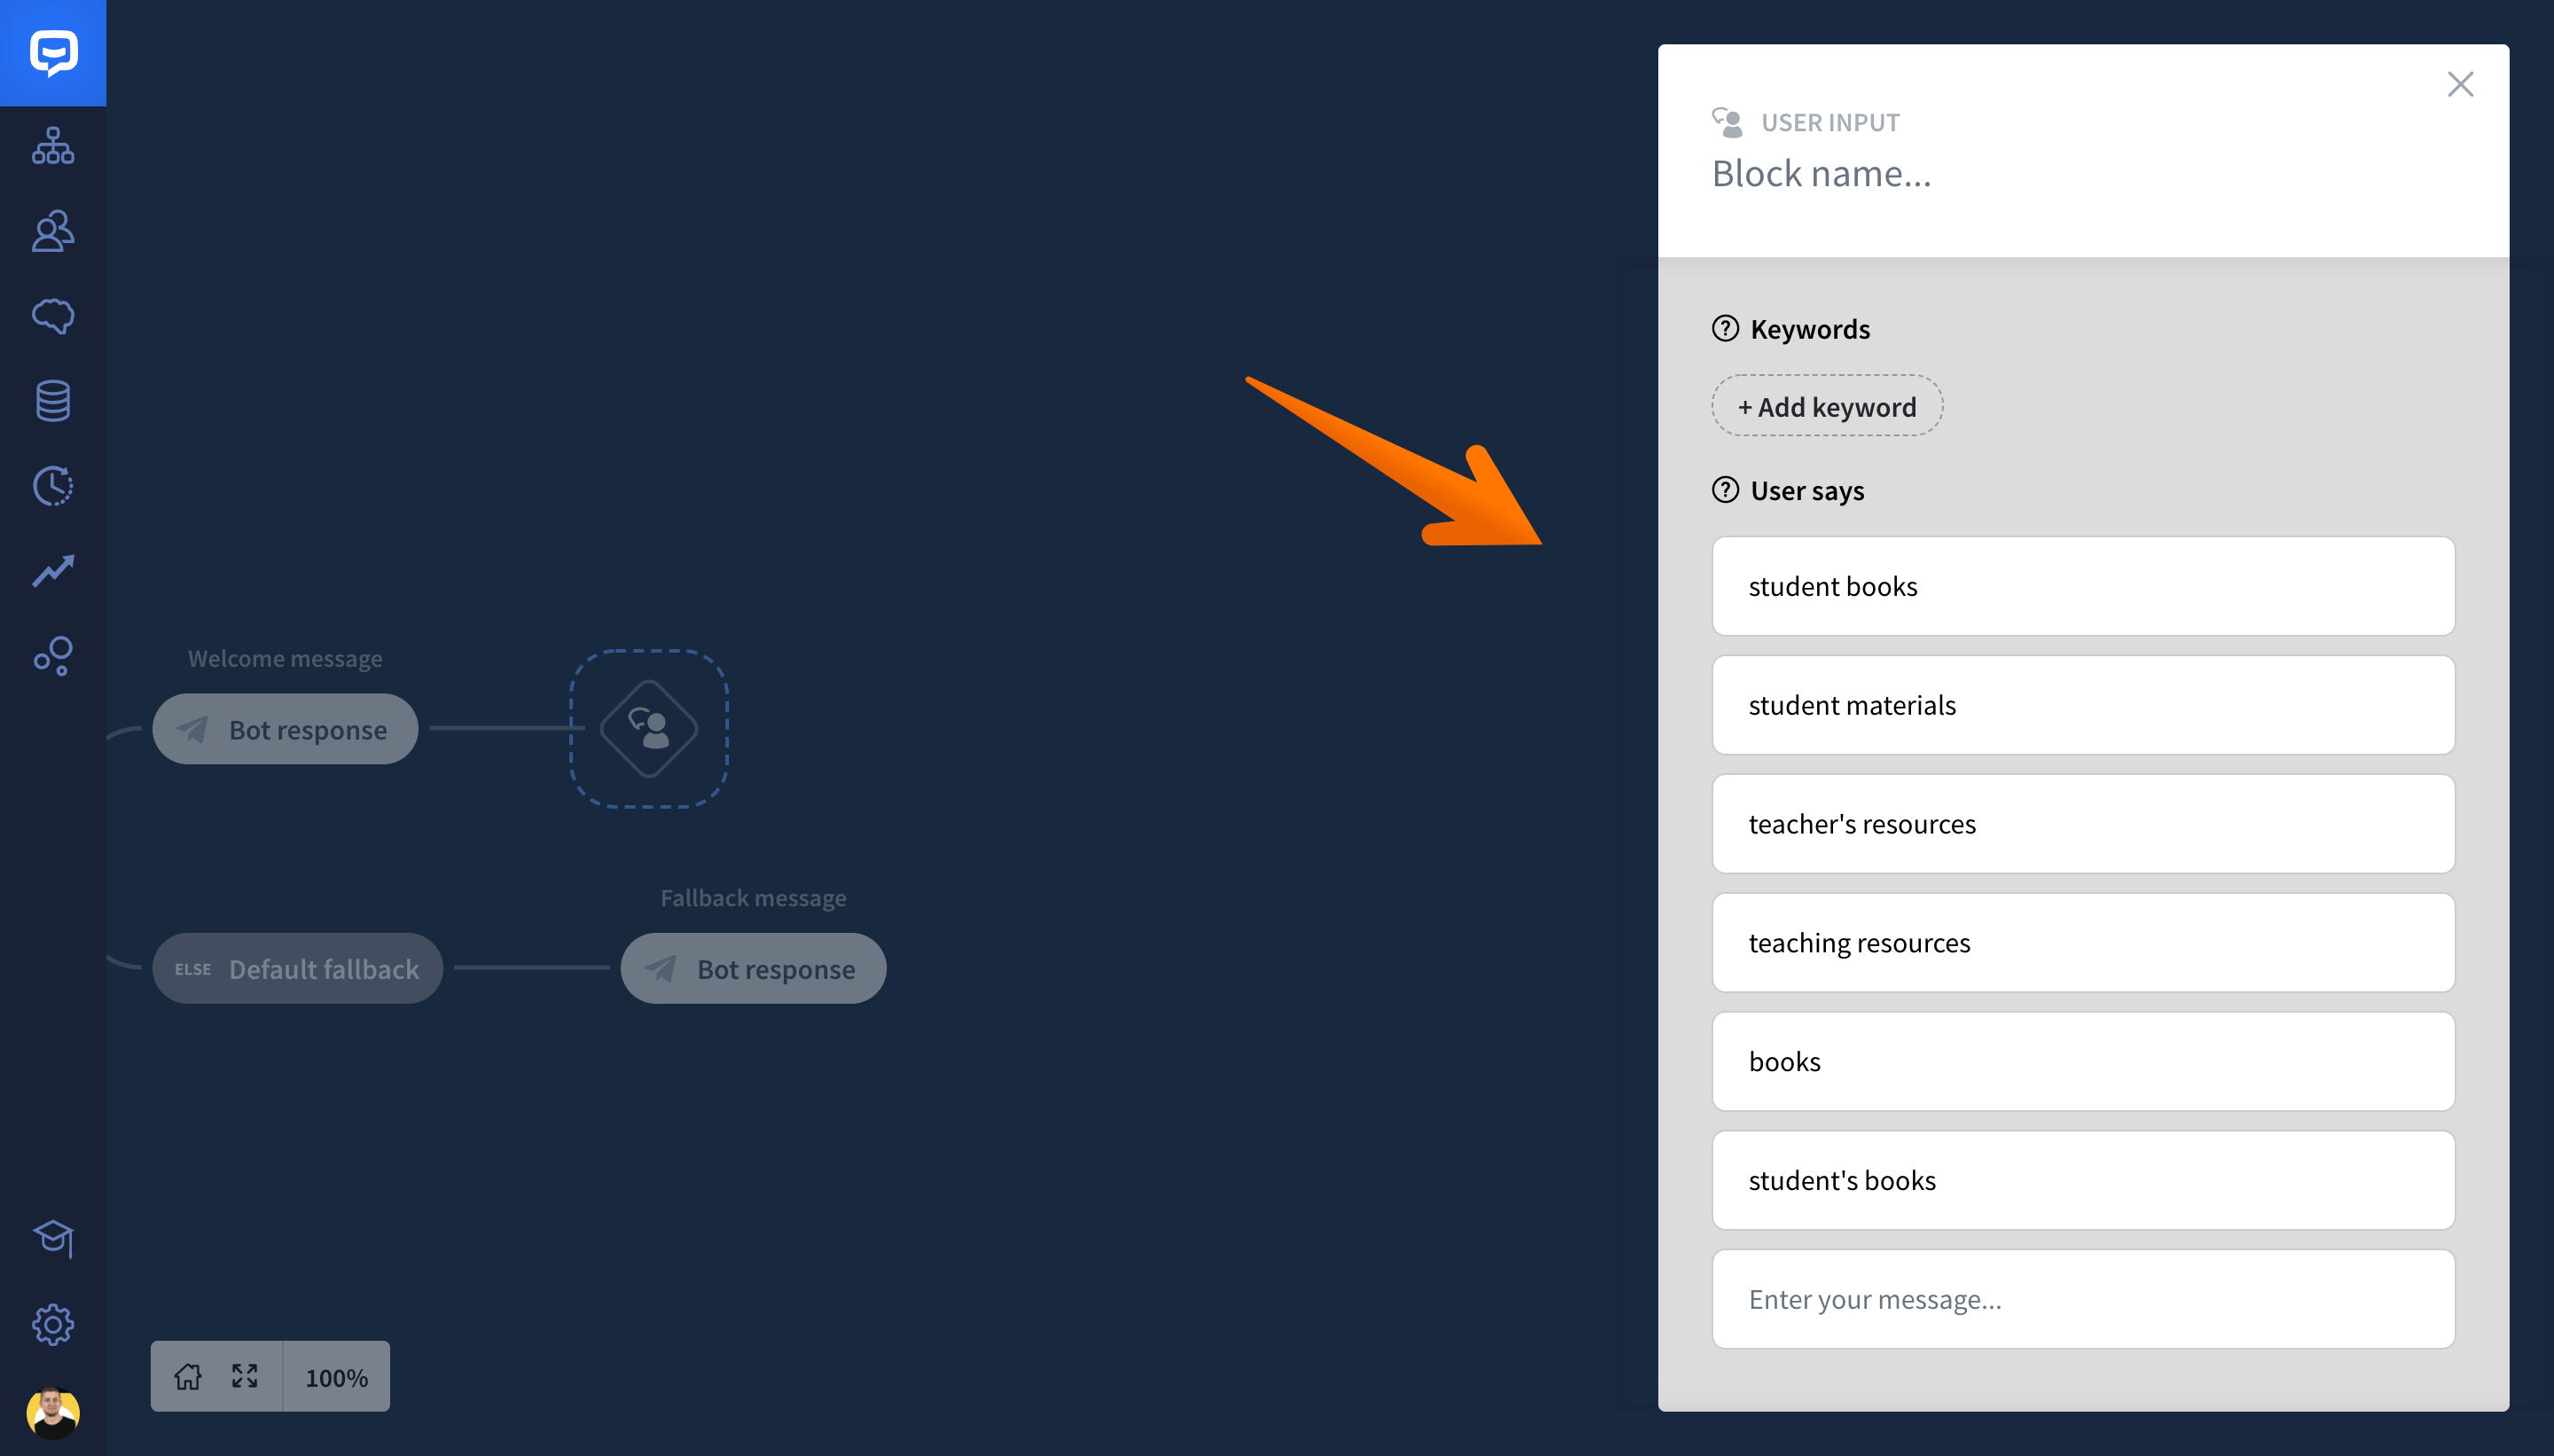
Click on the added User input block to open its edit window. Write all the possible variations of the messages your users might write on chat In User says and Keywords sections. Close the window. The change will be saved automatically
-
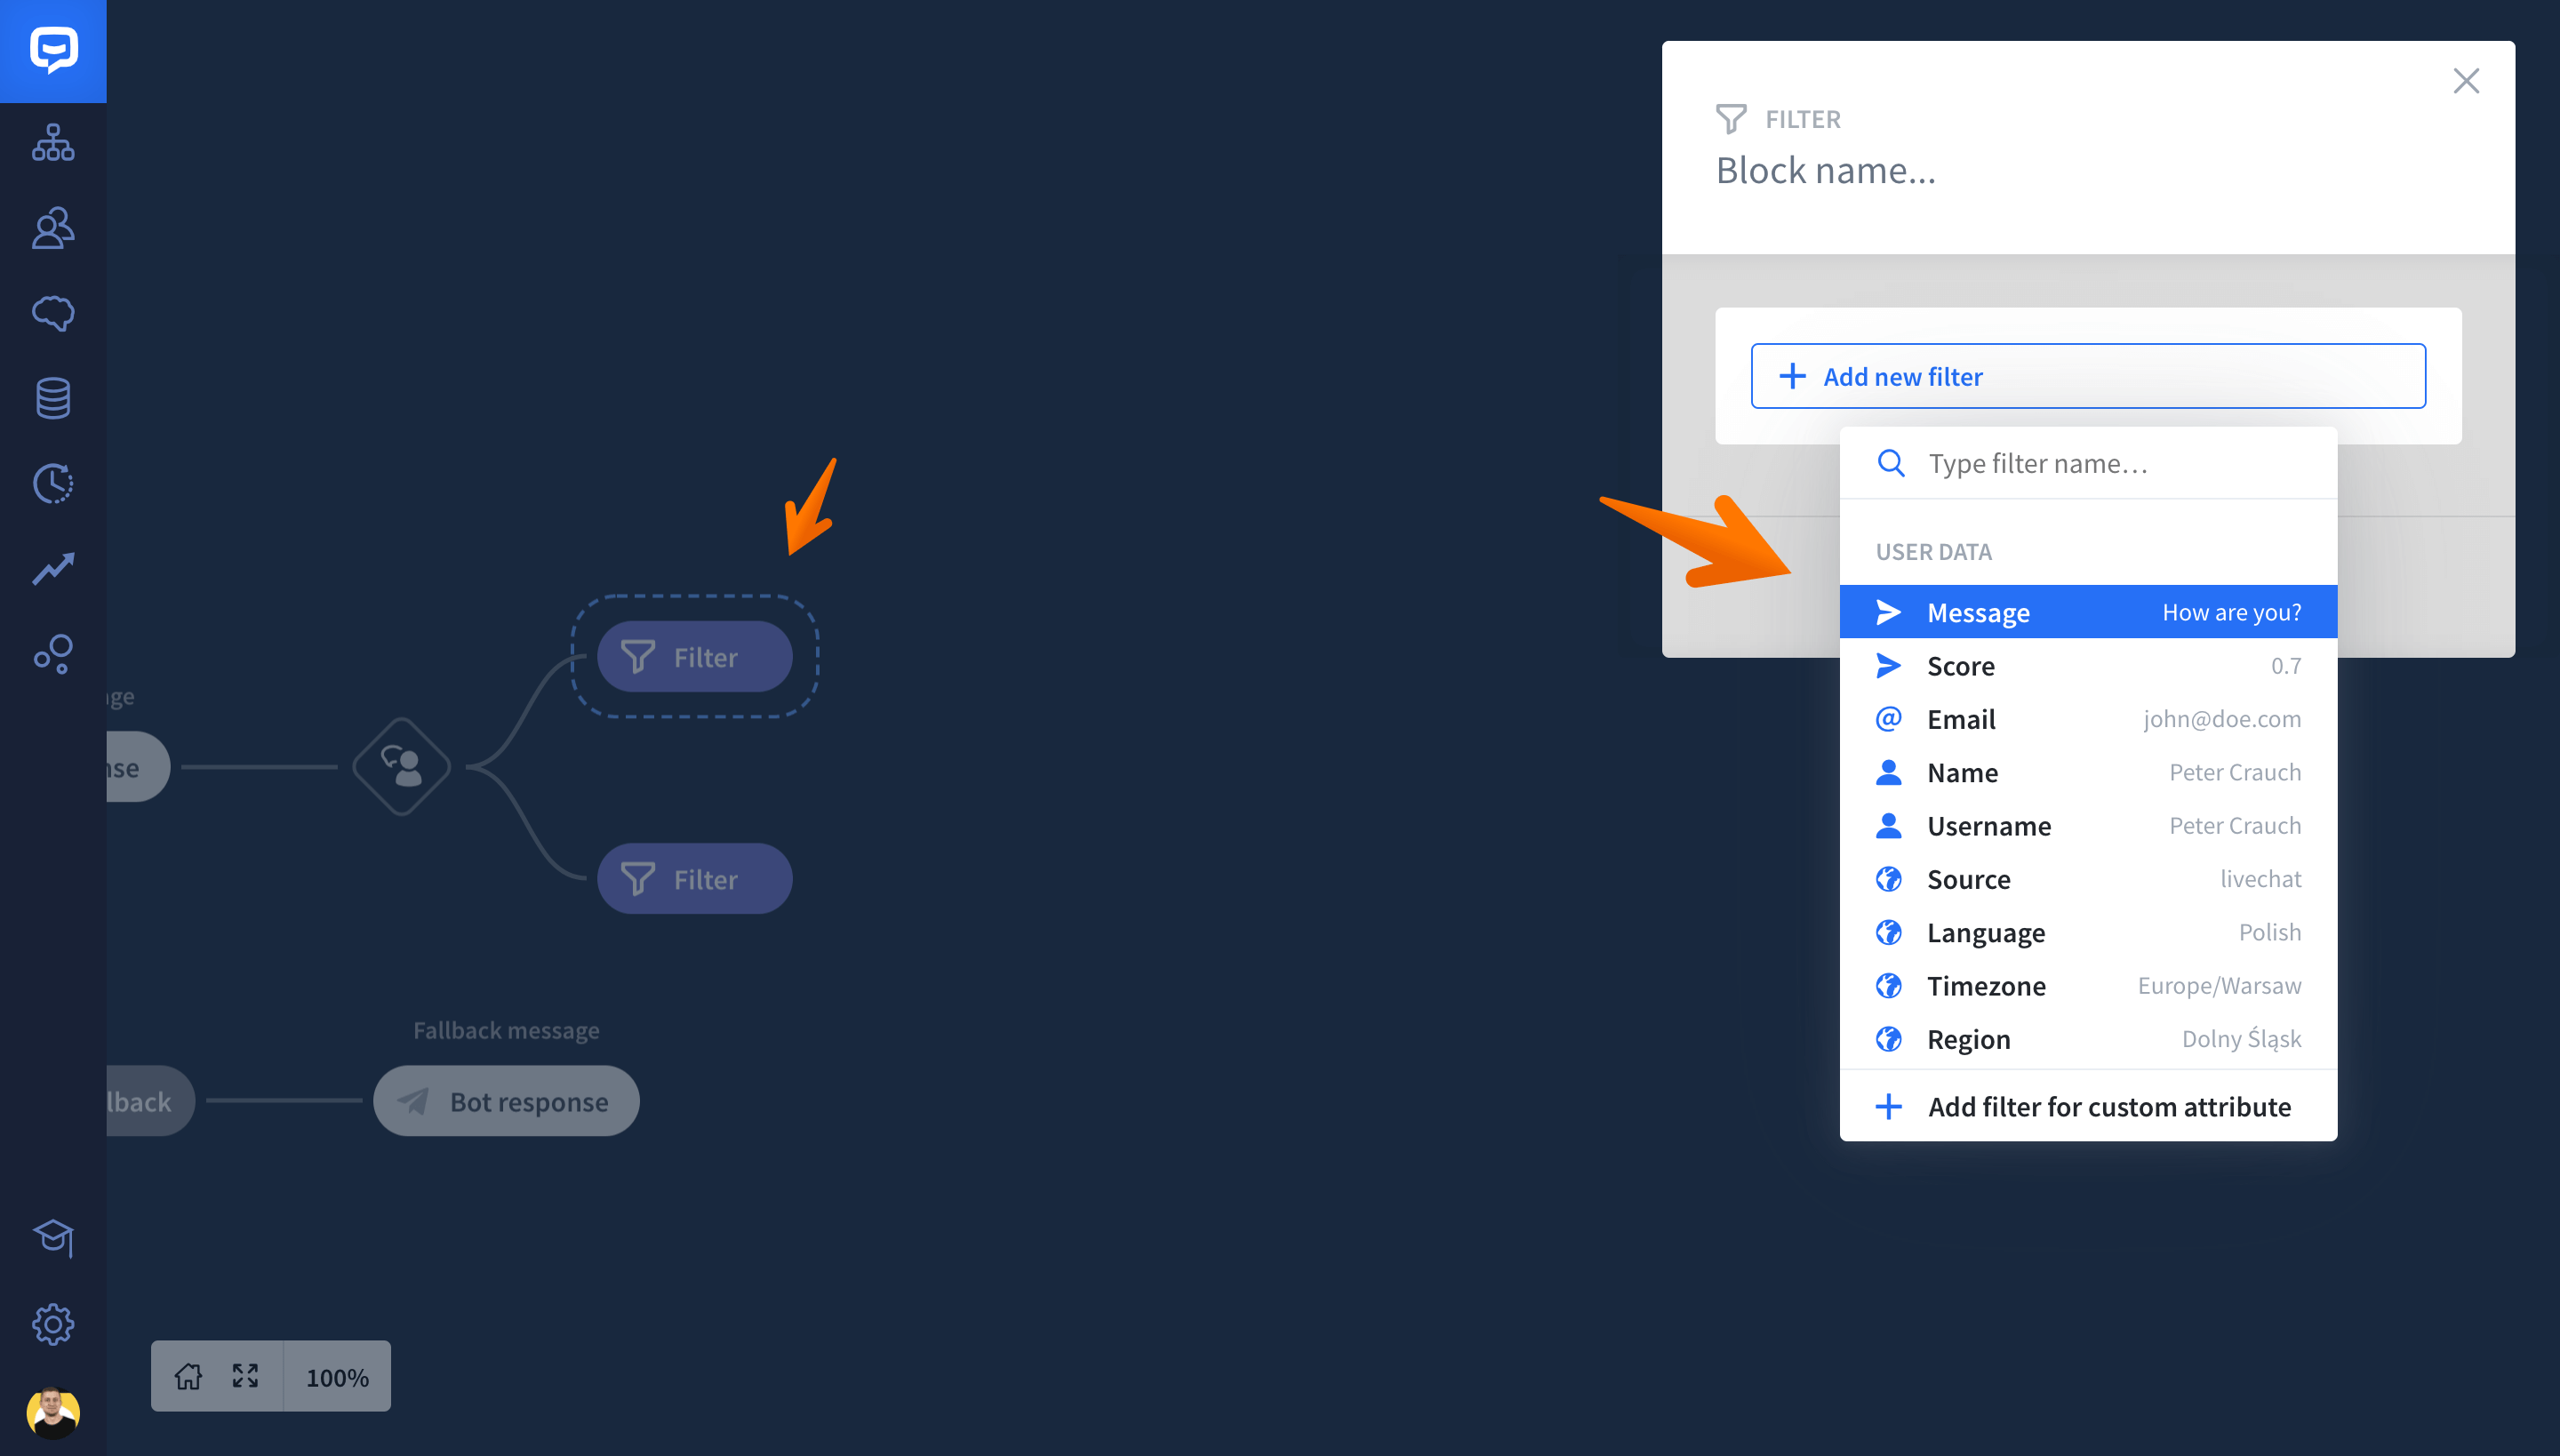
Drag the Filter block from the Actions & Interactions menu and drop it after the User input block. Add another Filter block after the same User input to create an additional path.
-
Click on the added Filter block to open its edit window. Click Add new filter to choose the type of parameter your bot will apply to filter users. As you want to filter the type of message your users will write on chat, choose Message.
-
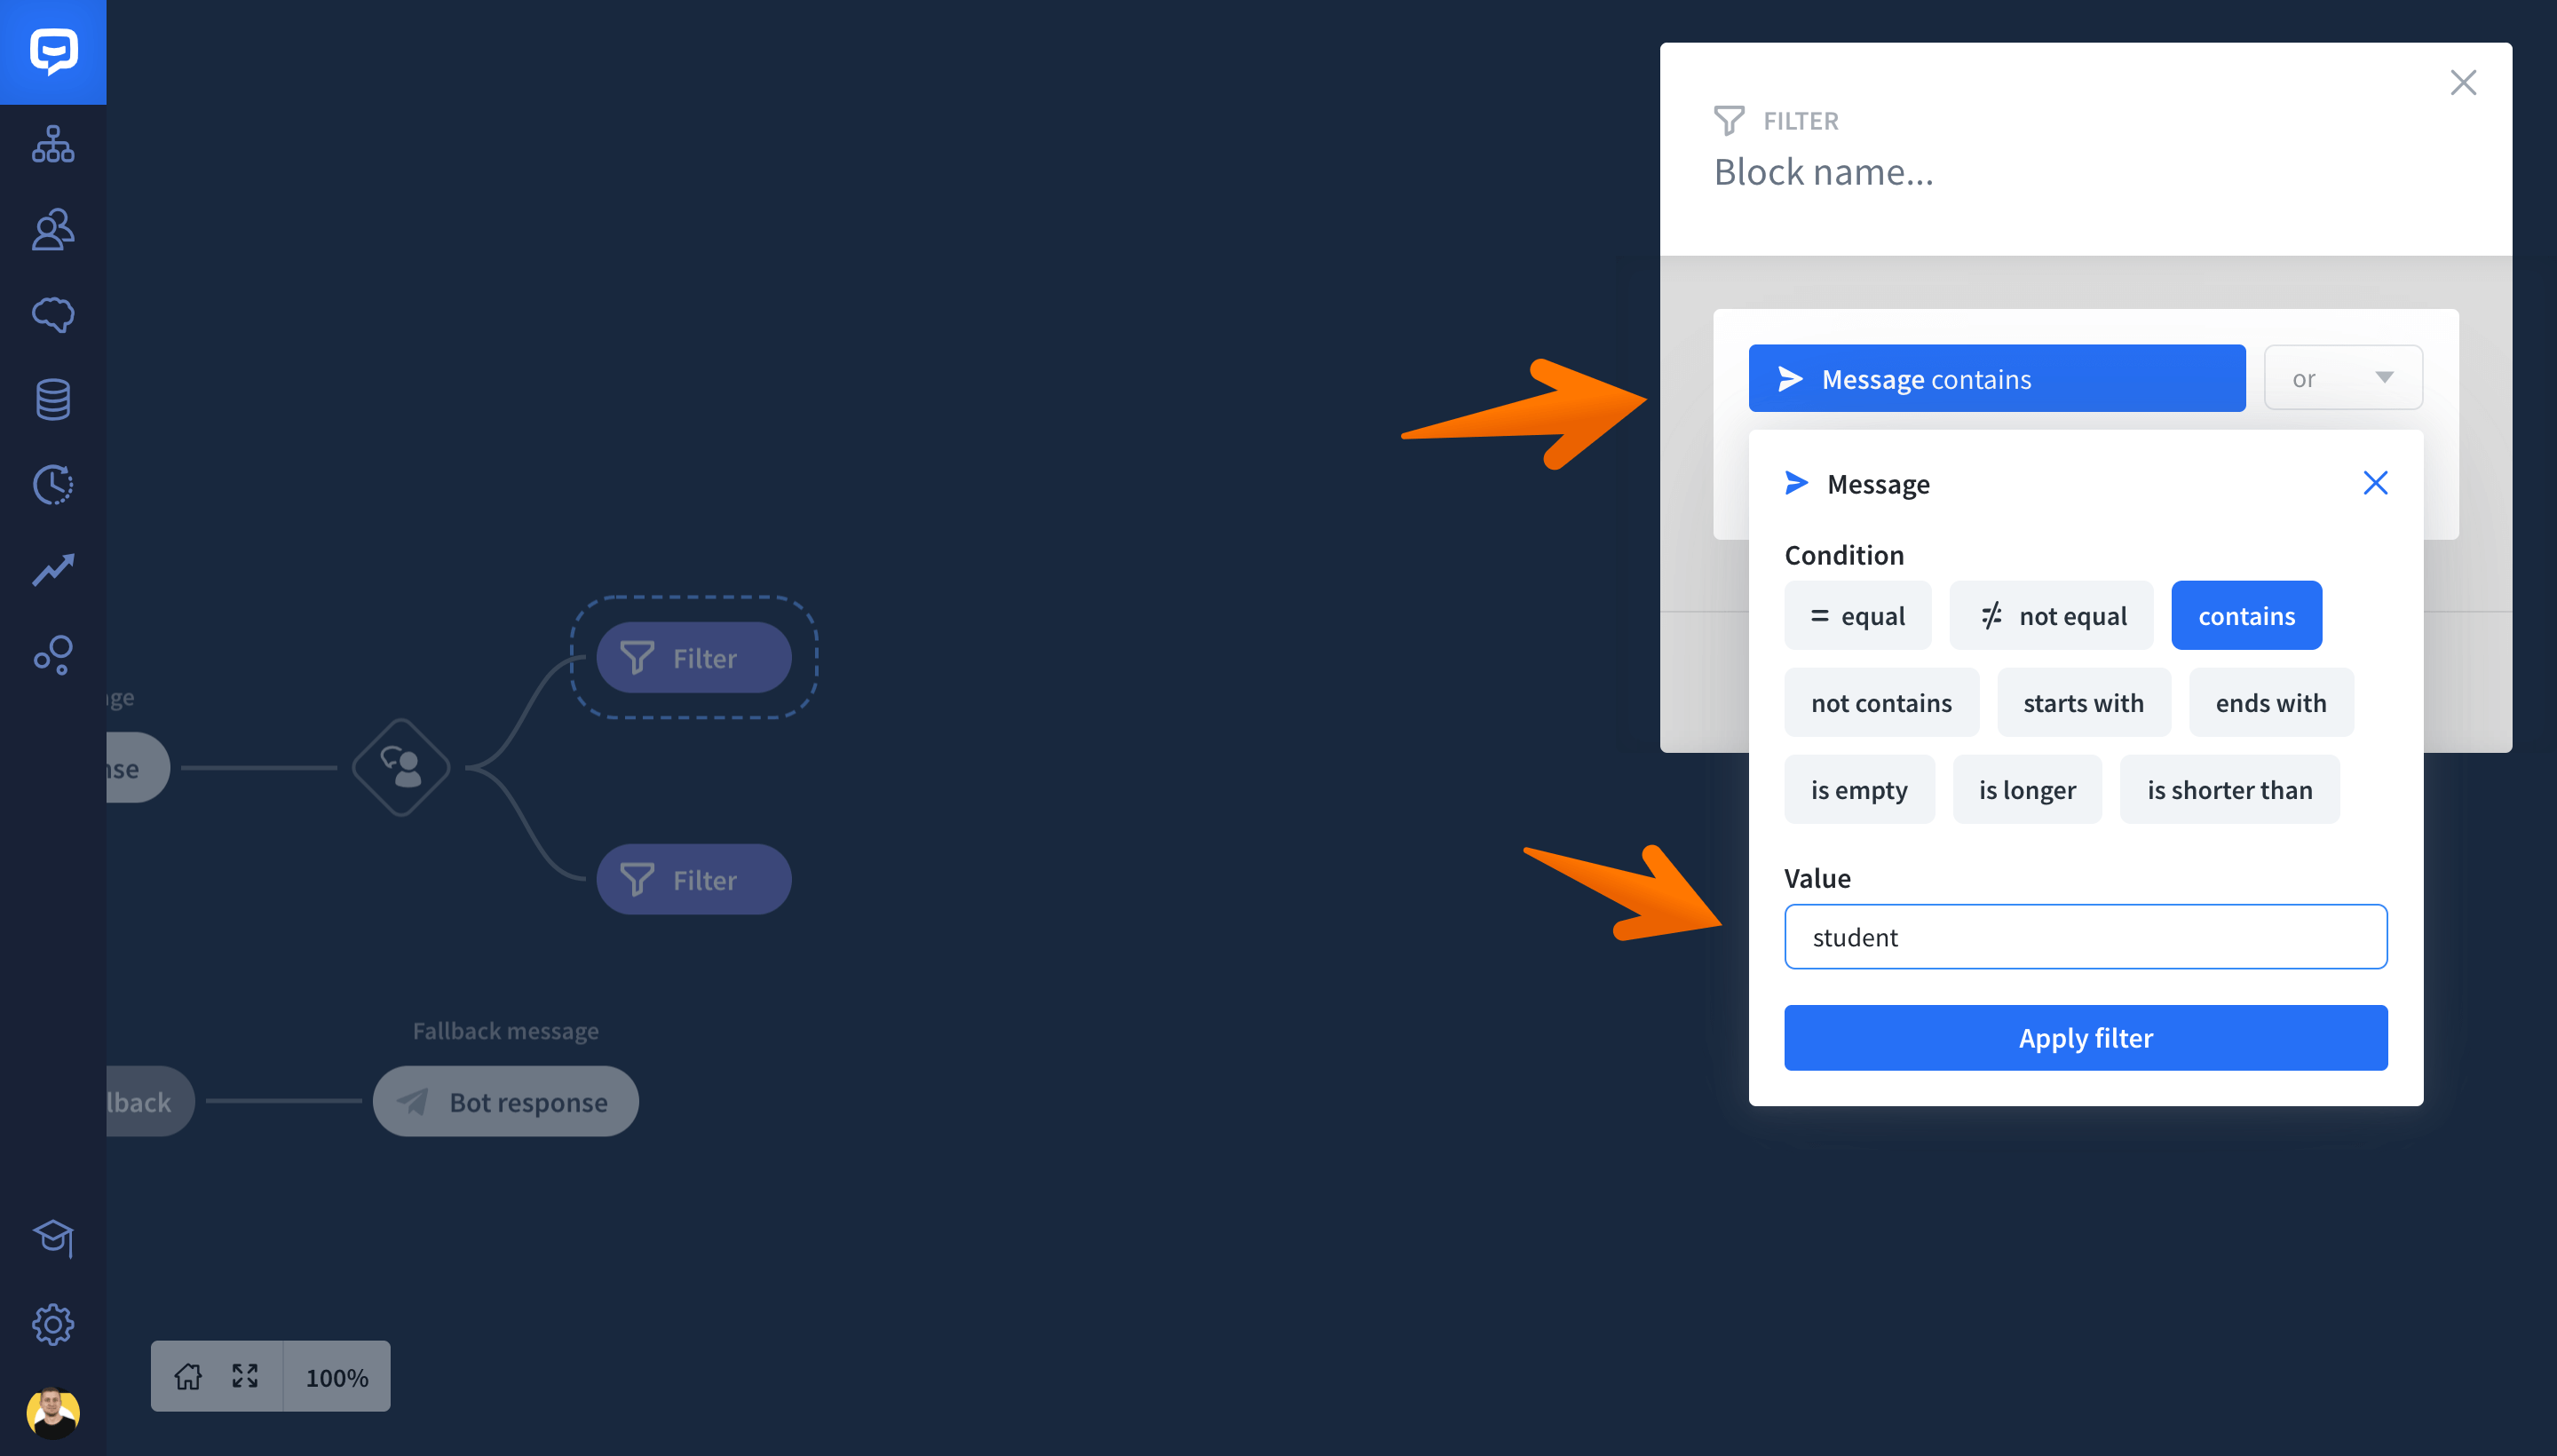
Then you need to choose the condition. For the purpose of this task, choose the contains option. This way you can make sure that your bot will reply properly as long as the user’s message contains the word or a phrase you provided. In the Value field write the type of a word or phrase that should trigger the bot responses (student).
-
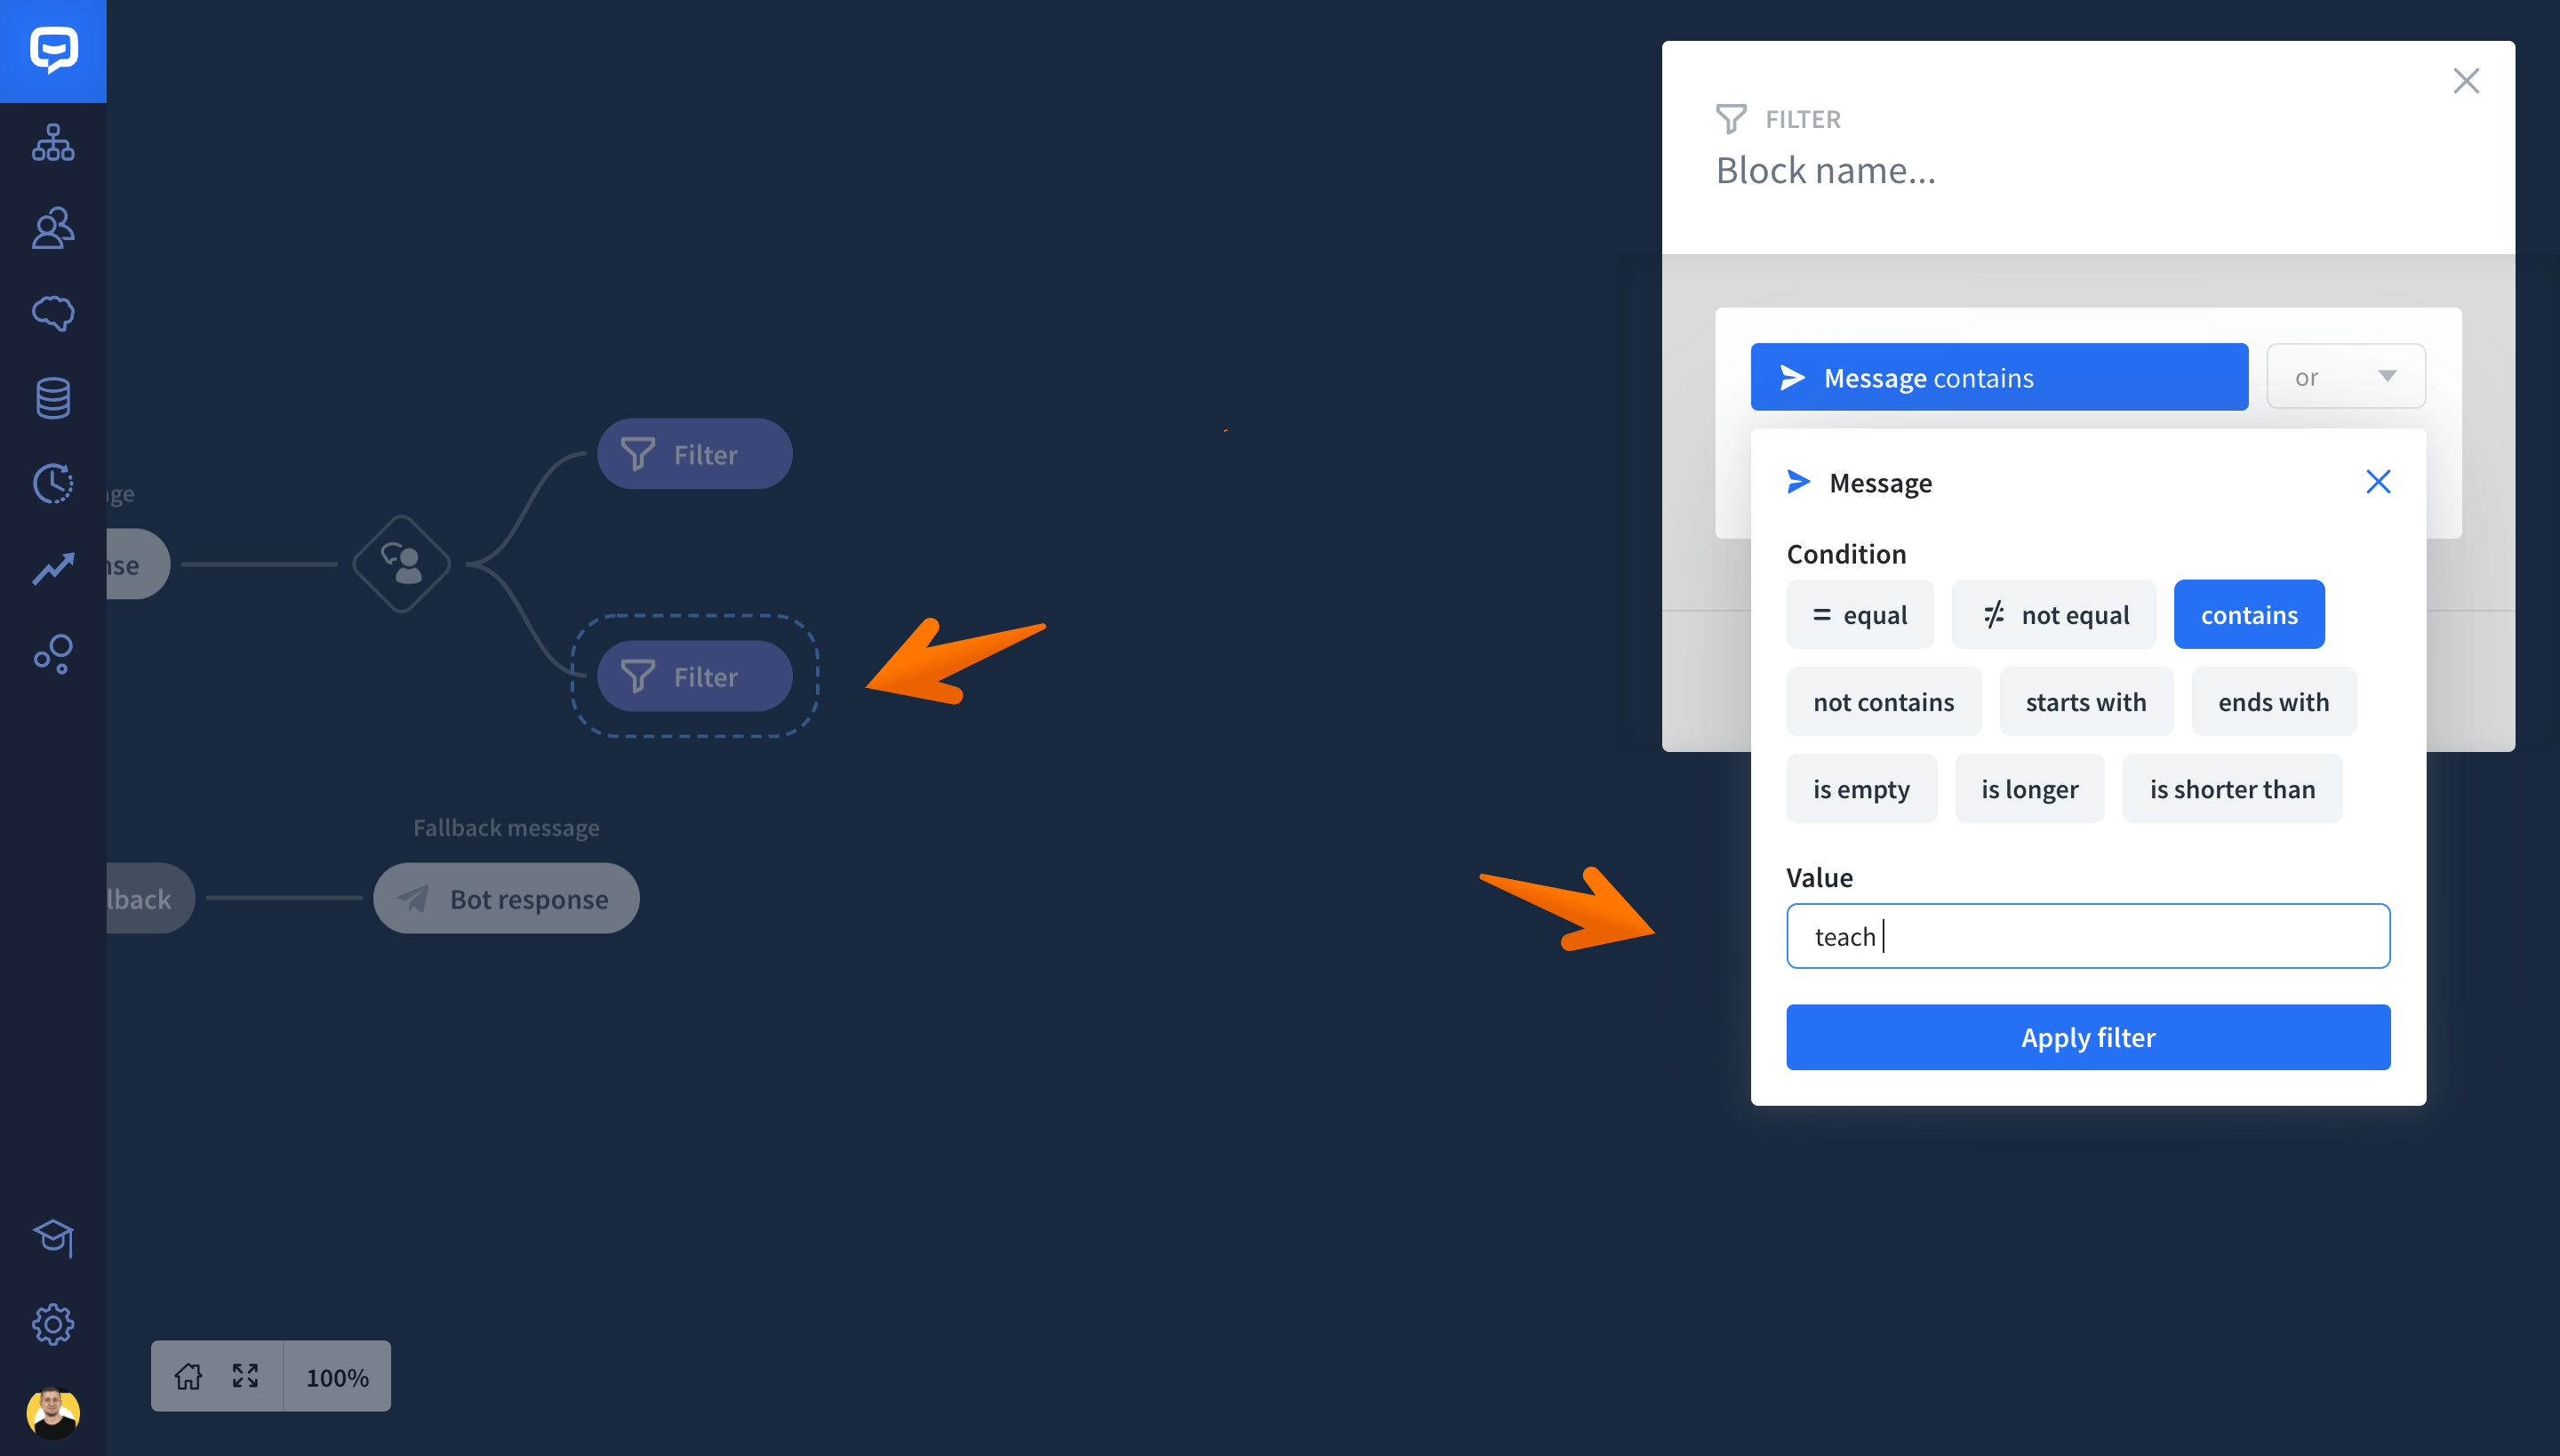
Repeat the same with the second Filter block.
-
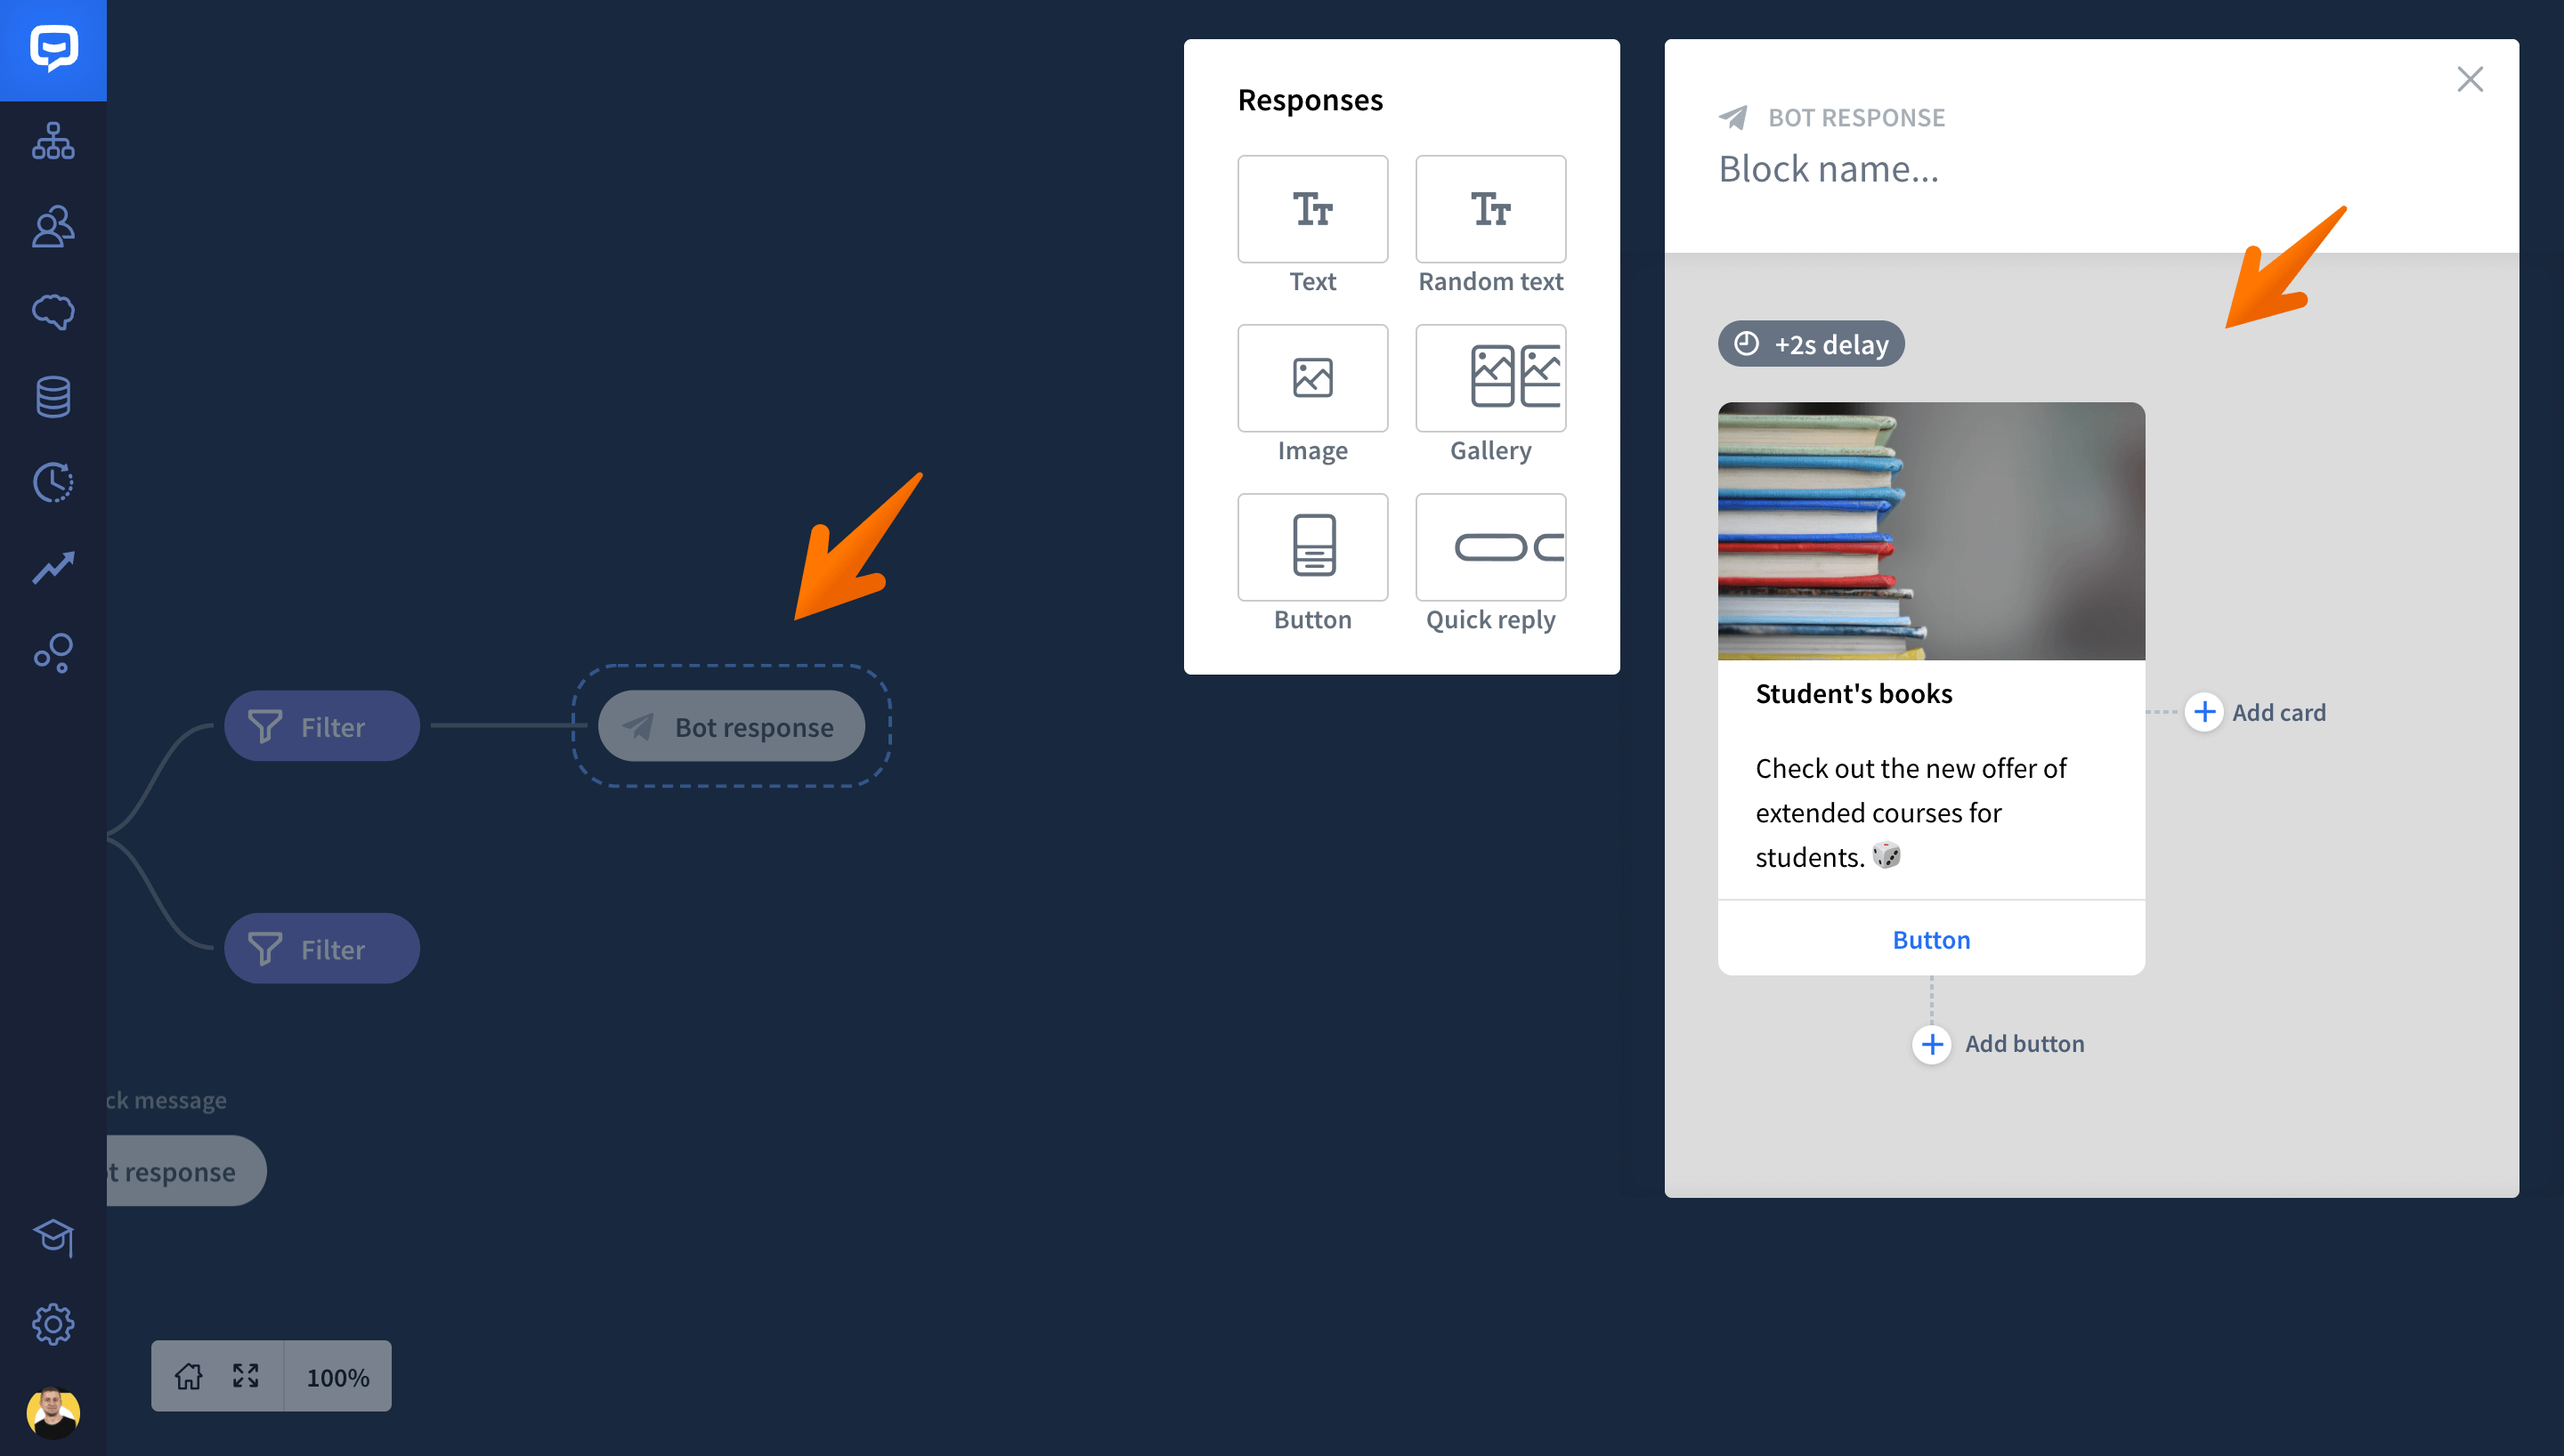
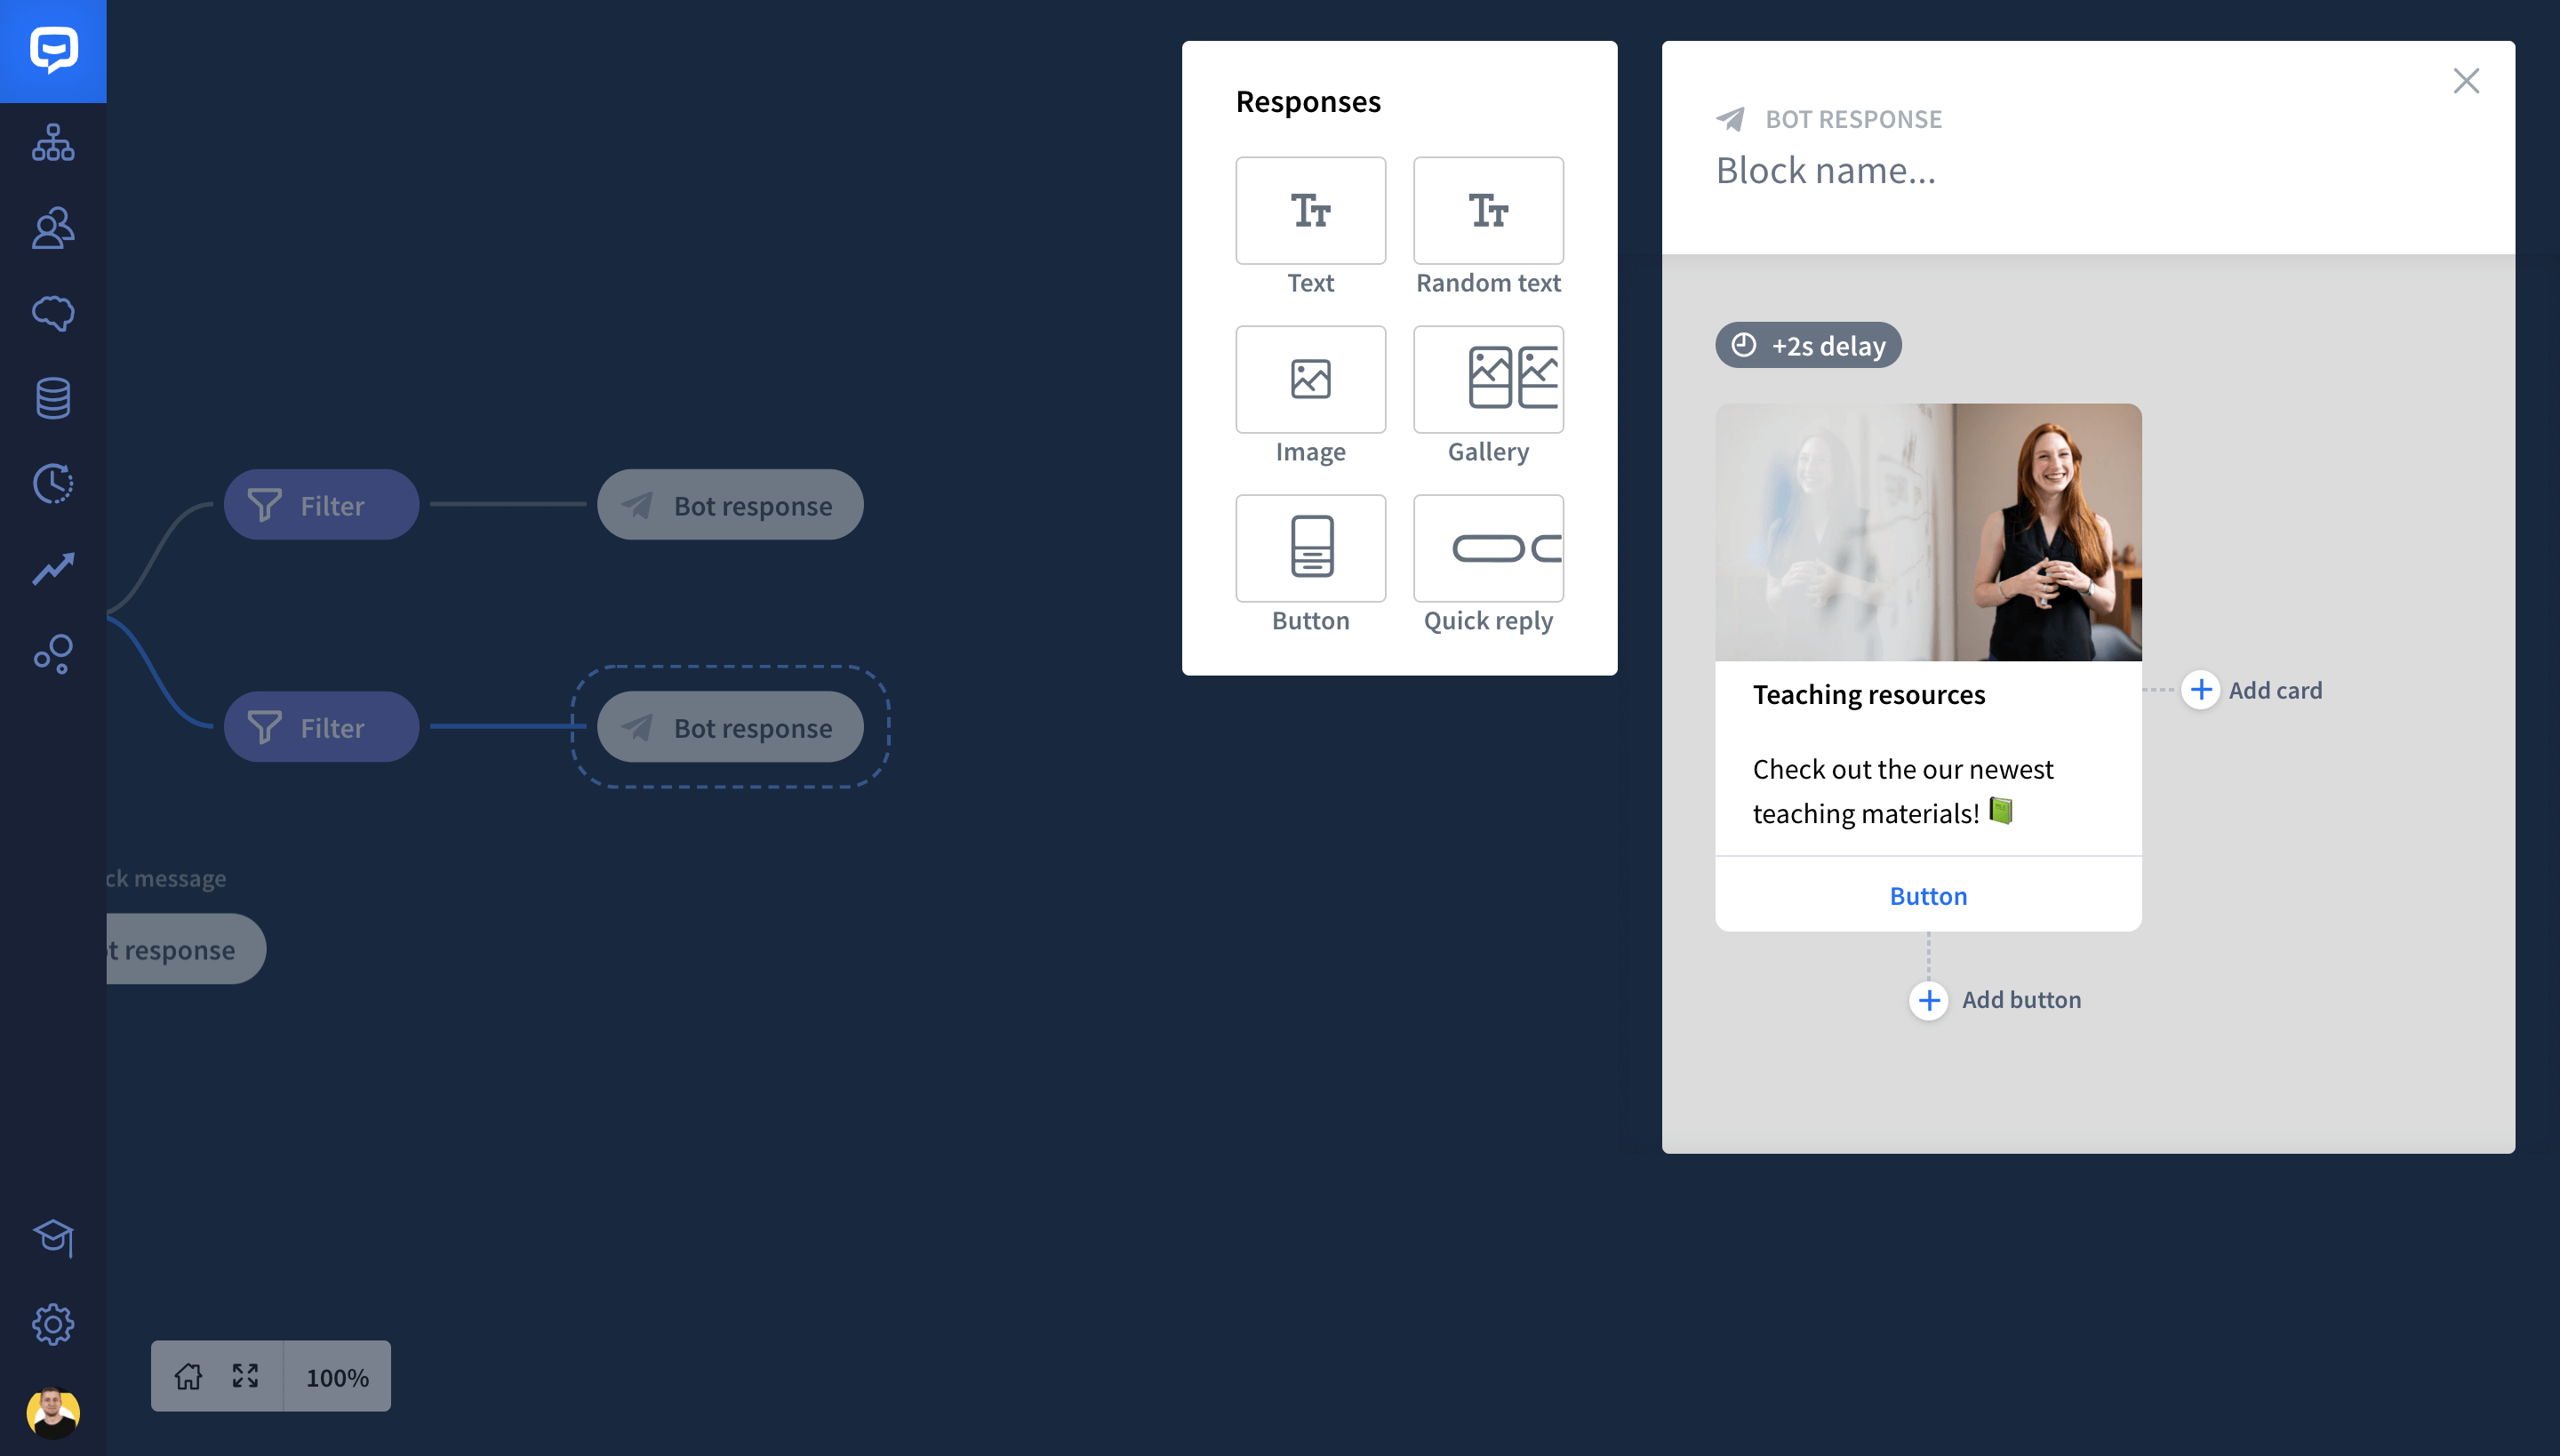
Now, drag the Bot response block and add it after the Filter block. Choose the type of response you want to display to the first group of users (Students). Then close the window. Your changes will be saved automatically.
-
Add another Bot response after the second Filter block. Choose the type of response you want to send to the second group of users (Teachers). Close the window to save the change.
-
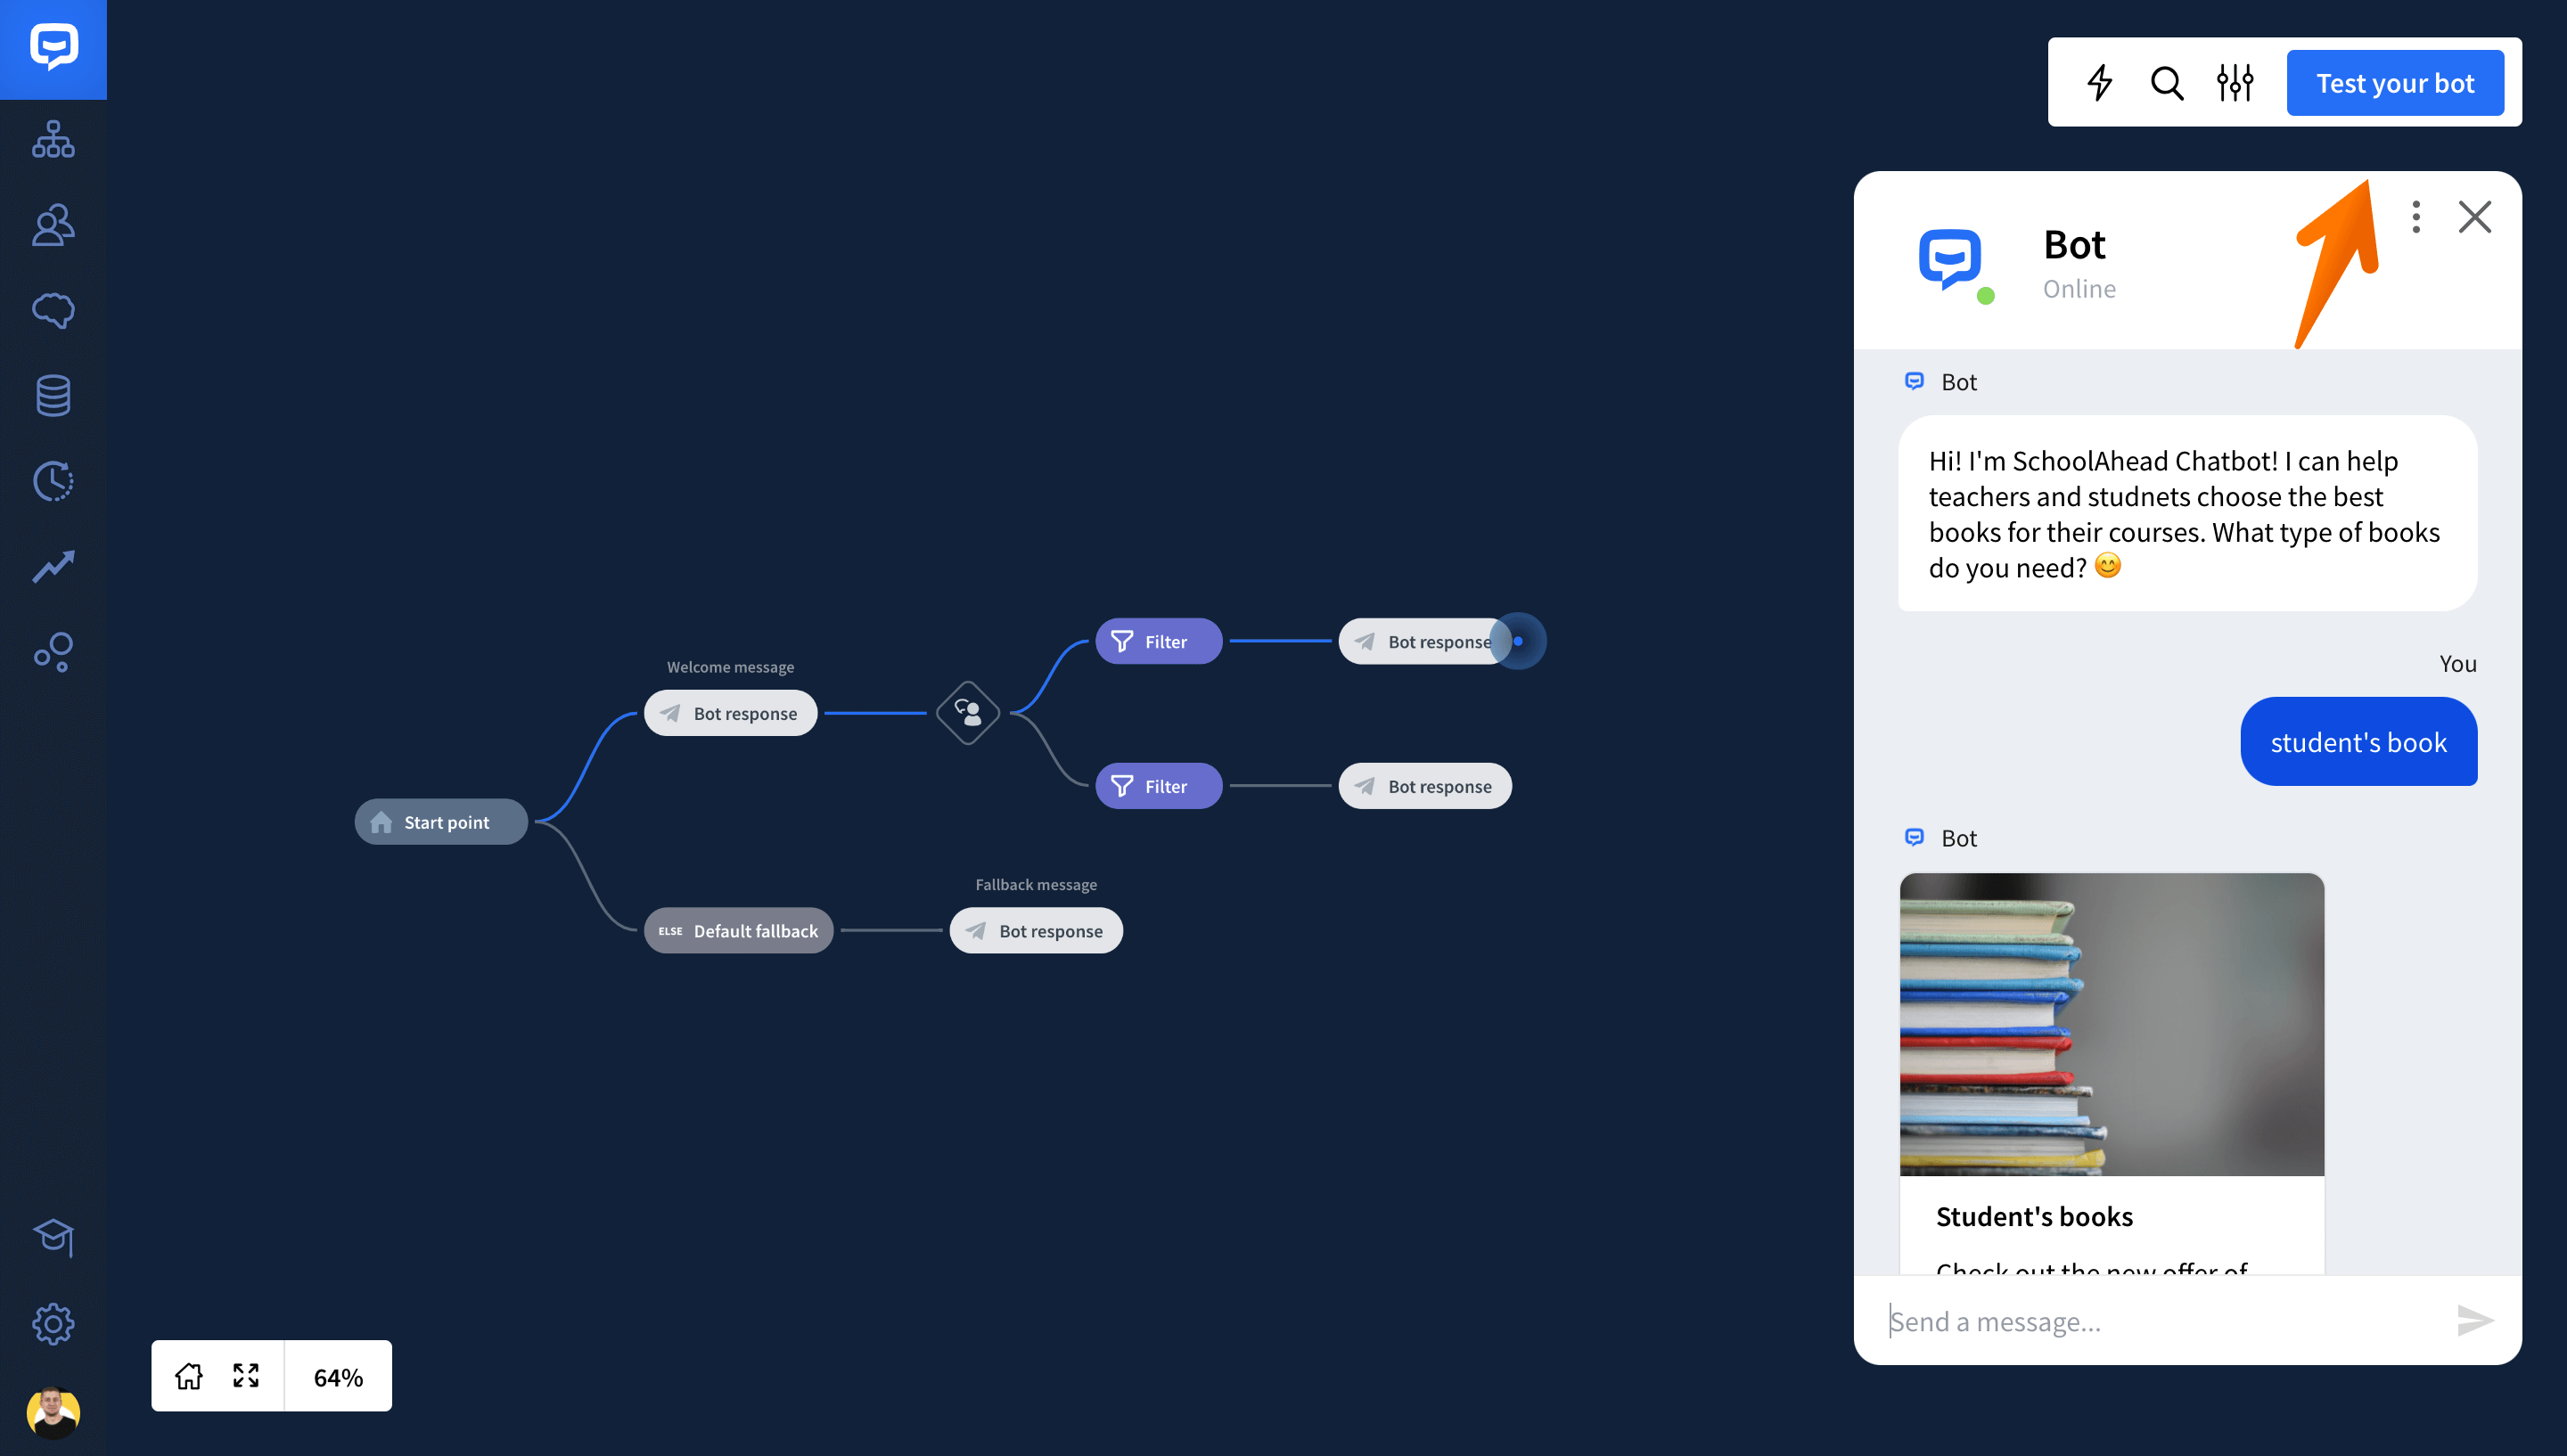
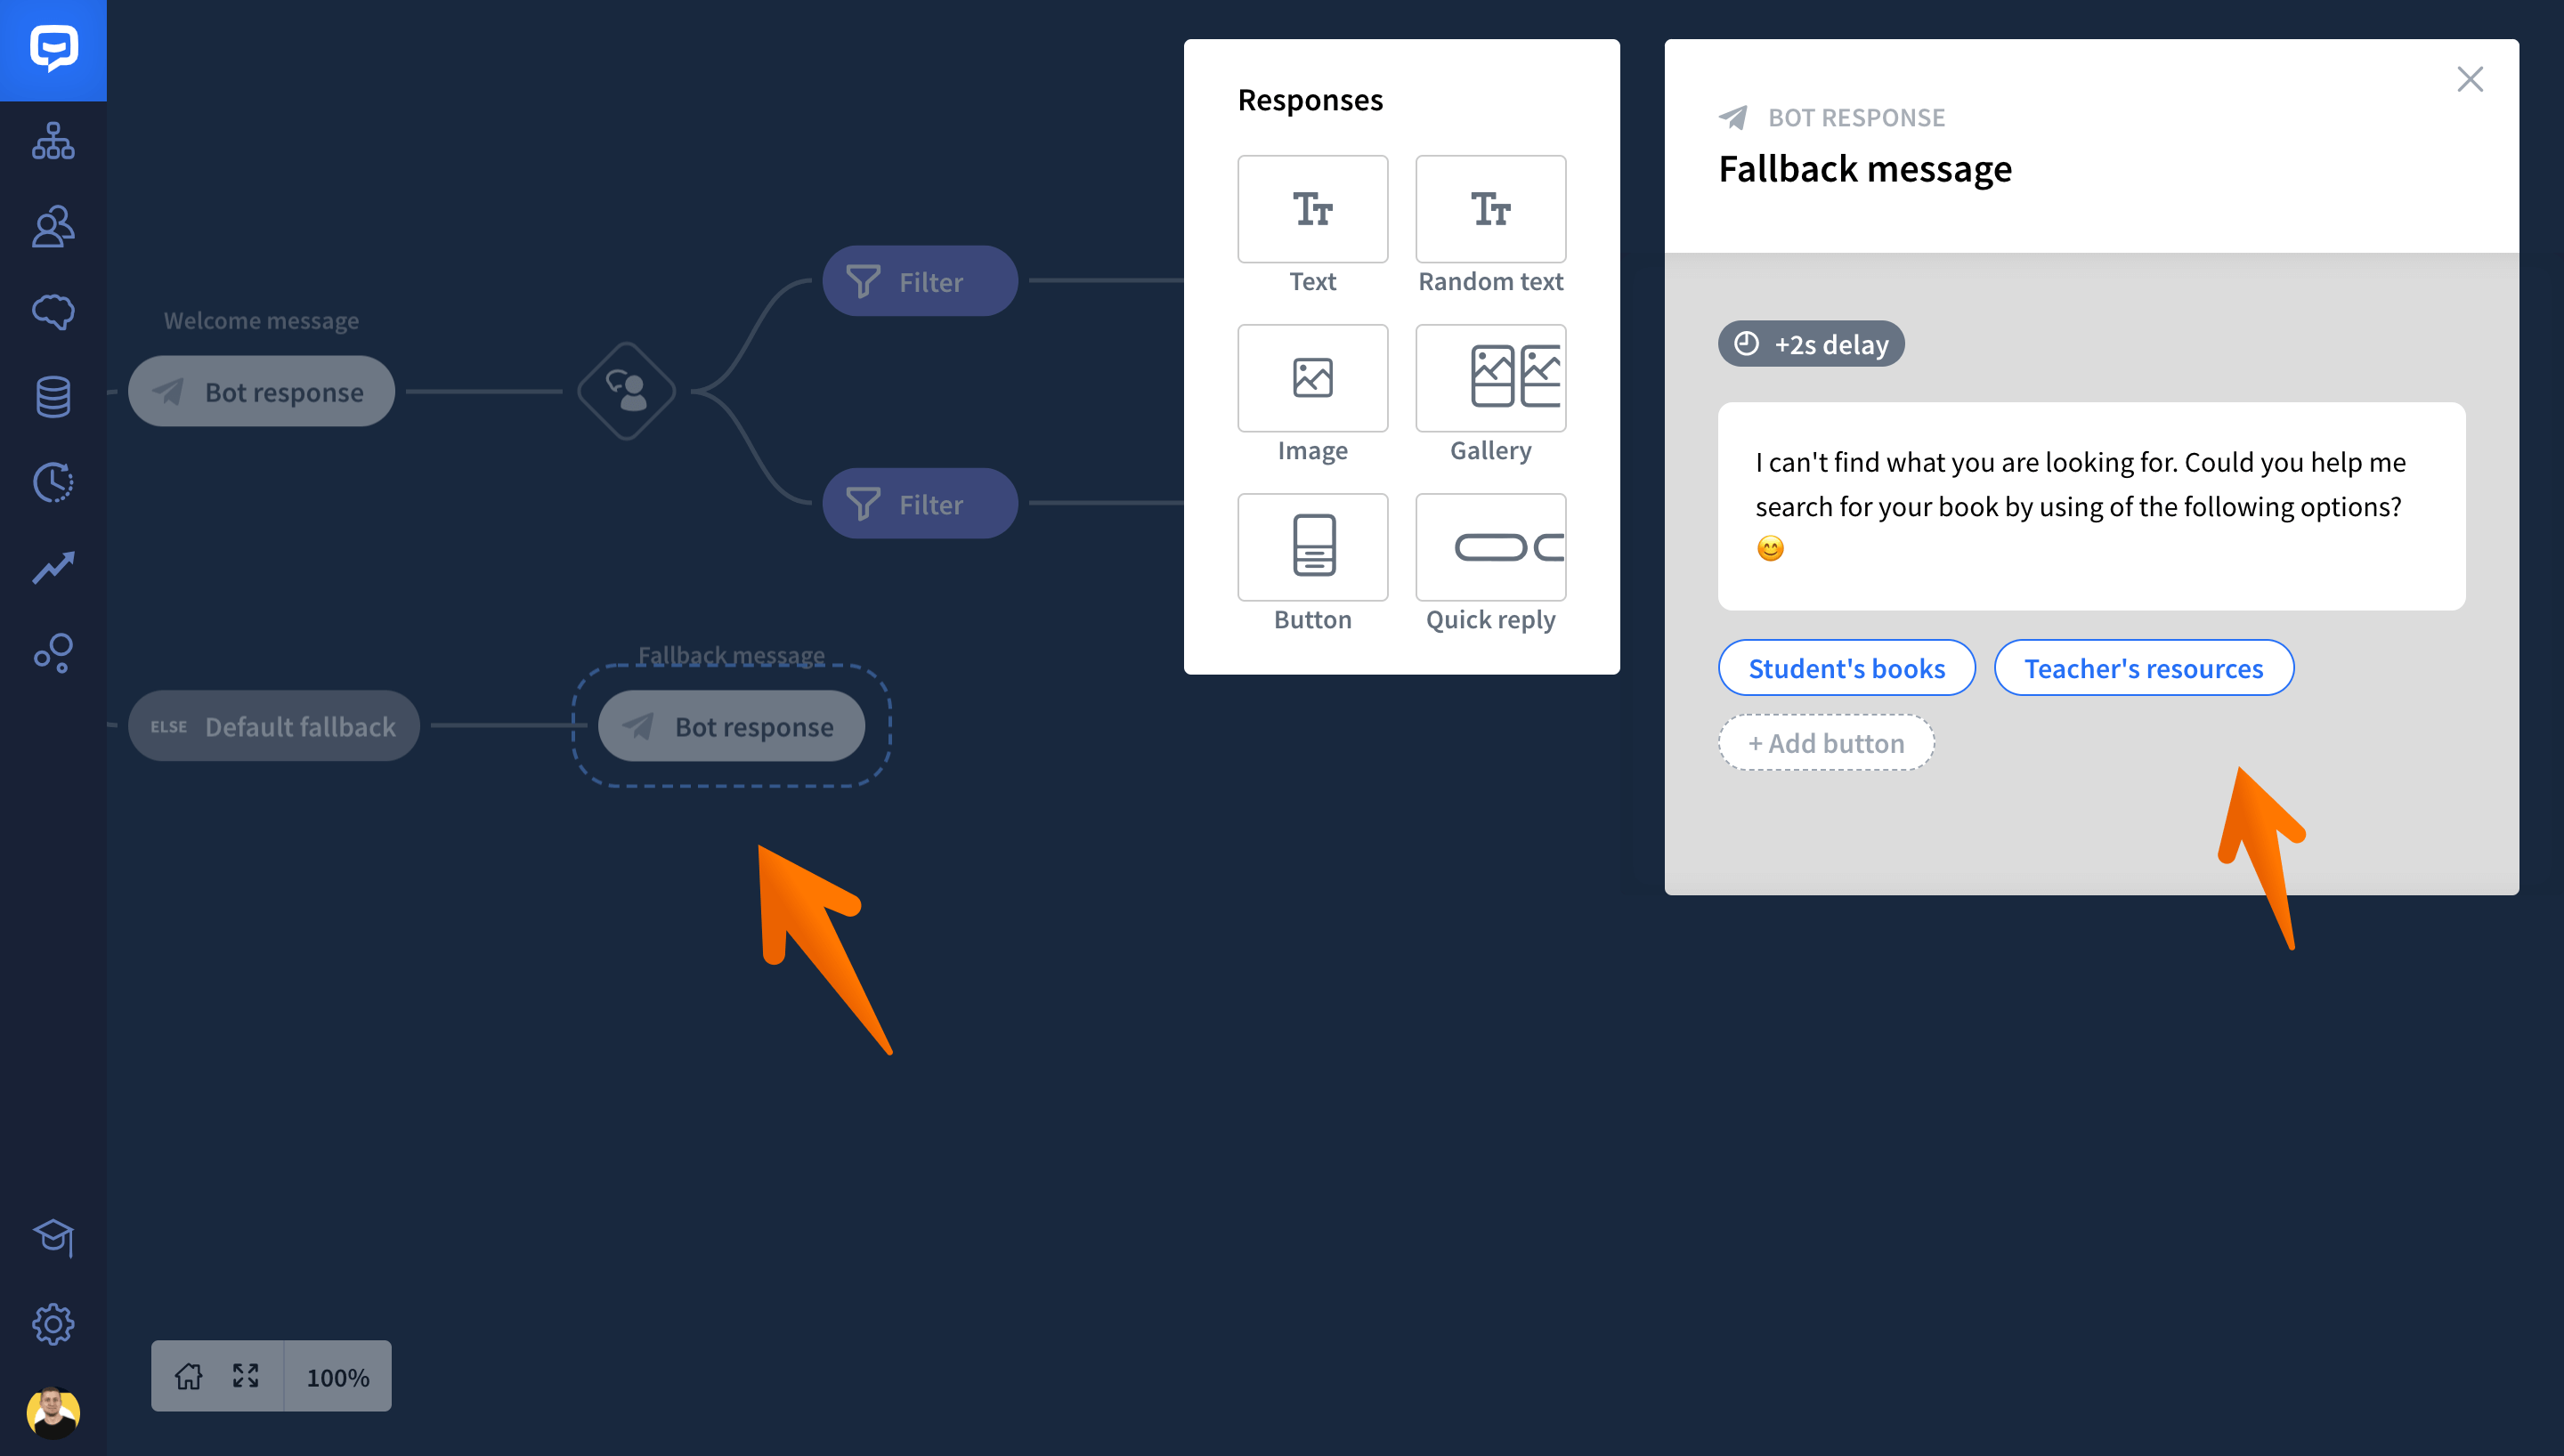
At last edit the Fallback message. It’s the type of message that is displayed to users when your bot isn’t able to match their question with any Bot response.
-
Click on the Bot response block that follows the default Fallback block. Choose the type of response you want to display users and write in your message.
-
Now test your story to check if everything works as intended.