Use Chat Widget’s general settings to adjust your chatbot to your business needs.
How to configure Chat Widget
-
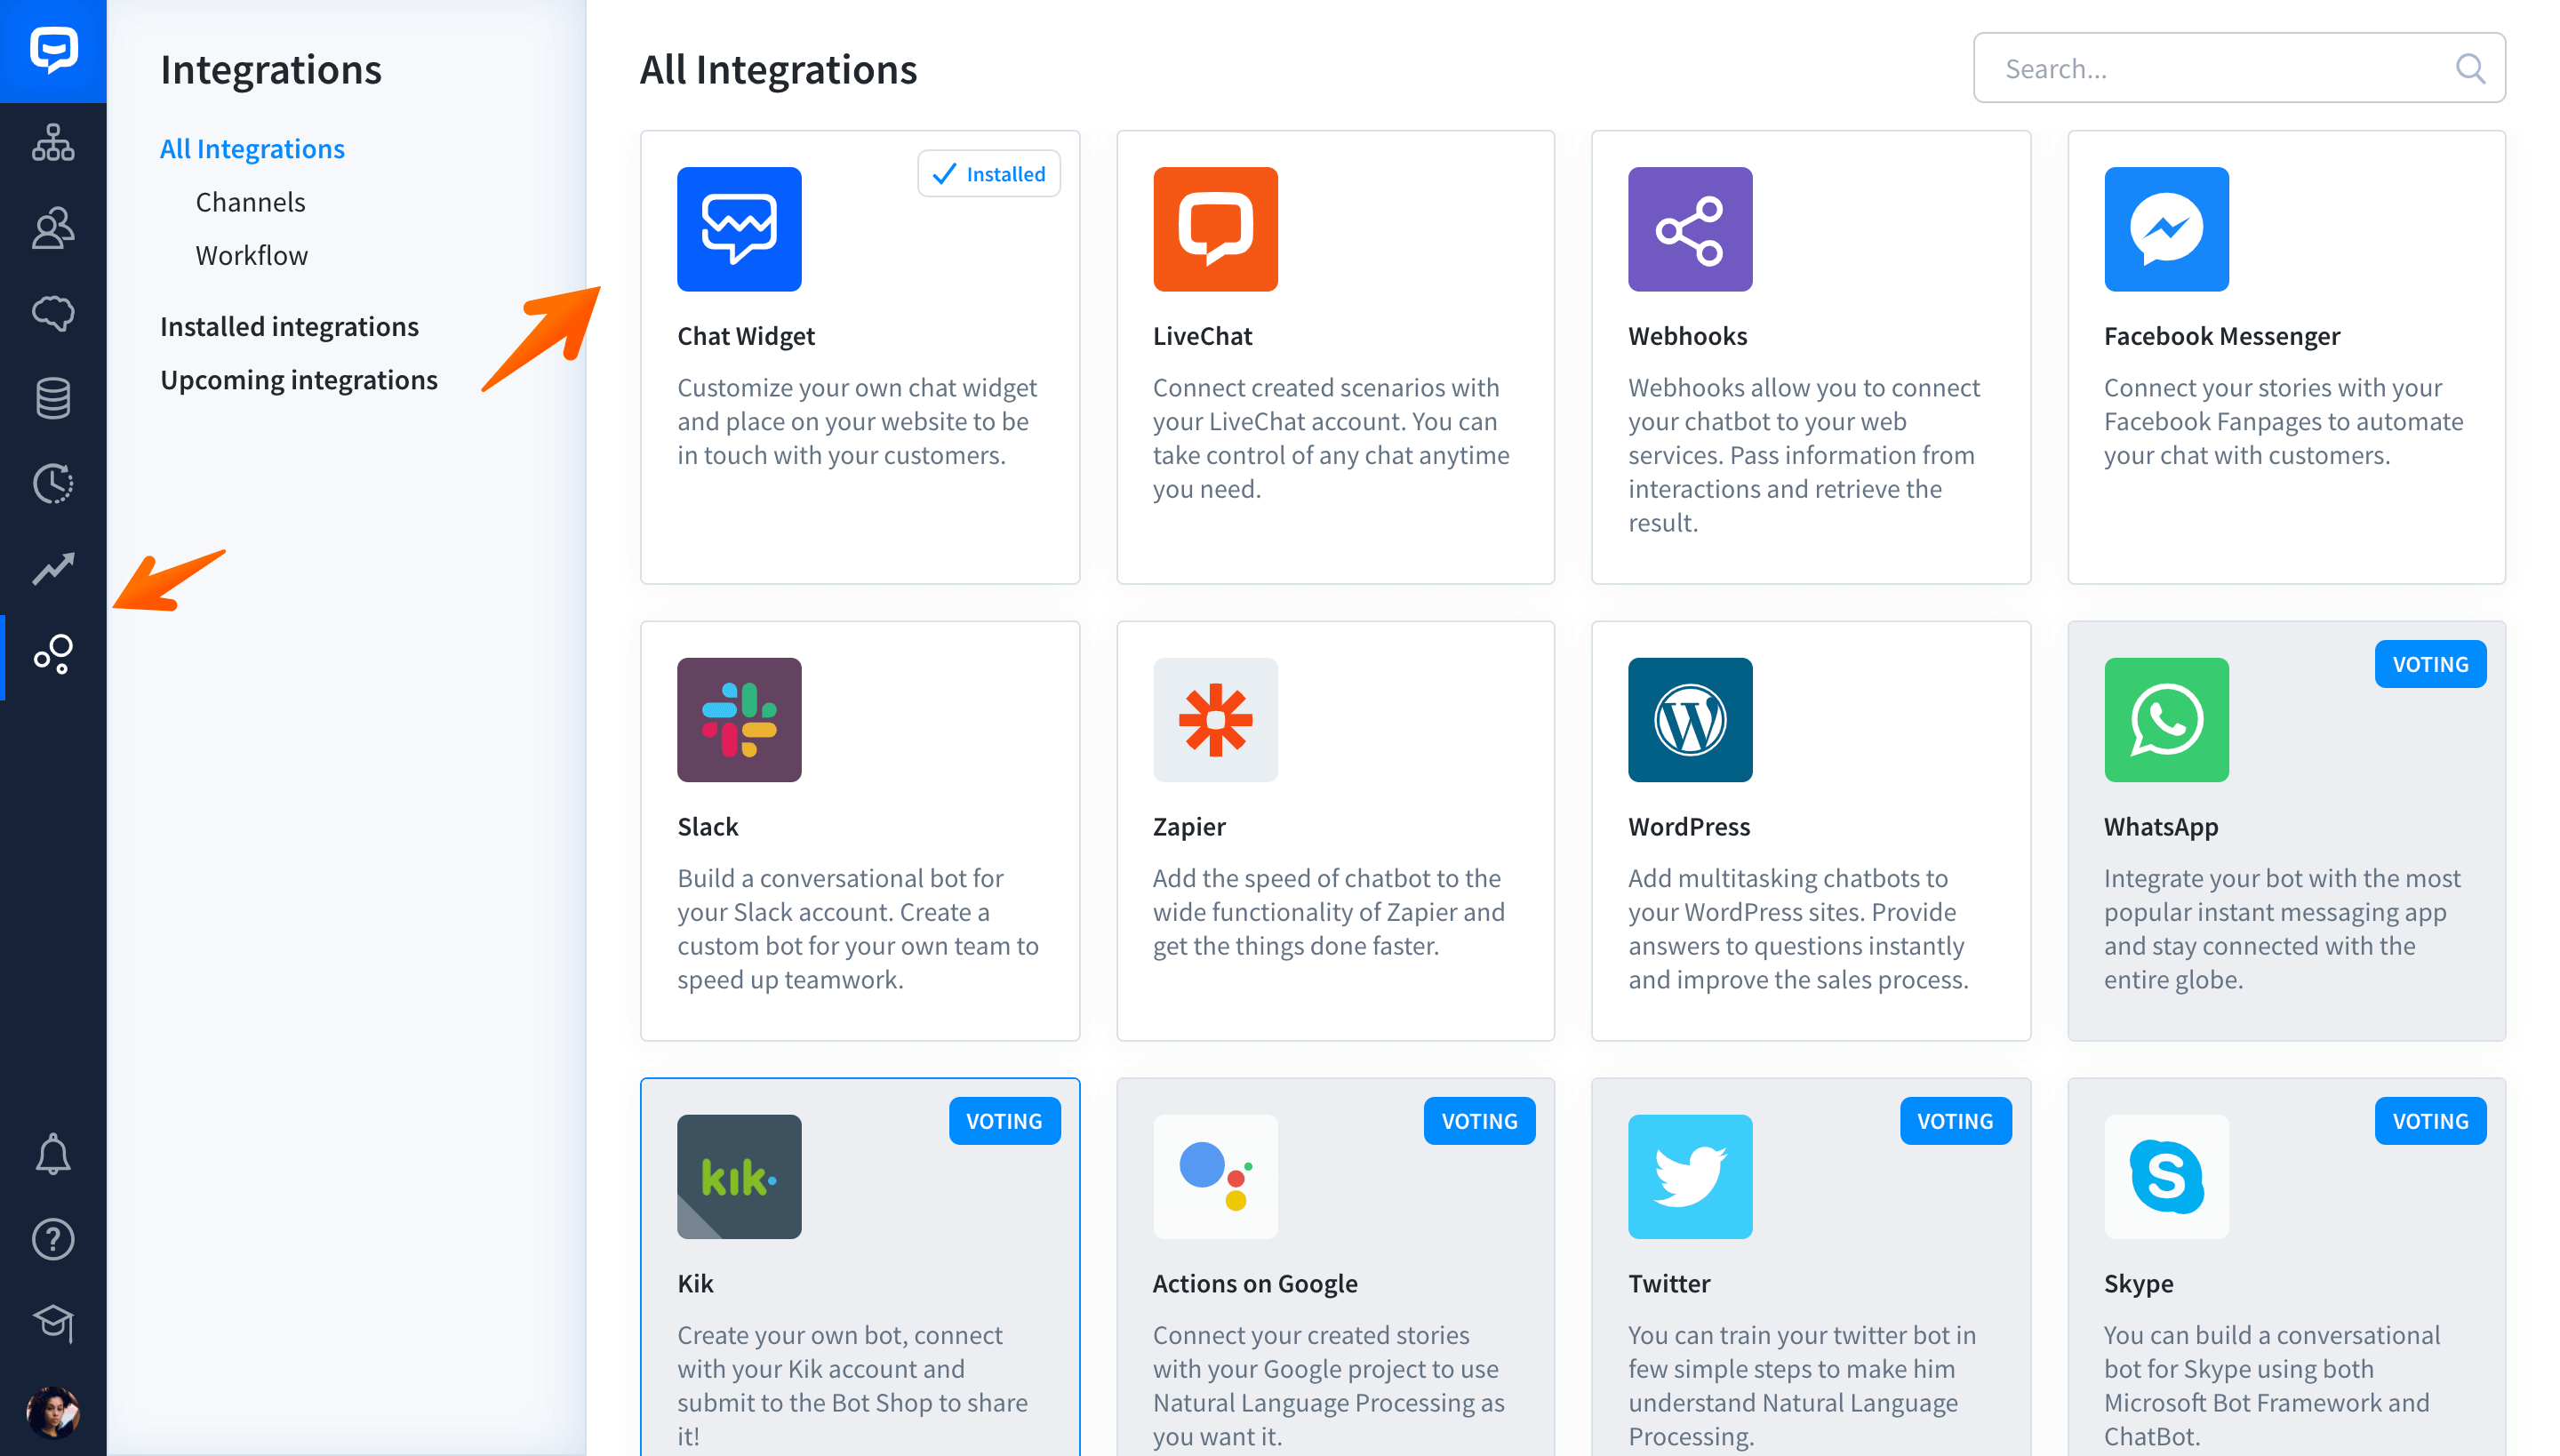
Go to the Integrations section and select Chat Widget.

-
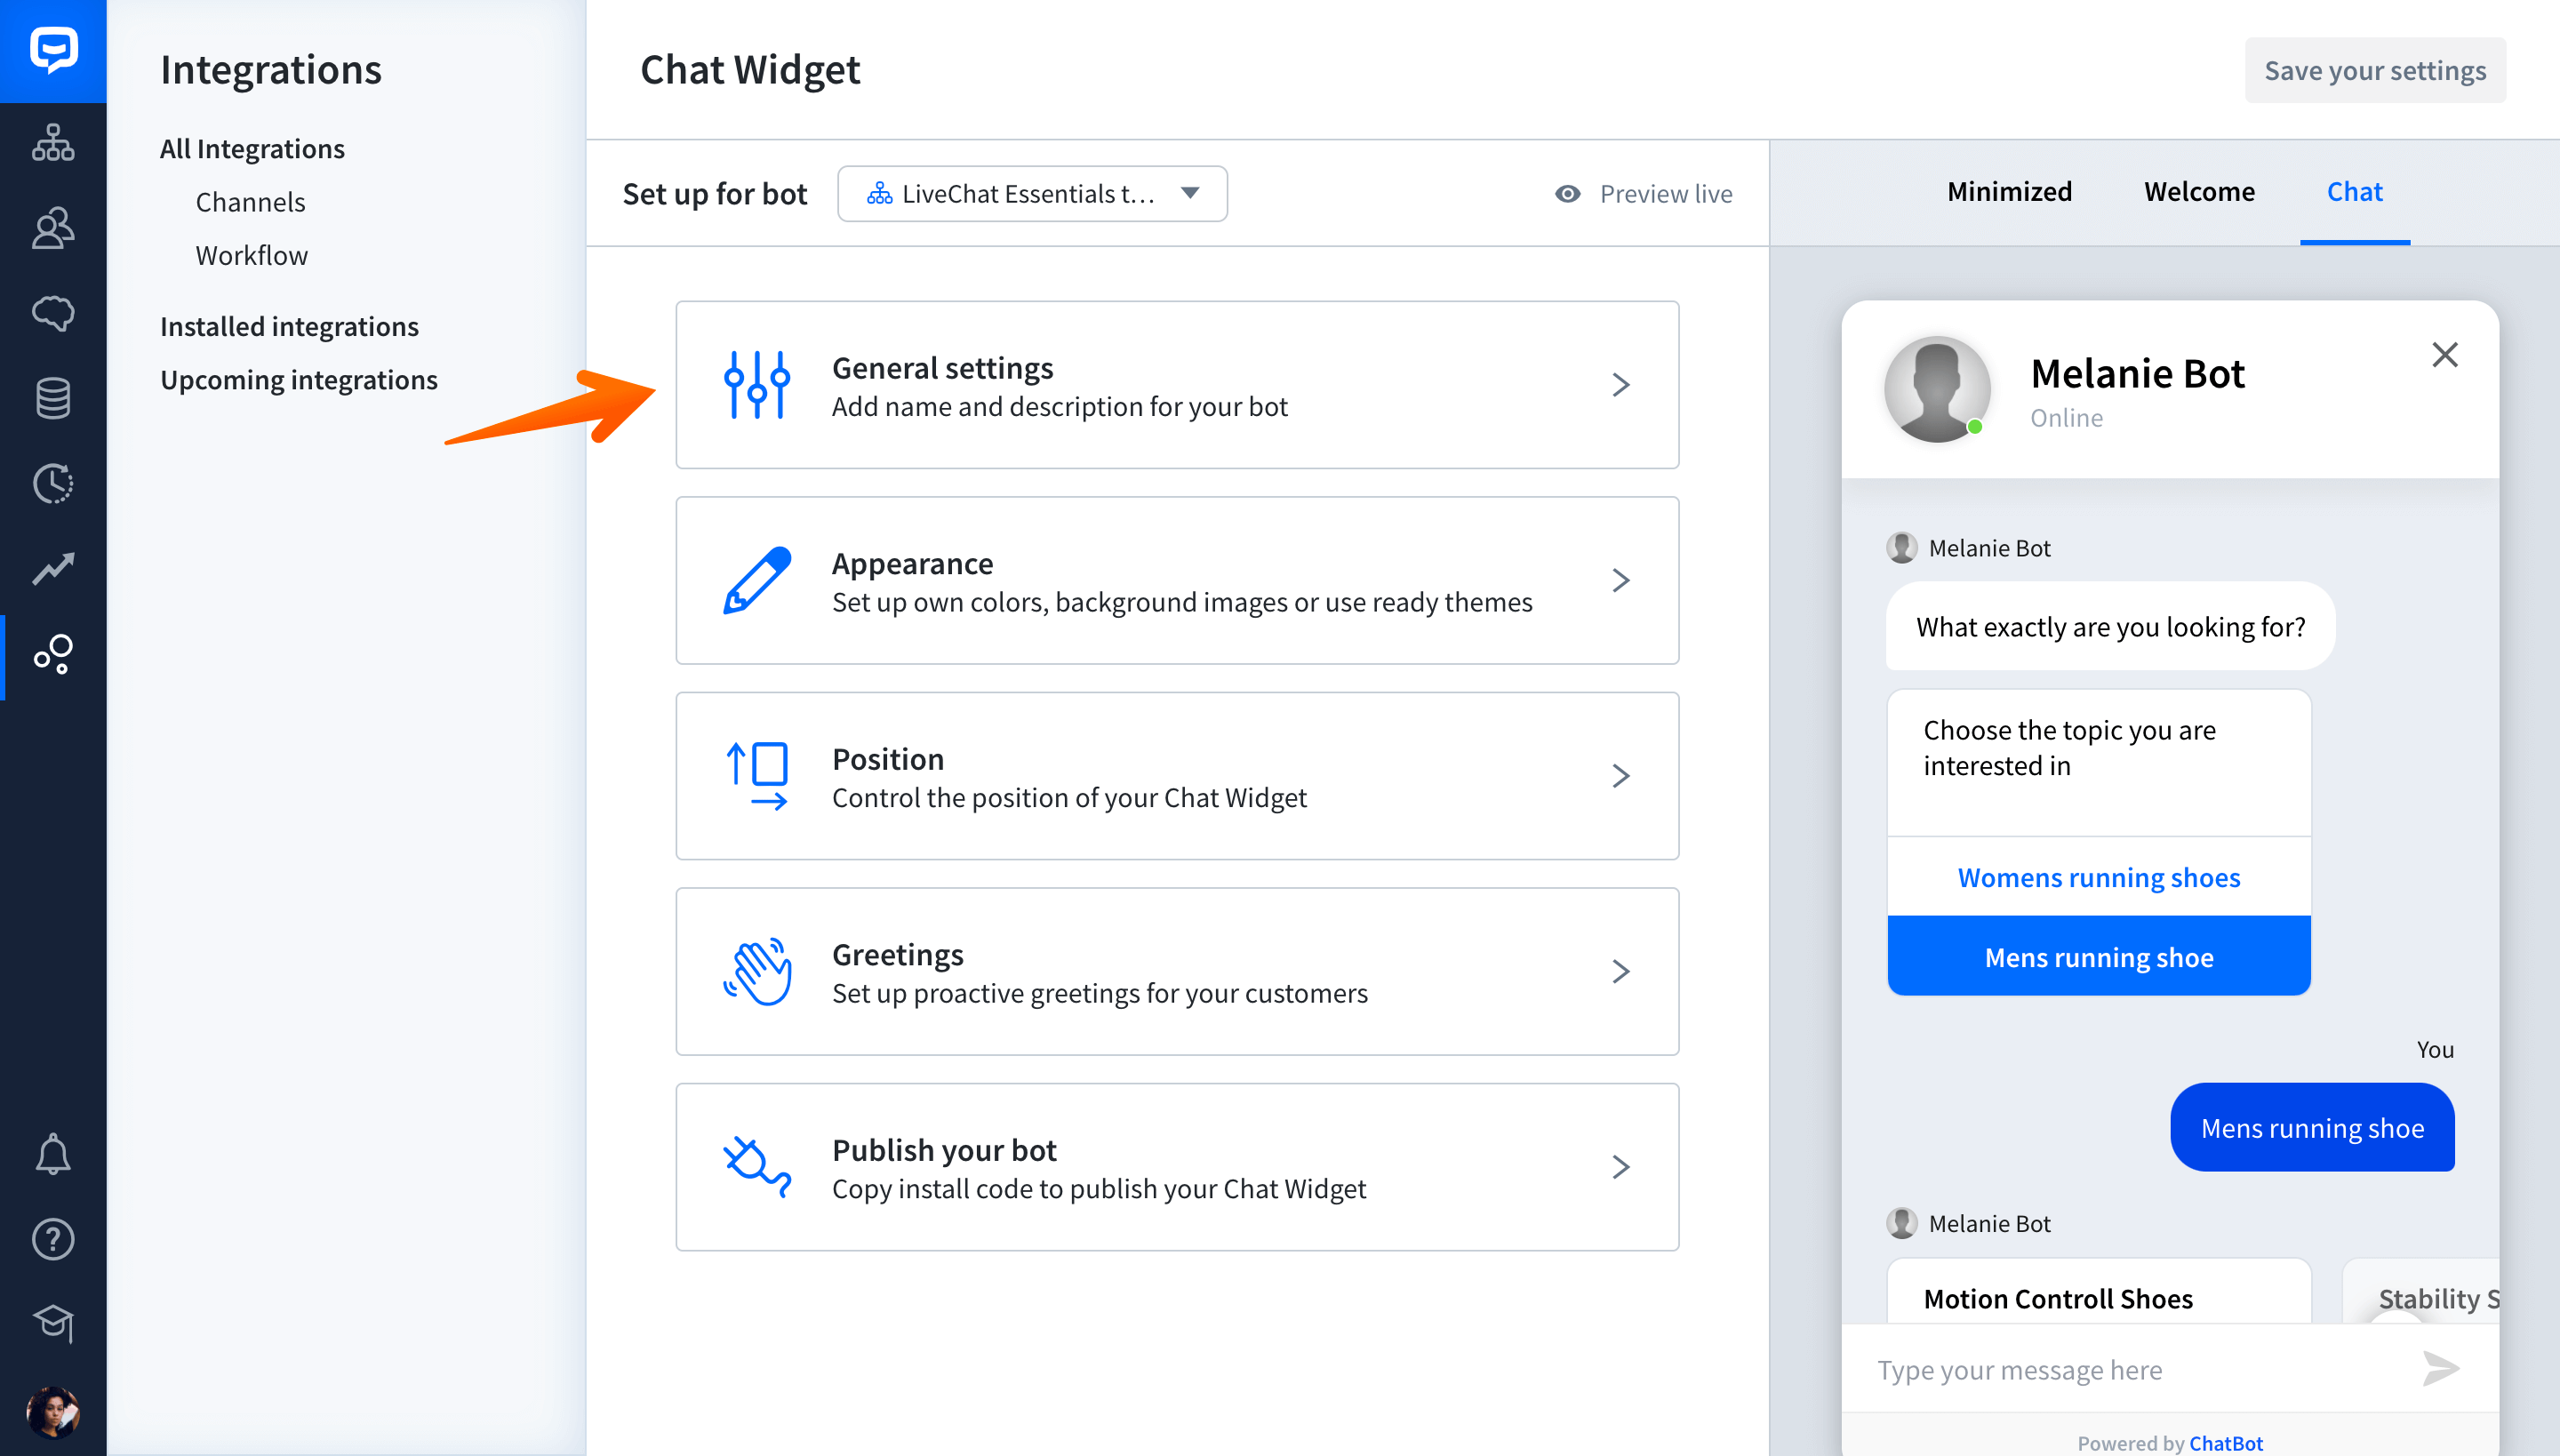
Click on the General settings section.

-
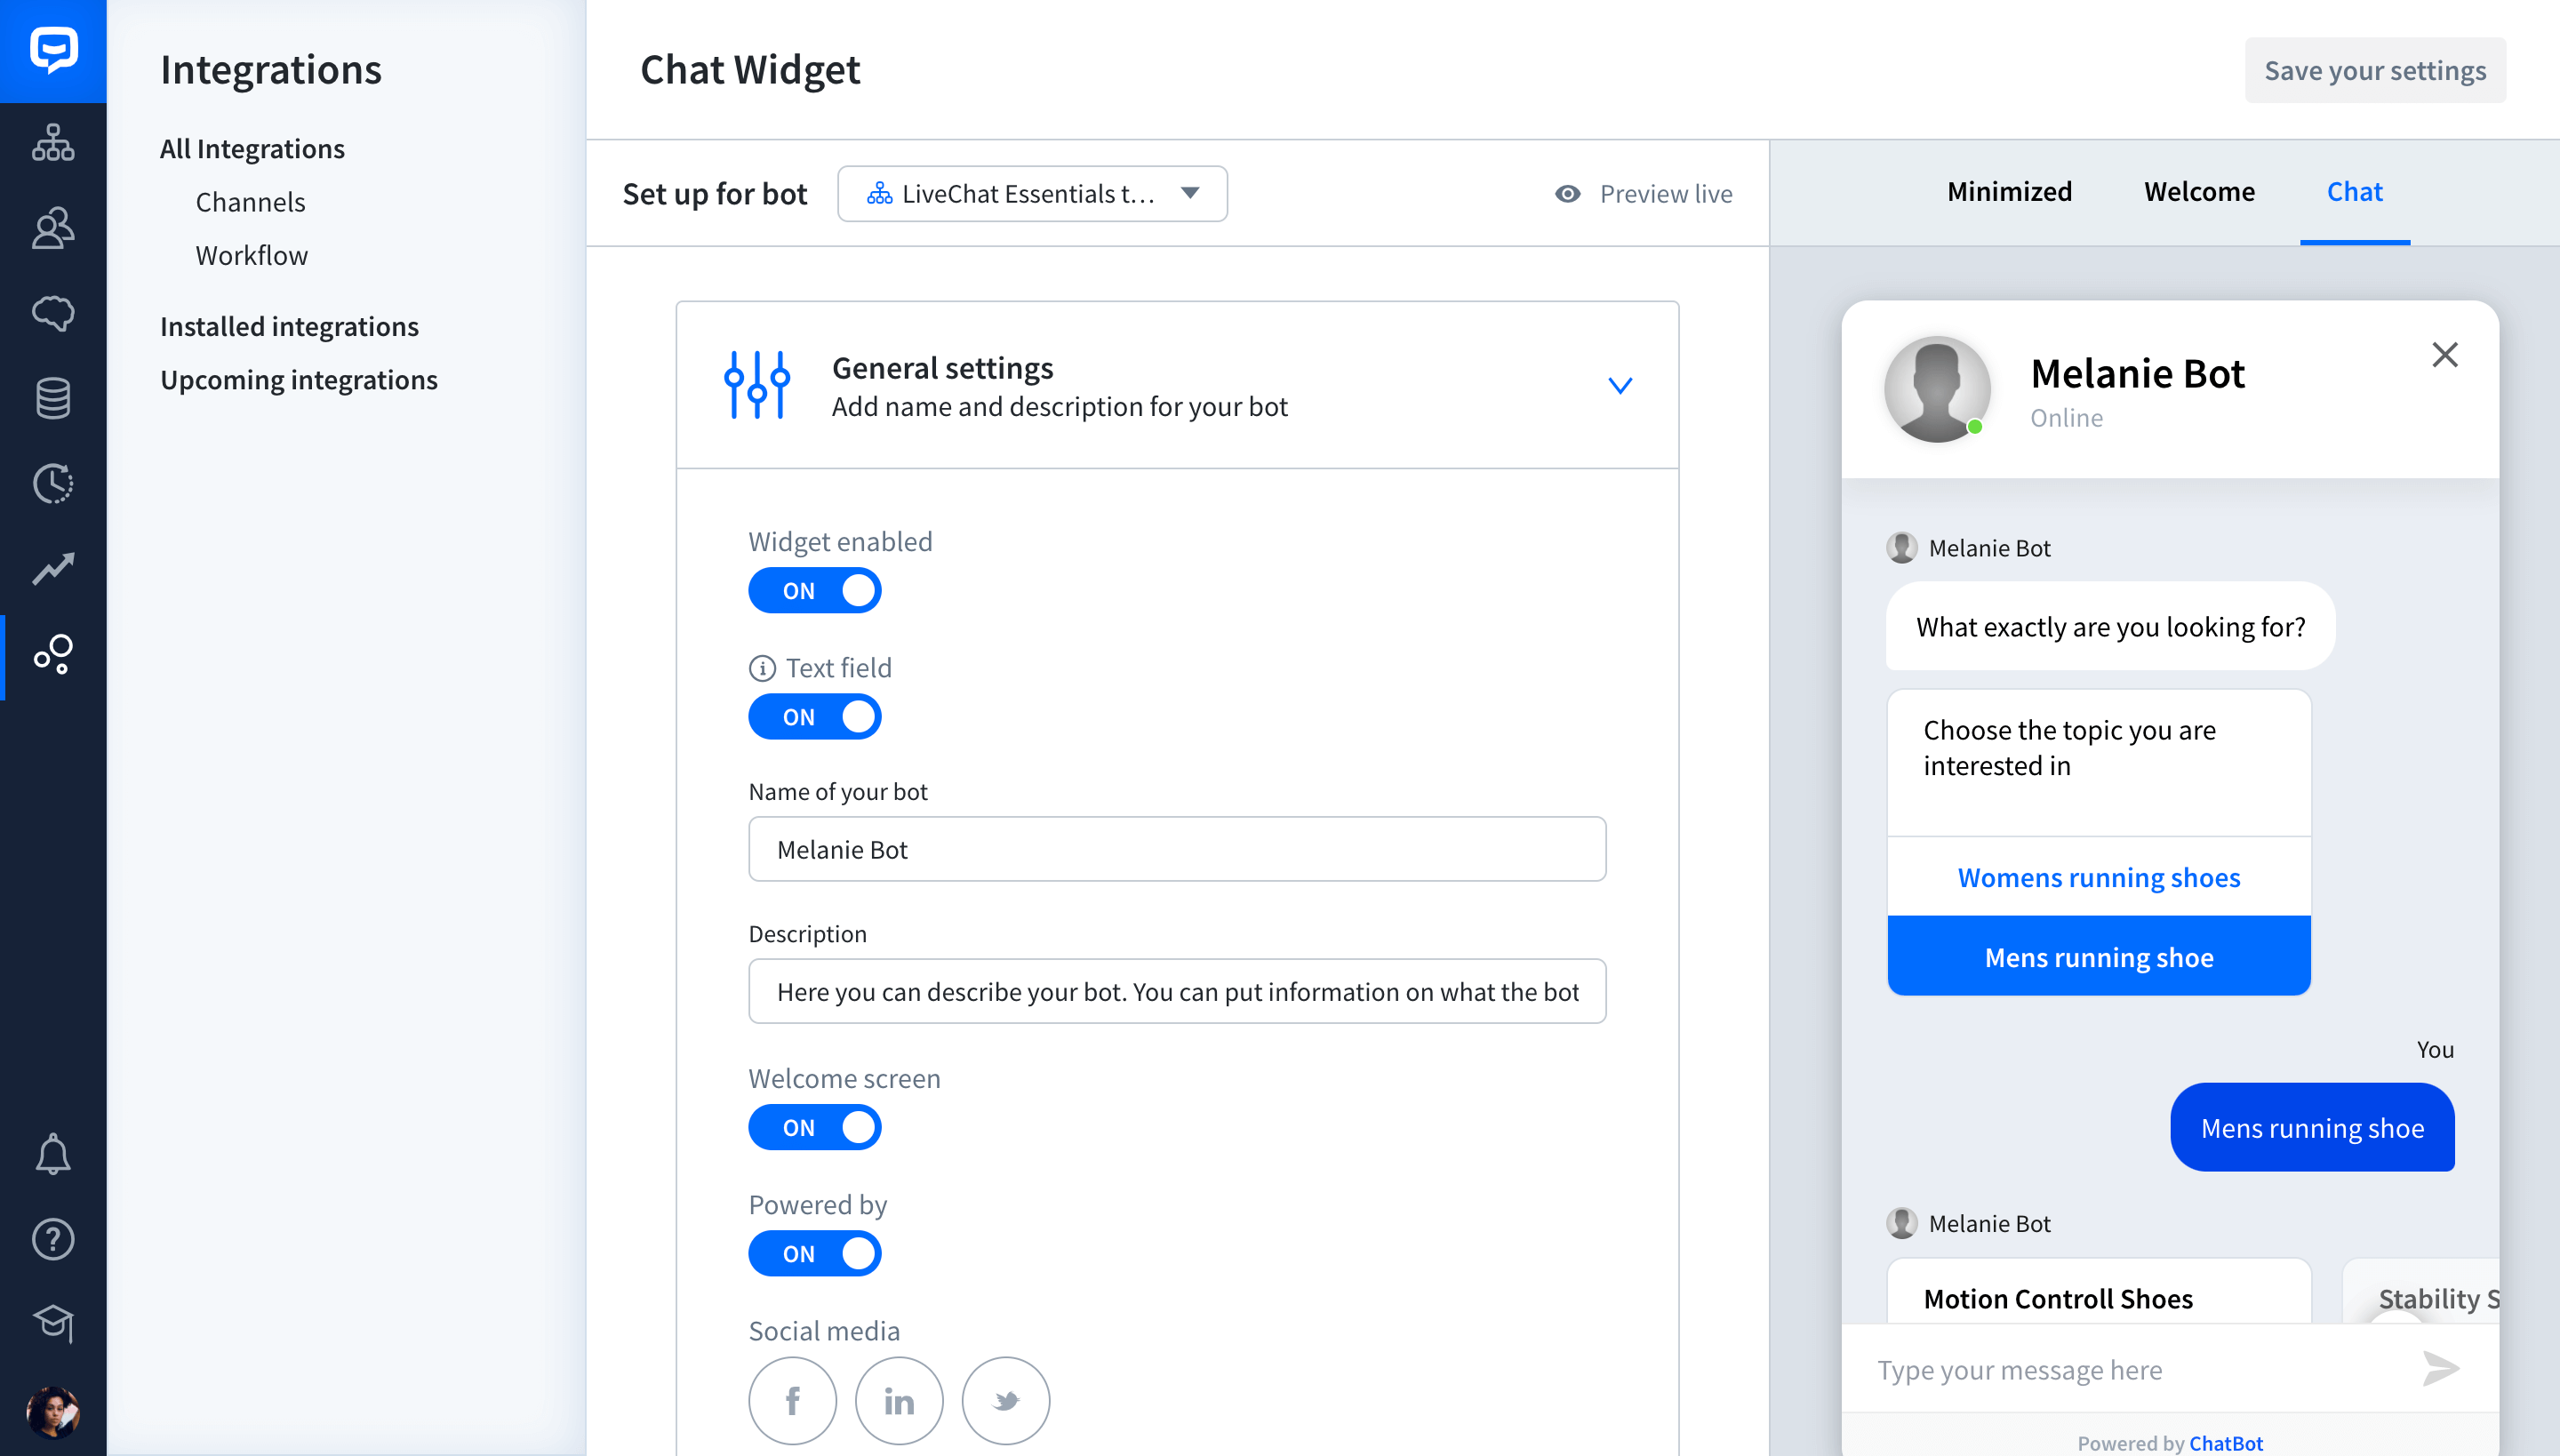
Set up your settings.

-
Widget enabled - this option allows you to turn ChatBot on or off on your website.
-
Text field - if needed, you can turn the text field off. Remember that if you do so, you’ll need to build your Story using rich messages. If you turn the text field off but use the Question action, the text field will be activated so that the user can answer that question. After the user provides an answer, the text field will be automatically turned off again.
-
Name - type your chatbot’s name here.
-
Description - this short text is displayed on the welcome screen. It should briefly describe your business and explain how the chatbot can help the user.
-
Welcome screen - you can enable this option to show the welcome screen with a description and your social media links before the chat starts.
-
Powered by - you can disable this option to remove the Powered by ChatBot label from your Chat Widget.
-
Social media - use it to share your social media links with customers directly in Chat Widget on the welcome screen.
Preview Chat Widget
You can preview the changes you’ve made to the Chat Widget in real time on the right side of the configuration screen. Choose a preview view: minimized chat, the welcome screen, or the ongoing chat view.