Freshdesk is online customer support software that helps you manage your customer communication process. It allows you to track and manage incoming tickets across different channels and collaborate with multiple teams for faster resolution.
By connecting ChatBot to Freshdesk, you can start using two new Freshdesk actions: Create ticket and Add contact. These will help you to streamline your customer communication process and drive long-term customer relationships.
How to use the Create ticket action for Freshdesk
The Create ticket action for Freshdesk lets you create tickets from chats that your customers have with your chatbot. To use this action, you first need to connect your Freshdesk account to ChatBot.
-
Go to your ChatBot dashboard.
-
Import a template, create a new Story, or use an existing one.

-
Head to the Actions and Interactions menu and scroll down to access Freshdesk actions.

-
Choose the Create ticket action and place the resulting block in the appropriate place in your Story.
To make use of the Create ticket action, you need to collect information from the customer earlier in the Story by using attributes.
Attributes allow you to configure the Create ticket action properly. To collect multiple user information using attributes, use the Question action.

-
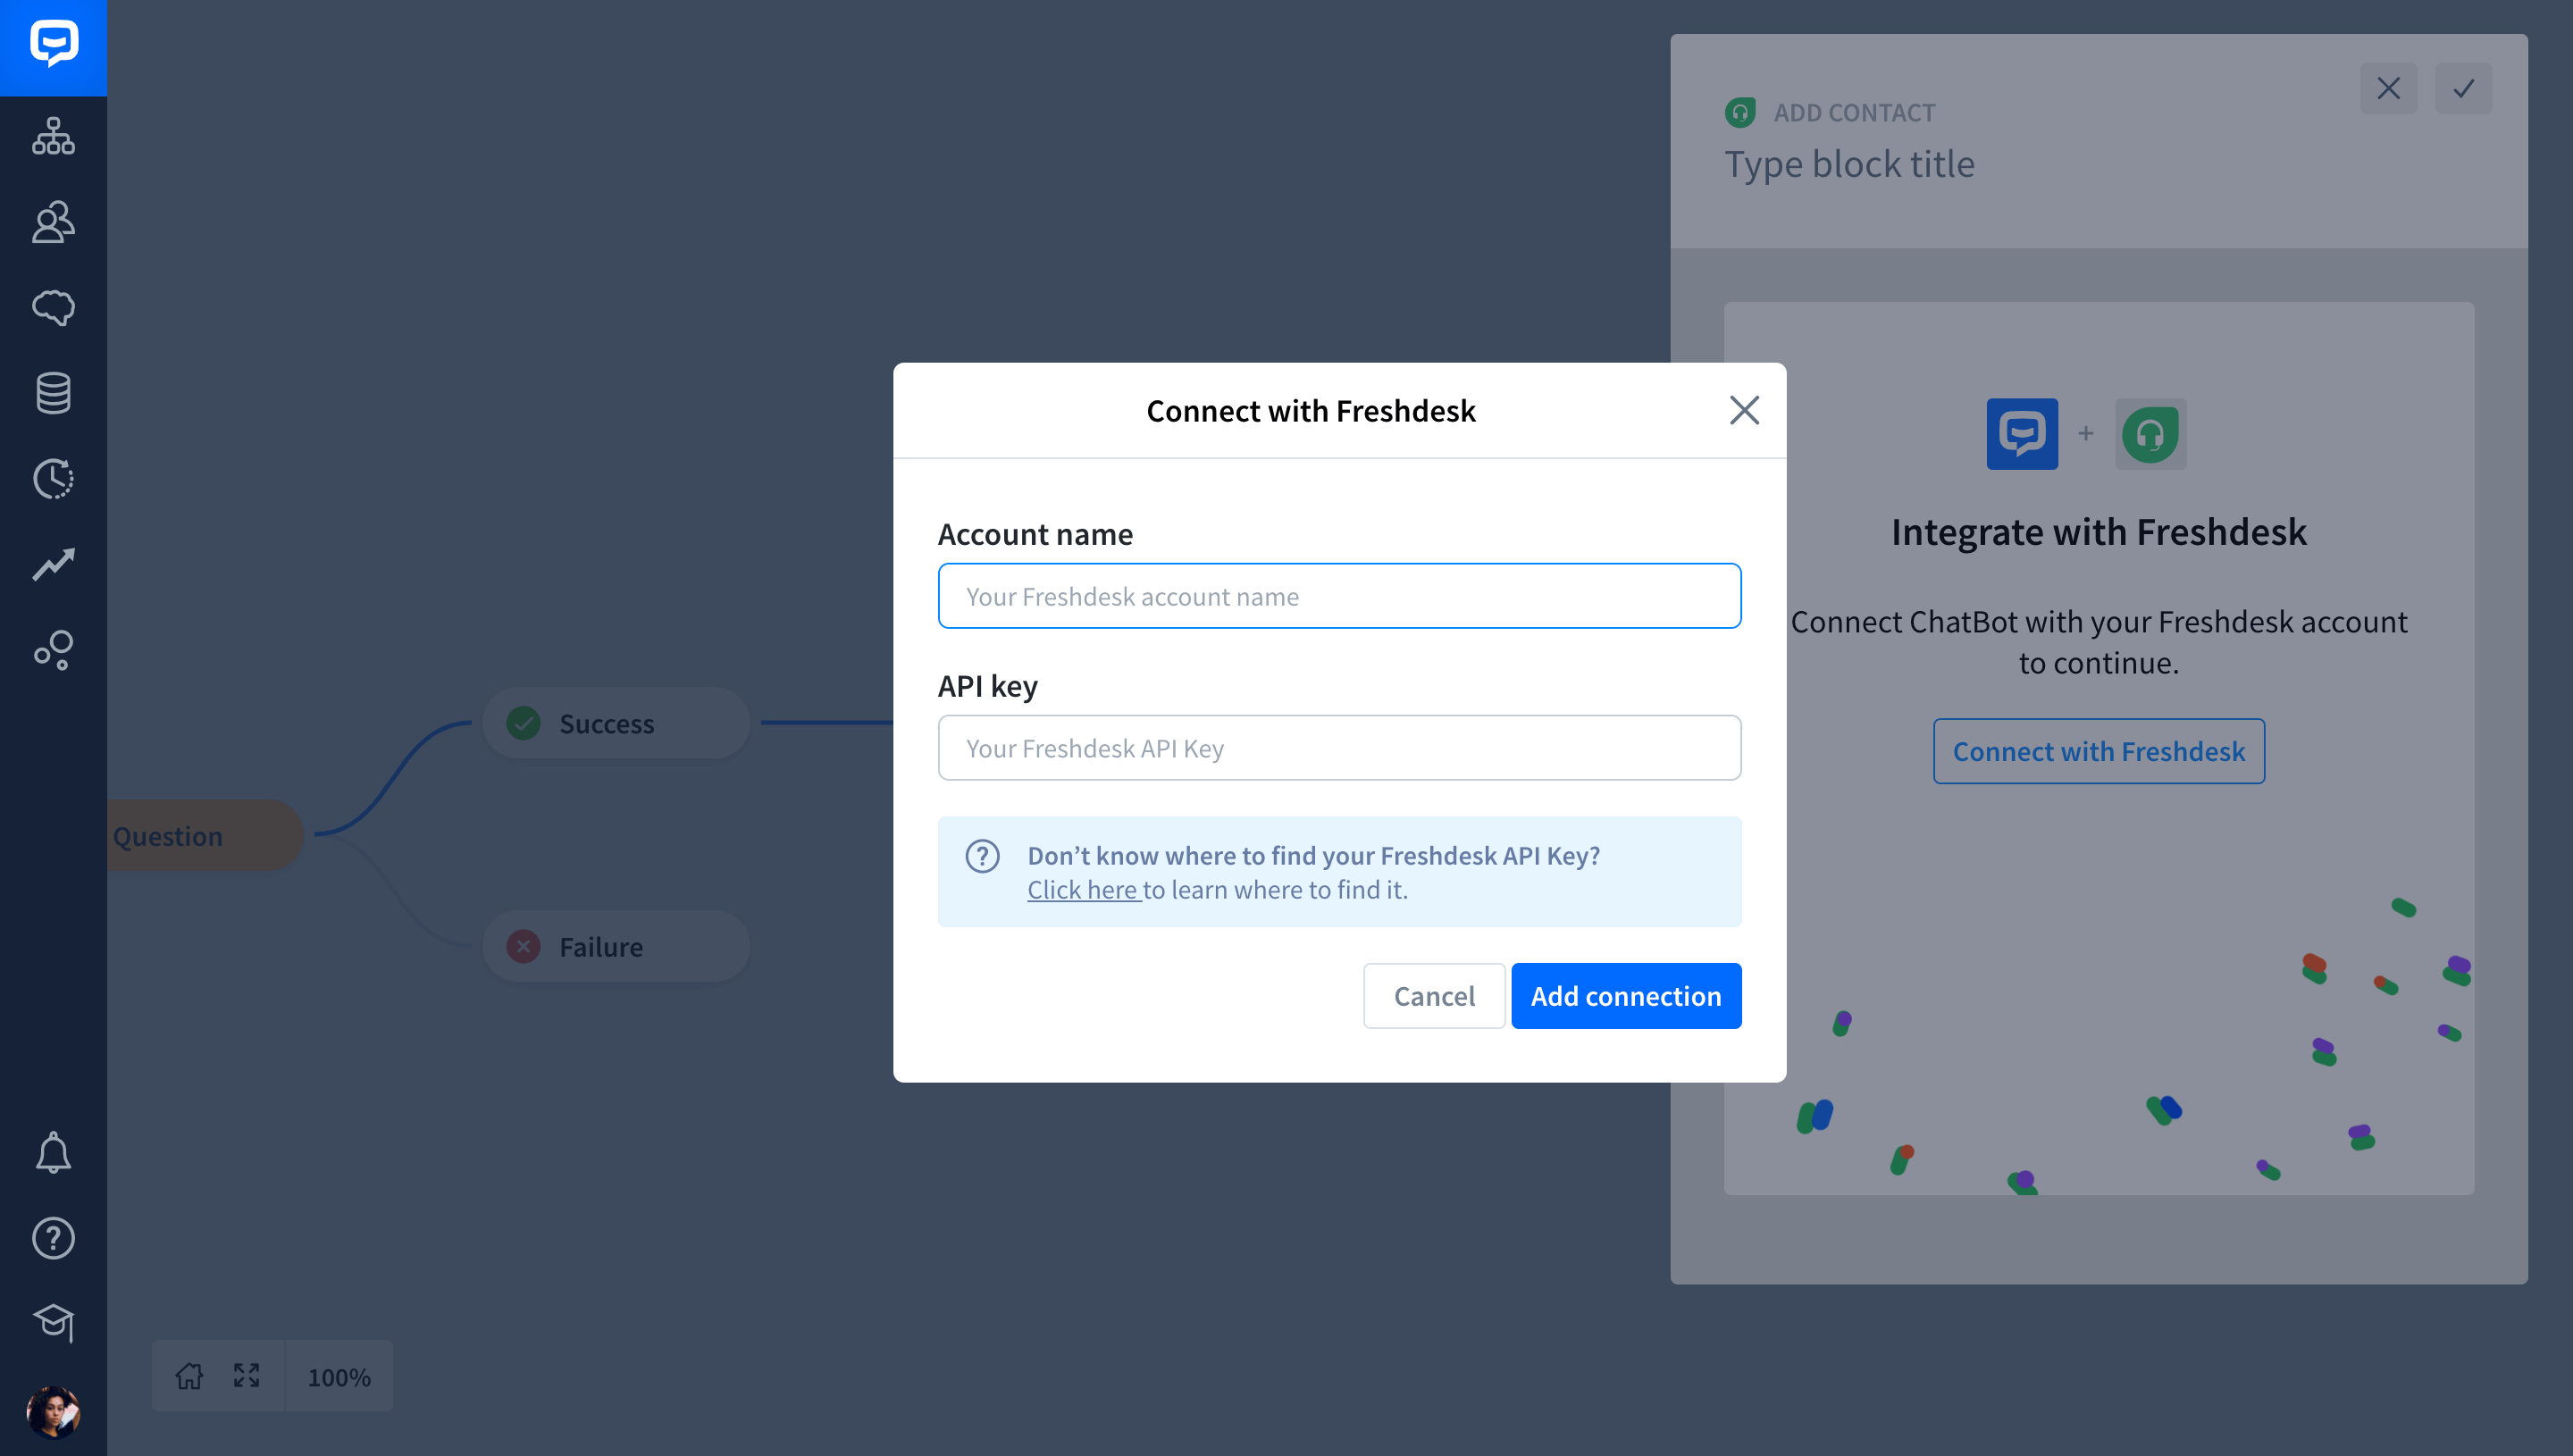
Next, select the Create ticket block you added. You will see that to proceed, you must first integrate ChatBot with Freshdesk. To continue, select Connect with Freshdesk in the panel that appears.

-
Now, enter your Freshdesk account name and the Freshdesk API Key. If you don’t know where to find them, here’s the link.
-
After you’ve added your credentials, choose your newly added account and select Continue.

-
Now, you need to fill in the Create ticket block. In the Subject field, you need to define the topic of the ticket created by the user. To do so, use default or custom attributes that you have already created and collected earlier in the Story by using the Question action.

-
In the Email field, define the email to which the response for the created ticket should be sent. Earlier in the Story, the customer will have already provided you with their email address in the Question action. Use that email attribute to define the address to which you will reply to the customer.

-
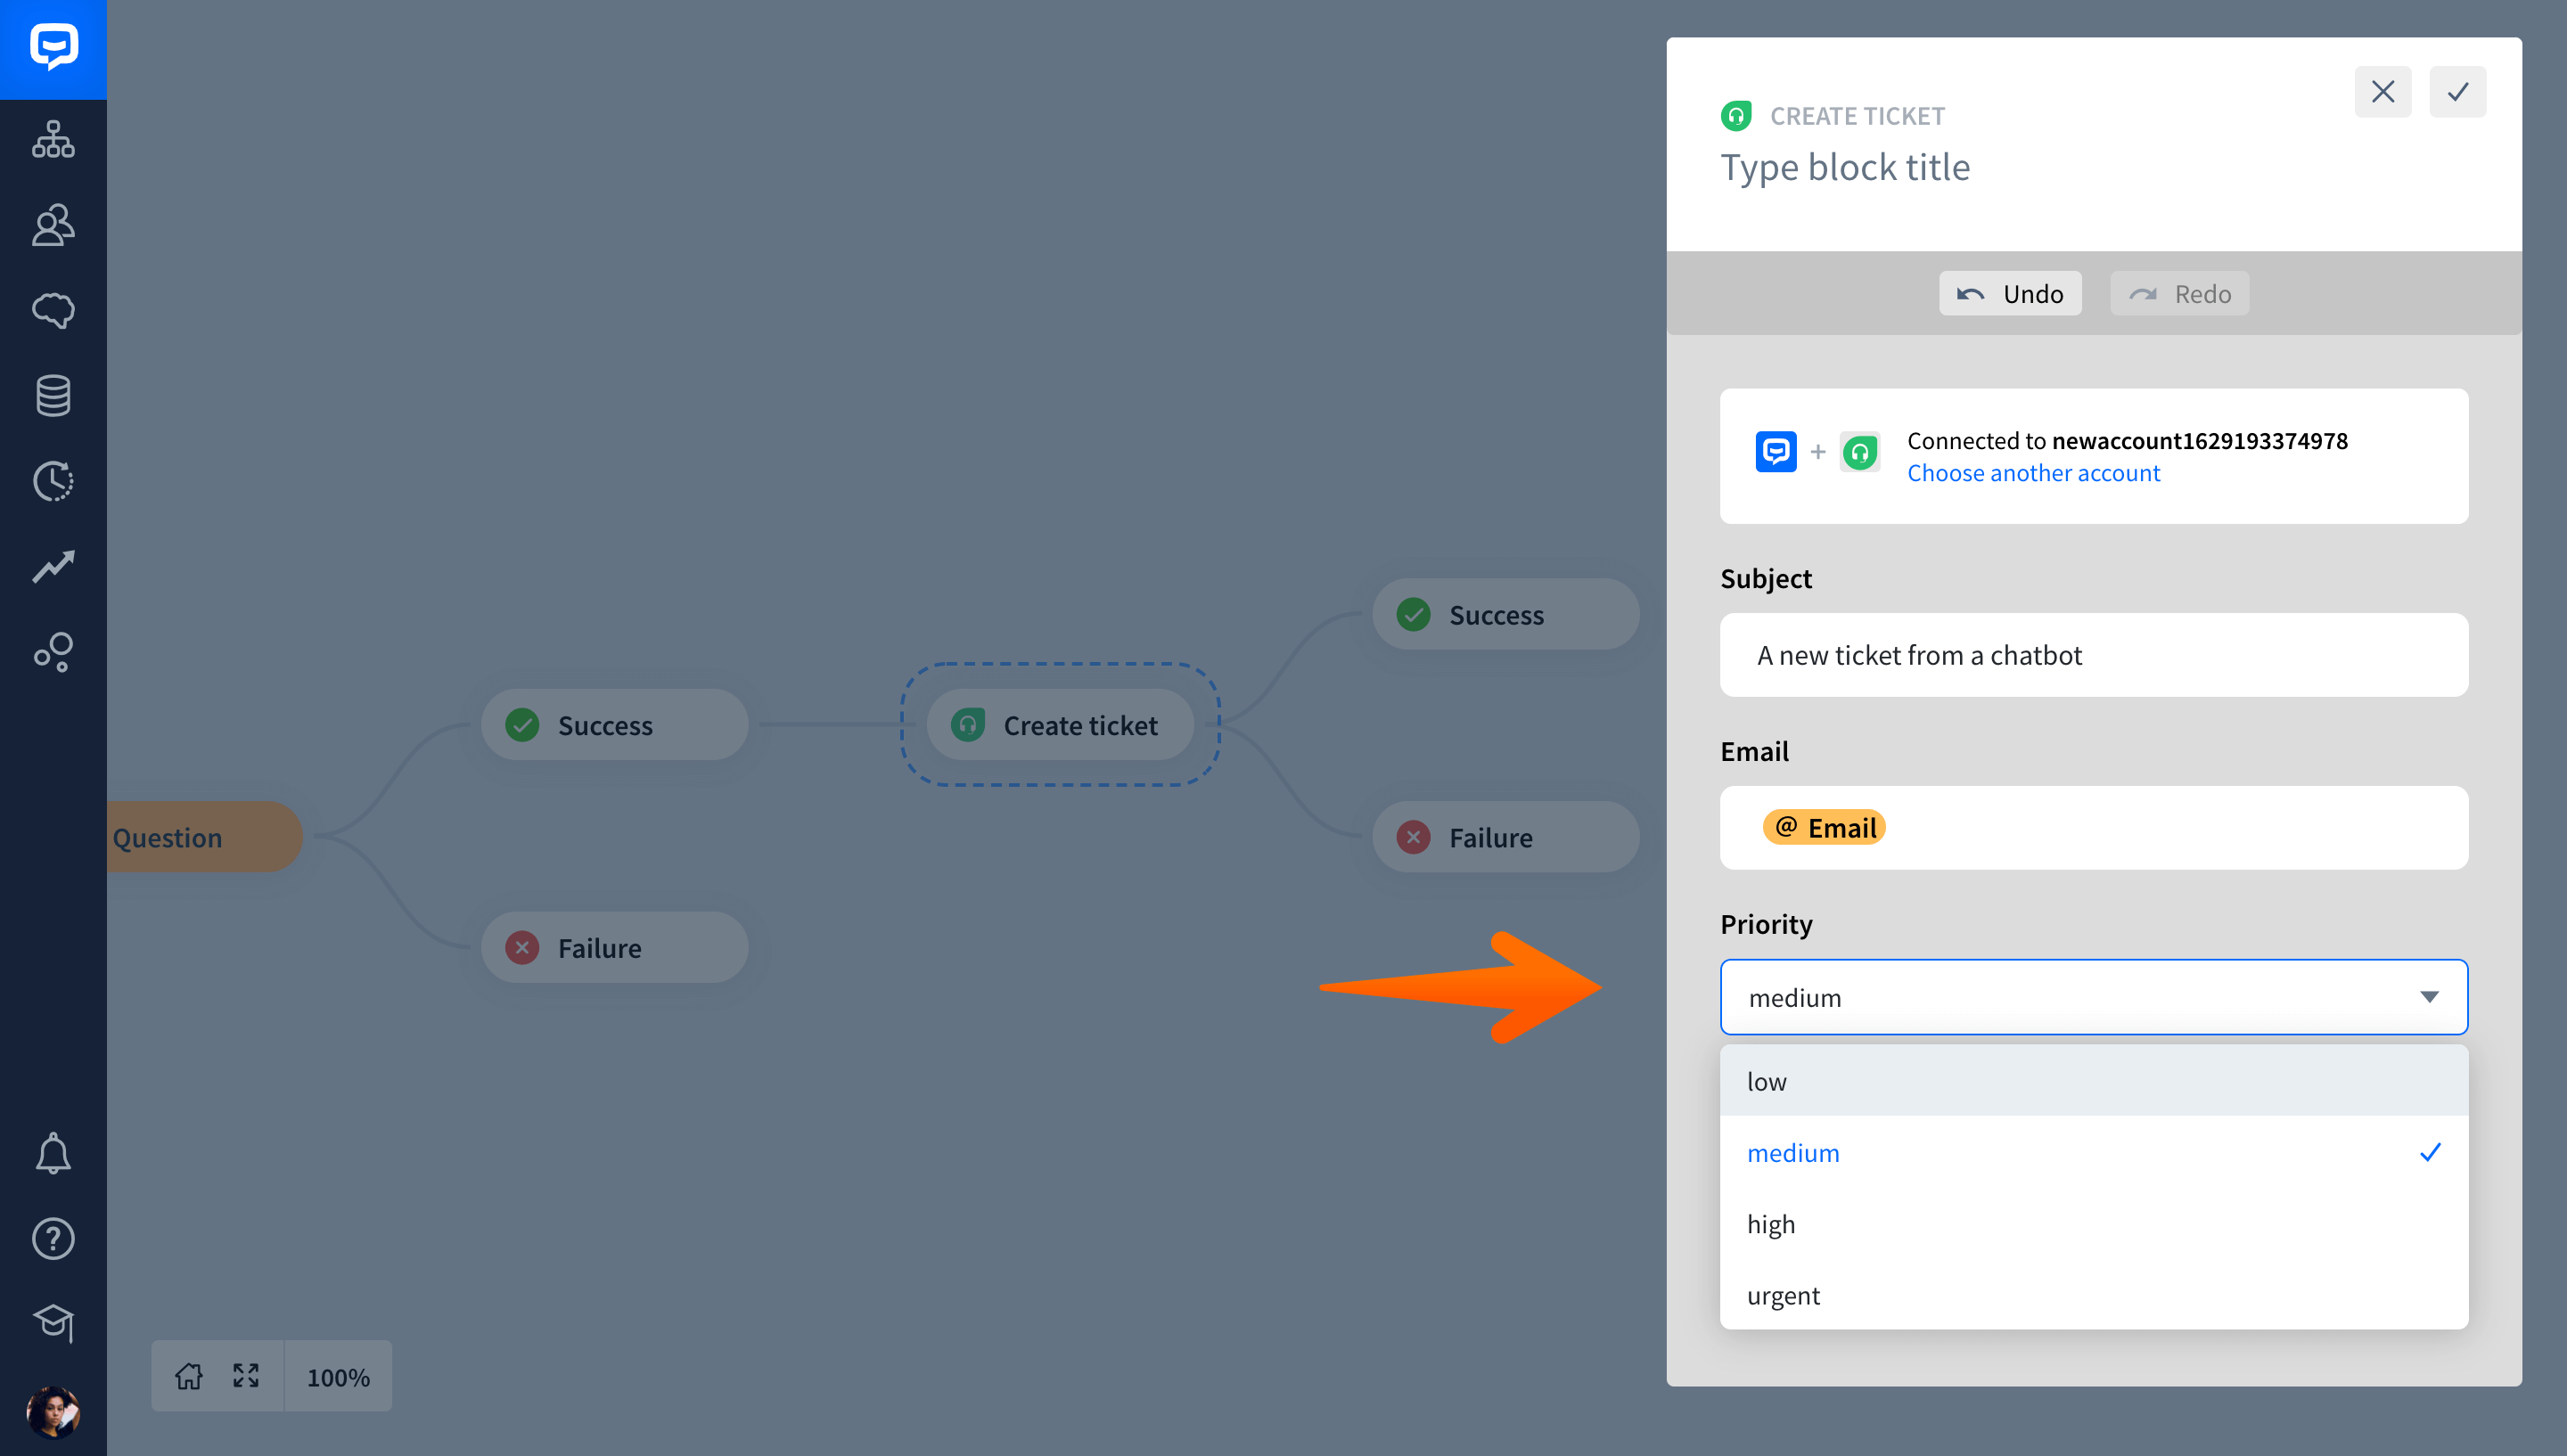
Now, you need to set up the ticket Priority. This will help your team verify which of the tickets need to be handled first. Remember that you can always change ticket priority later.
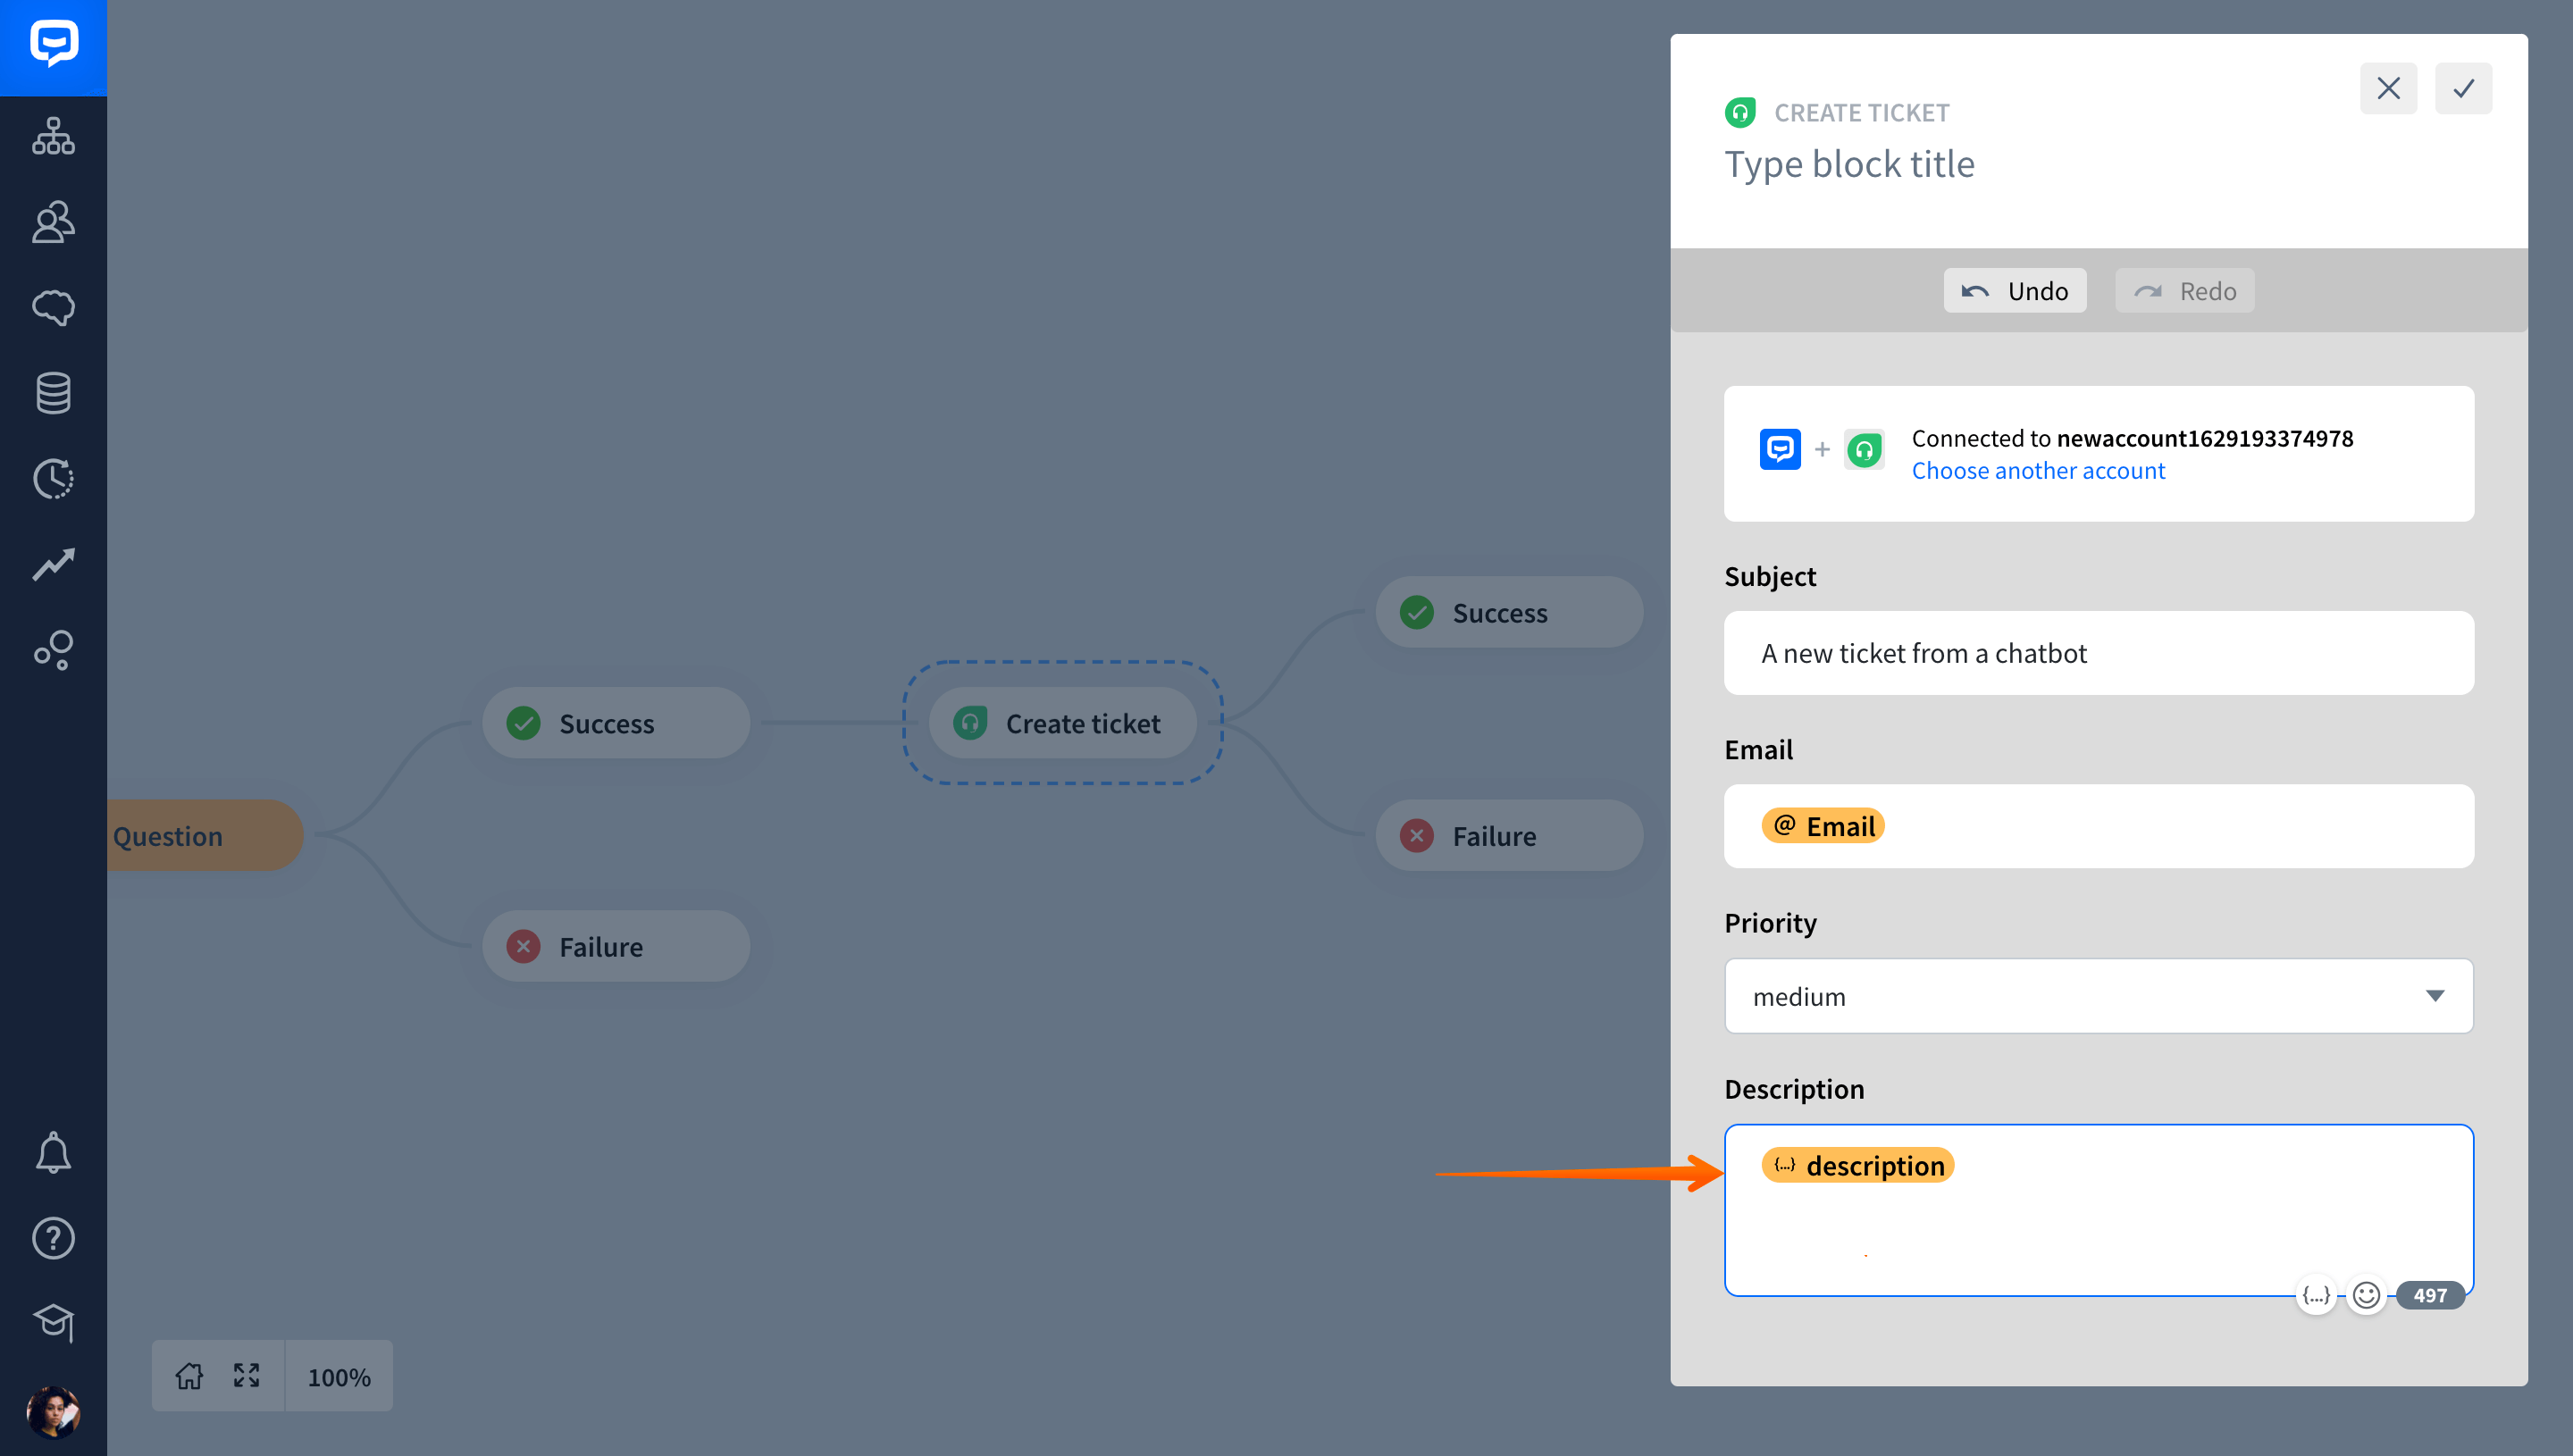
 11. Finally, you need to fill in the Description field. The description contains the content of a created ticket. Again, use default or custom attributes that you have collected earlier in the Story to configure this field. When you finish, select Save.
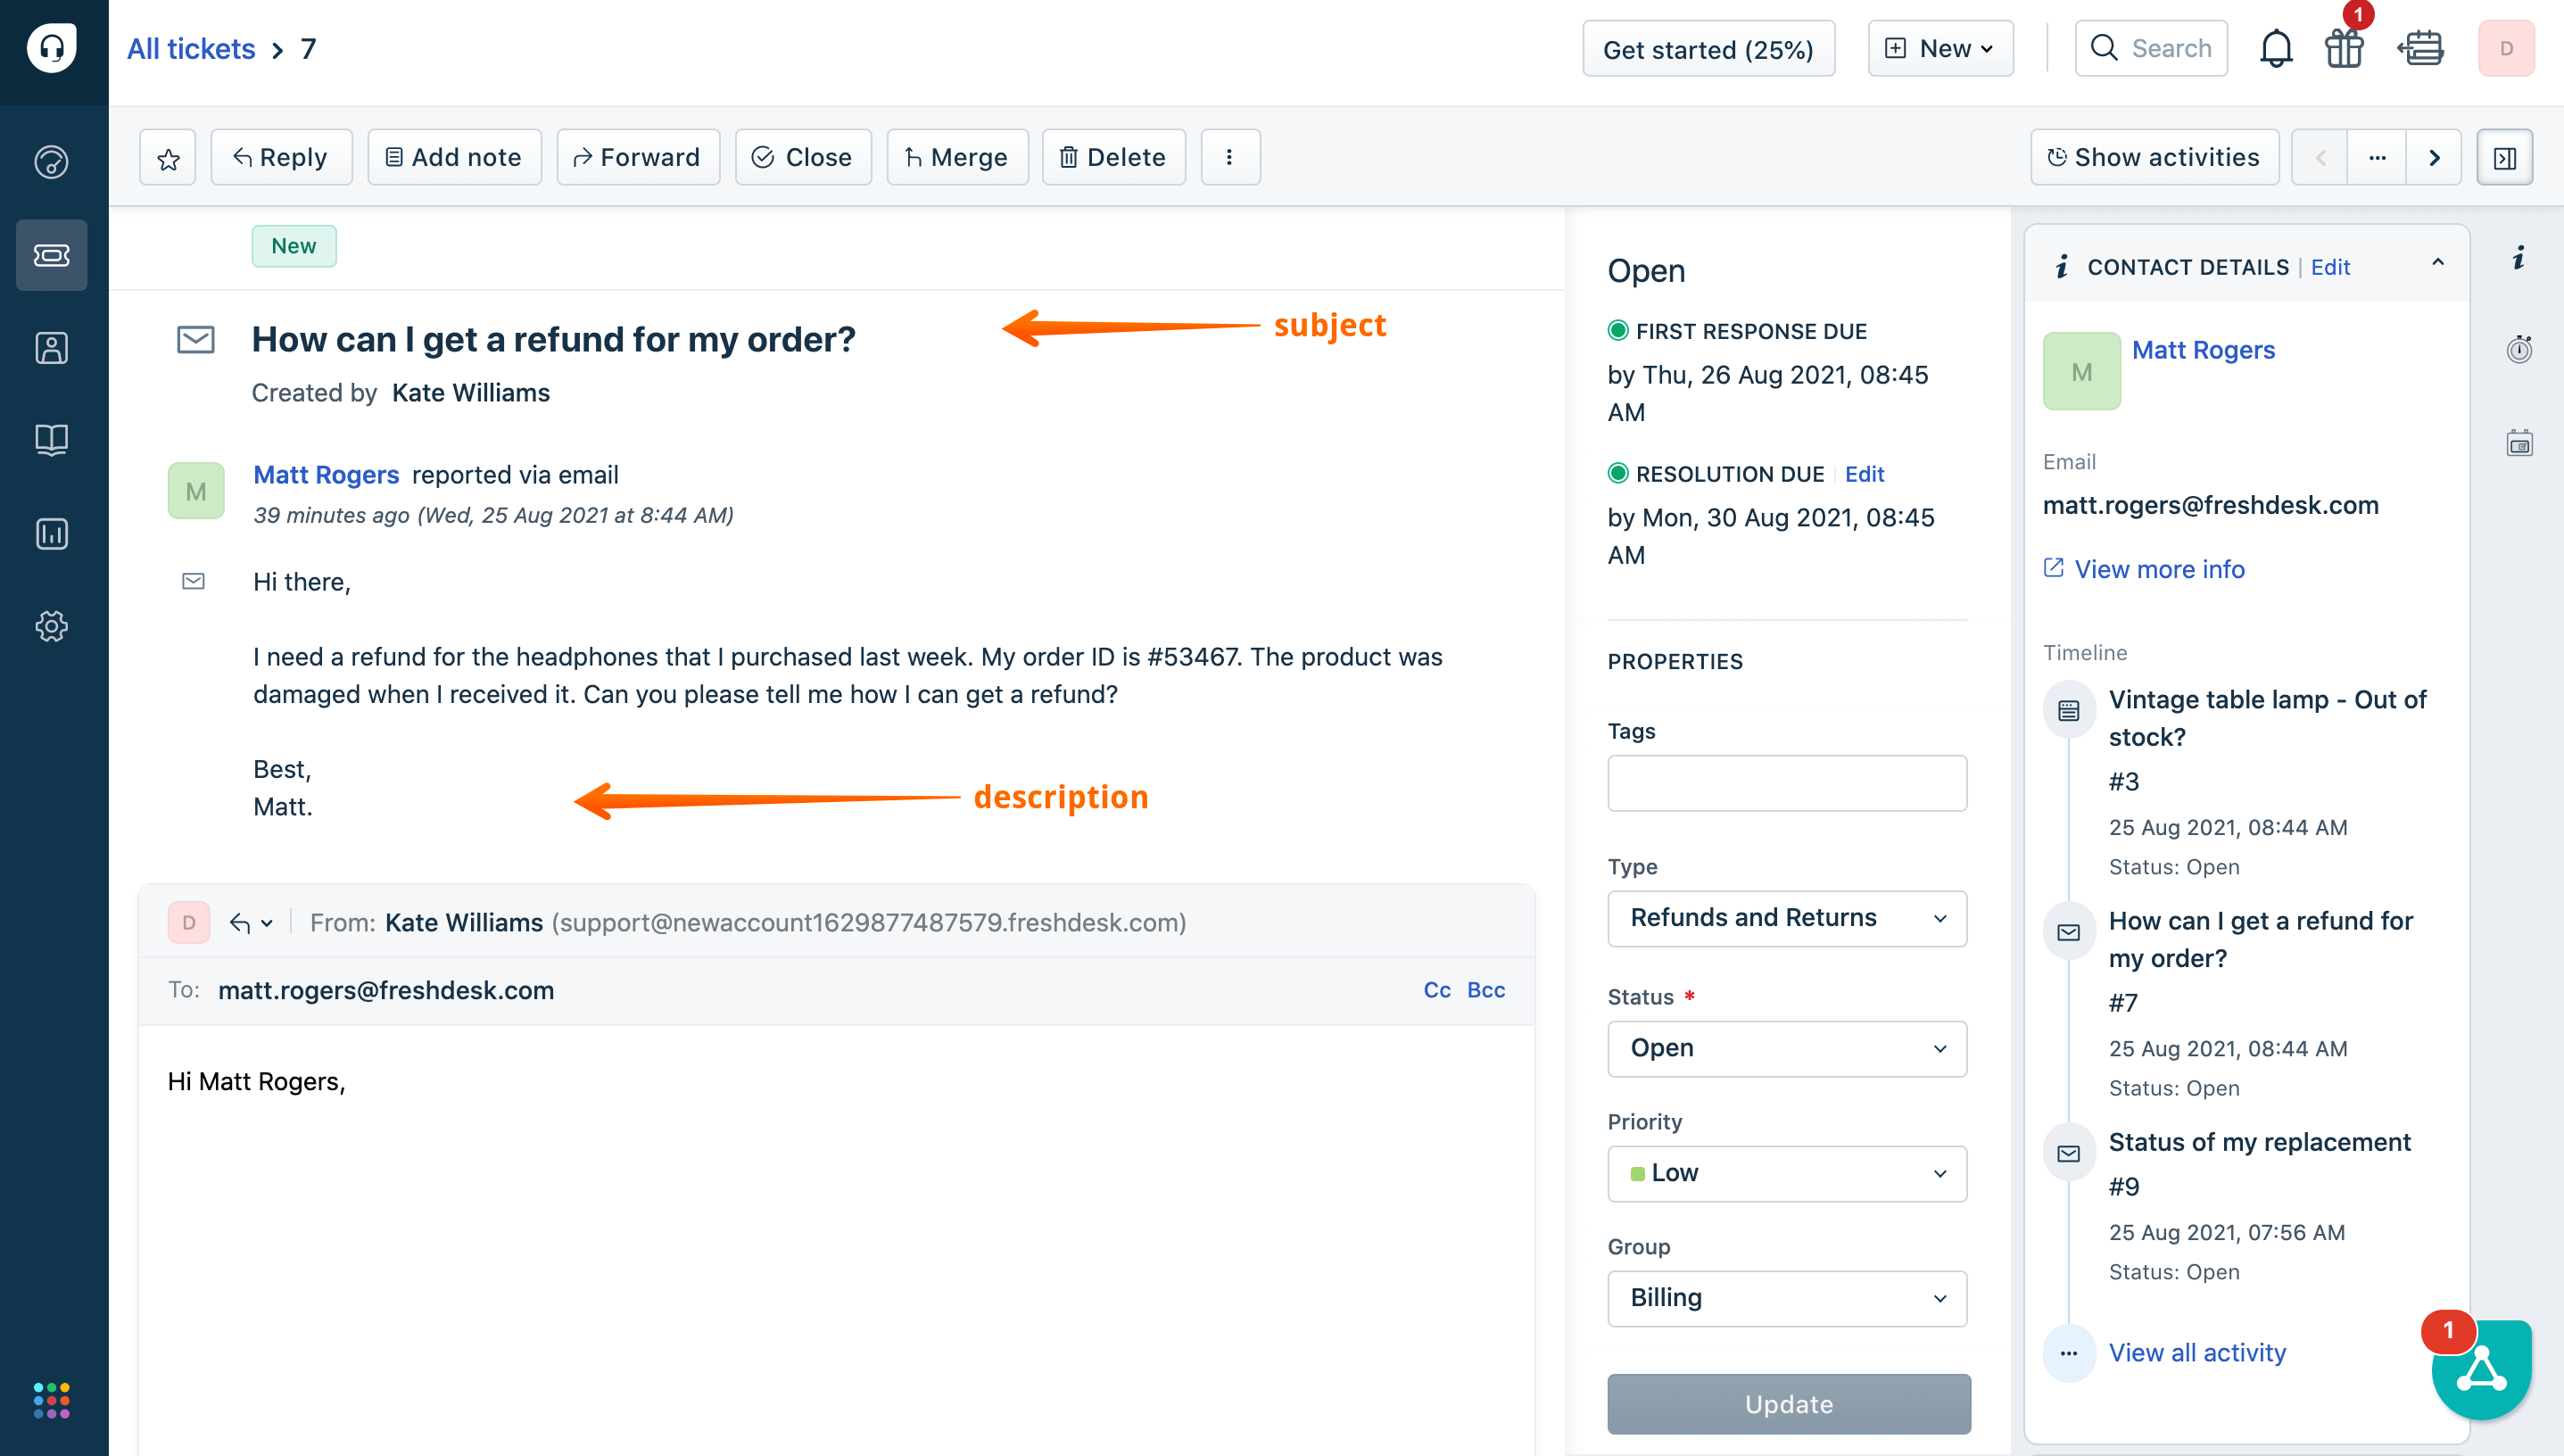
 12. To check out the tickets created by a chatbot, go to your Freshdesk account and open the Tickets sections.
 13. Select a ticket to read its content.
How to use Freshdesk’s Add contact action
The Add contact action for Freshdesk allows you to add contacts gathered by ChatBot to your Freshdesk account. As before, in order to use this action, you’ll need to connect your Freshdesk account to ChatBot first.
Before adding the Add contact block to your Story, you need to collect customer information by using attributes. Attributes allow you to configure the Add contact action the right way. To collect attributes in your Story, you can the Question action.
-
Open a Story you want to use to add contacts to Freshdesk.
-
Choose the Add contact block from the Actions and Interactions menu and add it in the appropriate place in your Story.

-
Connect ChatBot to Freshdesk unless you’ve already done so. Choose a Freshdesk account that you want to connect to this Story. Then select Continue.

-
Select the block you added and configure the Contact name field. It lets you define the name of the user that’s creating the ticket. Use attributes collected in the Question action to set it up.

-
In the Contact email field, you define the user’s emails. Once again, use a default or custom attribute to pass the user’s email address to your Freshdesk account.

-
Your chatbot contacts will appear in the Contacts section in Freshdesk.

How can you find your Freshdesk name and API key?
-
Go to your Freshdesk app.
-
After logging, select the Freshworks switcher.

-
Copy your account’s unique name.

-
Paste it into ChatBot in the Account name field.

-
Go back to Freshdesk and select your profile avatar or picture.

-
Select Profile settings.

-
Your API Key will appear in the top right corner of your dashboard. Copy it.

-
Go back to ChatBot and paste it into the API key field.

