The native ChatBot integration for Zendesk makes it possible for your customers to create Zendesk tickets while conversing with your chatbots.
Zendesk is an email-based ticketing application that helps businesses manage their ticket communication. The software lets you gather customer requests submitted through multiple channels, including email, live chat, social networks, and chatbots. You can then answer them all efficiently from one place.
How to integrate ChatBot and Zendesk
-
Open the ChatBot app.
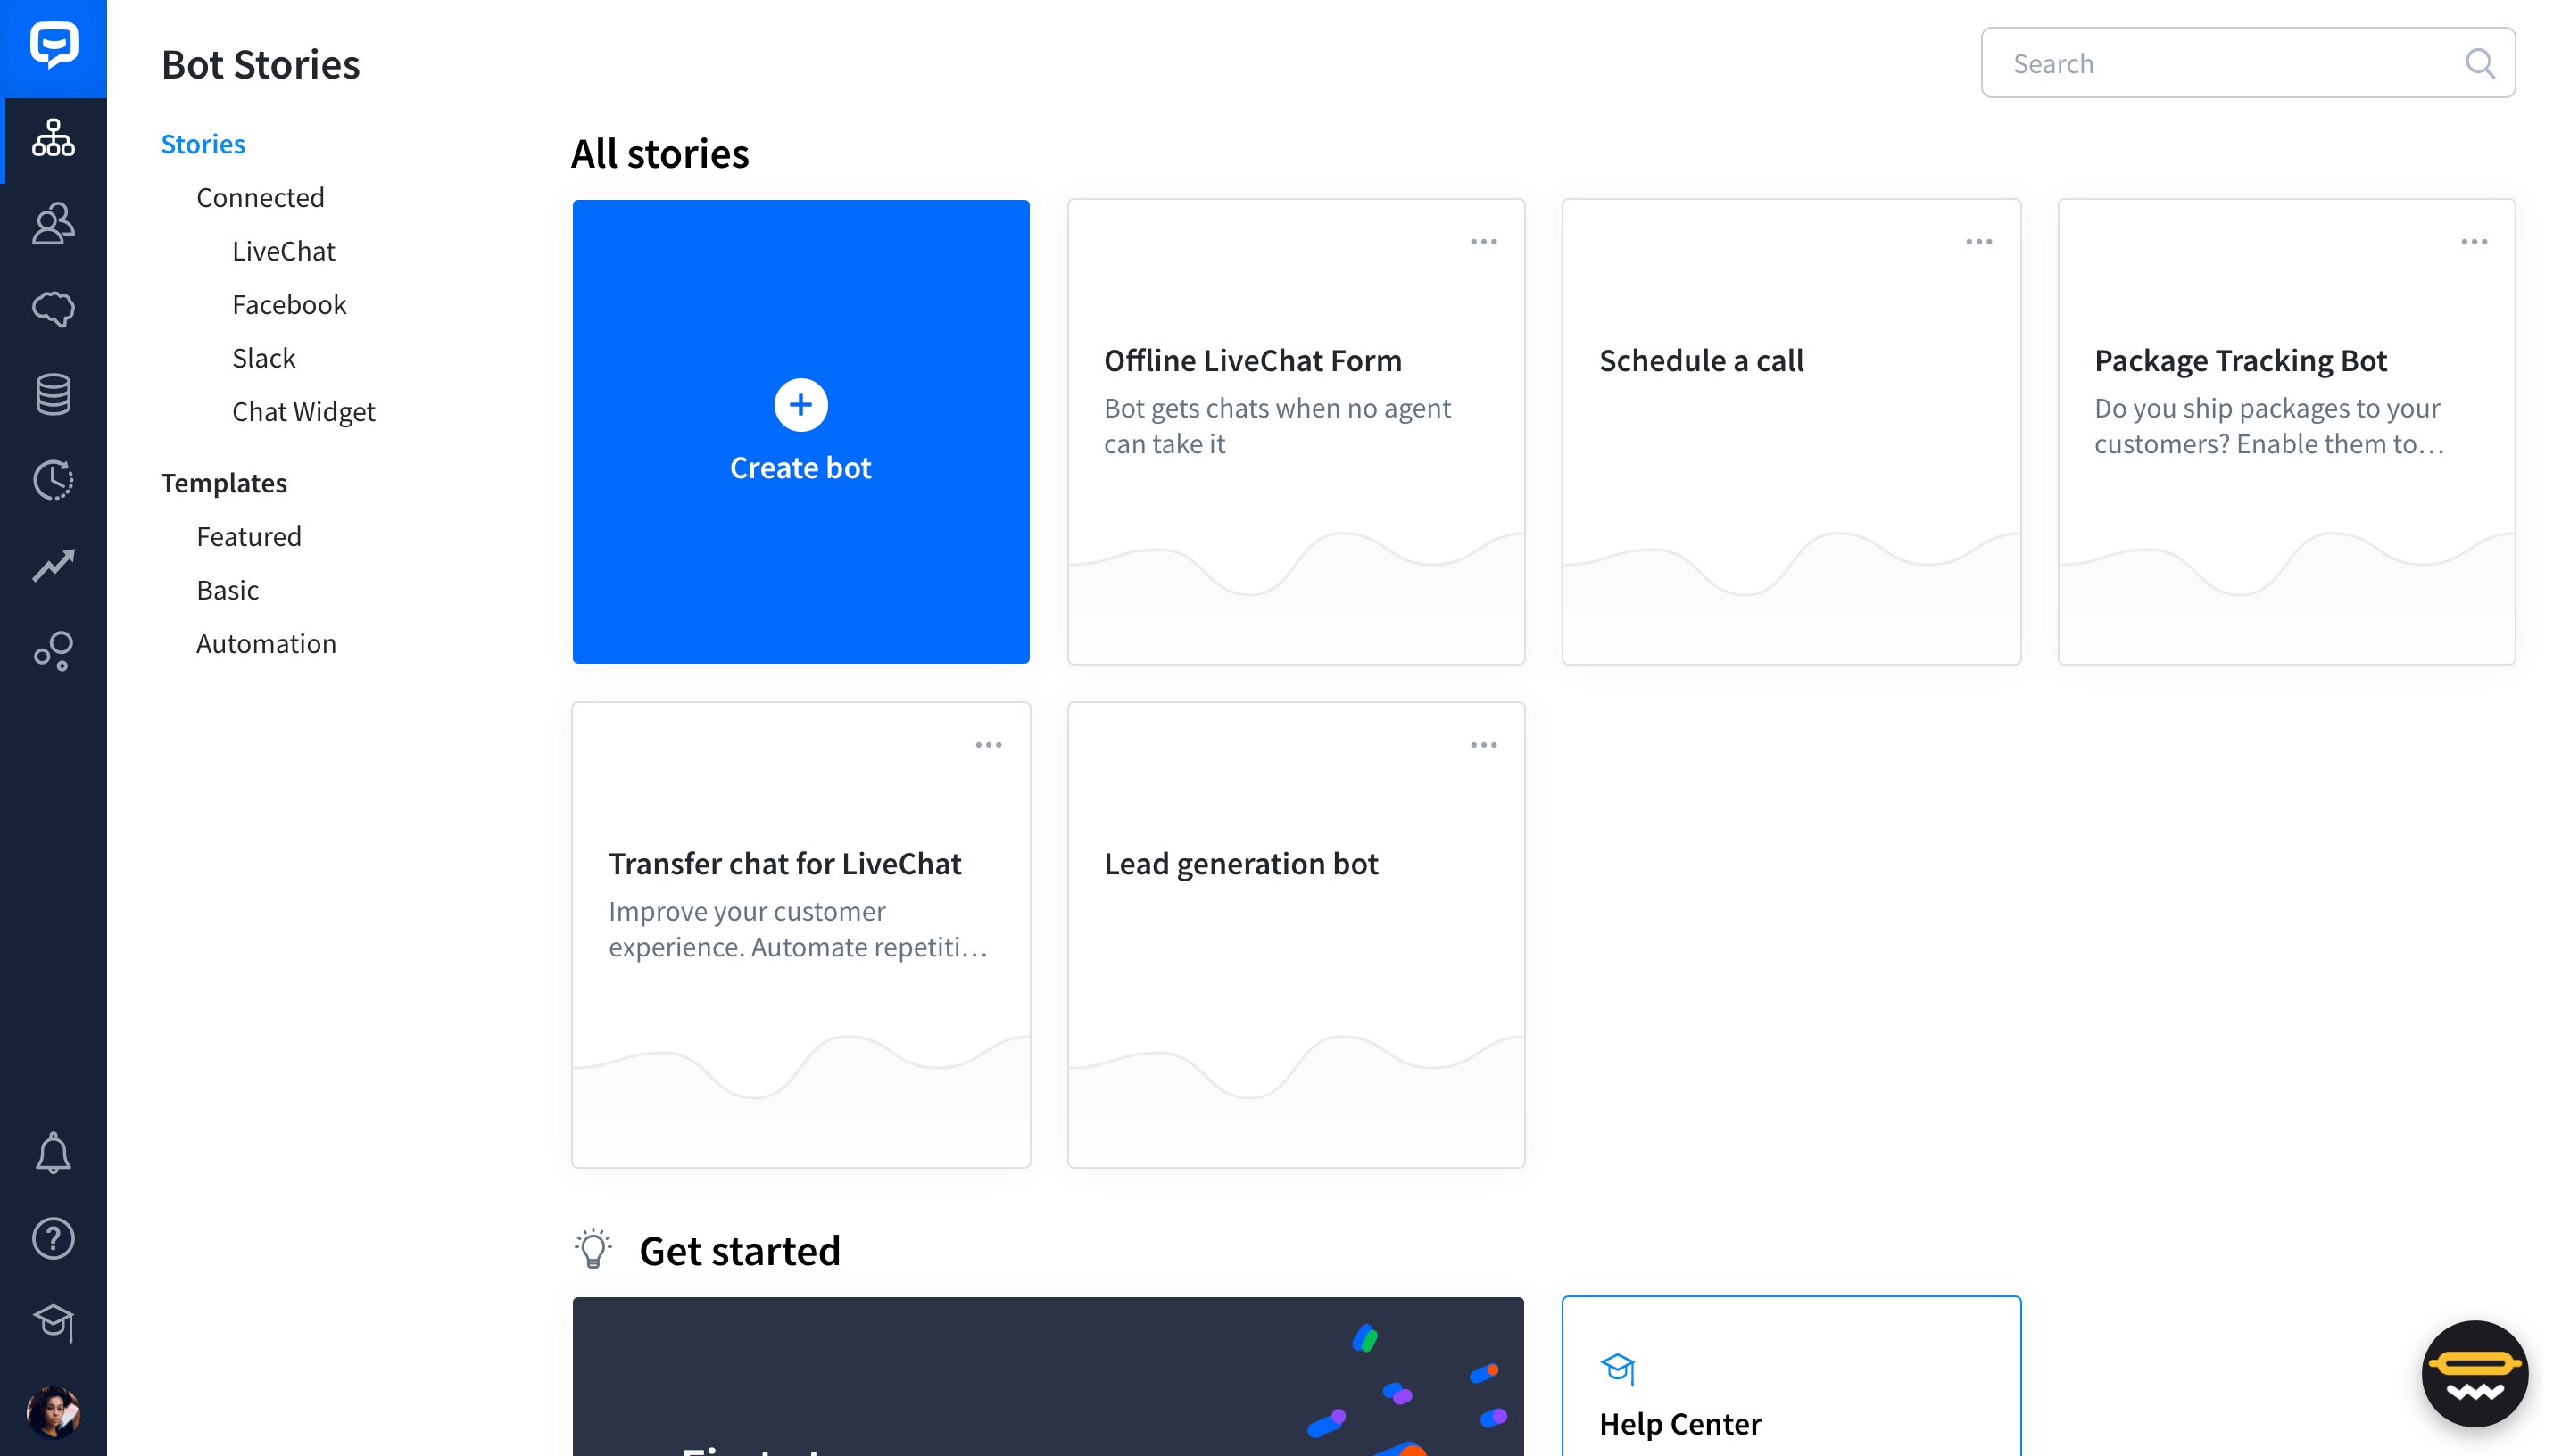
-
Create a new Story or select an existing one to connect with your Zendesk account.

-
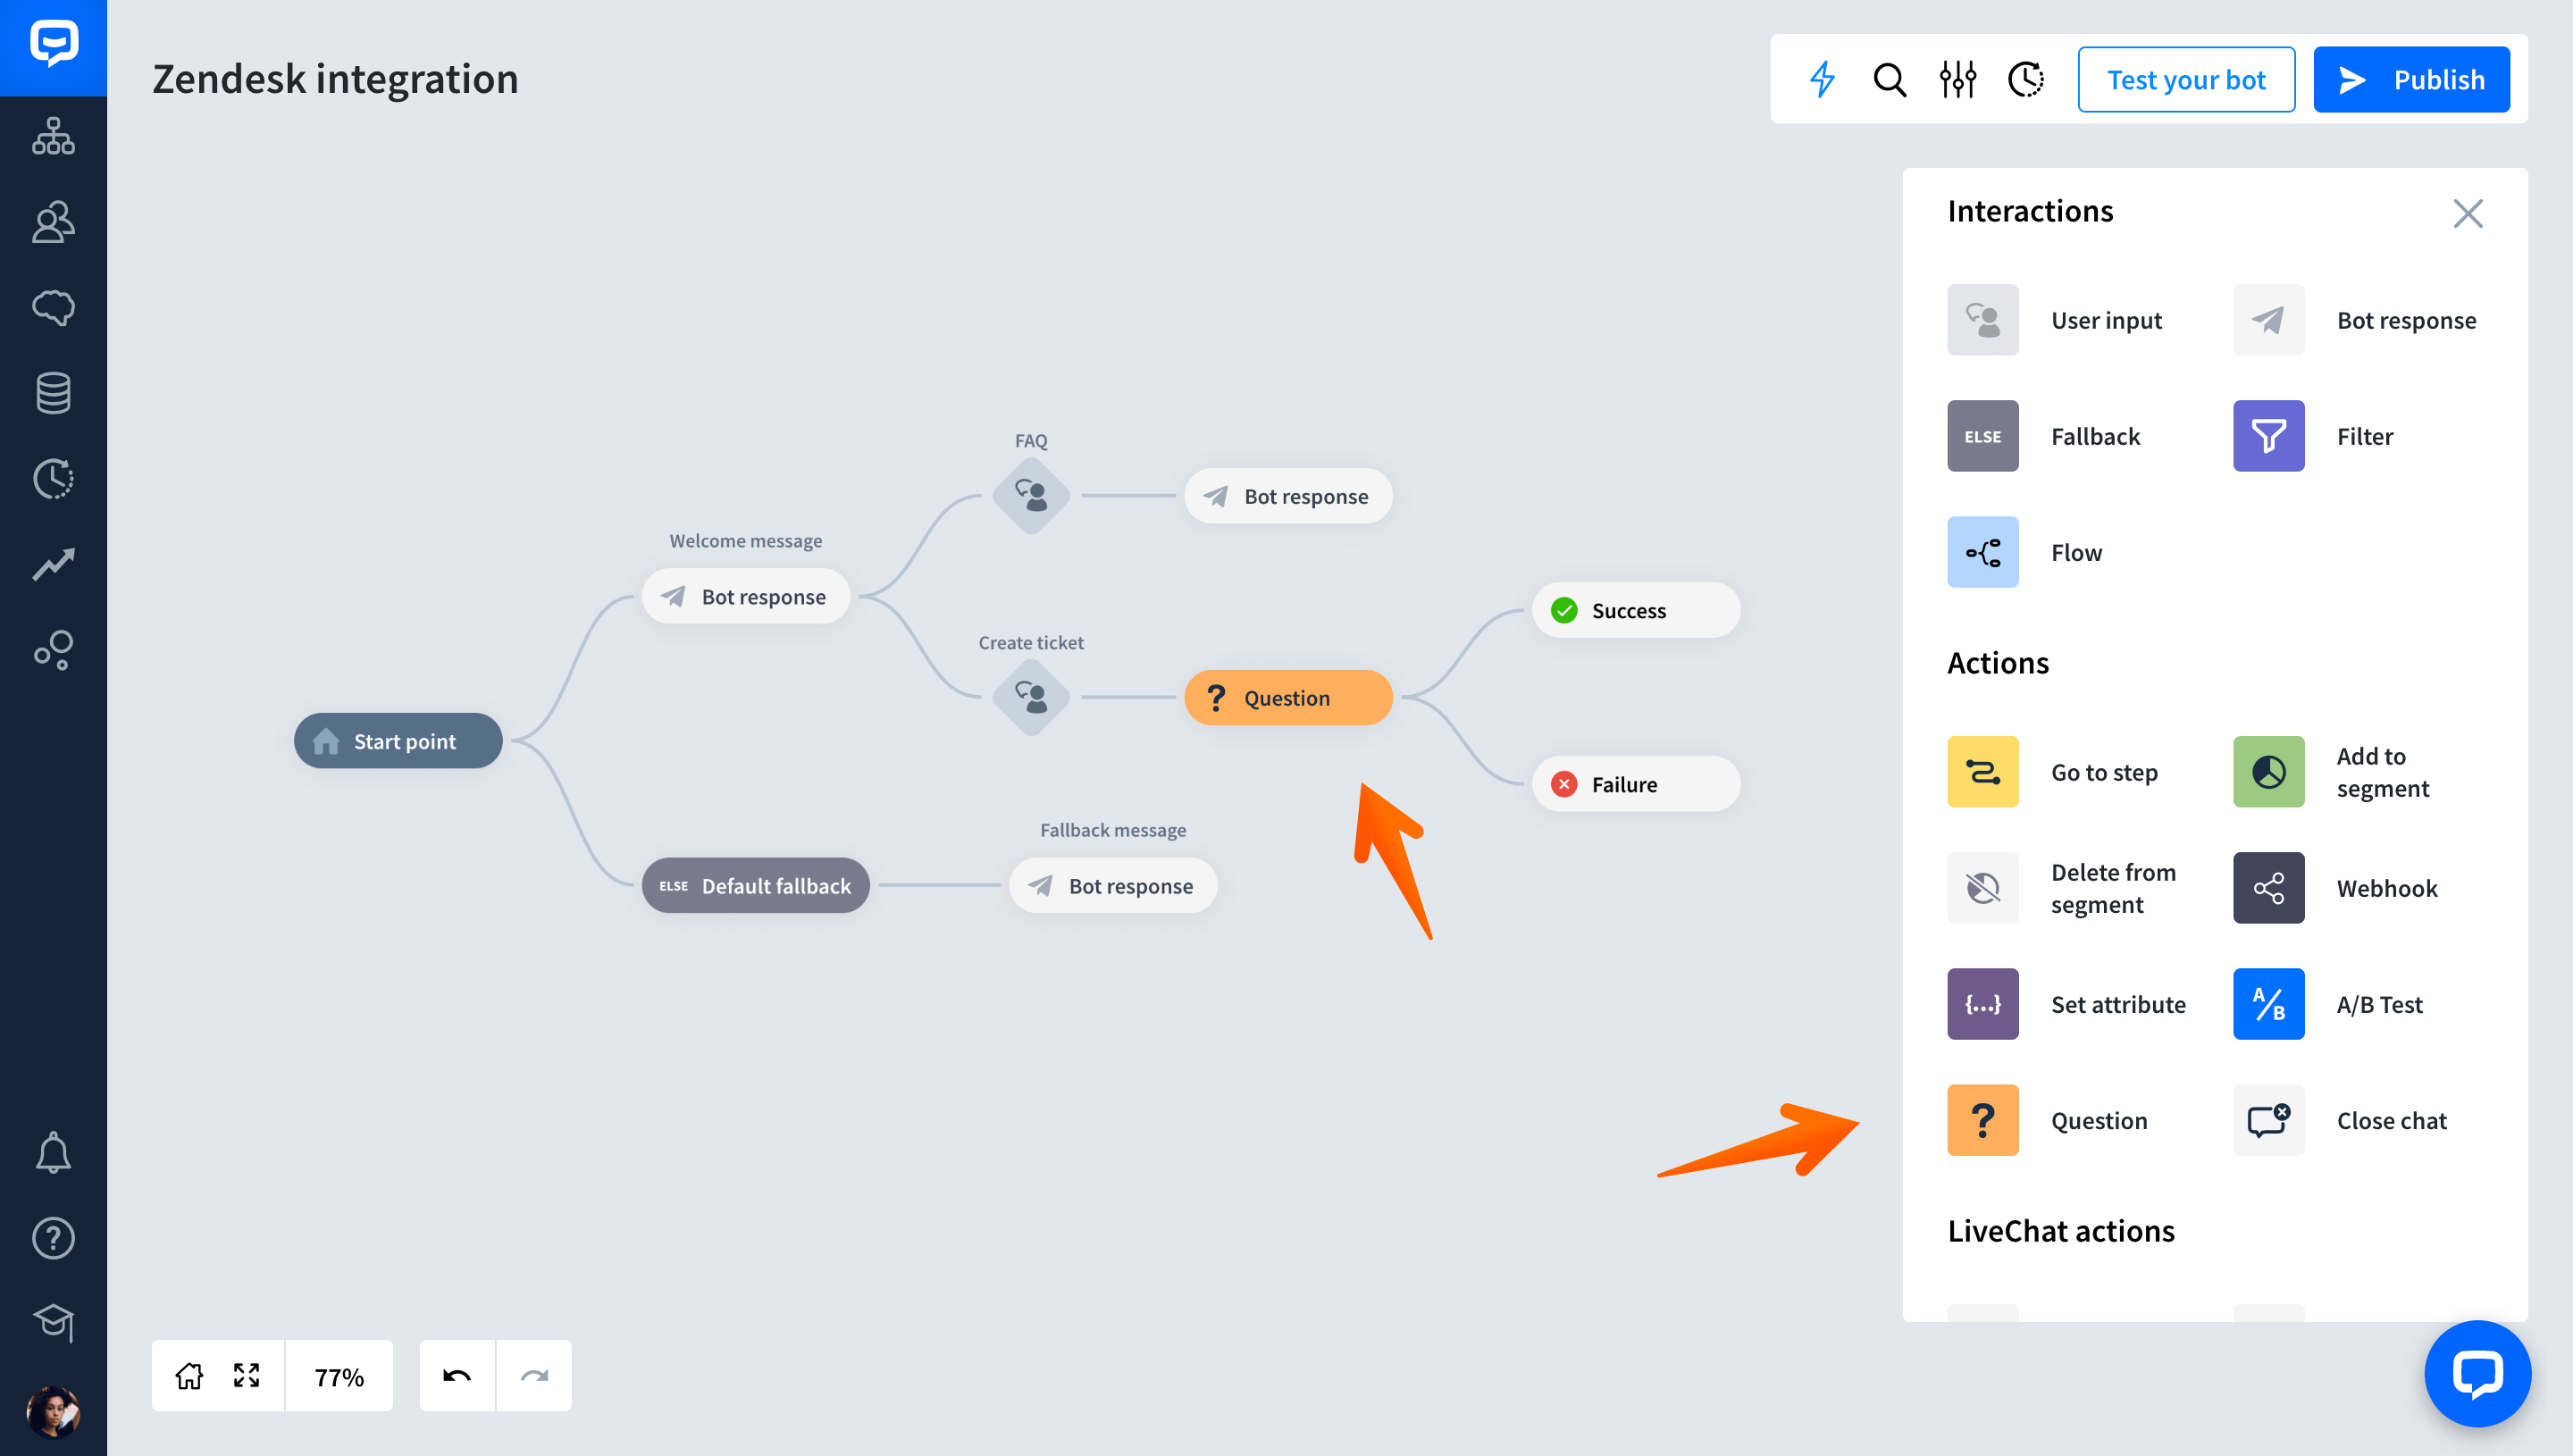
Go to the Actions and Interactions menu and scroll down to access the Zendesk actions section. Drag the Create ticket block and drop it in an appropriate place in your Story.
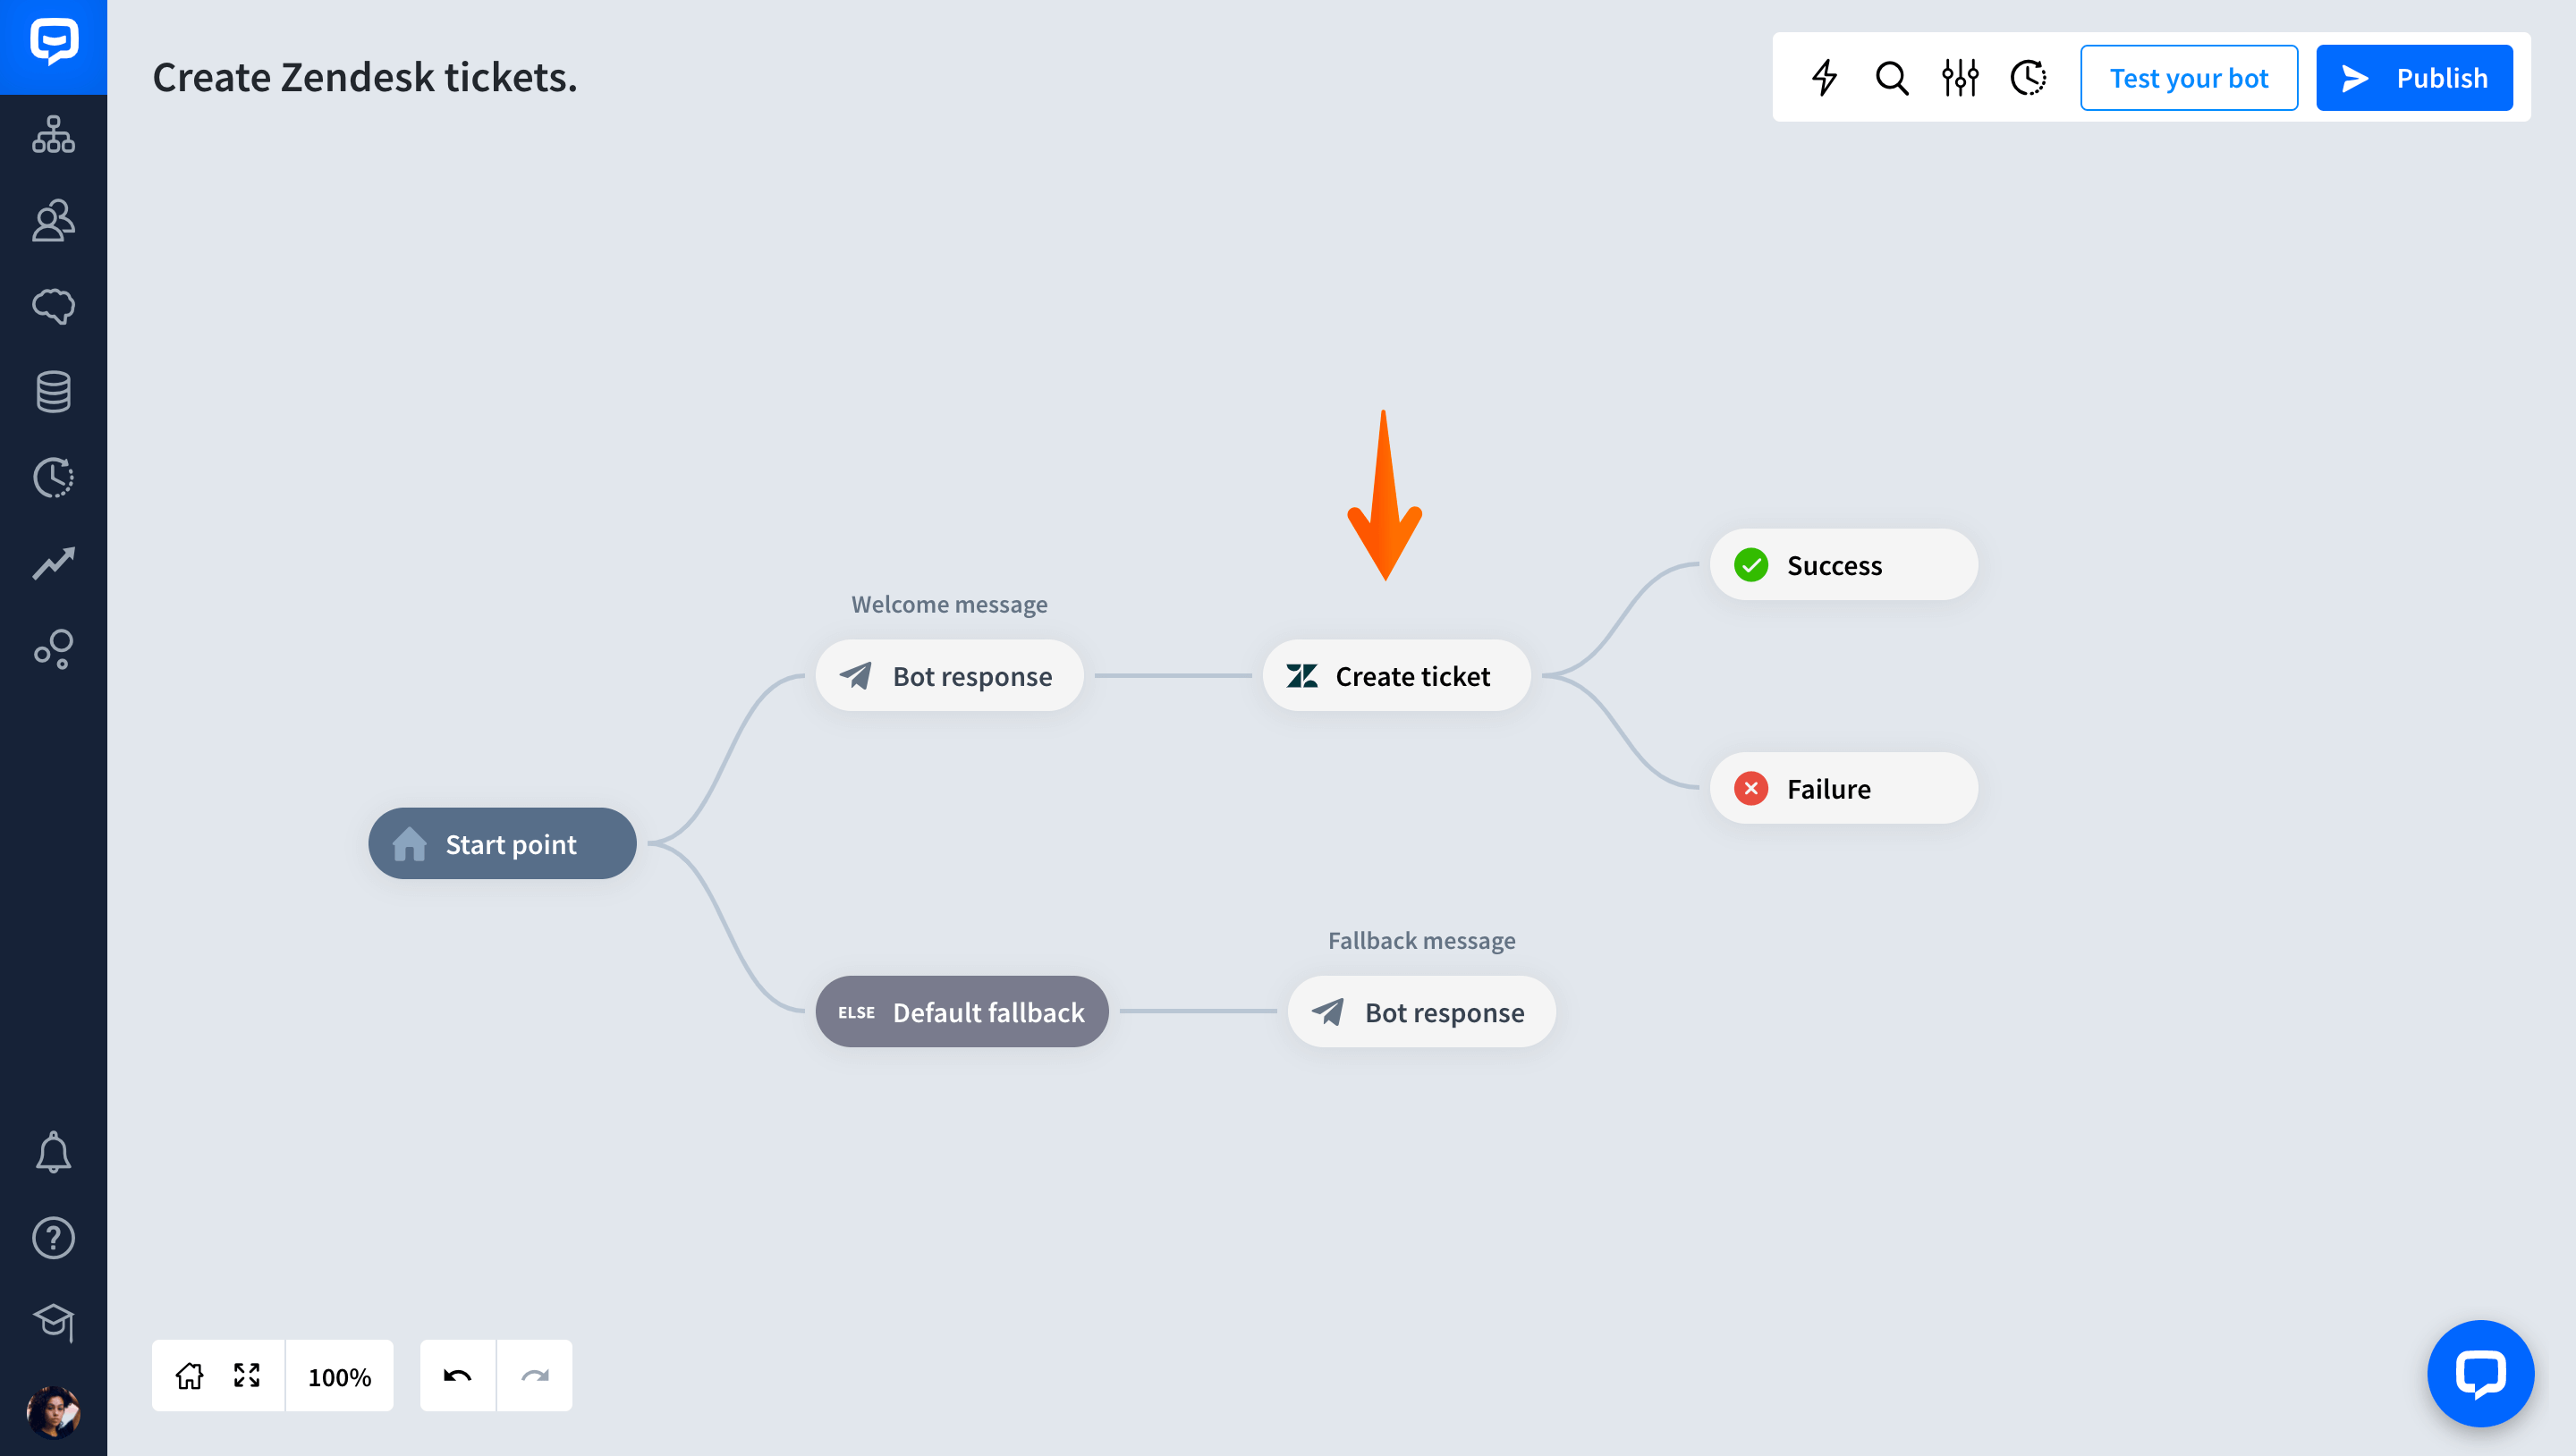
-
Select the Create ticket action you added and then select the Connect with Zendesk button in the window that appears.
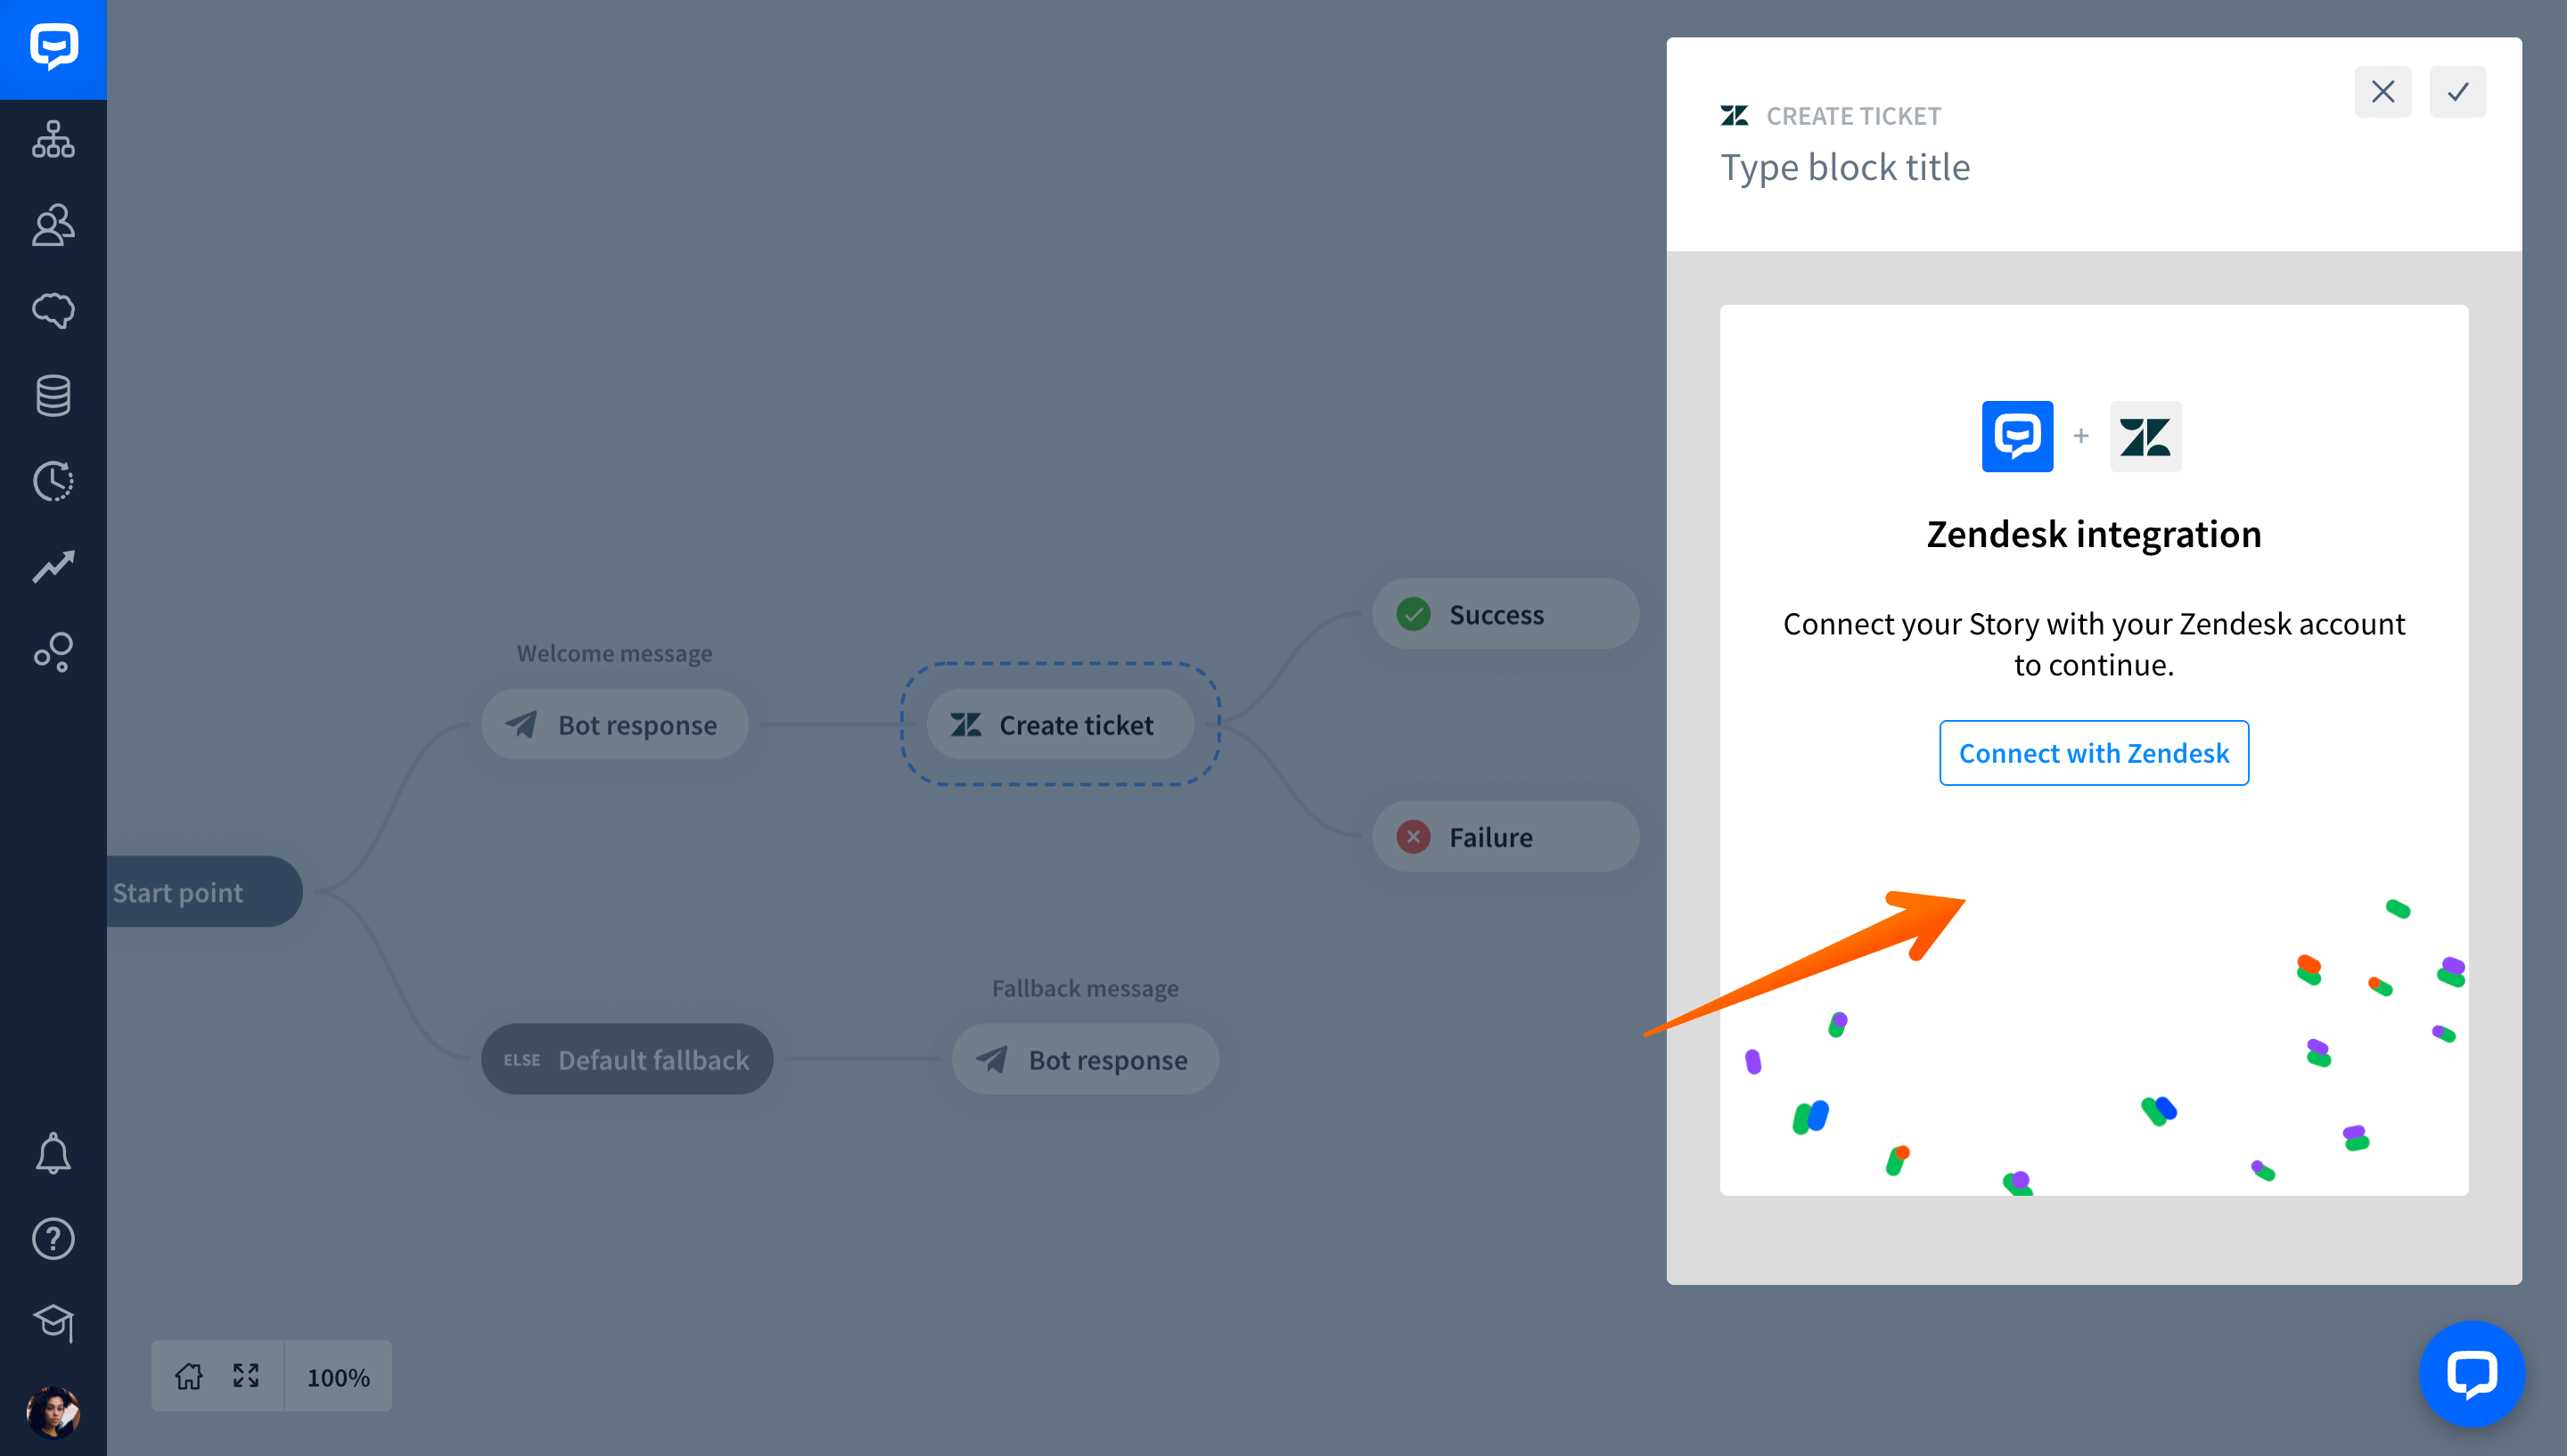
-
Now, enter your Zendesk account name. Then select Add connection.
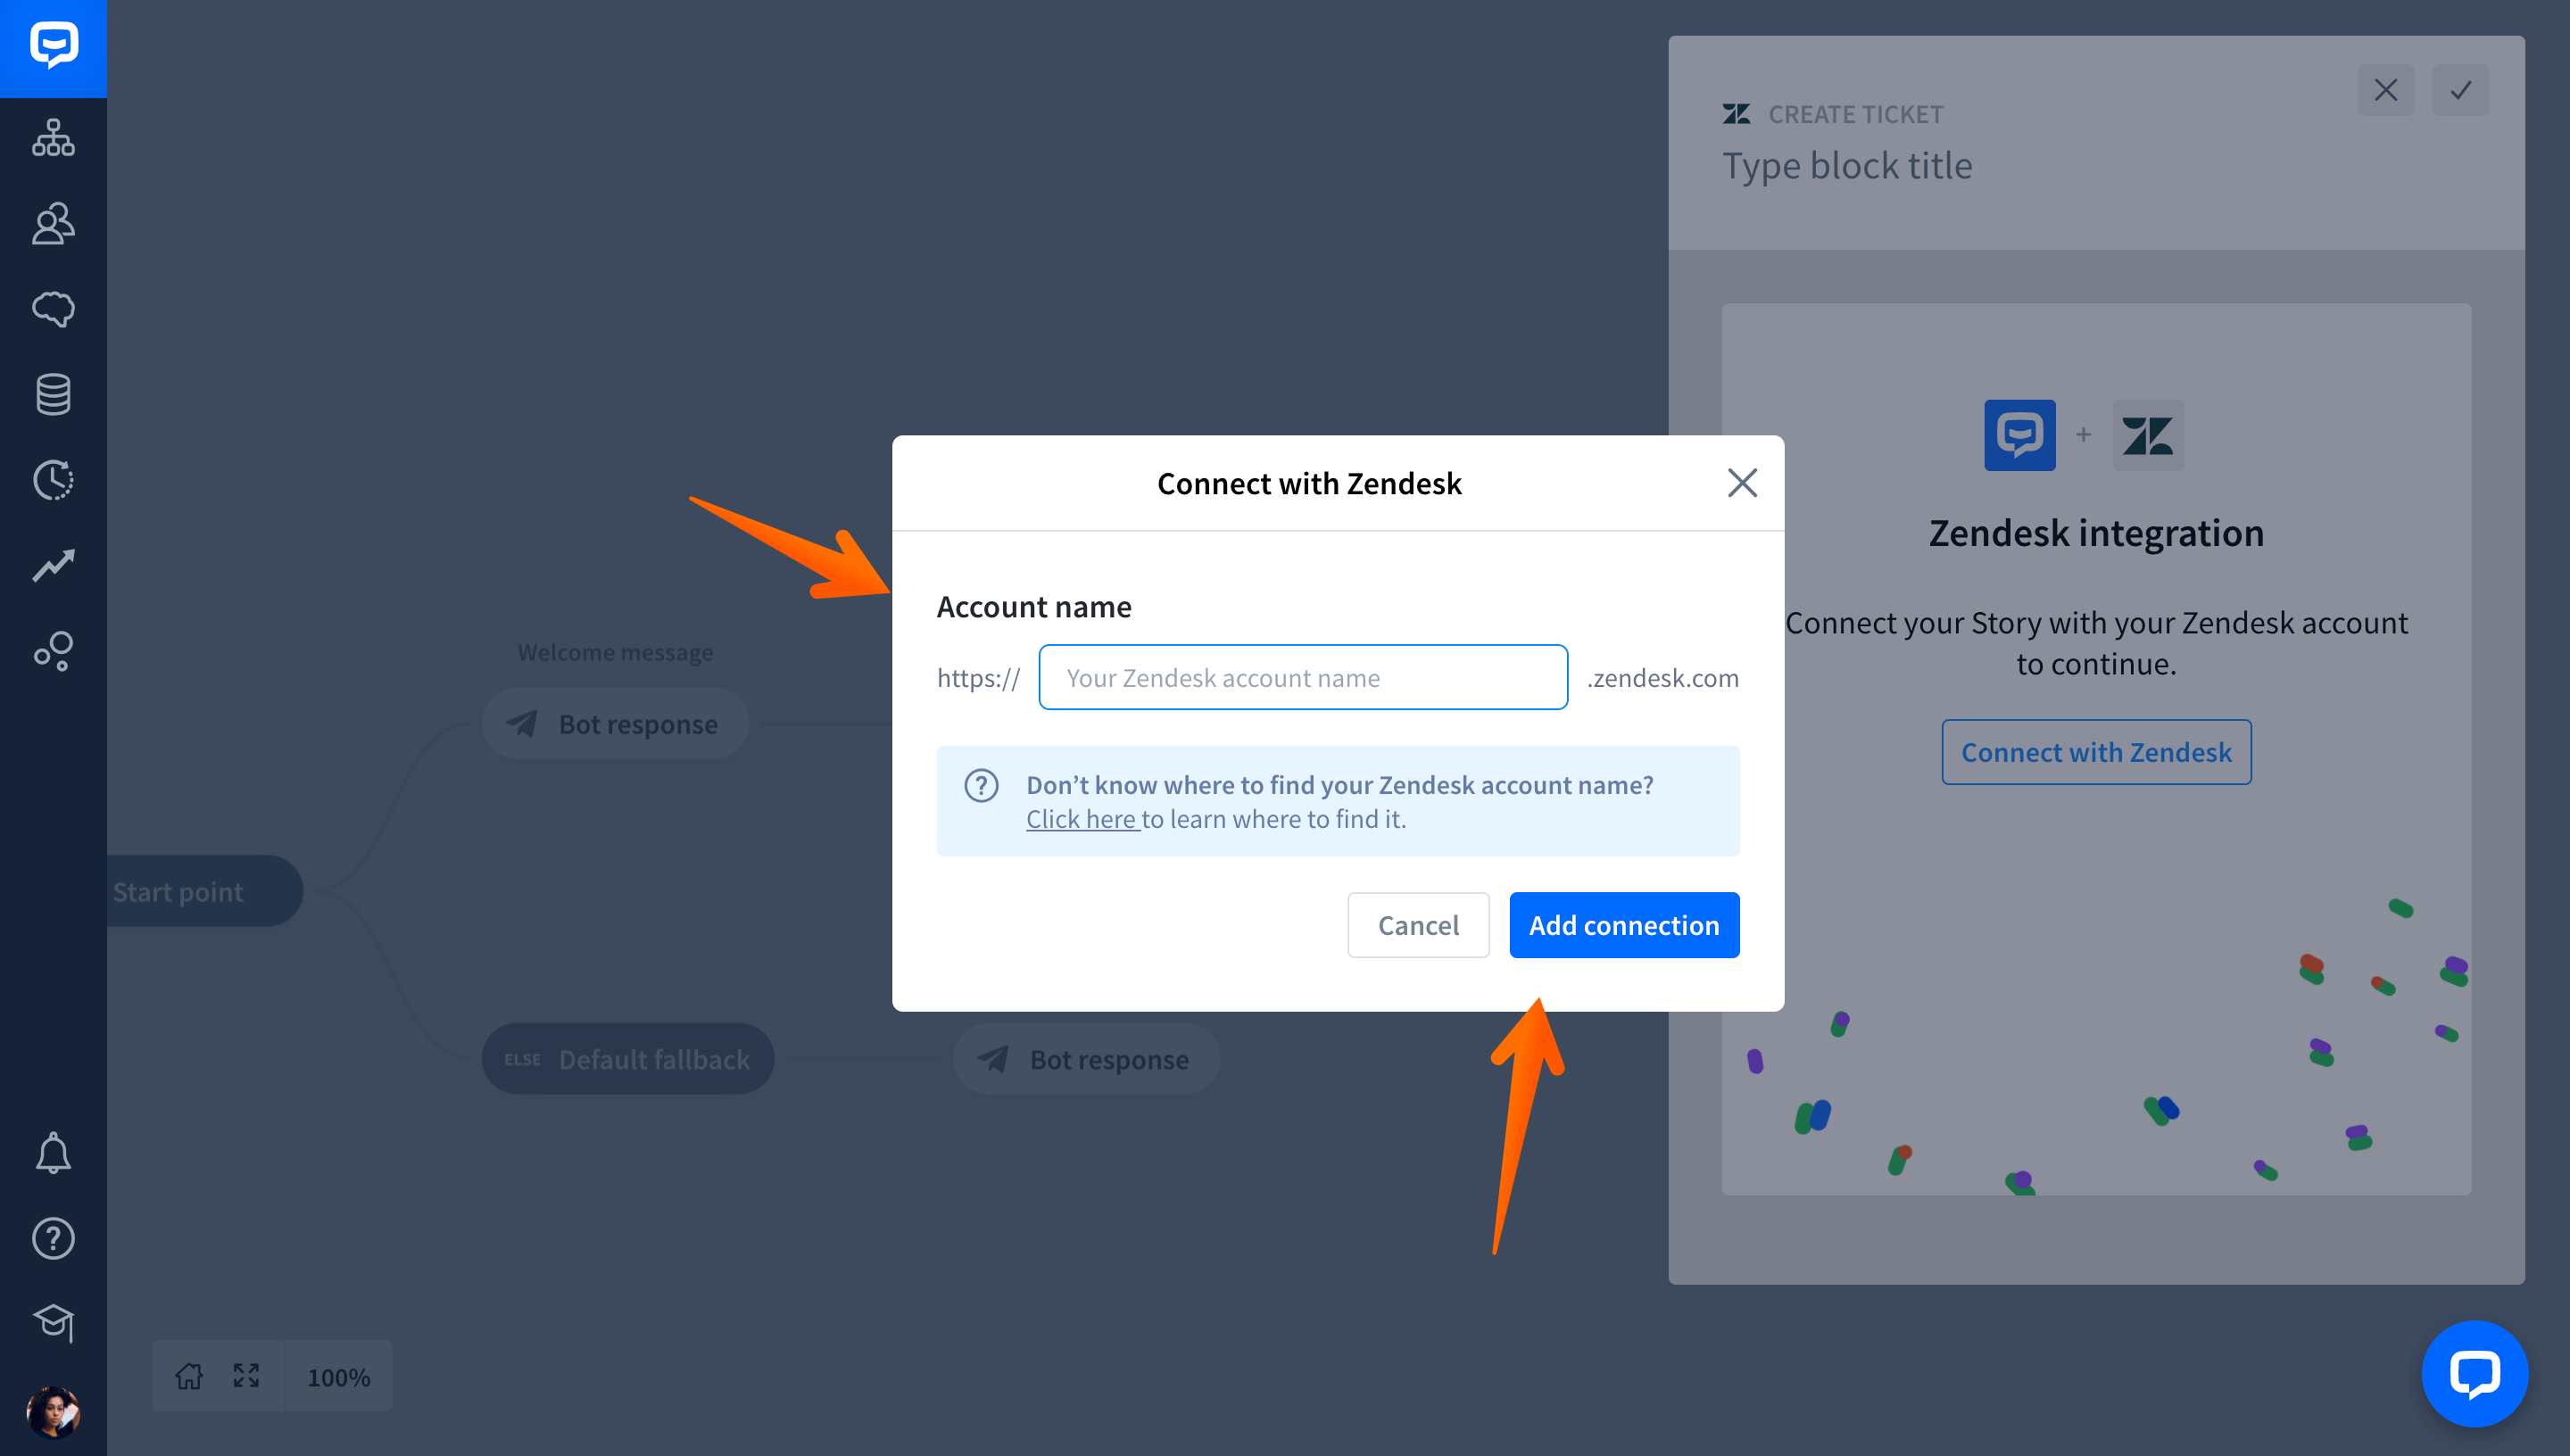
-
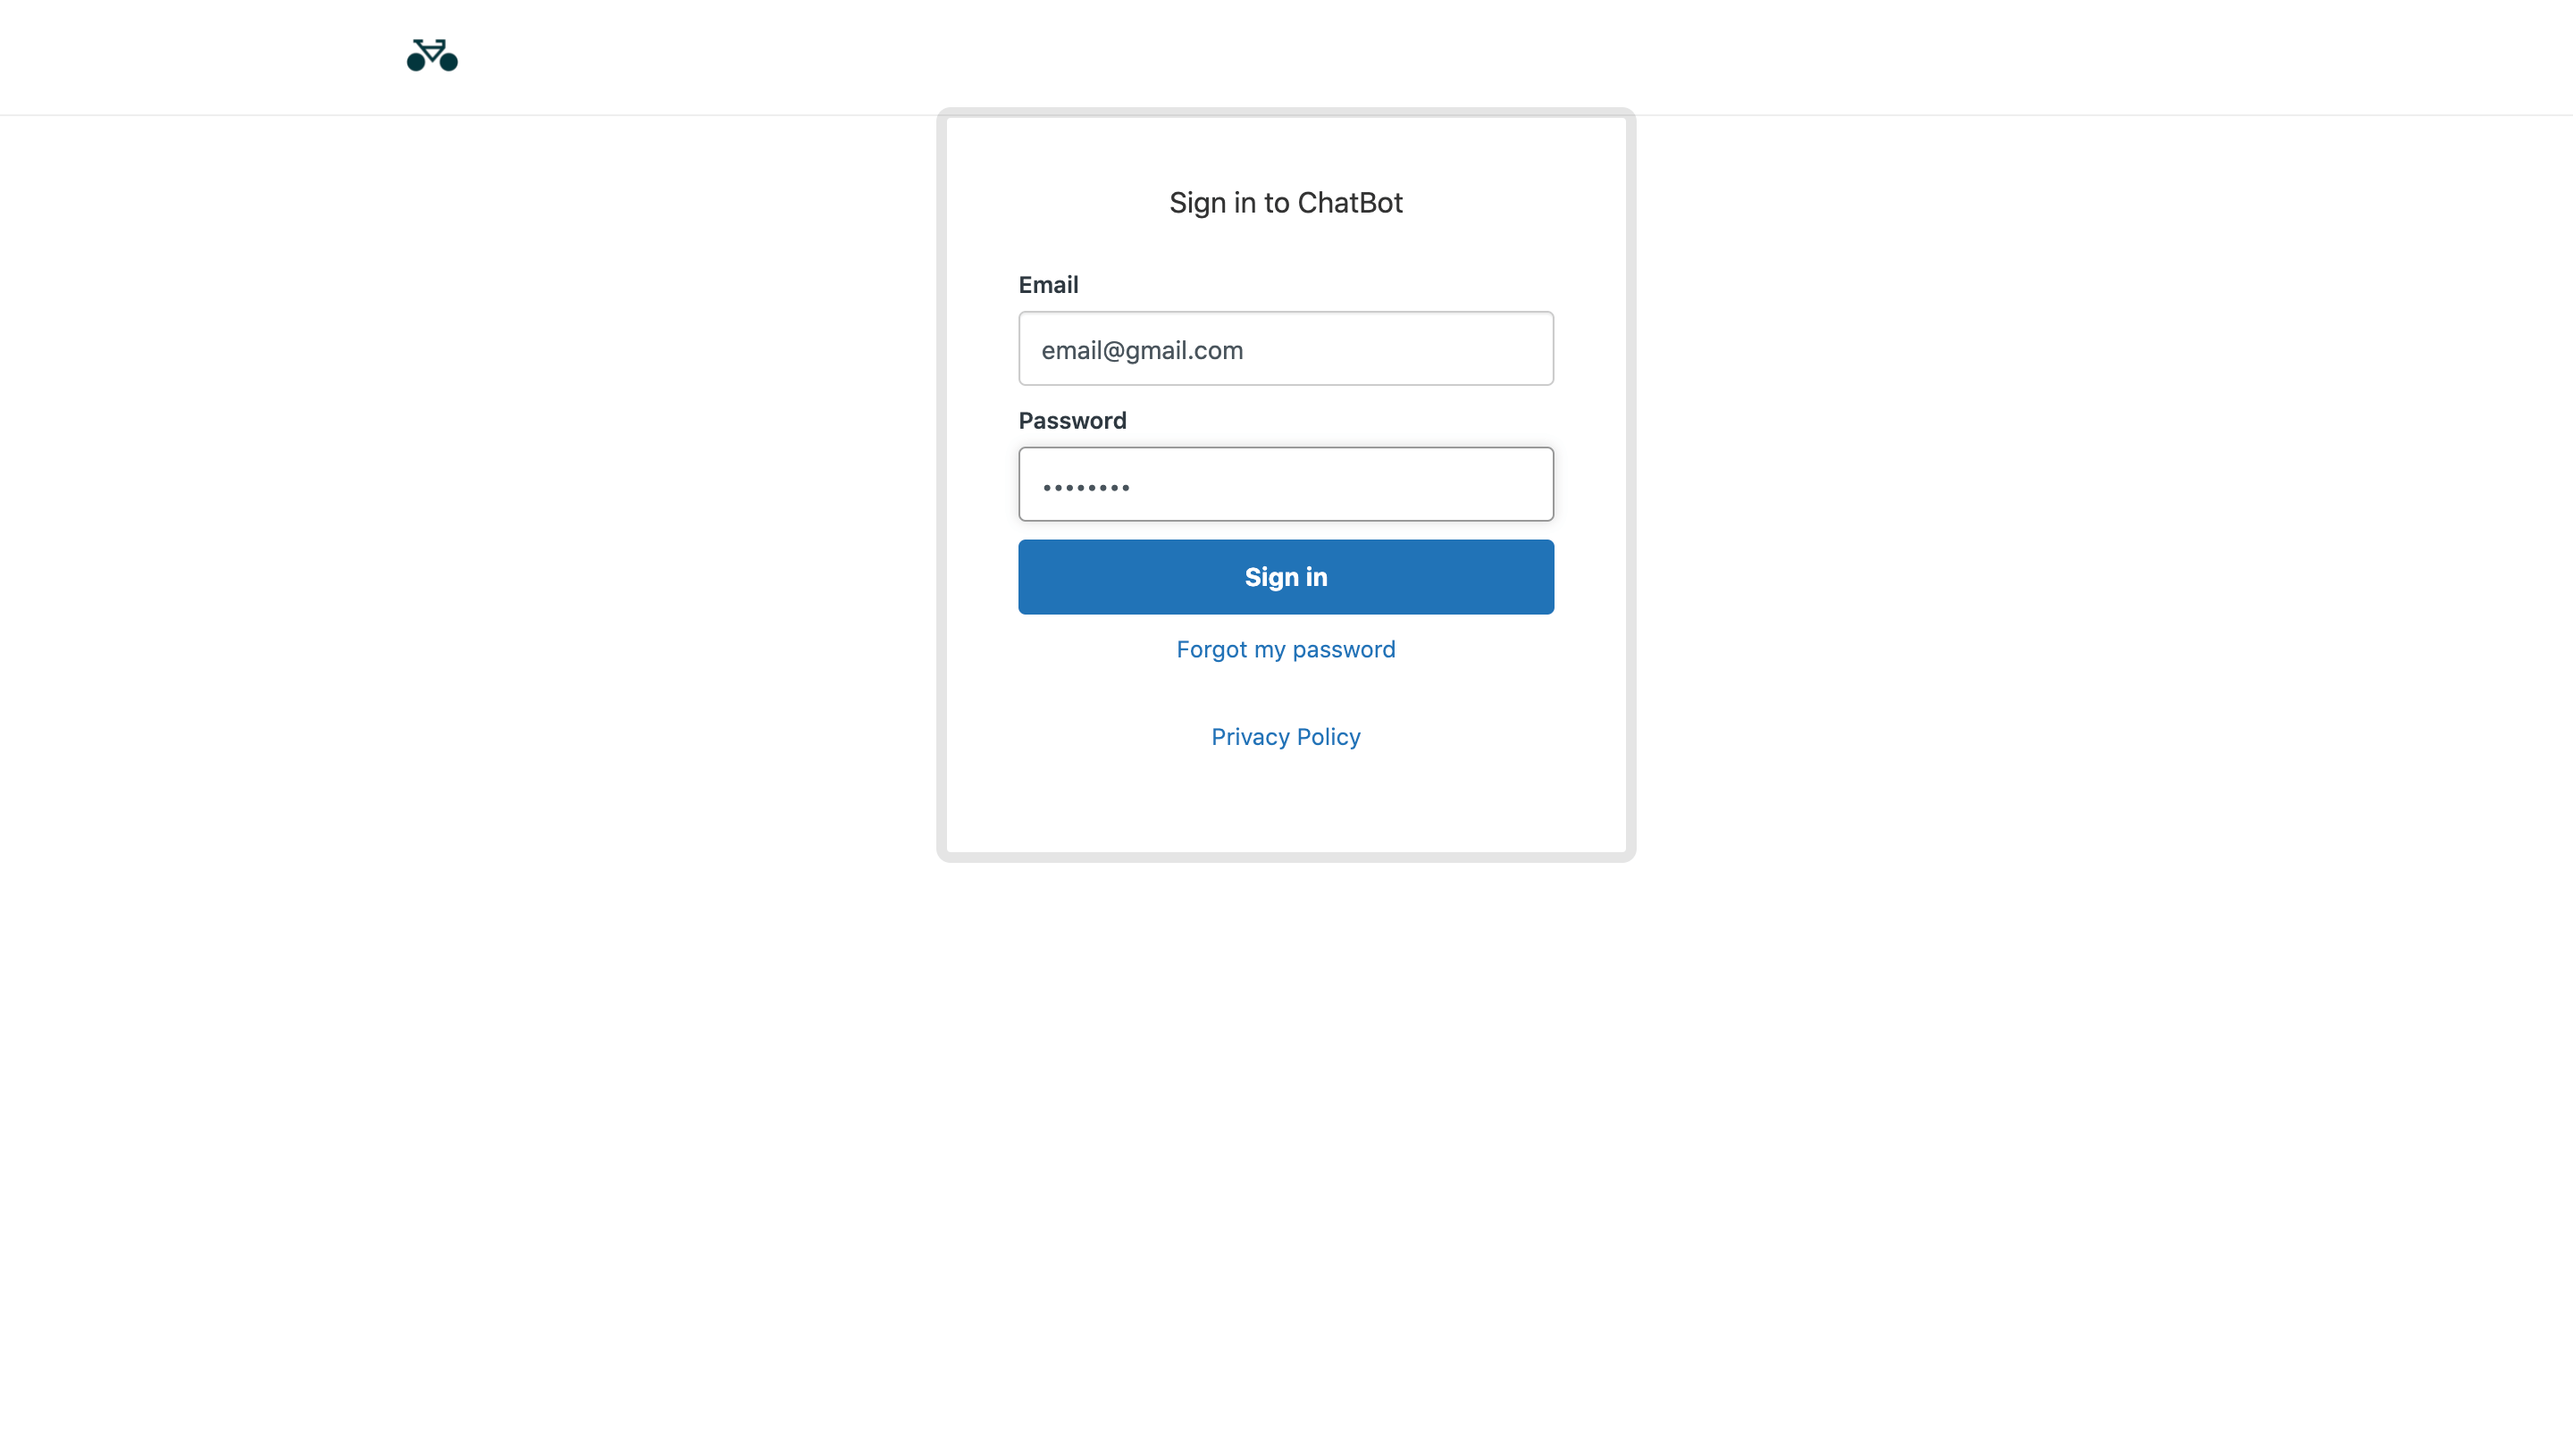
Next, type in the email and password to your Zendesk account.
-
Your Zendesk integration is now installed.

How to use the Create ticket action for Zendesk
The chatbot can work both as the first line of your customer support and as an after-hours agent. It can resolve simple queries and help customers easily find information on your website. However, when the human touch is needed, it can assist the user in creating a ticket out of a chat. All tickets created through ChatBot are passed automatically to the Zendesk app.
To enable the user to create a Zendesk ticket while chatting with your chatbot, you need to use the Create ticket action for Zendesk. However, to configure this action, you need to collect user information via attributes. To gather multiple attributes, you can use the Question action.
-
Add a Question block to the Create ticket path.
-
Select the Question action that you added and fill in the required fields:
-
In the Question variants field, ask the user for their email.
-
In the Validate response with entity drop-down menu, select the Email entity type.
-
In the Save response to attribute drop-down menu, select the default Email attribute. By choosing the email attribute, you will help ChatBot to assess whether the user provided the proper email format.

-
-
Select Add next question. This option lets you ask the user to provide more information.

-
In the Question variants field, ask the user to provide their message. Then in the Validate response with entity drop-down menu, select Any.

-
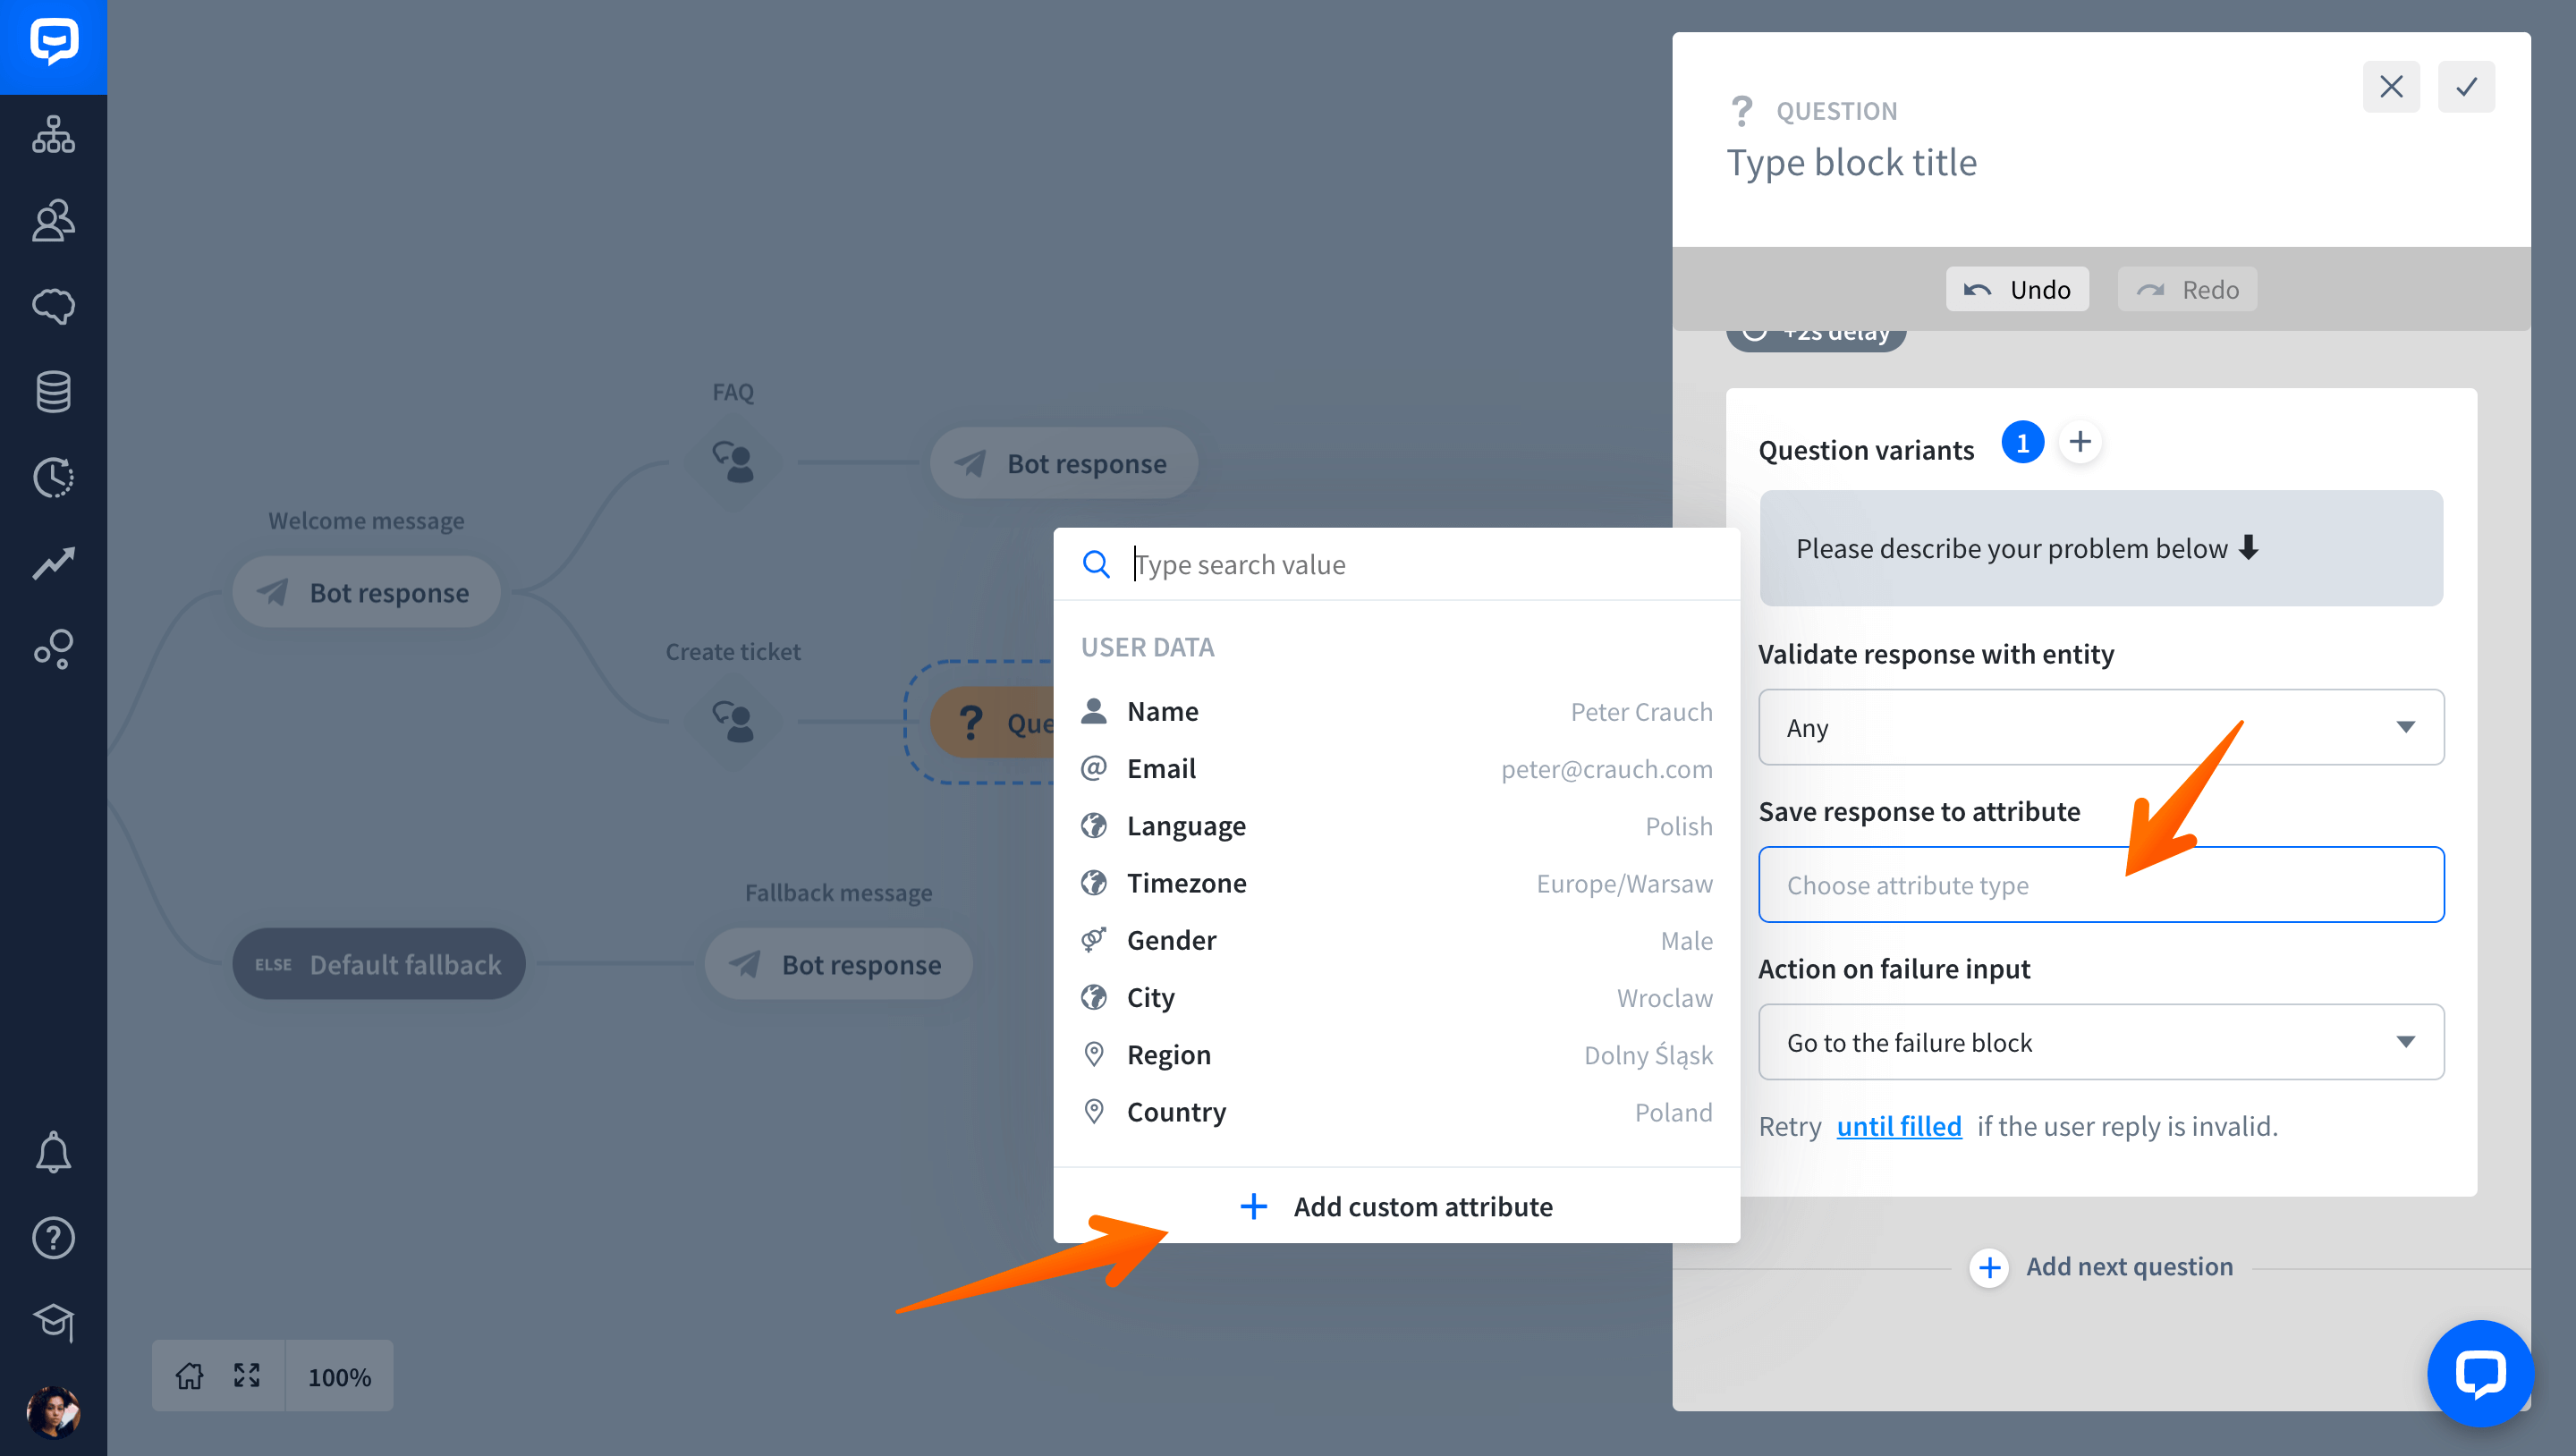
Select Save response to attribute and then select the Add custom attribute button. This will let you create a custom description attribute. This attribute will allow ChatBot to save the user’s message as the content of a Zendesk ticket.
-
In the Attribute name field, type in “description” and select the Add attribute button.

-
You can also decide whether the tickets created through your chatbot should always be shown with the same subject line in your Zendesk system (e.g. “Ticket from ChatBot”) or you can enable the user to fill in their own subject line. In that case, you must ask the user to enter the subject of their issue on their own. To save their reply as the subject line of a Zendesk ticket, you need to create a custom subject attribute.
When you’re ready, save your changes.

-
After you configure the Question action, head to the HelpDesk actions section. Select the Create ticket block and drop it after the Question block.

-
Select the Create ticket action. In the Subject field you can either:
- Enter the default subject field copy — e.g. “Ticket from ChatBot” — it’ll be displayed in the HelpDesk app every time a ticket is created through your chatbot.
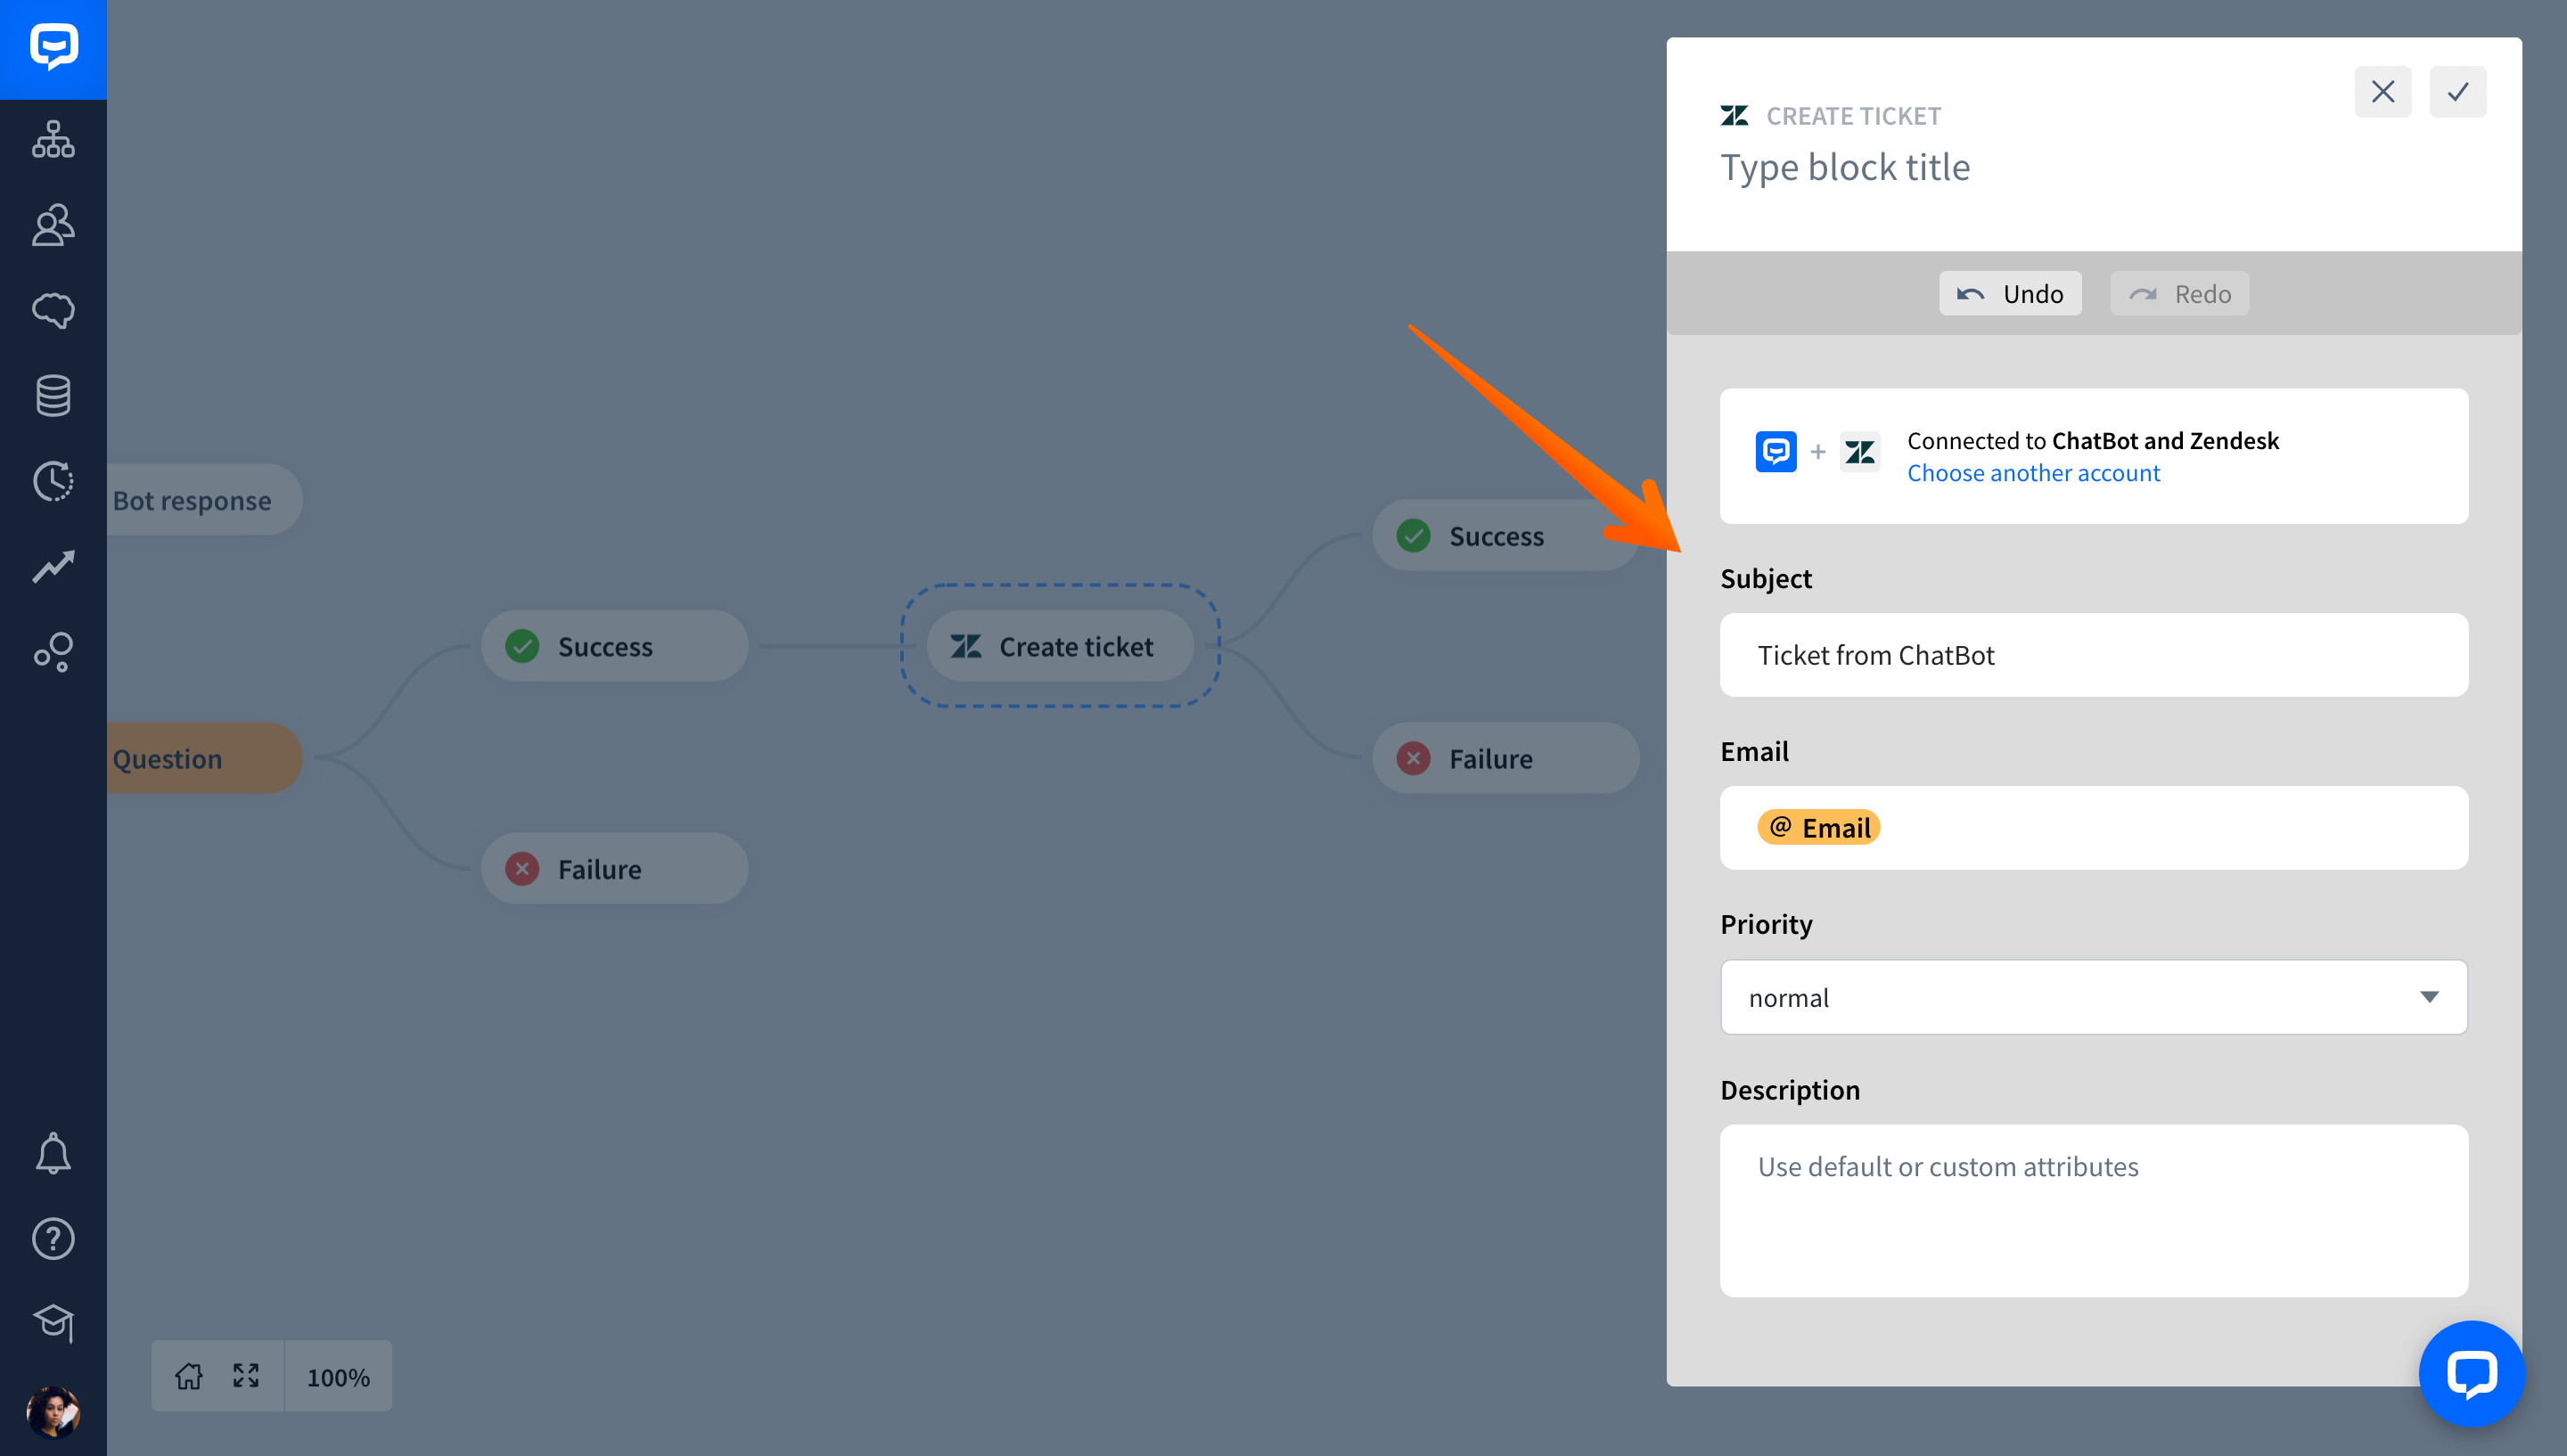
- Or add the custom subject attribute — provided you’ve asked the user about it earlier in the Story and saved their reply as a custom subject attribute — for instance by using the Question action.

-
In the Email field, select the default Email attribute.

-
Next, select the priority for tickets sent from ChatBot. The priority can help your team determine how fast the tickets should be handled.

-
In the Description field, select the custom description attribute from the list (if all went to plan, you created it earlier while configuring the Question action). You’ve now turned the user’s message into the content of a Zendesk support ticket.

-
Now, select the Test your bot button and chat with your bot to verify whether everything works as planned.
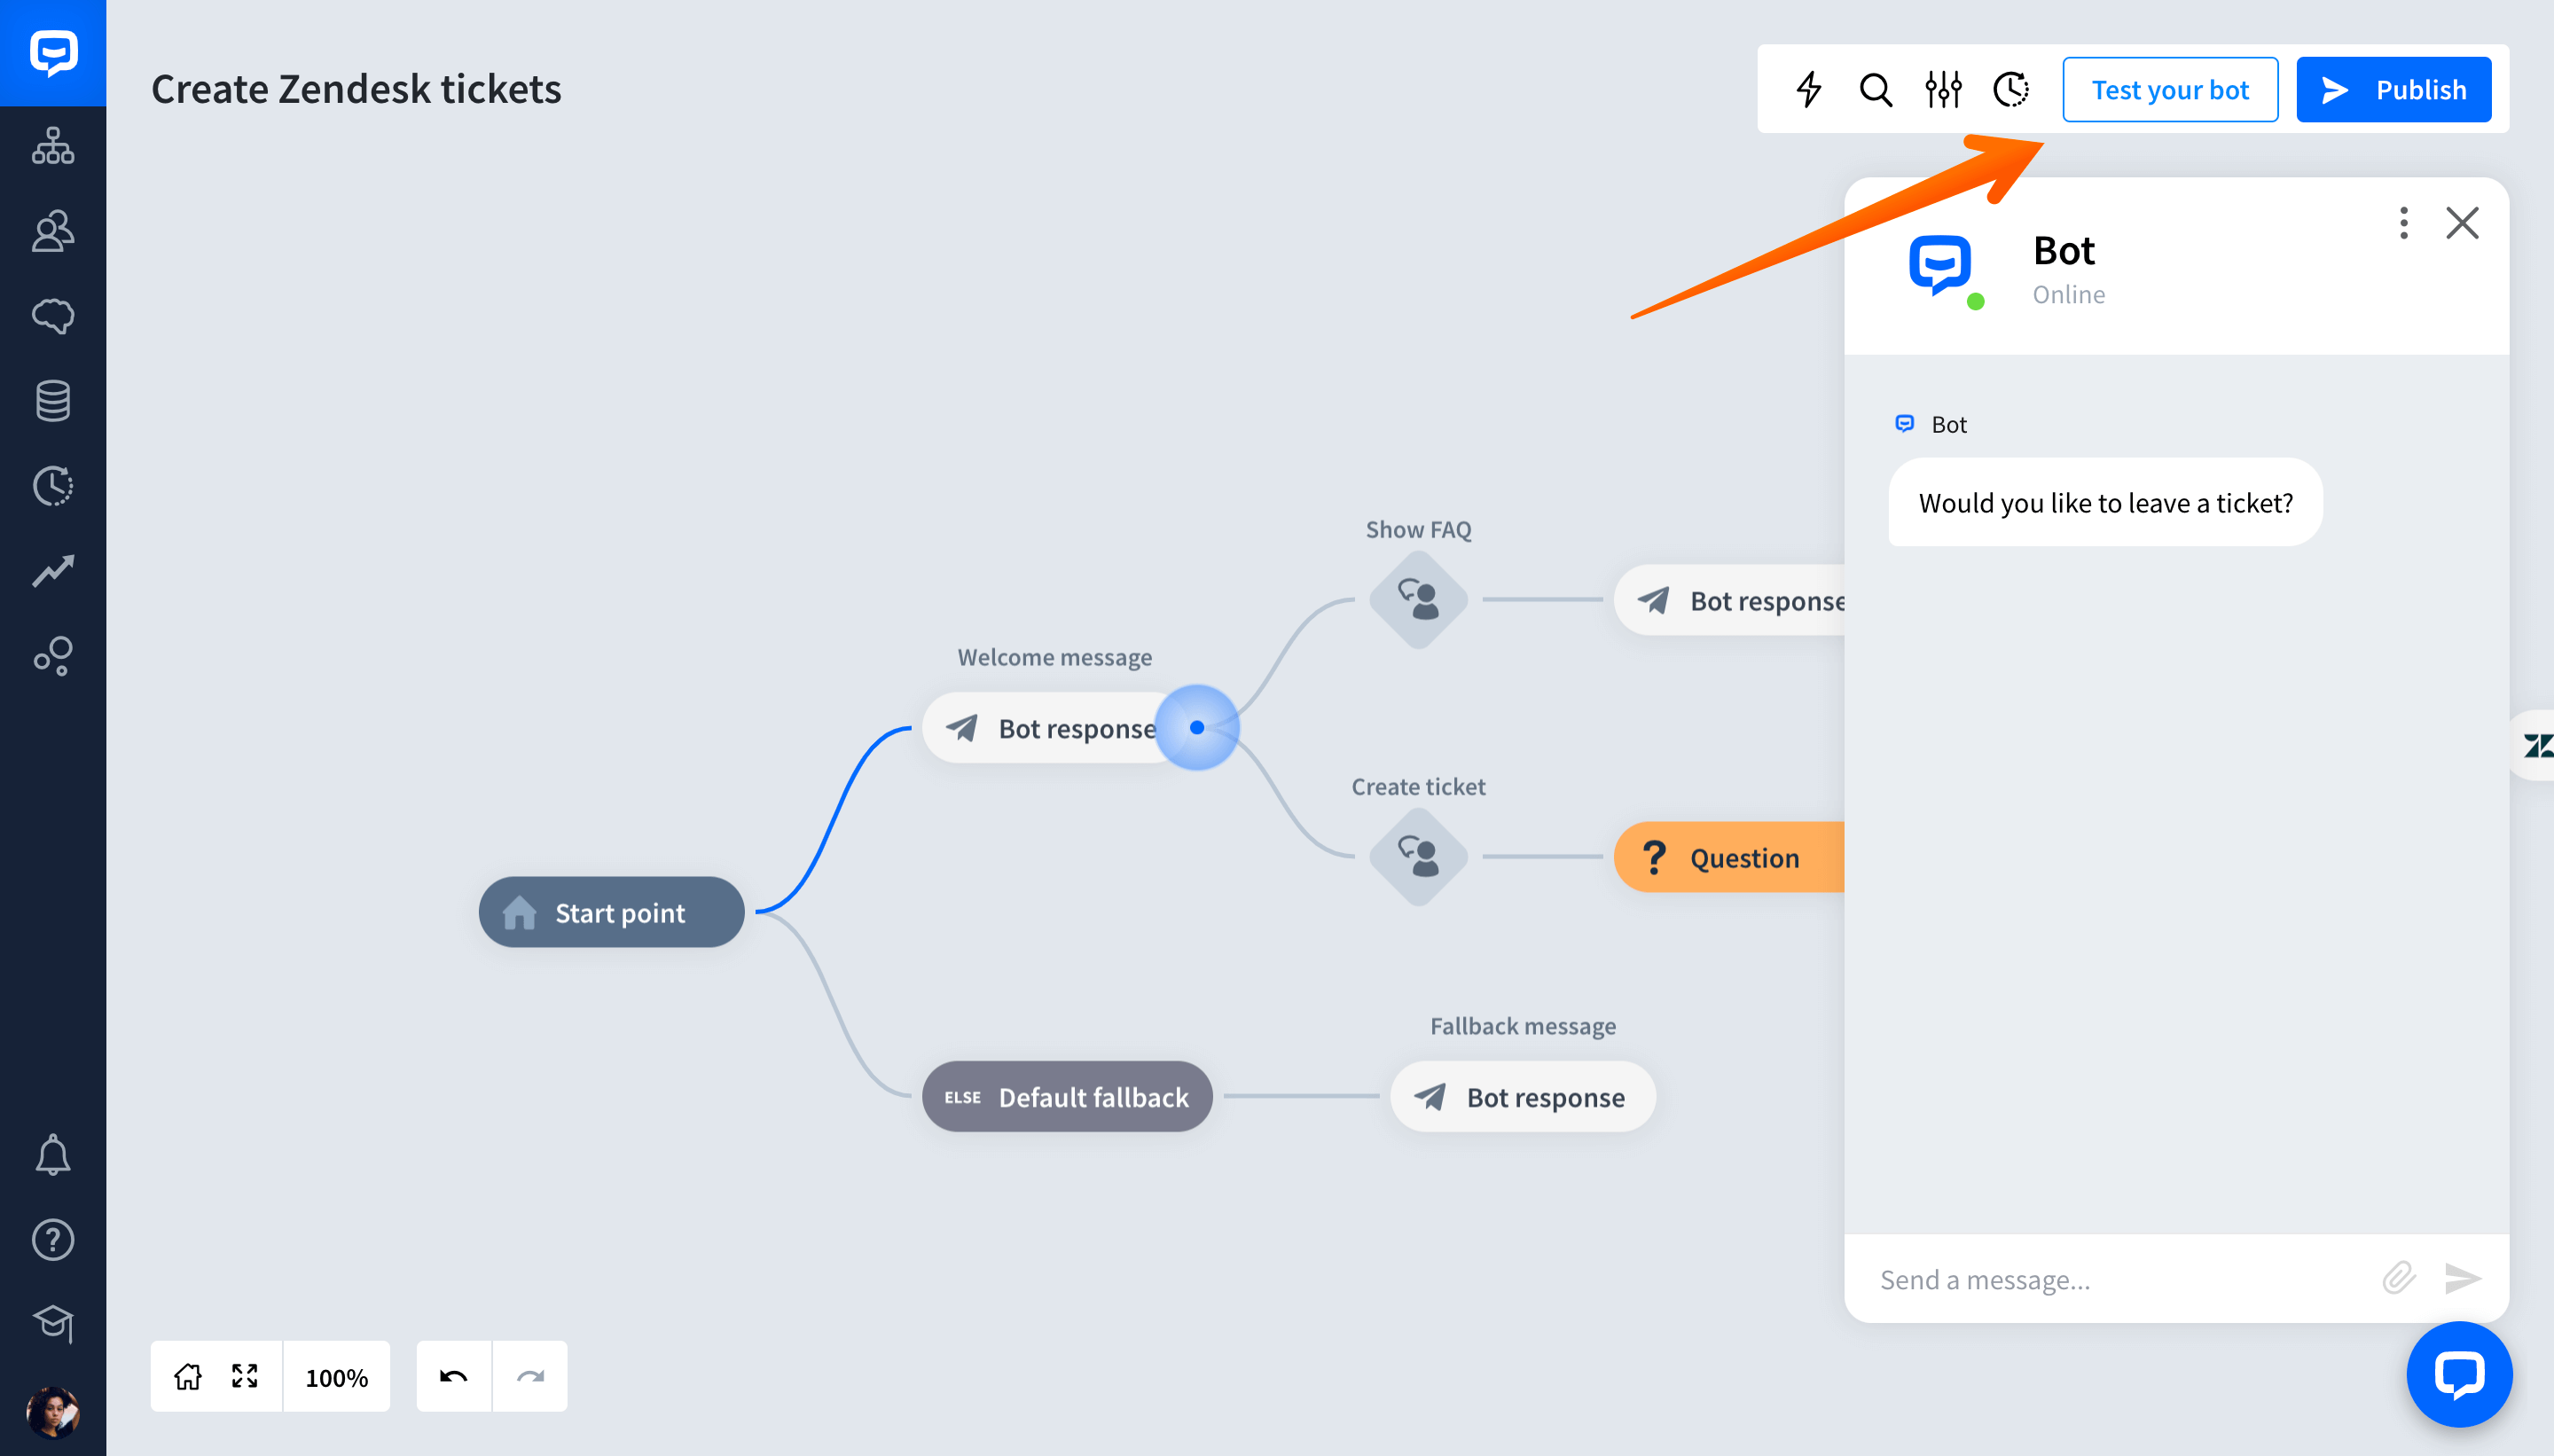
-
When you finish testing, open the Tickets section in your HelpDesk app. You should see the ticket created by your chatbot in the list. The subject will differ depending on whether you set up a default subject for every ticket (e.g. “Ticket from ChatBot”) or you’ve used the custom subject attribute and the user provided their own subject line.
