The ChatBot platform lets you build and launch bots on multiple communication channels with no coding skills. A customer service chatbot can resolve repetitive queries and offer after-hours support, freeing up your LiveChat agents, who will have more time to work on difficult cases.
How to integrate LiveChat with ChatBot
-
First, log in to your ChatBot account. Then create a new Story if you haven’t done so yet.
-
Next, head to the Integrations section.

-
Select LiveChat from the list.

-
Next, click on Add new bot.

-
Click on Sign in with LiveChat. Type in the email and password you use to log in to LiveChat. Then click on Sign in.

-
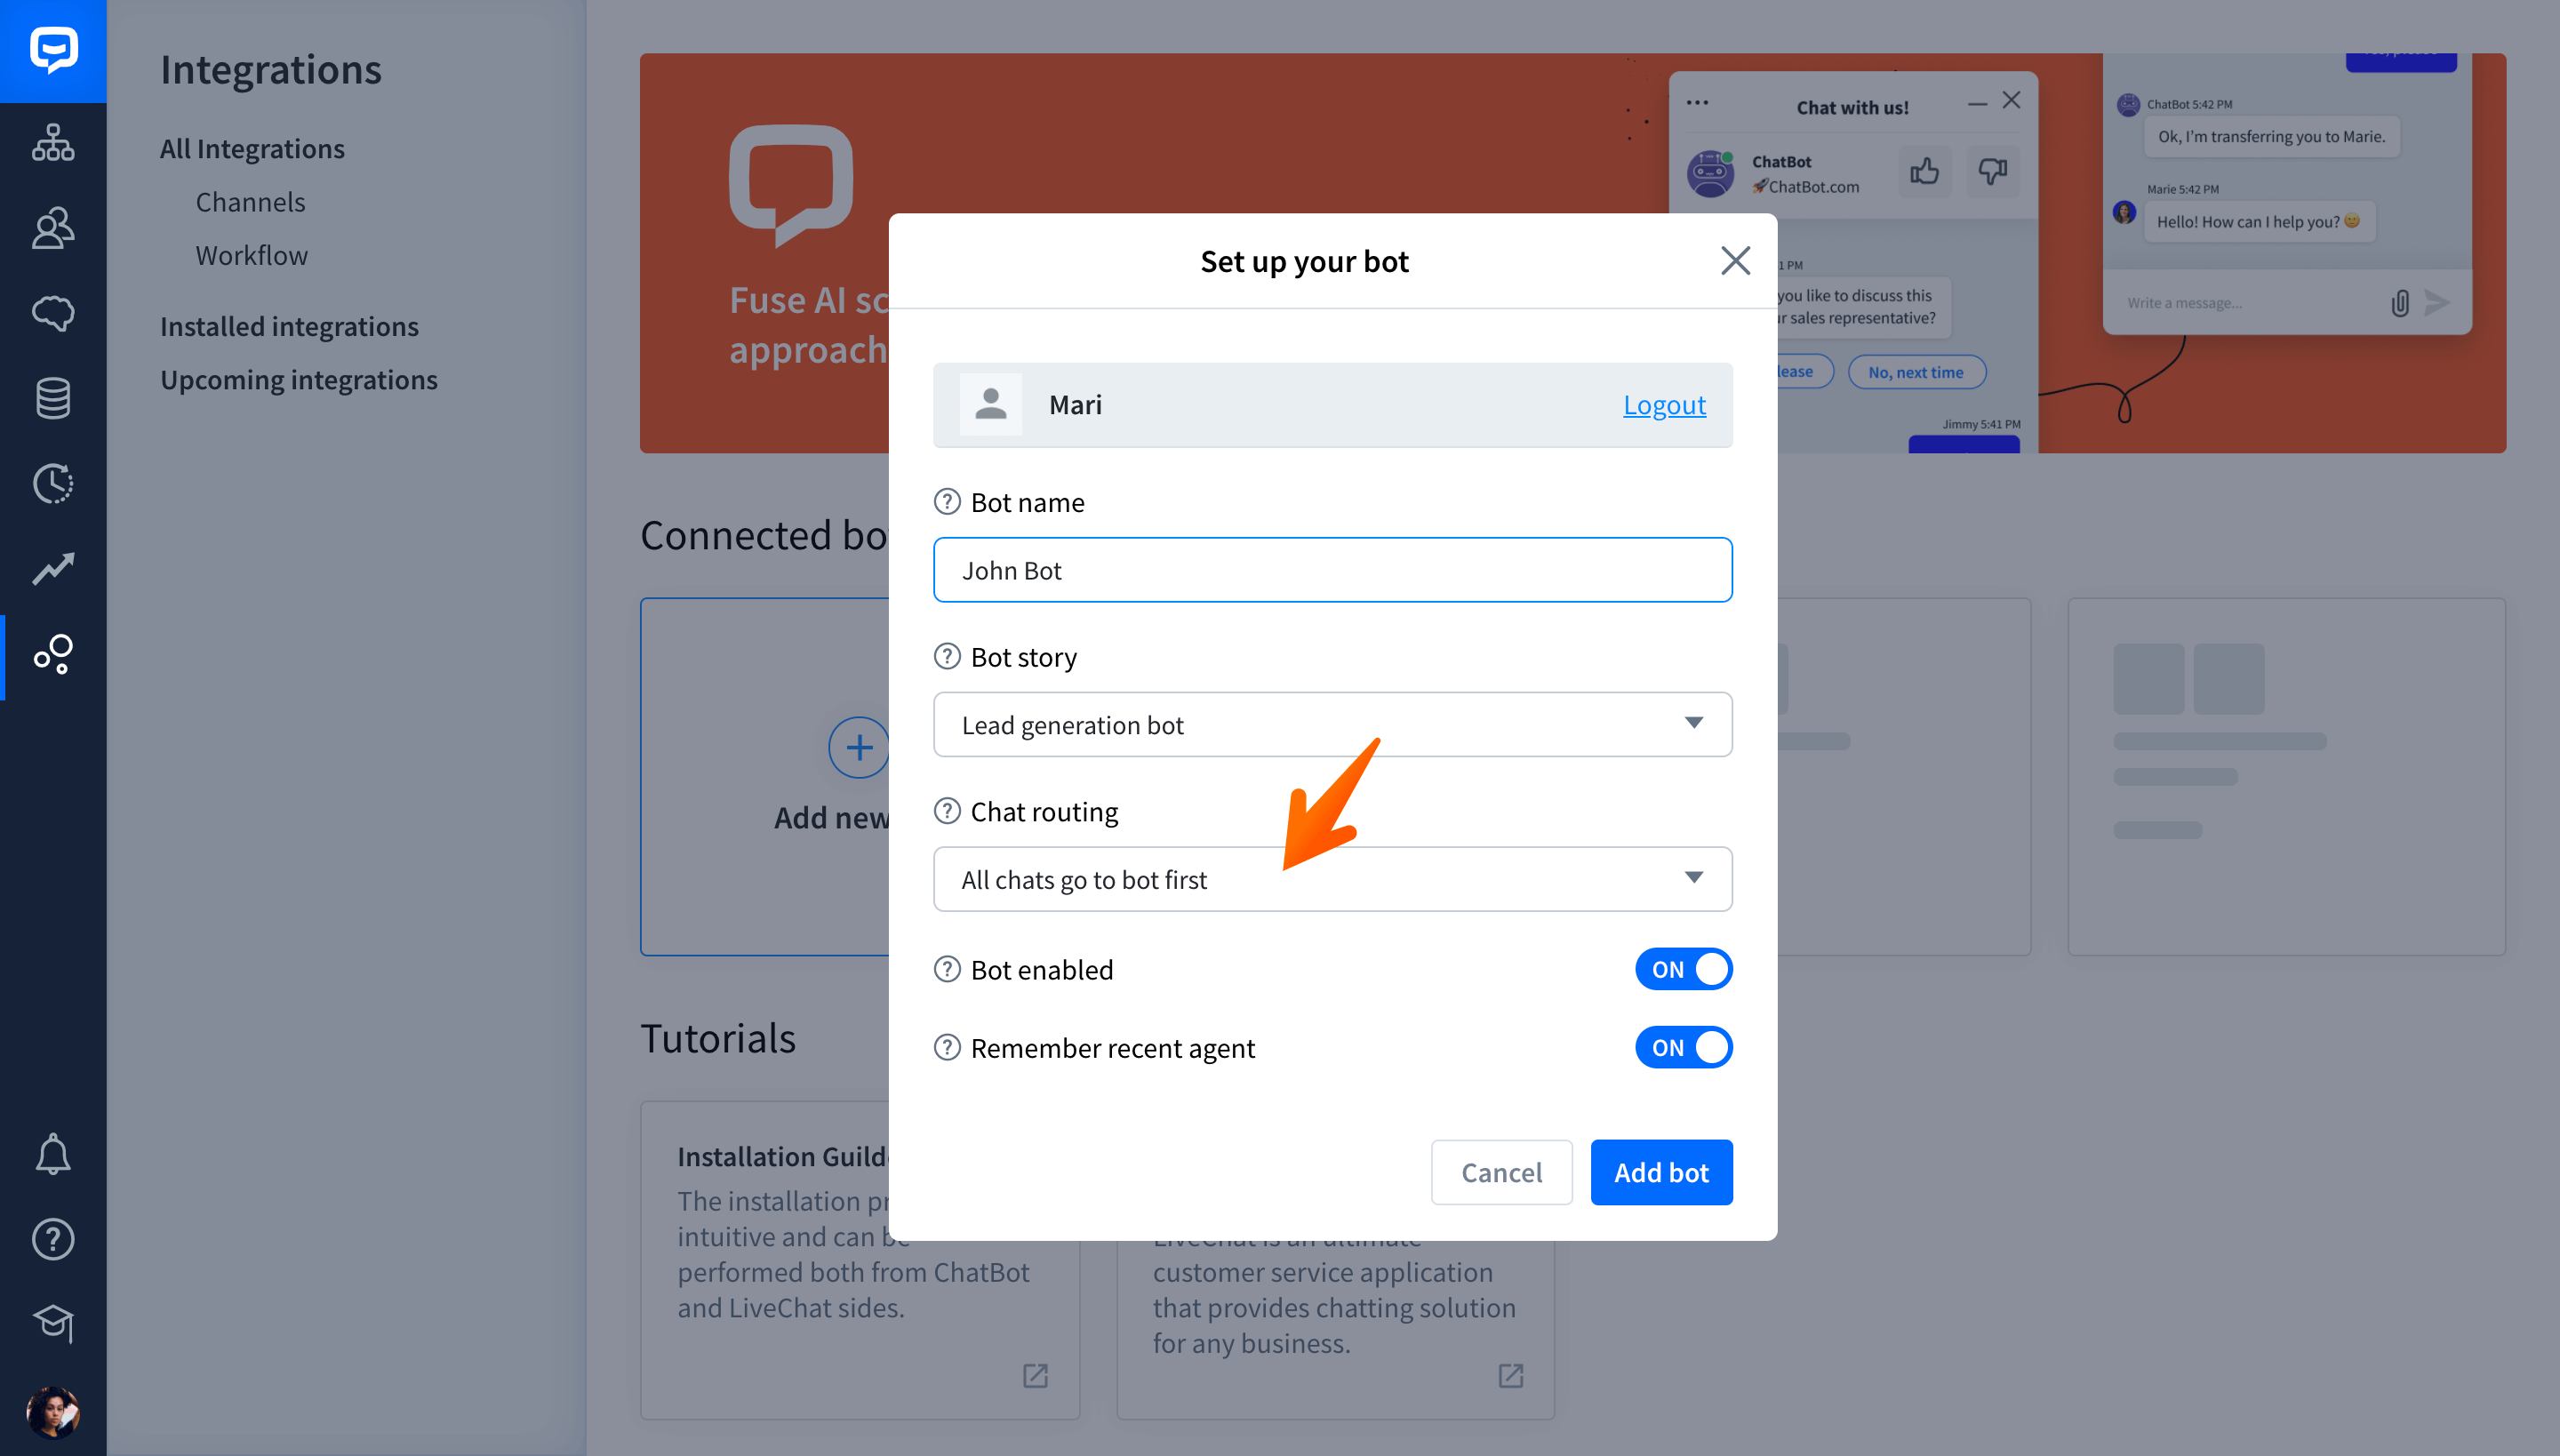
Now, it’s time to set up a chatbot for your account. Fill in the Bot name section. Remember that you can change the name later.

-
Next, choose the bot Story you want to connect to your LiveChat.

-
Choose the routing priority. There are three options:
-
all chats go to bot first,
-
the bot gets chats when no agent can take them.

-
-
Now, choose whether your chatbot should be enabled on your website right away.

-
Then, decide if the visitor should be connected first with the human agent or with a chatbot. If you turn the Remember recent agent option on, the system will always try to reconnect the visitor with the human agent they have previously chatted with. If no human agent is available, the user will be connected with a chatbot.

-
Finally, click on Add bot.

-
Ta-dah! Your chatbot is now ready to handle chats with customers. You can edit your bot it ChatBot or preview its performance in the Bots tab in the Agents section in LiveChat.

How chatbots work in LiveChat
There are a few rules that define how chatbots function in LiveChat:
-
A chatbot becomes one of your agents and takes up a seat.
-
All chats go to a chatbot by default. You can change this by choosing the Remember recent agents option.
-
A chatbot can transfer a chat to a human agent.
-
All chats with a chatbot are archived both by ChatBot and LiveChat.
LiveChat’s exclusive actions for ChatBot
The LiveChat integration lets you use a few additional actions while building your Story:
-
Transfer lets you transfer ongoing chats to human agents when human expertise is needed.
-
Create ticket allows the customer to create a ticket.
-
Transcript allows you to send a chat transcript to a defined email address.
-
Tag chat lets the bot the bot can tag ongoing chats to help you find them later in the Archives.
-
Mark goal you can set goals for your conversations to track every successful purchase, website visit, etc.
How to disable a bot
-
Go to Integrations and click on LiveChat.
-
Turn off the switch in the bot tile.

That’s it, the bot has been disabled and all chats will be directed to agents. If you change your mind, you can enable it again, by turning the switch on.
How to delete your chatbot
-
Go to Integrations and click on LiveChat.
-
Click on the three dots icon to open the menu. Select Delete bot.

-
To finalize, click on Confirm.
 Your chatbot has been deleted. To connect your bot again, you need to integrate LiveChat with ChatBot again.
Want to know more about chatbots? Check out these articles: