Chatbots improve the way we communicate with customers but also take out the personal touch from chats. The Users tool allows you to get closer to the people that chat with your bot and build relationships.
The Users section shows a list of people that have chatted with your bot. Each person is presented as a separate user with valuable data gathered such as name, email address, collected attributes, and more. Moreover, each profile shows how often the person talks to the bot and when the last chat occurred. Users can be added to custom lists, called segments, that can be further sent to your mailing lists or databases and utilized for your sales or marketing purposes.
Let me take you for a little walk around the section.
Get started with users
Users can give lots of information on who is talking with your bot. Use this data to create the persona for your marketing campaigns, save and manage leads or anything you want to. Let’s get started!
Meet your users
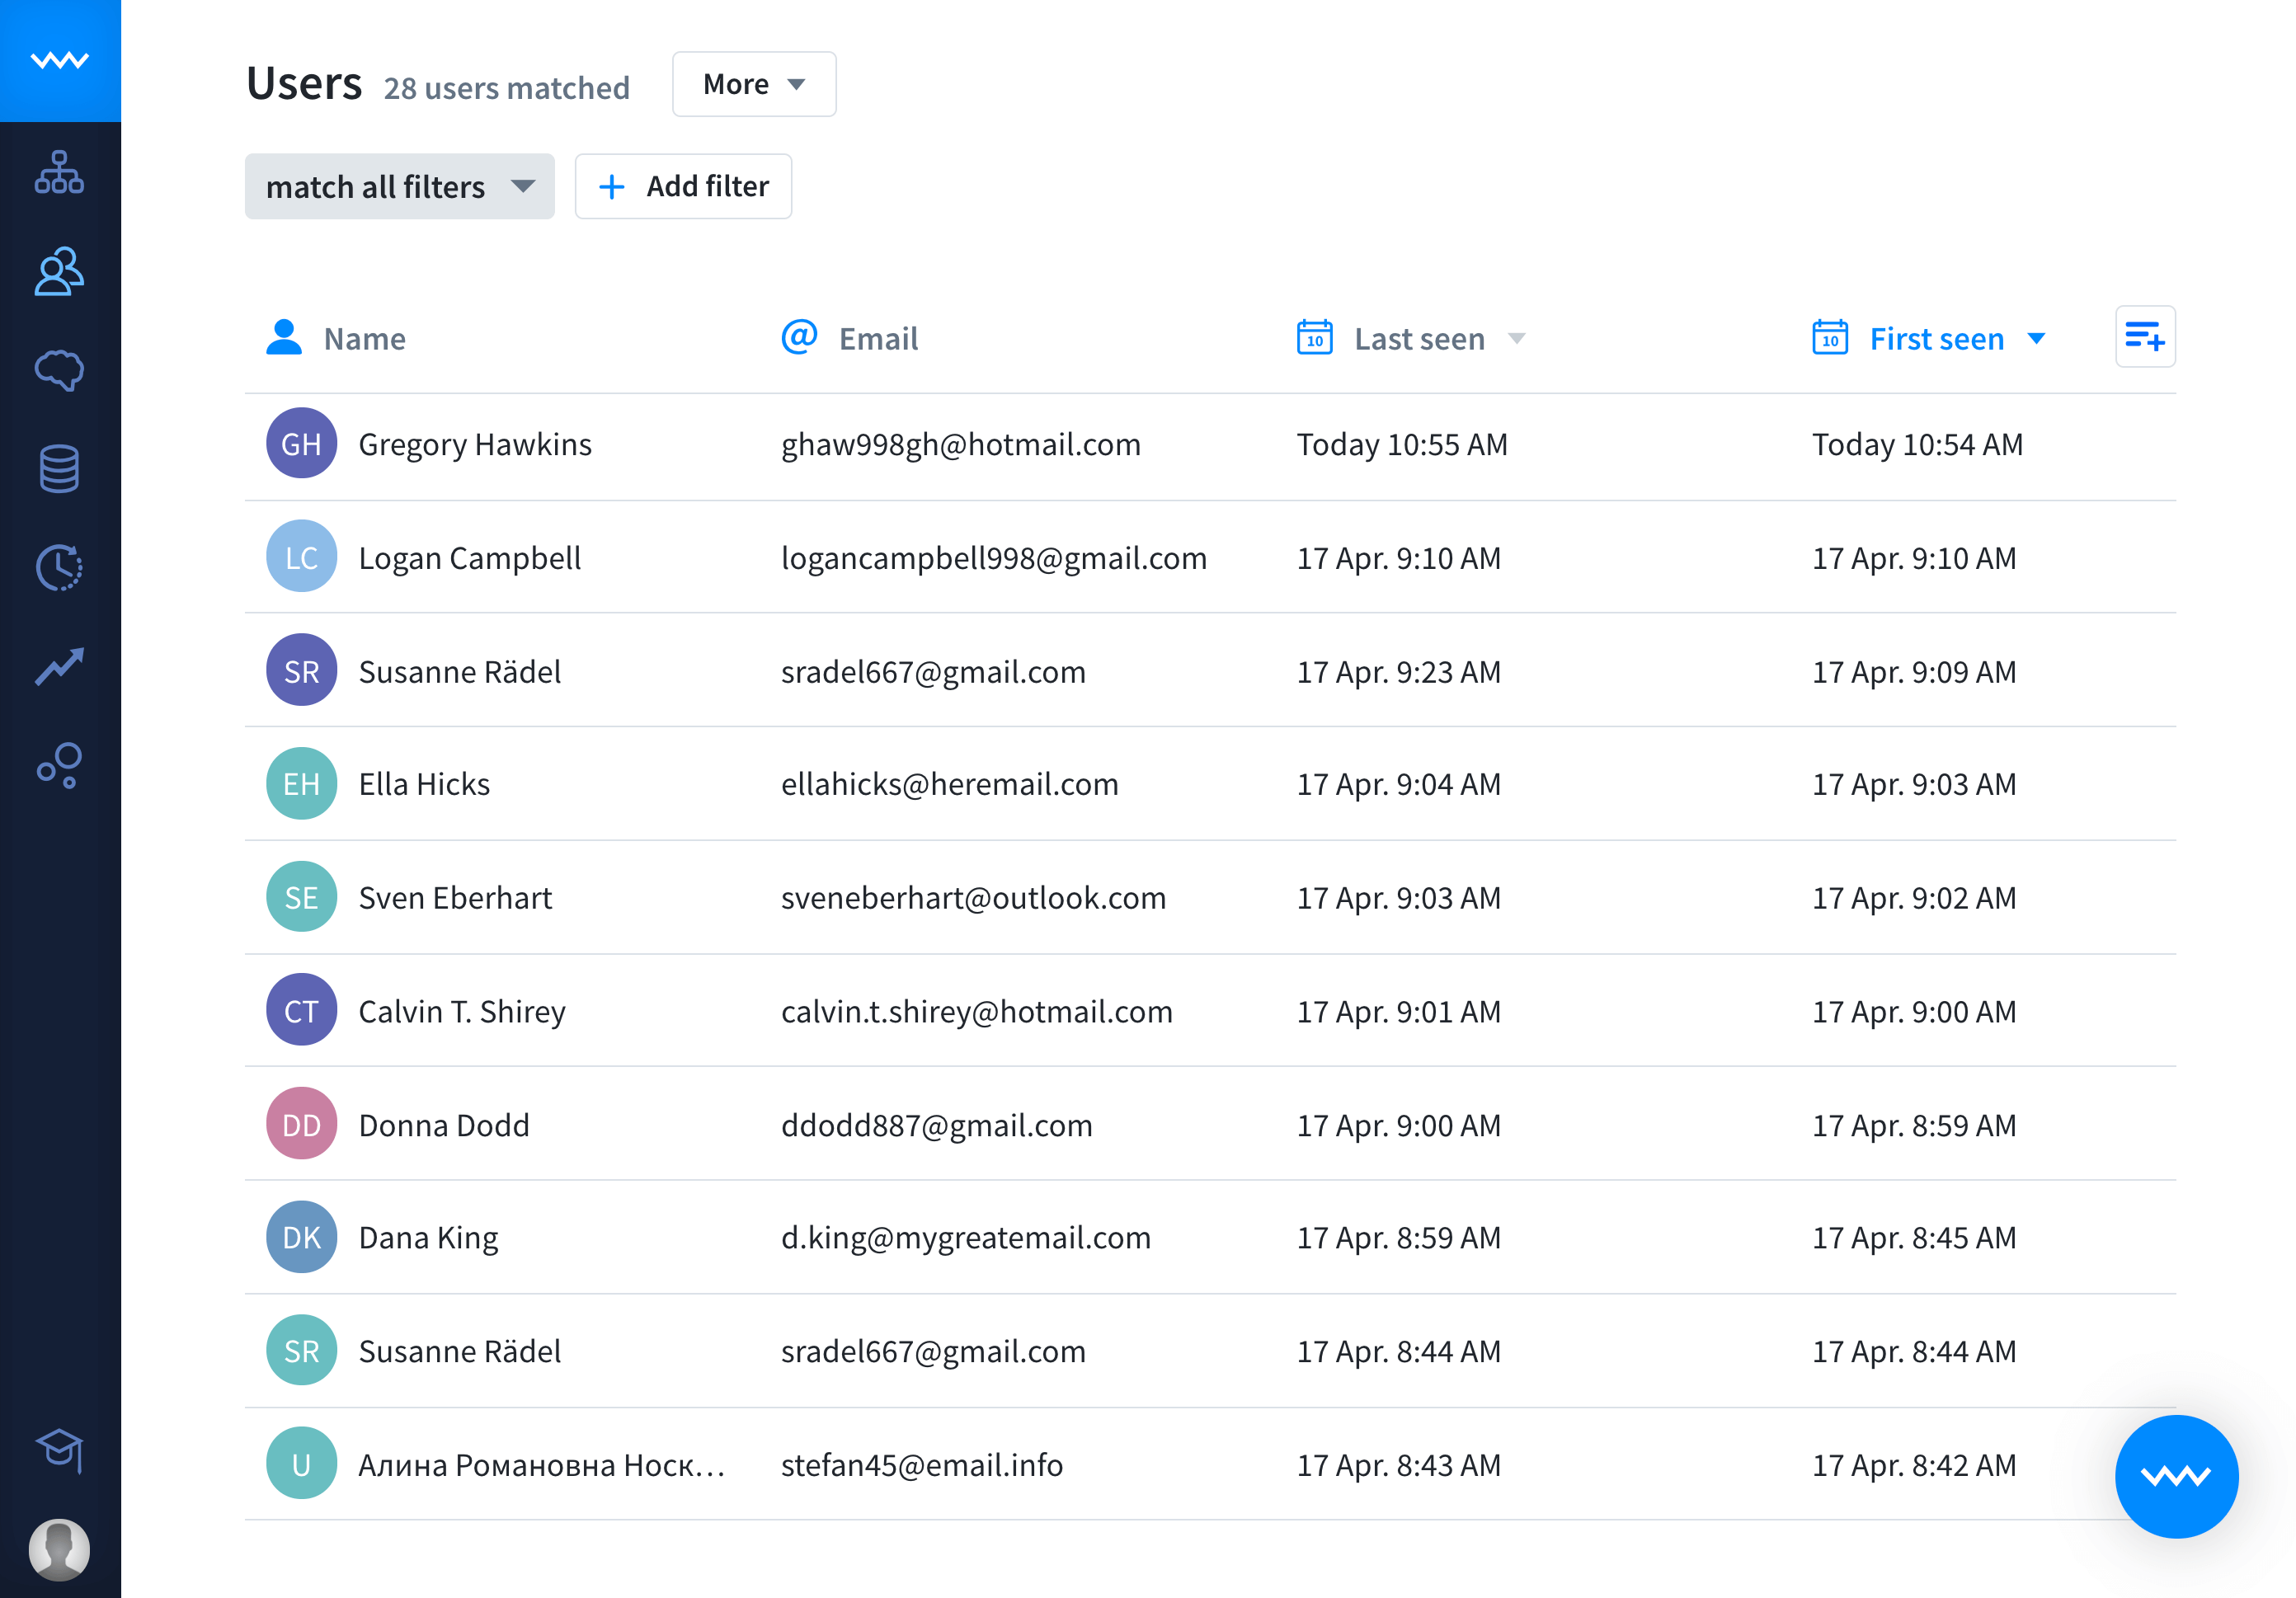
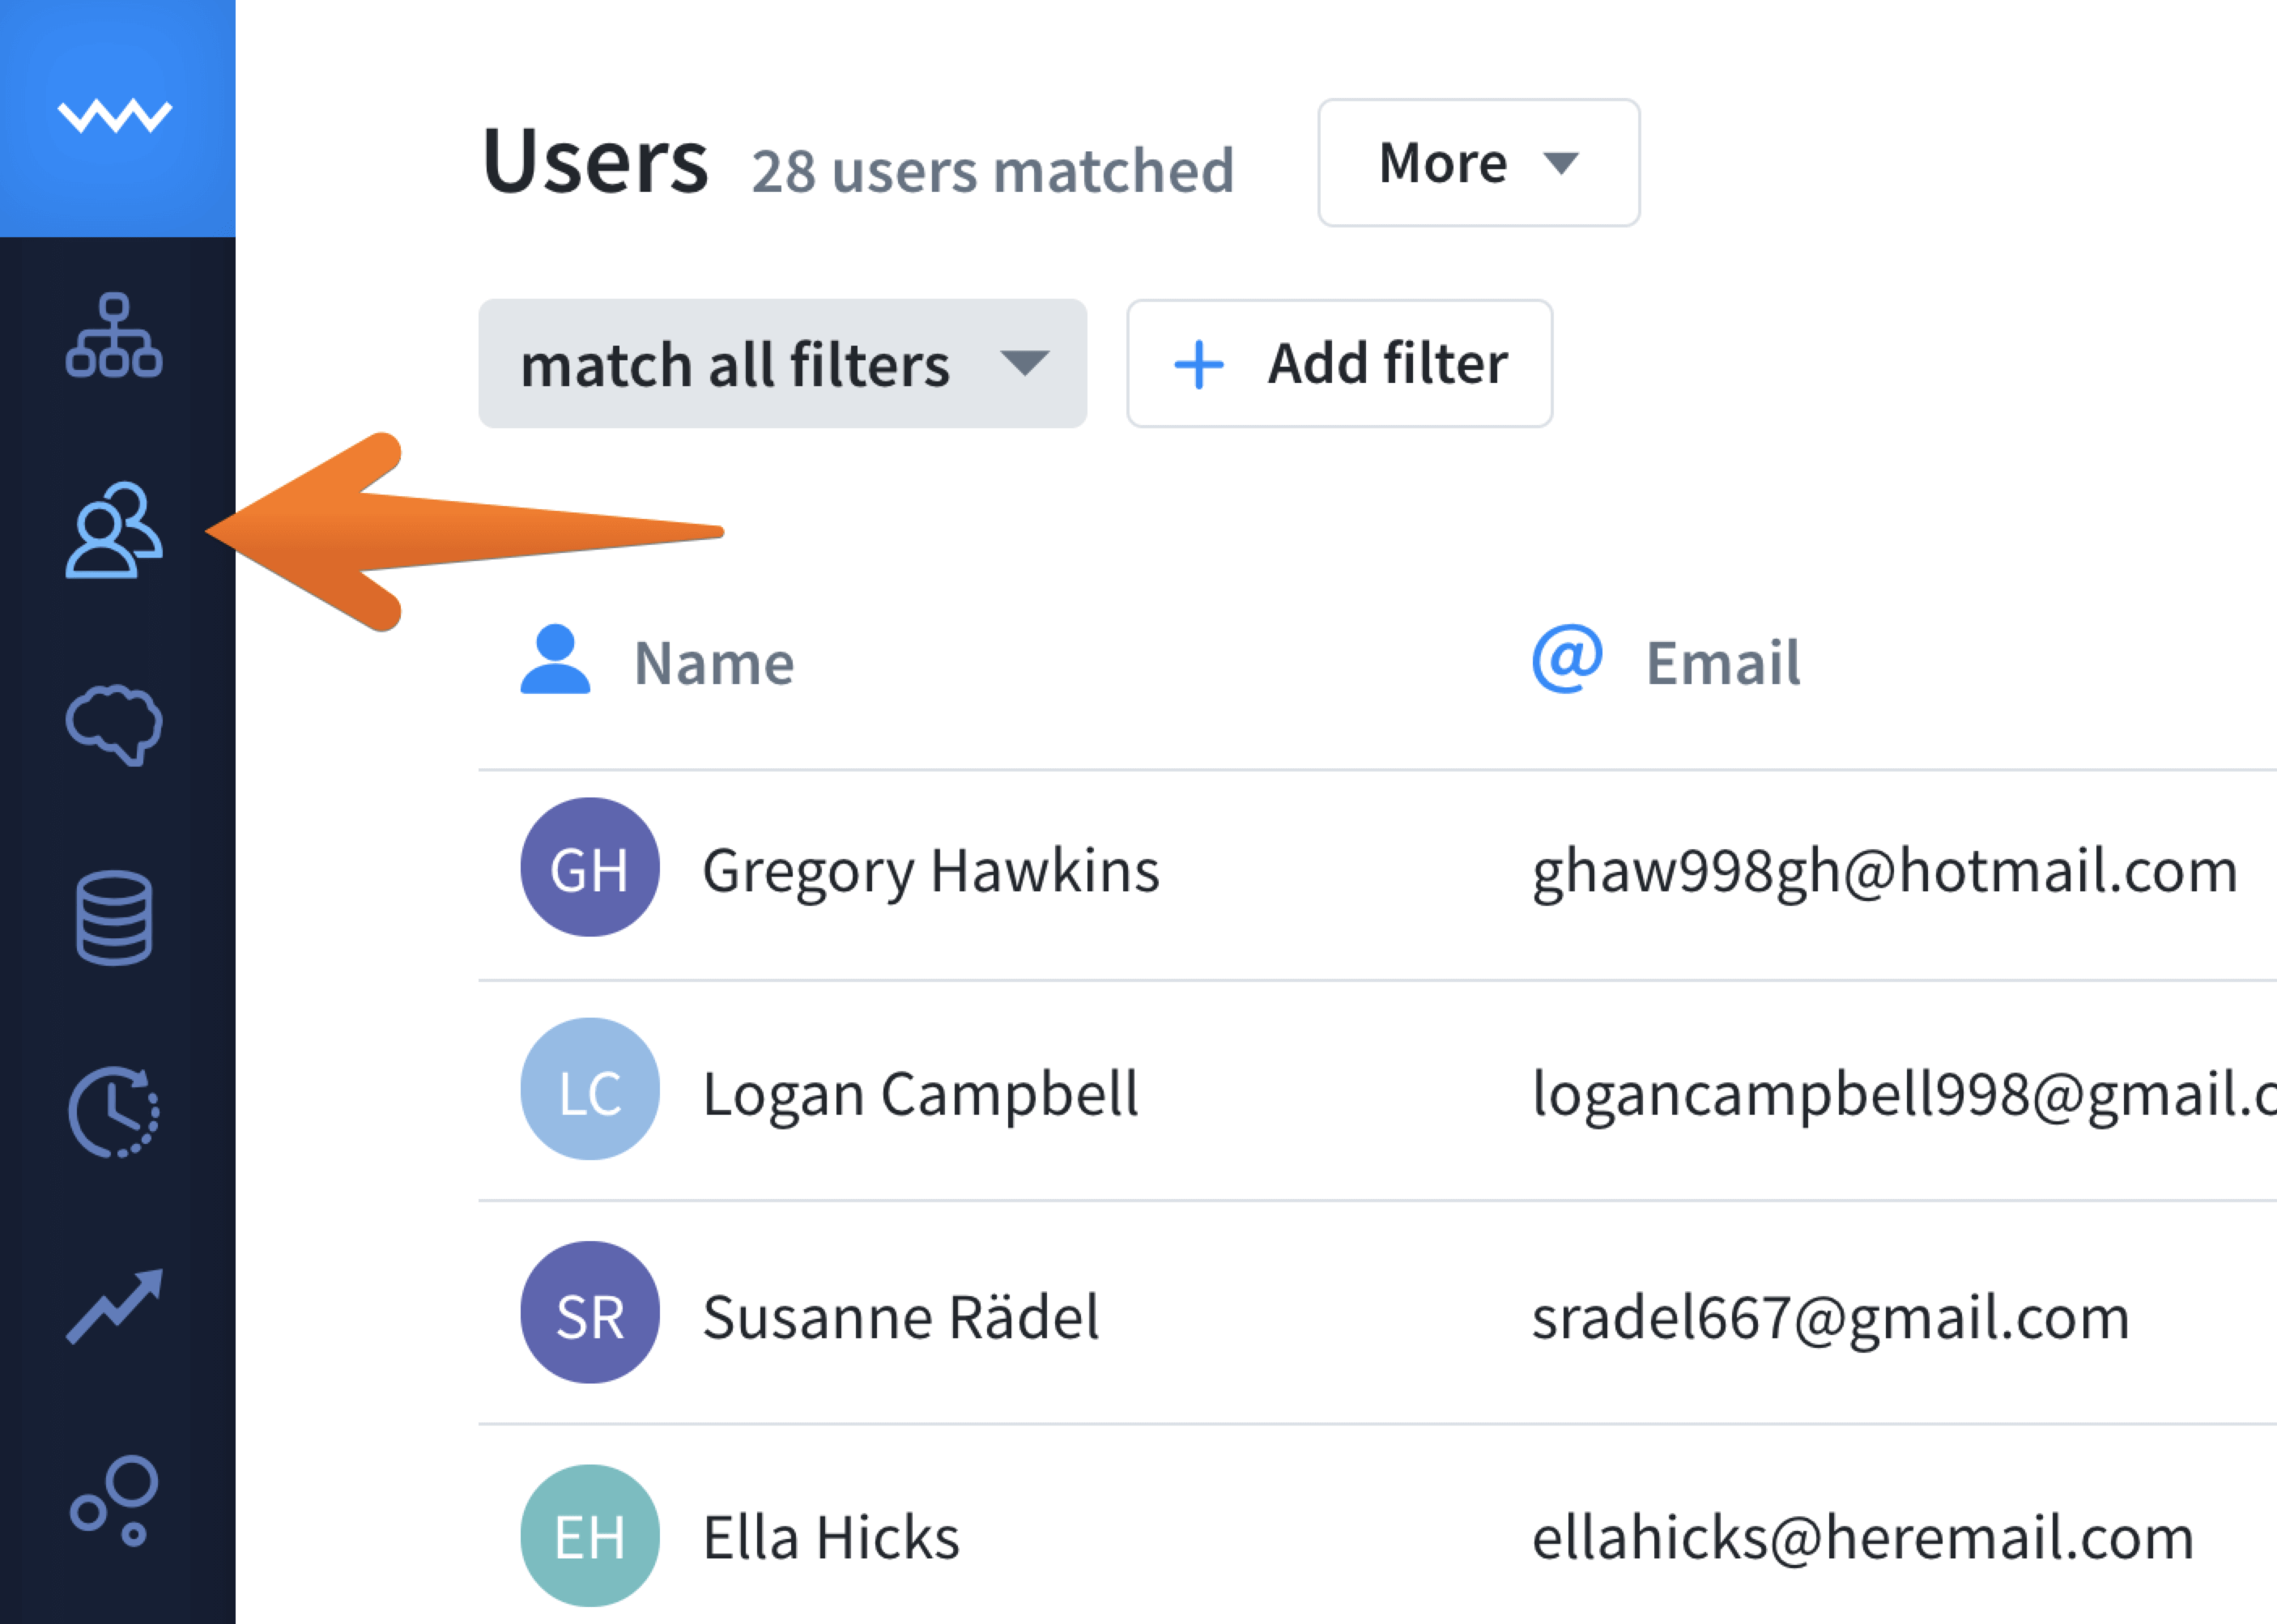
To go to to the section, click the Users icon that you can find on the left sidebar. By default, you can see all users that have chatted with your bot, ordered by the last time they talked to your bot. Additionally, you can see the first time they initiated a chat with the bot and the location.
Customizing the main view can help you to find essential leads easier. You can decide what data is visible on the main screen by adding columns, such as email, IP or city. Another way to manage your list is to use one or more filters to narrow down the view. You can share customized views by providing the URL for those who know your ChatBot’s login credentials.
Additionally, users can be added to segments – custom lists that group users based on criteria that are important to your further marketing actions. Segments can be exported as .CSV files and used in your email campaigns, spreadsheets and whatever you want.
Customize the view
In the Users section, you can see the list of users that have talked with your bot. By default, each person is listed with the following attributes: name, email, last seen and first seen, where two last columns can be used to sort the results.
You can easily modify this view by clicking on the plus icon and select additional attributes or hide existing ones.
When the user list gets longer, filters come in handy. You can apply multiple filters to extract valuable information from your list. You can combine many filters and decide if the users must meet all the created criteria or only one of them by switching between match all filters and match any filter.
Note that using more than one filter can help you to find patterns in users behavior such as last seen and location to spot that you’re getting more customers from New York and those from Seattle stopped talking with your bot.
Available attributes
Below you can see the full list of attributes. Note that most of them, such as timezone, city, language, and avatar, are automatically received by integrations such as LiveChat, Slack and Messenger.
If you’re using a custom integration or our Chat Widget, you can prompt users to collect these values. To do so, you need to use the exact same attributes names as listed below.
| Filter name | Attribute name | Description |
|---|---|---|
| default_email | User email. | |
| Last seen | lastSeen | Day and time of the most recent chat. |
| First seen | createdAt | Day and time the first chat occurred. |
| City | default_city | User city. |
| Country | default_country | User country. |
| Language | default_language | User language. |
| Timezone | default_timezone | Current user timezone. |
| Gender | default_gender | User gender. |
| Referrer | default_referrer | The URL the the user originated from. |
| Integration | default_source | Integration used in the chat. |
| Source | default_url | URL where the chat occurred. |
| IP | default_ip | User IP address. |
| Username | default_username | User username. |
| User ID | userId | A unique ID assigned by the system or obtained from external systems, e.g. integrations. |
| Banned | banned | Information if the user is banned or not. This attribute can be either true or false. |
| Segment | segment | Segments that the users belongs to. |
| Attribute | attribute | A custom attribute. |
| Avatar | default_avatar | An avatar’s URL. |
Set up filters
Before applying filters decide which group of users you wish to include in this action. By default, all users are selected so filters can be useful to narrow down the results to choose only a specific group.
In this quick tutorial, we will filter out users located in the United States who speak English. Then we will be able to add them to a segment named Monthly Newsletter US ENG and send future email newsletters to this group.
So let’s get this done! 🚀
-
Log in to your ChatBot account and head over to the Users section that can be found on the left sidebar.
-
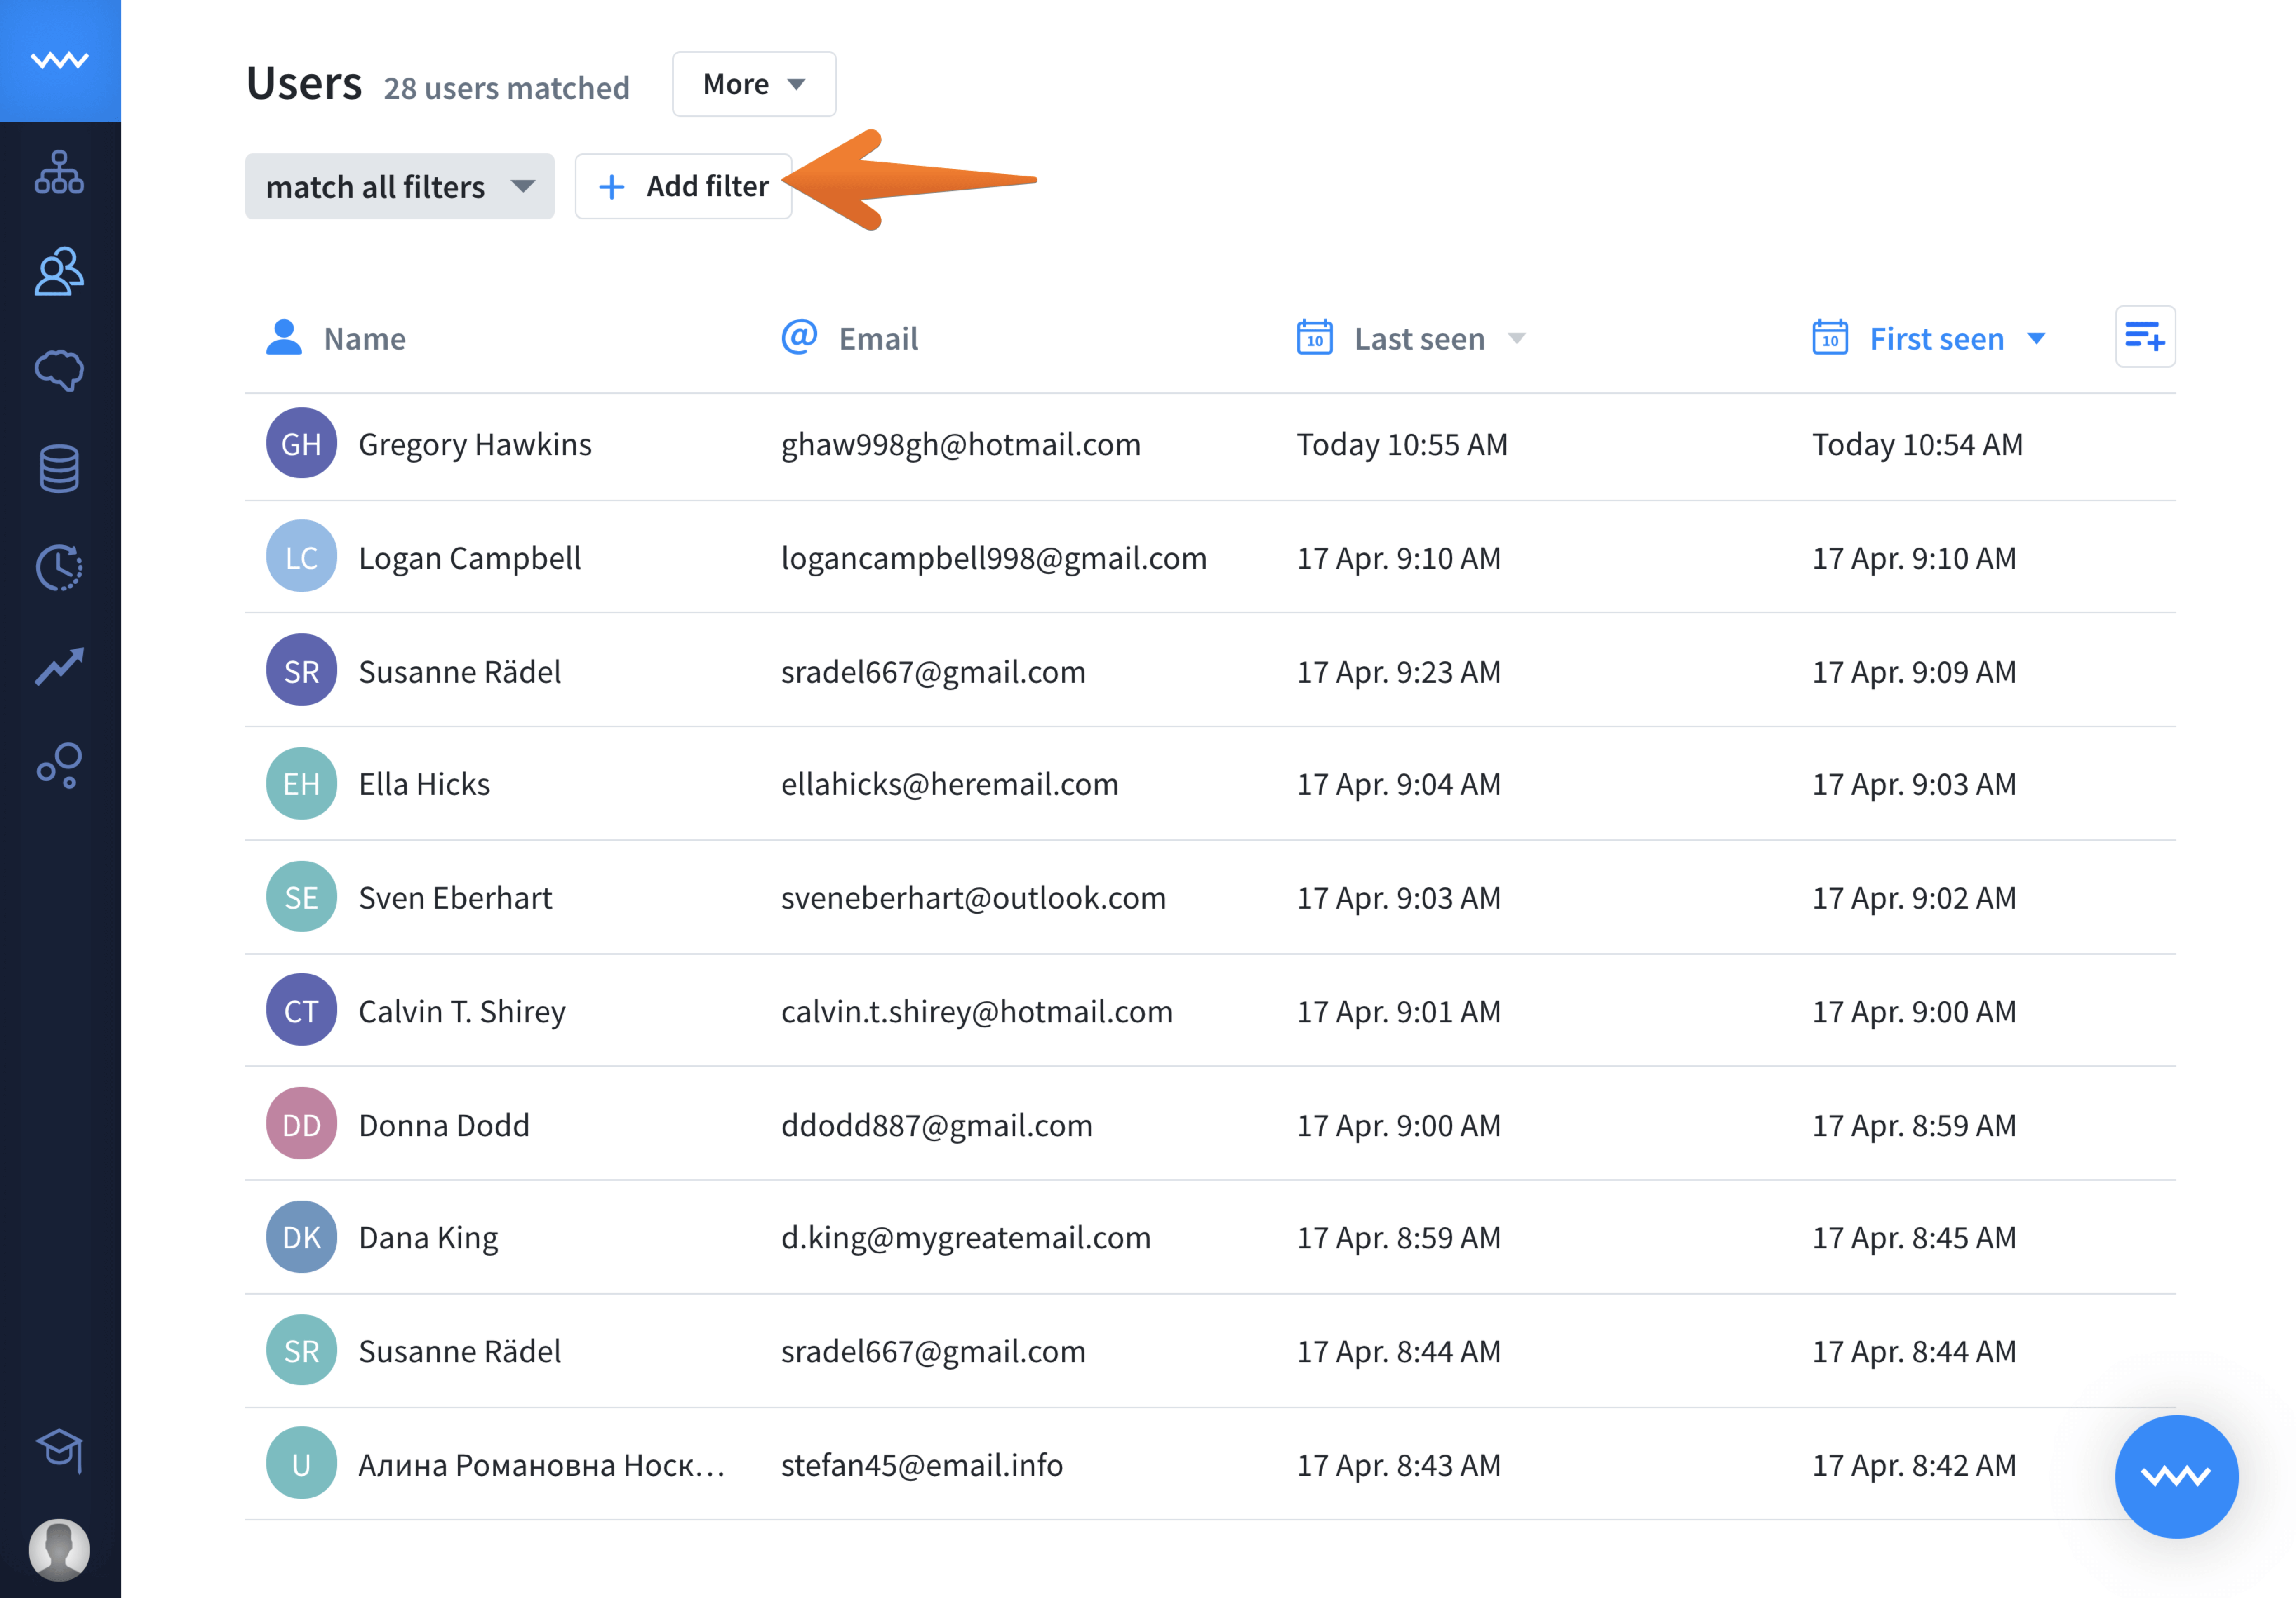
By default, we see all users, listen from the most recent down. To narrow down the list, use filters. Click on the add filter button to open the full list of available filters.
-
Select country from the list and set the rule of the filter to
is. Now type down United States and hitapply filter.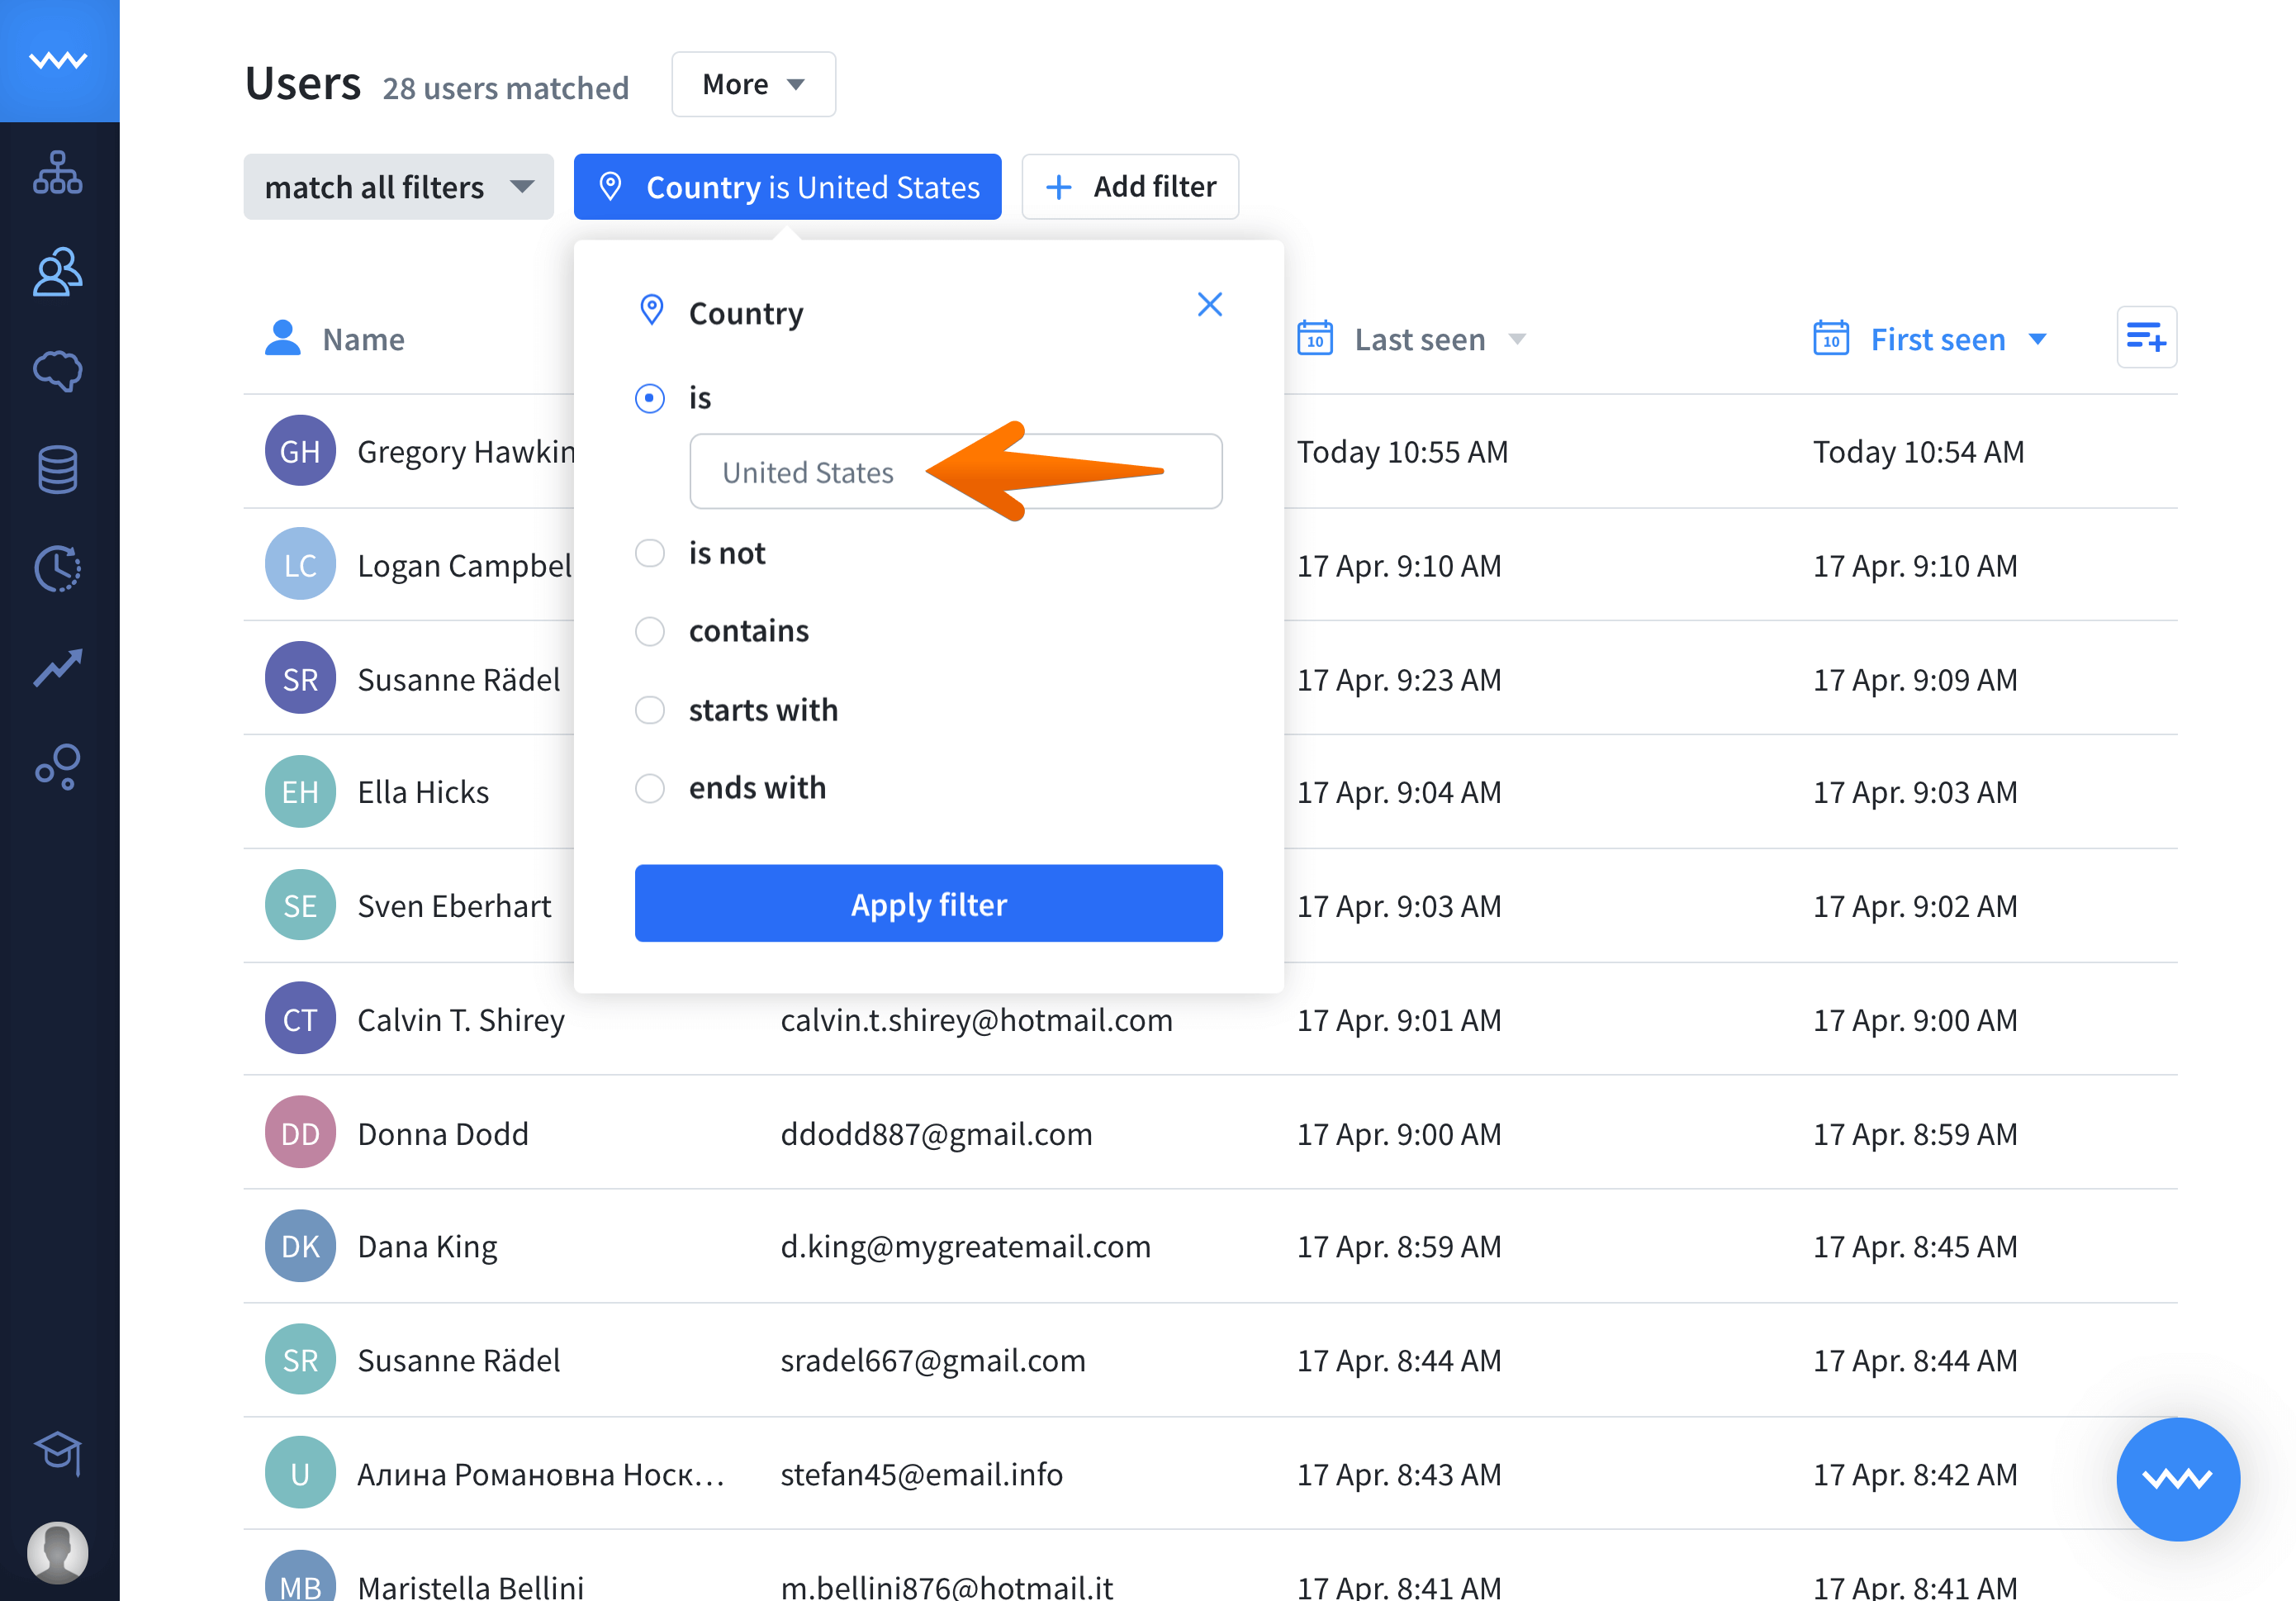
-
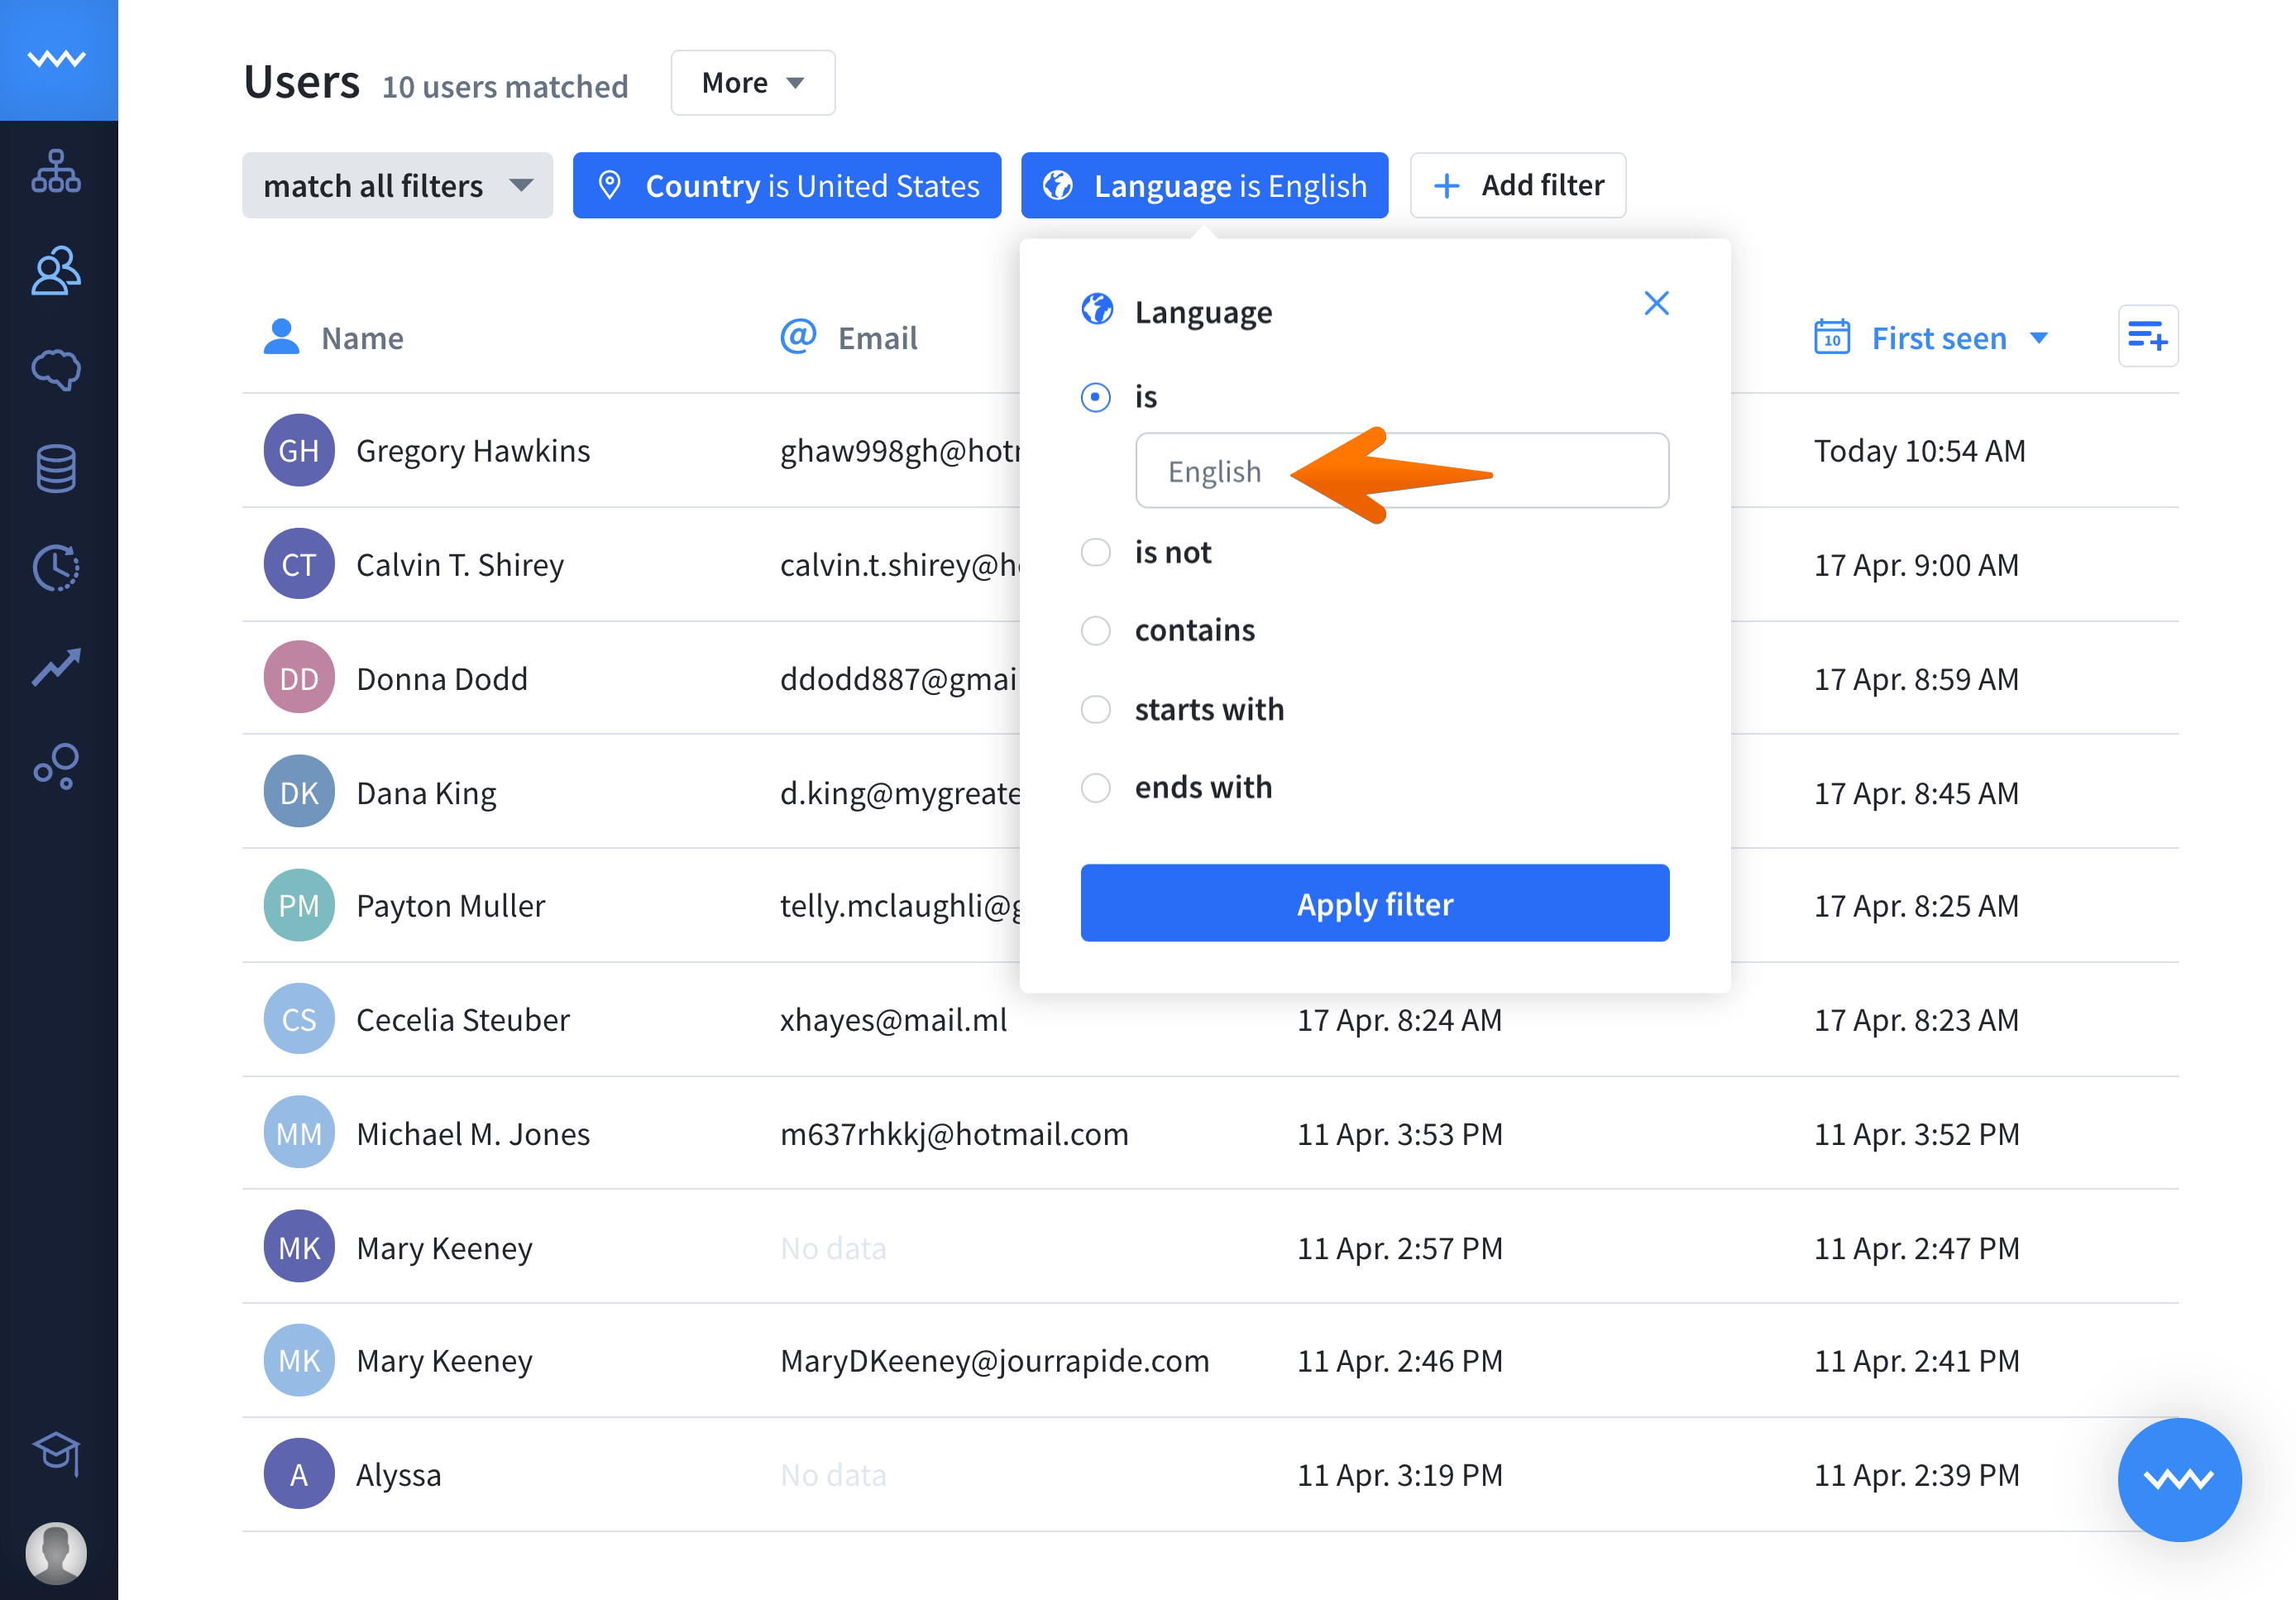
Similarly, you can do with the language. Add another filter and select language. Use again the is rule and type English.
-
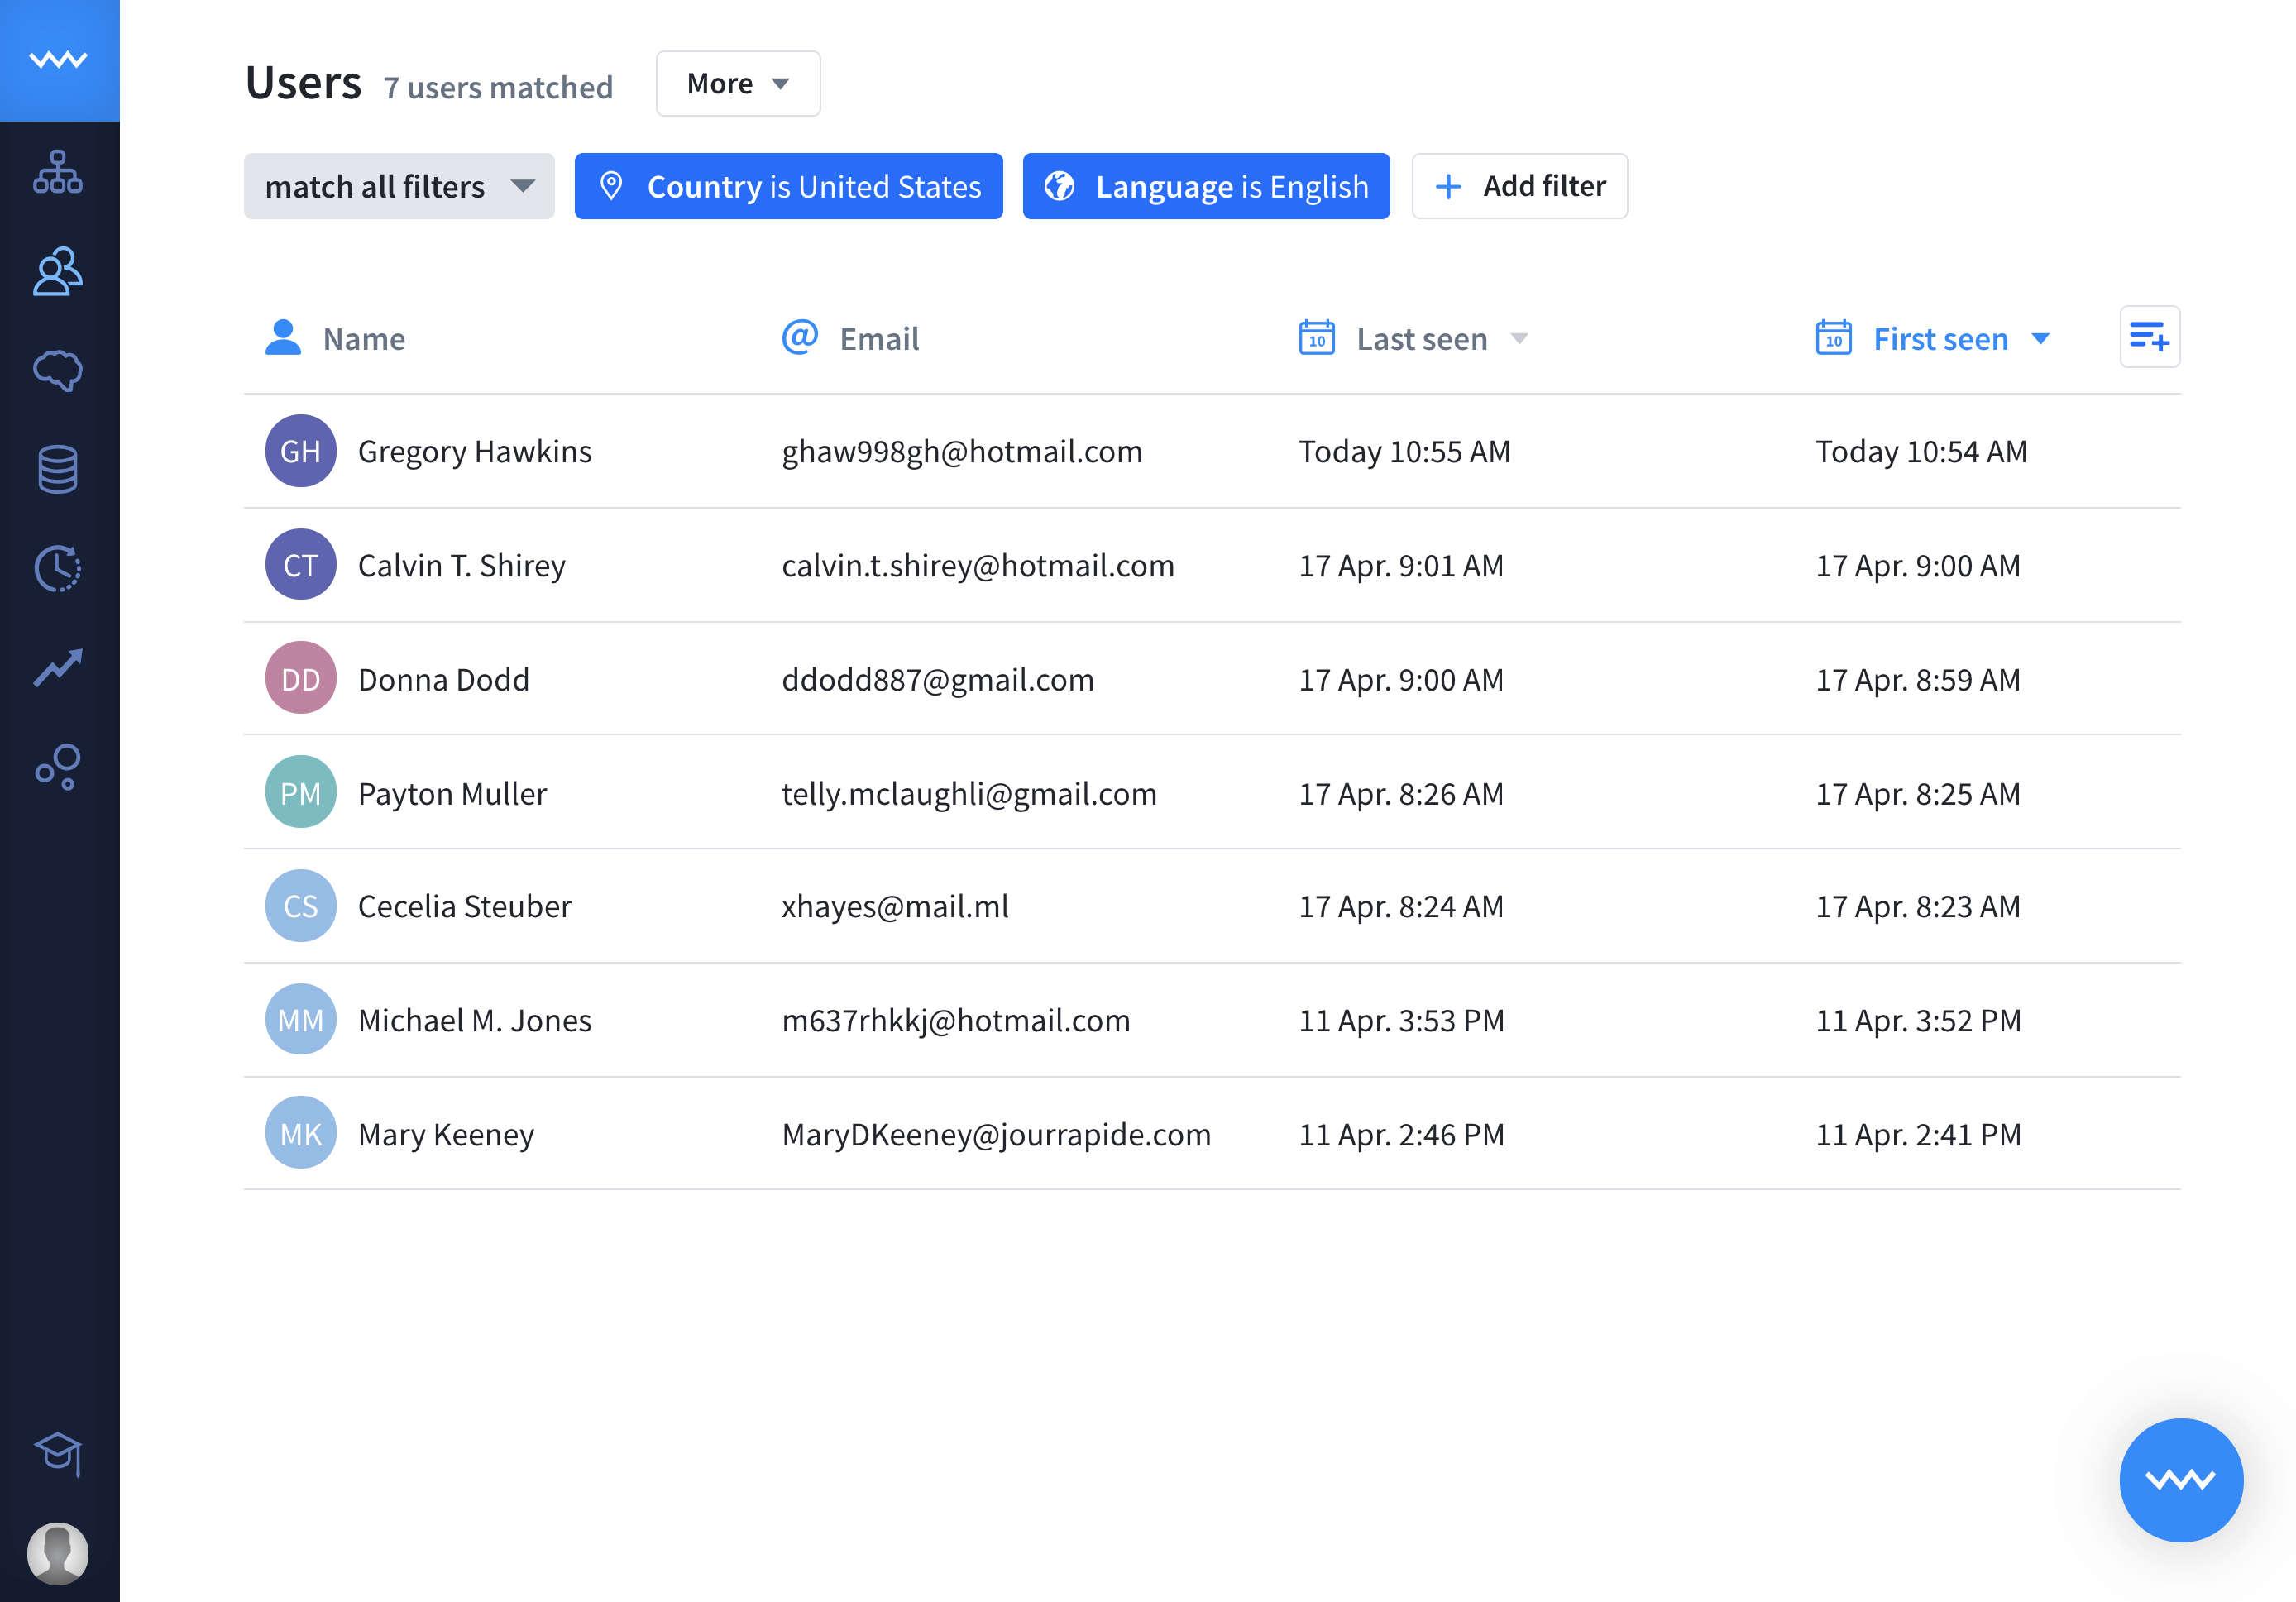
Great job! ✨ Now the list shows only the users who live in the United States and speak English. In the next steps you’ll lear how to export and order these results.
Manage users lists
Users can help you create marketing campaigns, collect data in your databases and more. Grouping users into segments and exporting them is very simple. So let’s get started! 🚀
Add users to segments
Segments can help you to organize users lists by criteria you want. It can be newsletter signup: mutual city, language, or anything you want.
-
First, you need to create a segment. If you don’t know how to do it, follow the quick tutorial in segments help post.
-
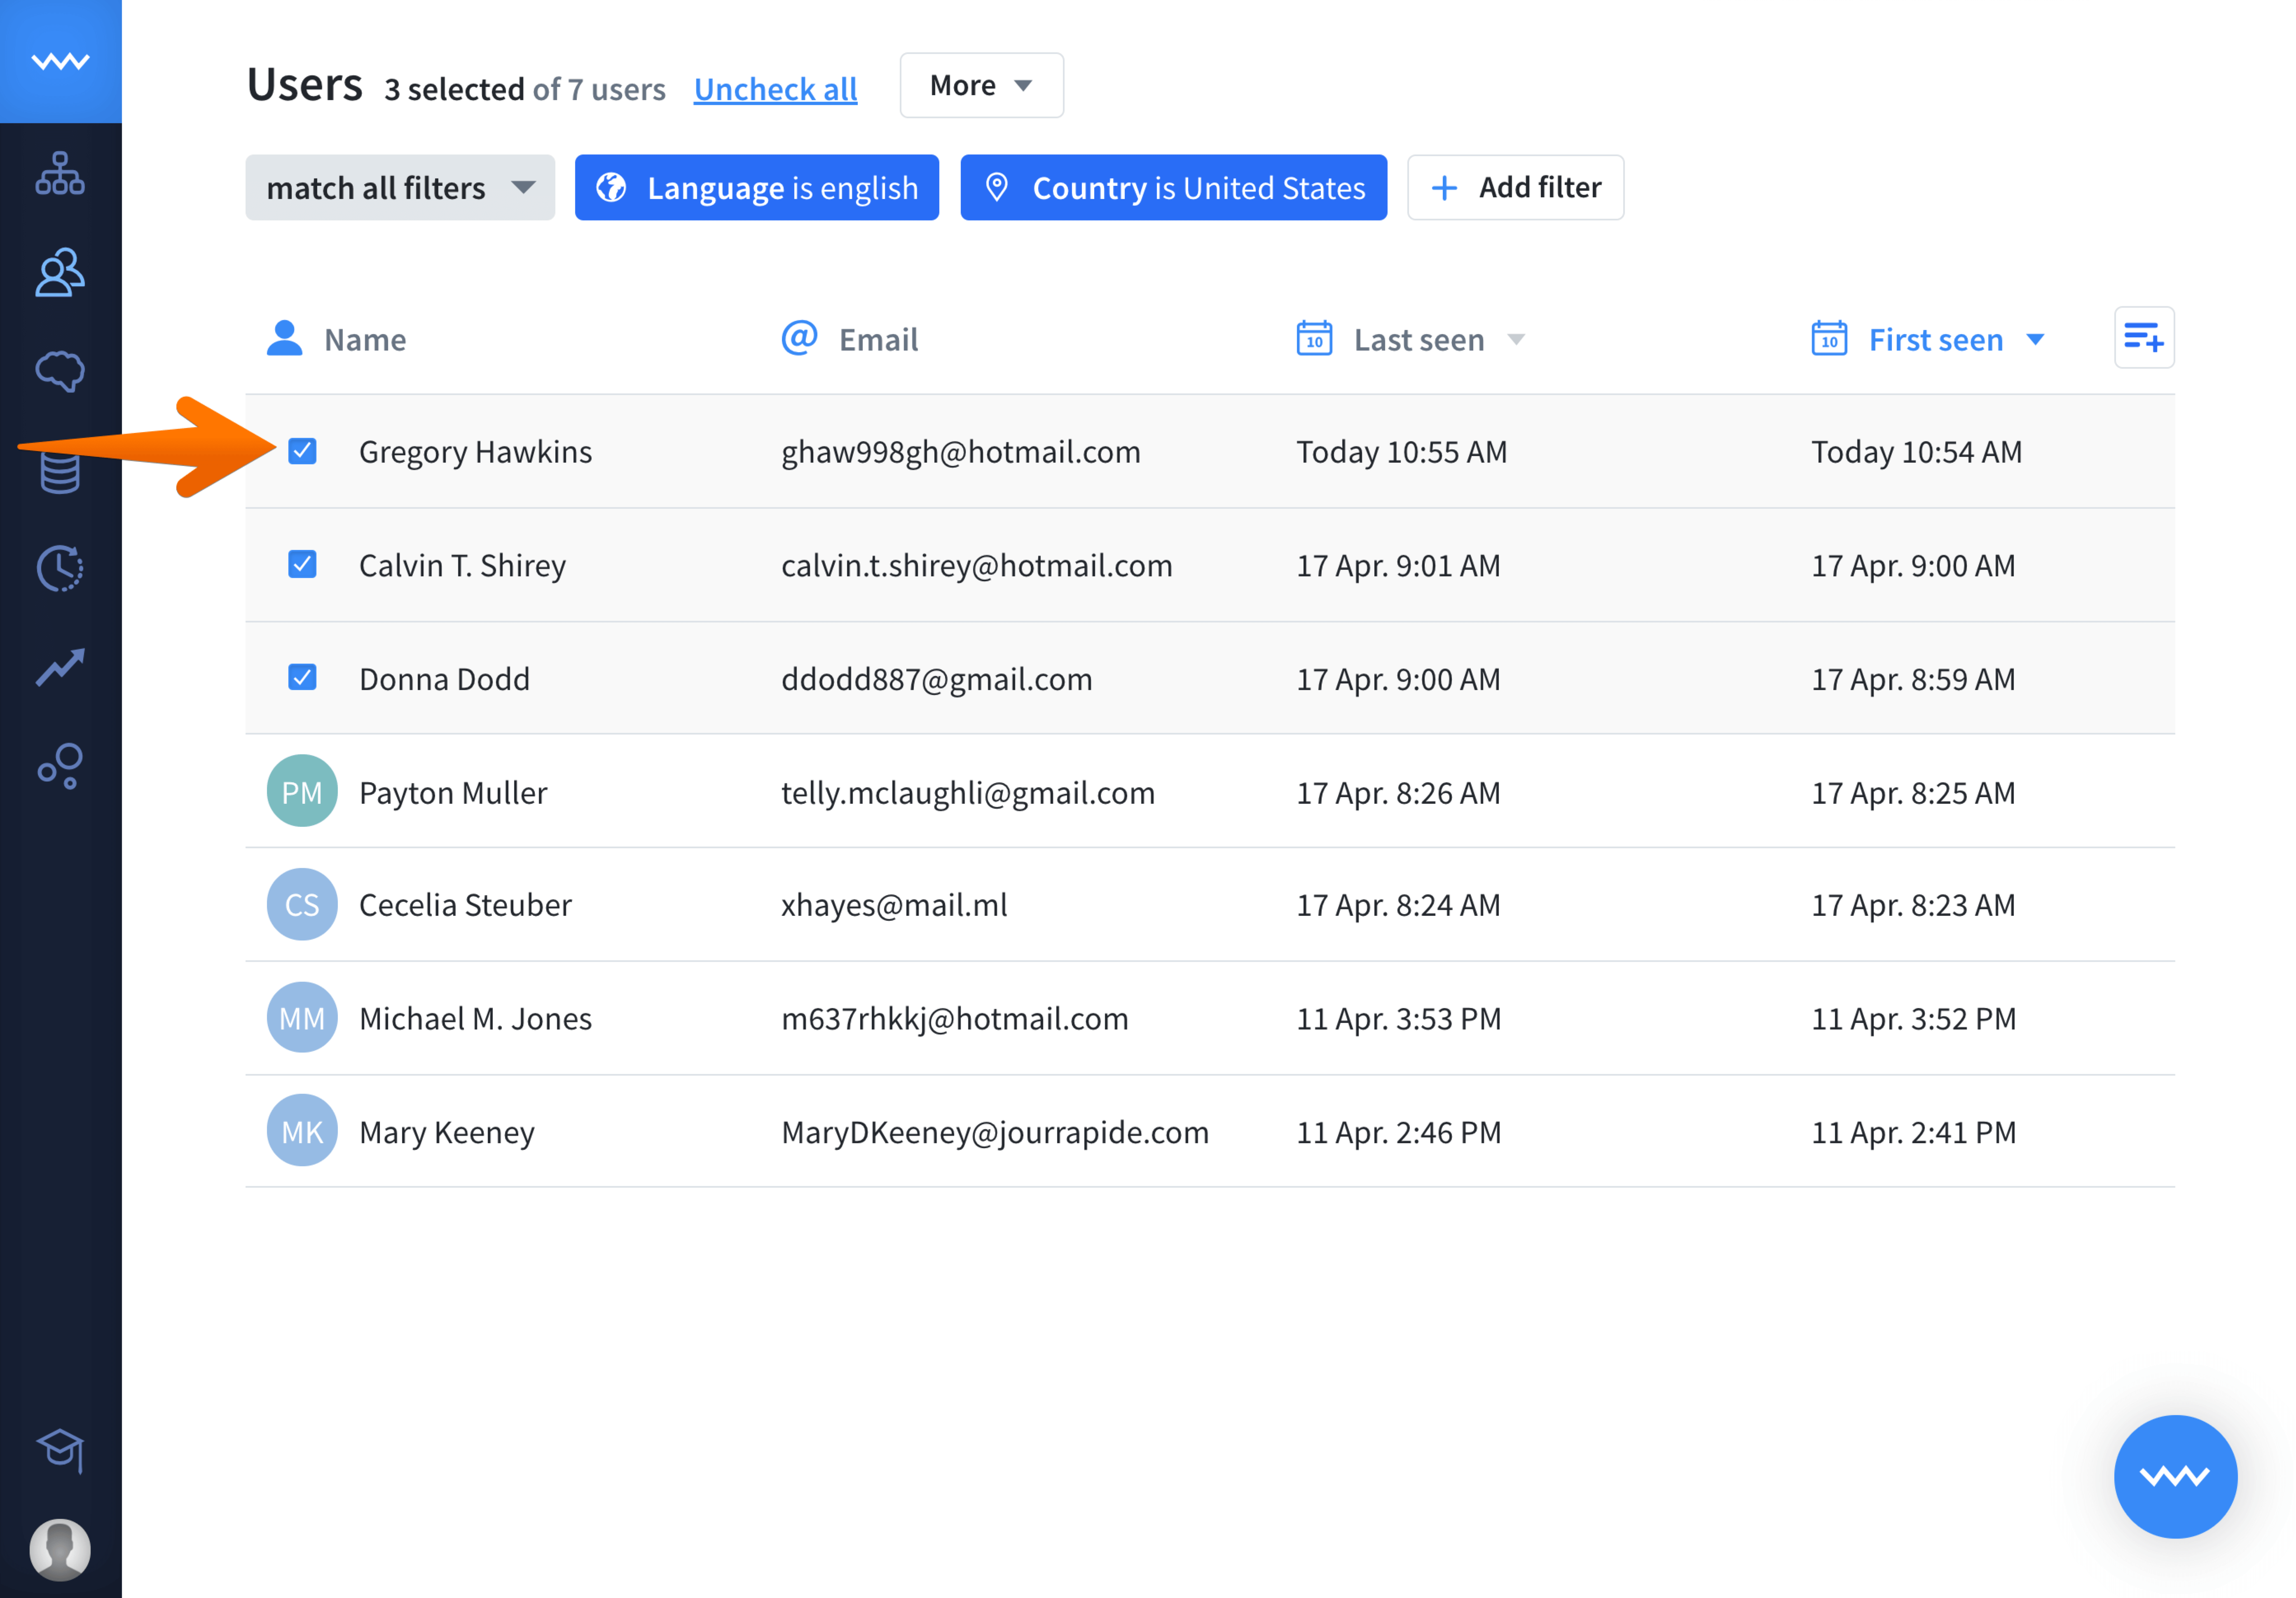
Now, select users that you want to add to this segment.
-
Click more and choose the
Save to Segmentoption.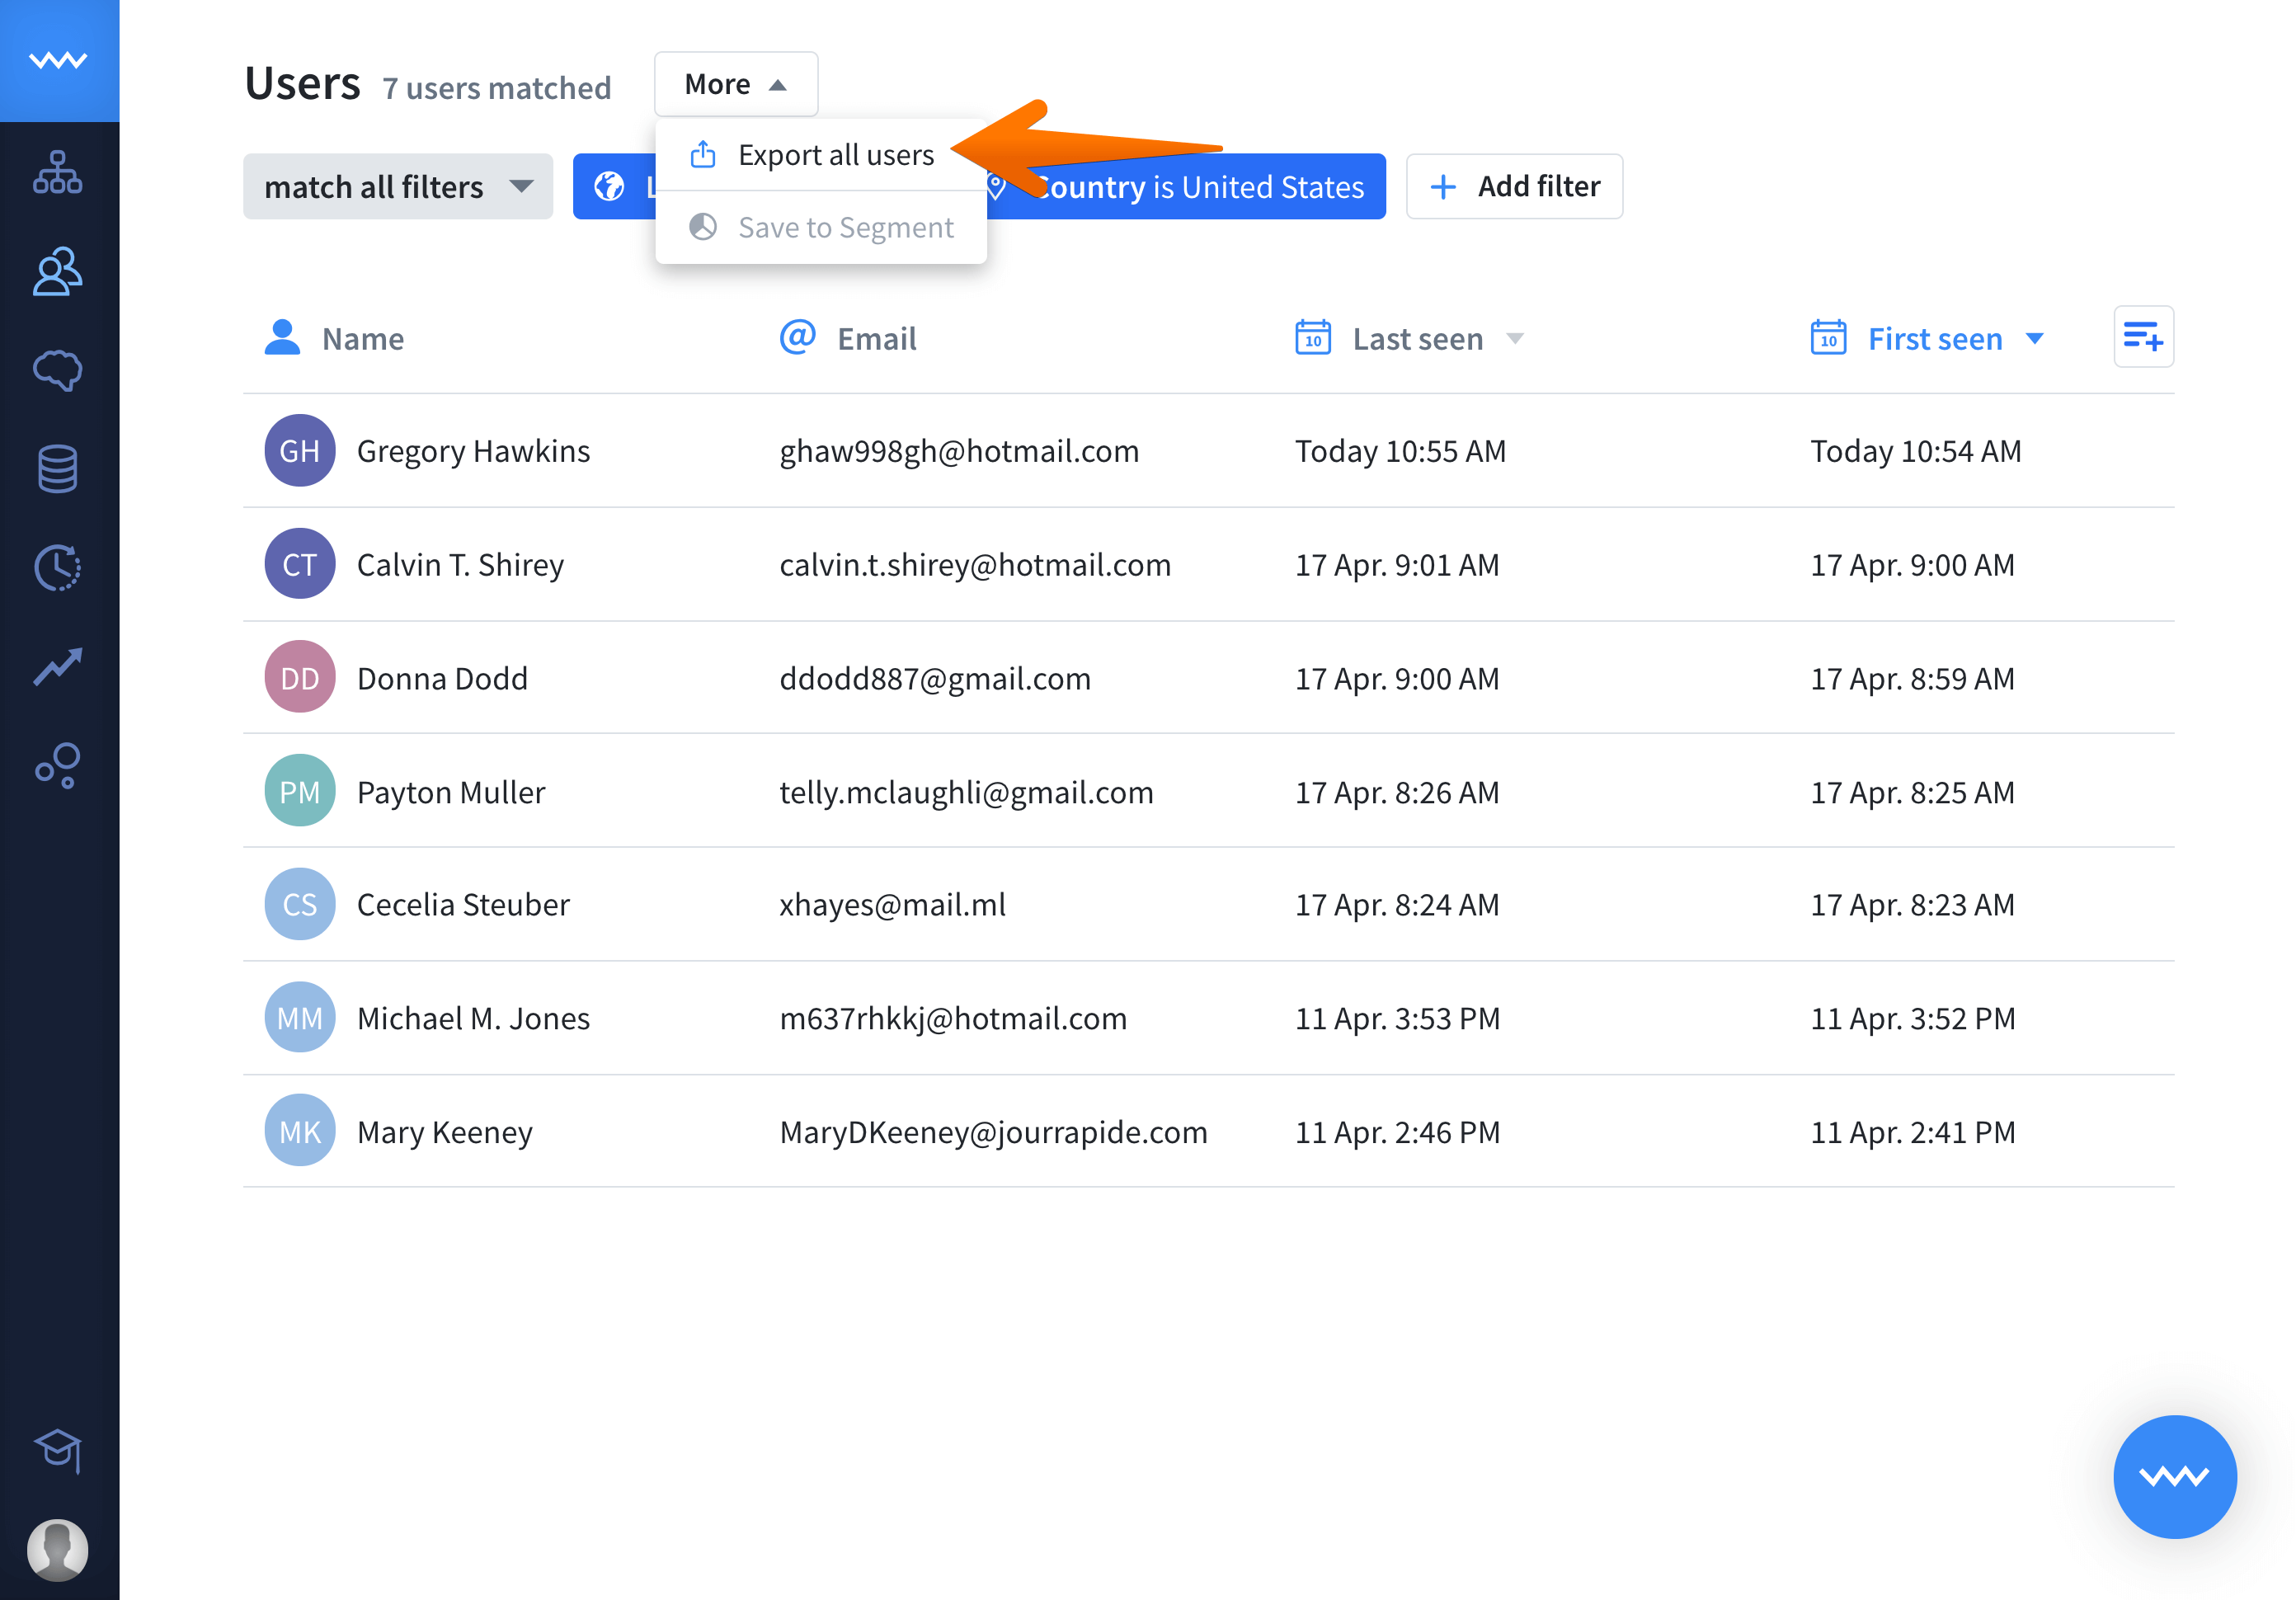
-
Now you will see your available segments. Choose one or more segments to add users to. Hit confirm when you’re ready.
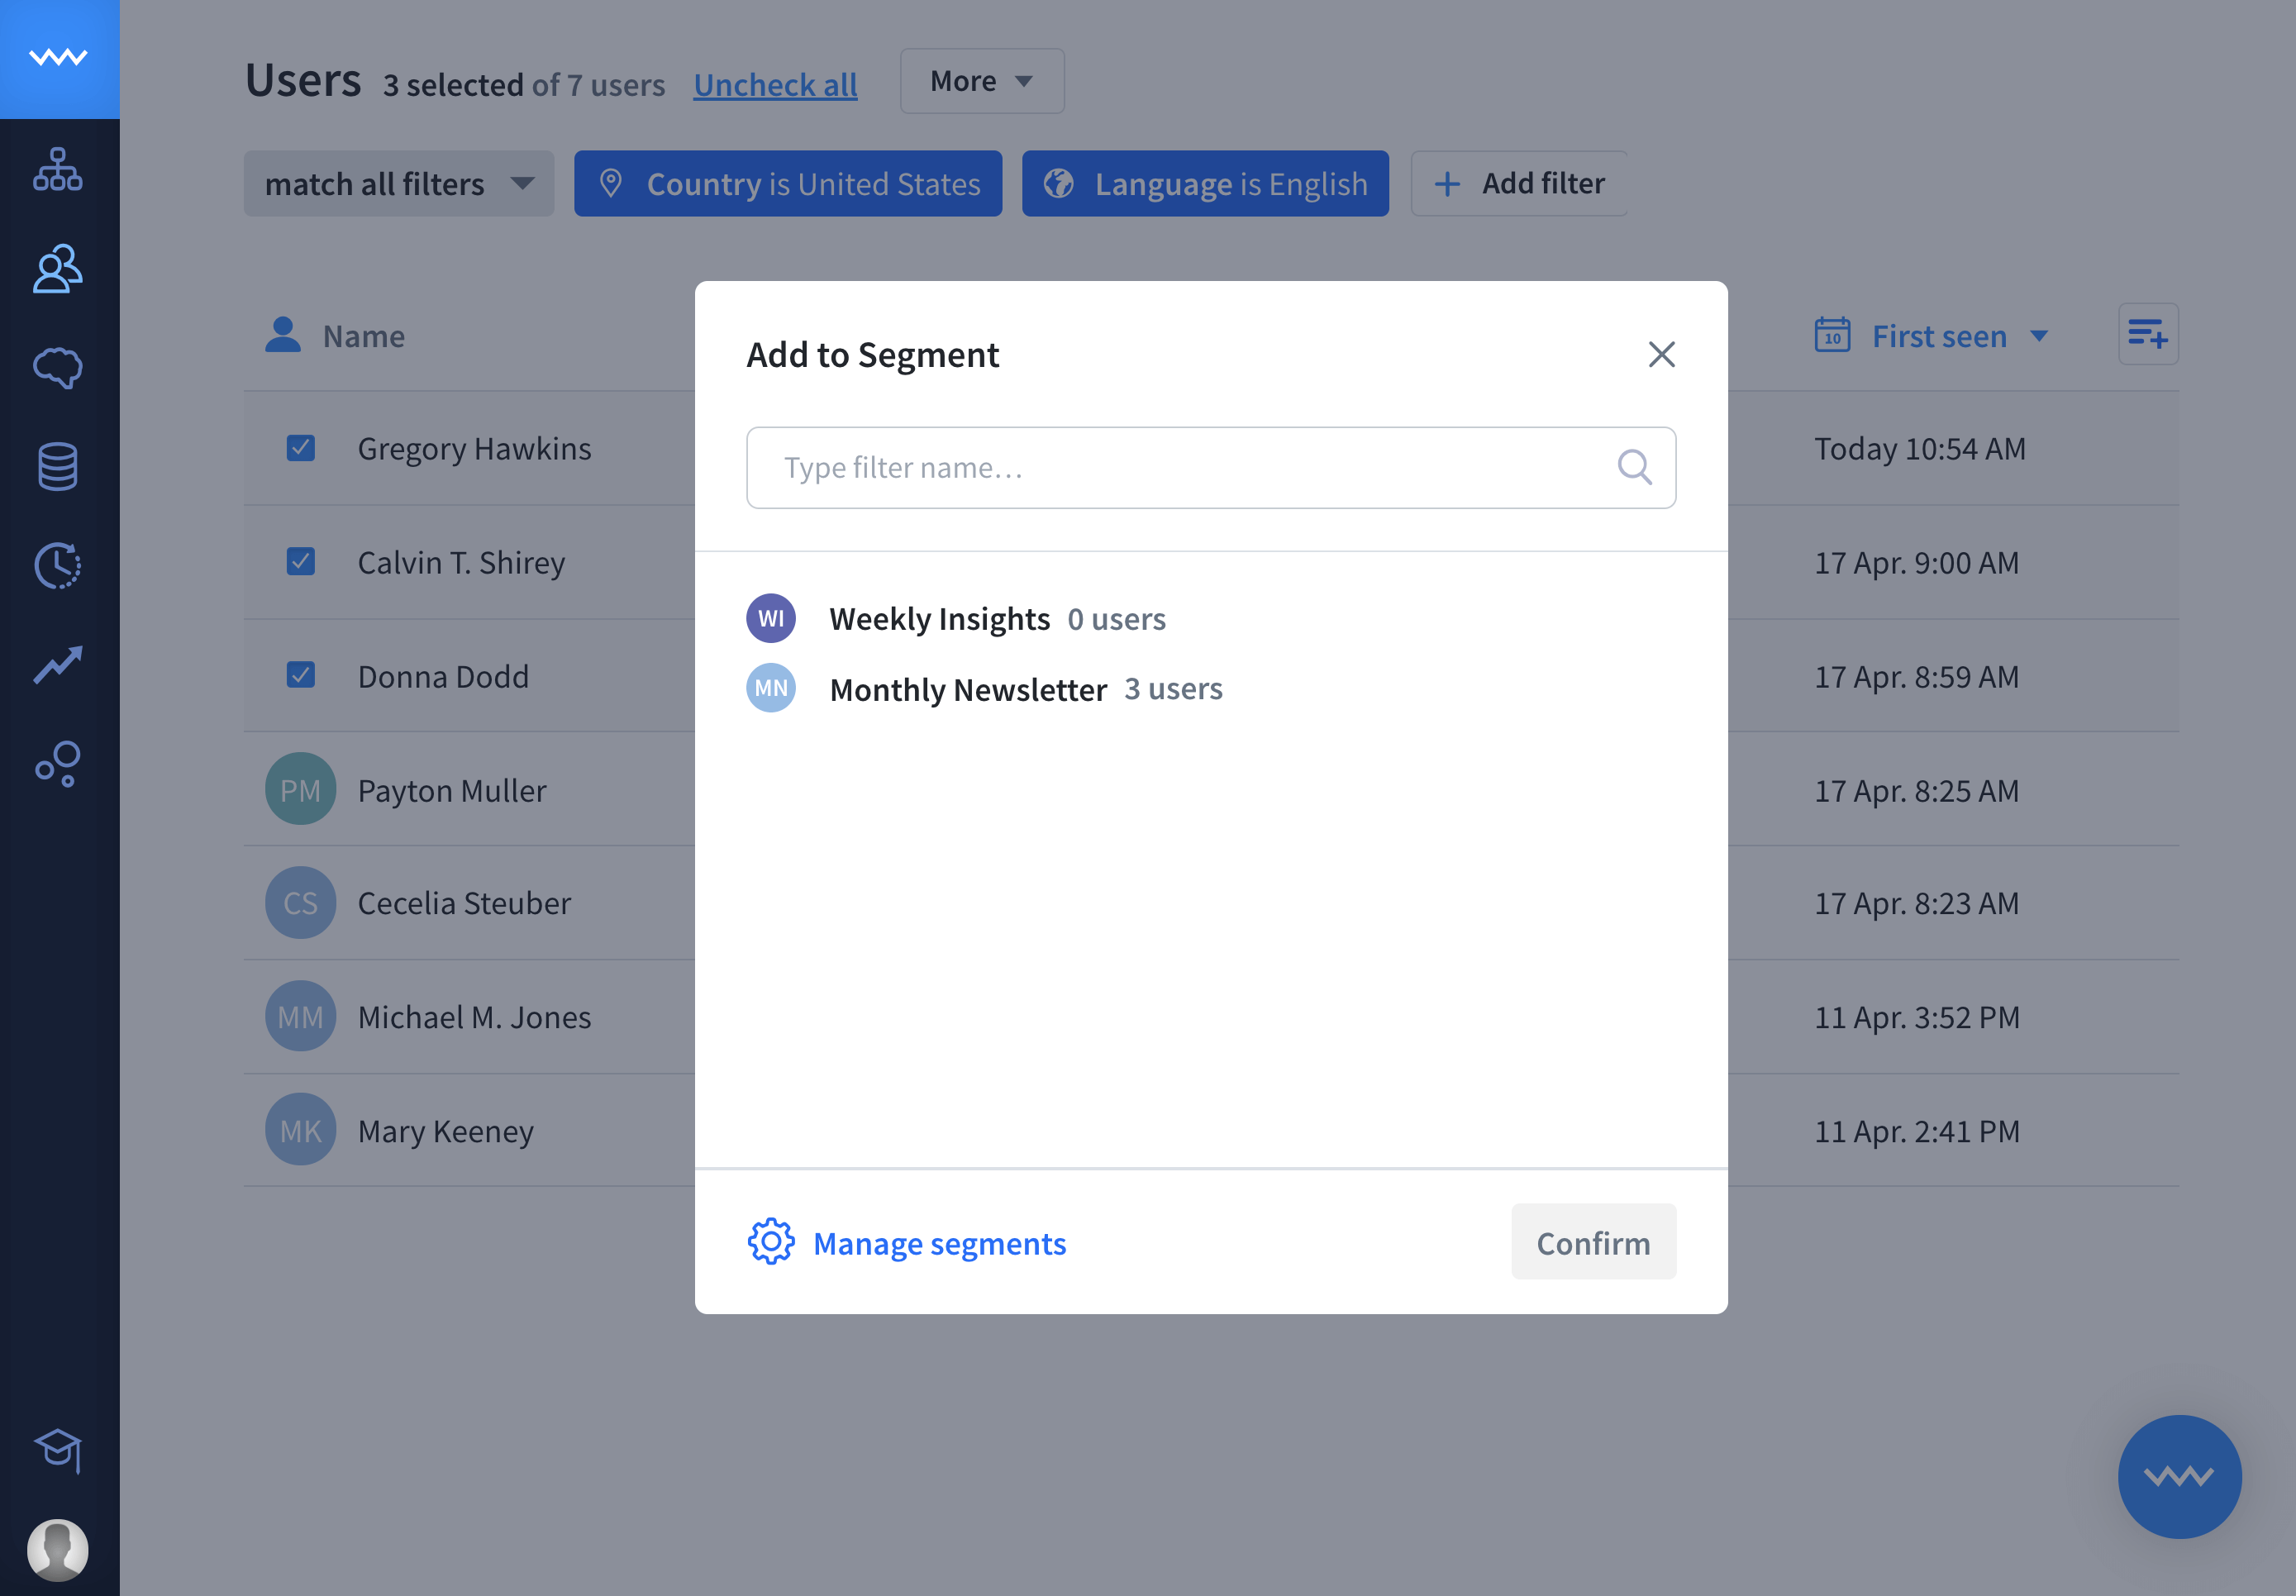
-
You added first users to your segments. Great job!
Export users
It is also possible to export user lists to use them with external tools and applications. The list is exported as .CSV file and can contain all or selected users or a whole segment.
-
When all the users you want are selected, hit
more.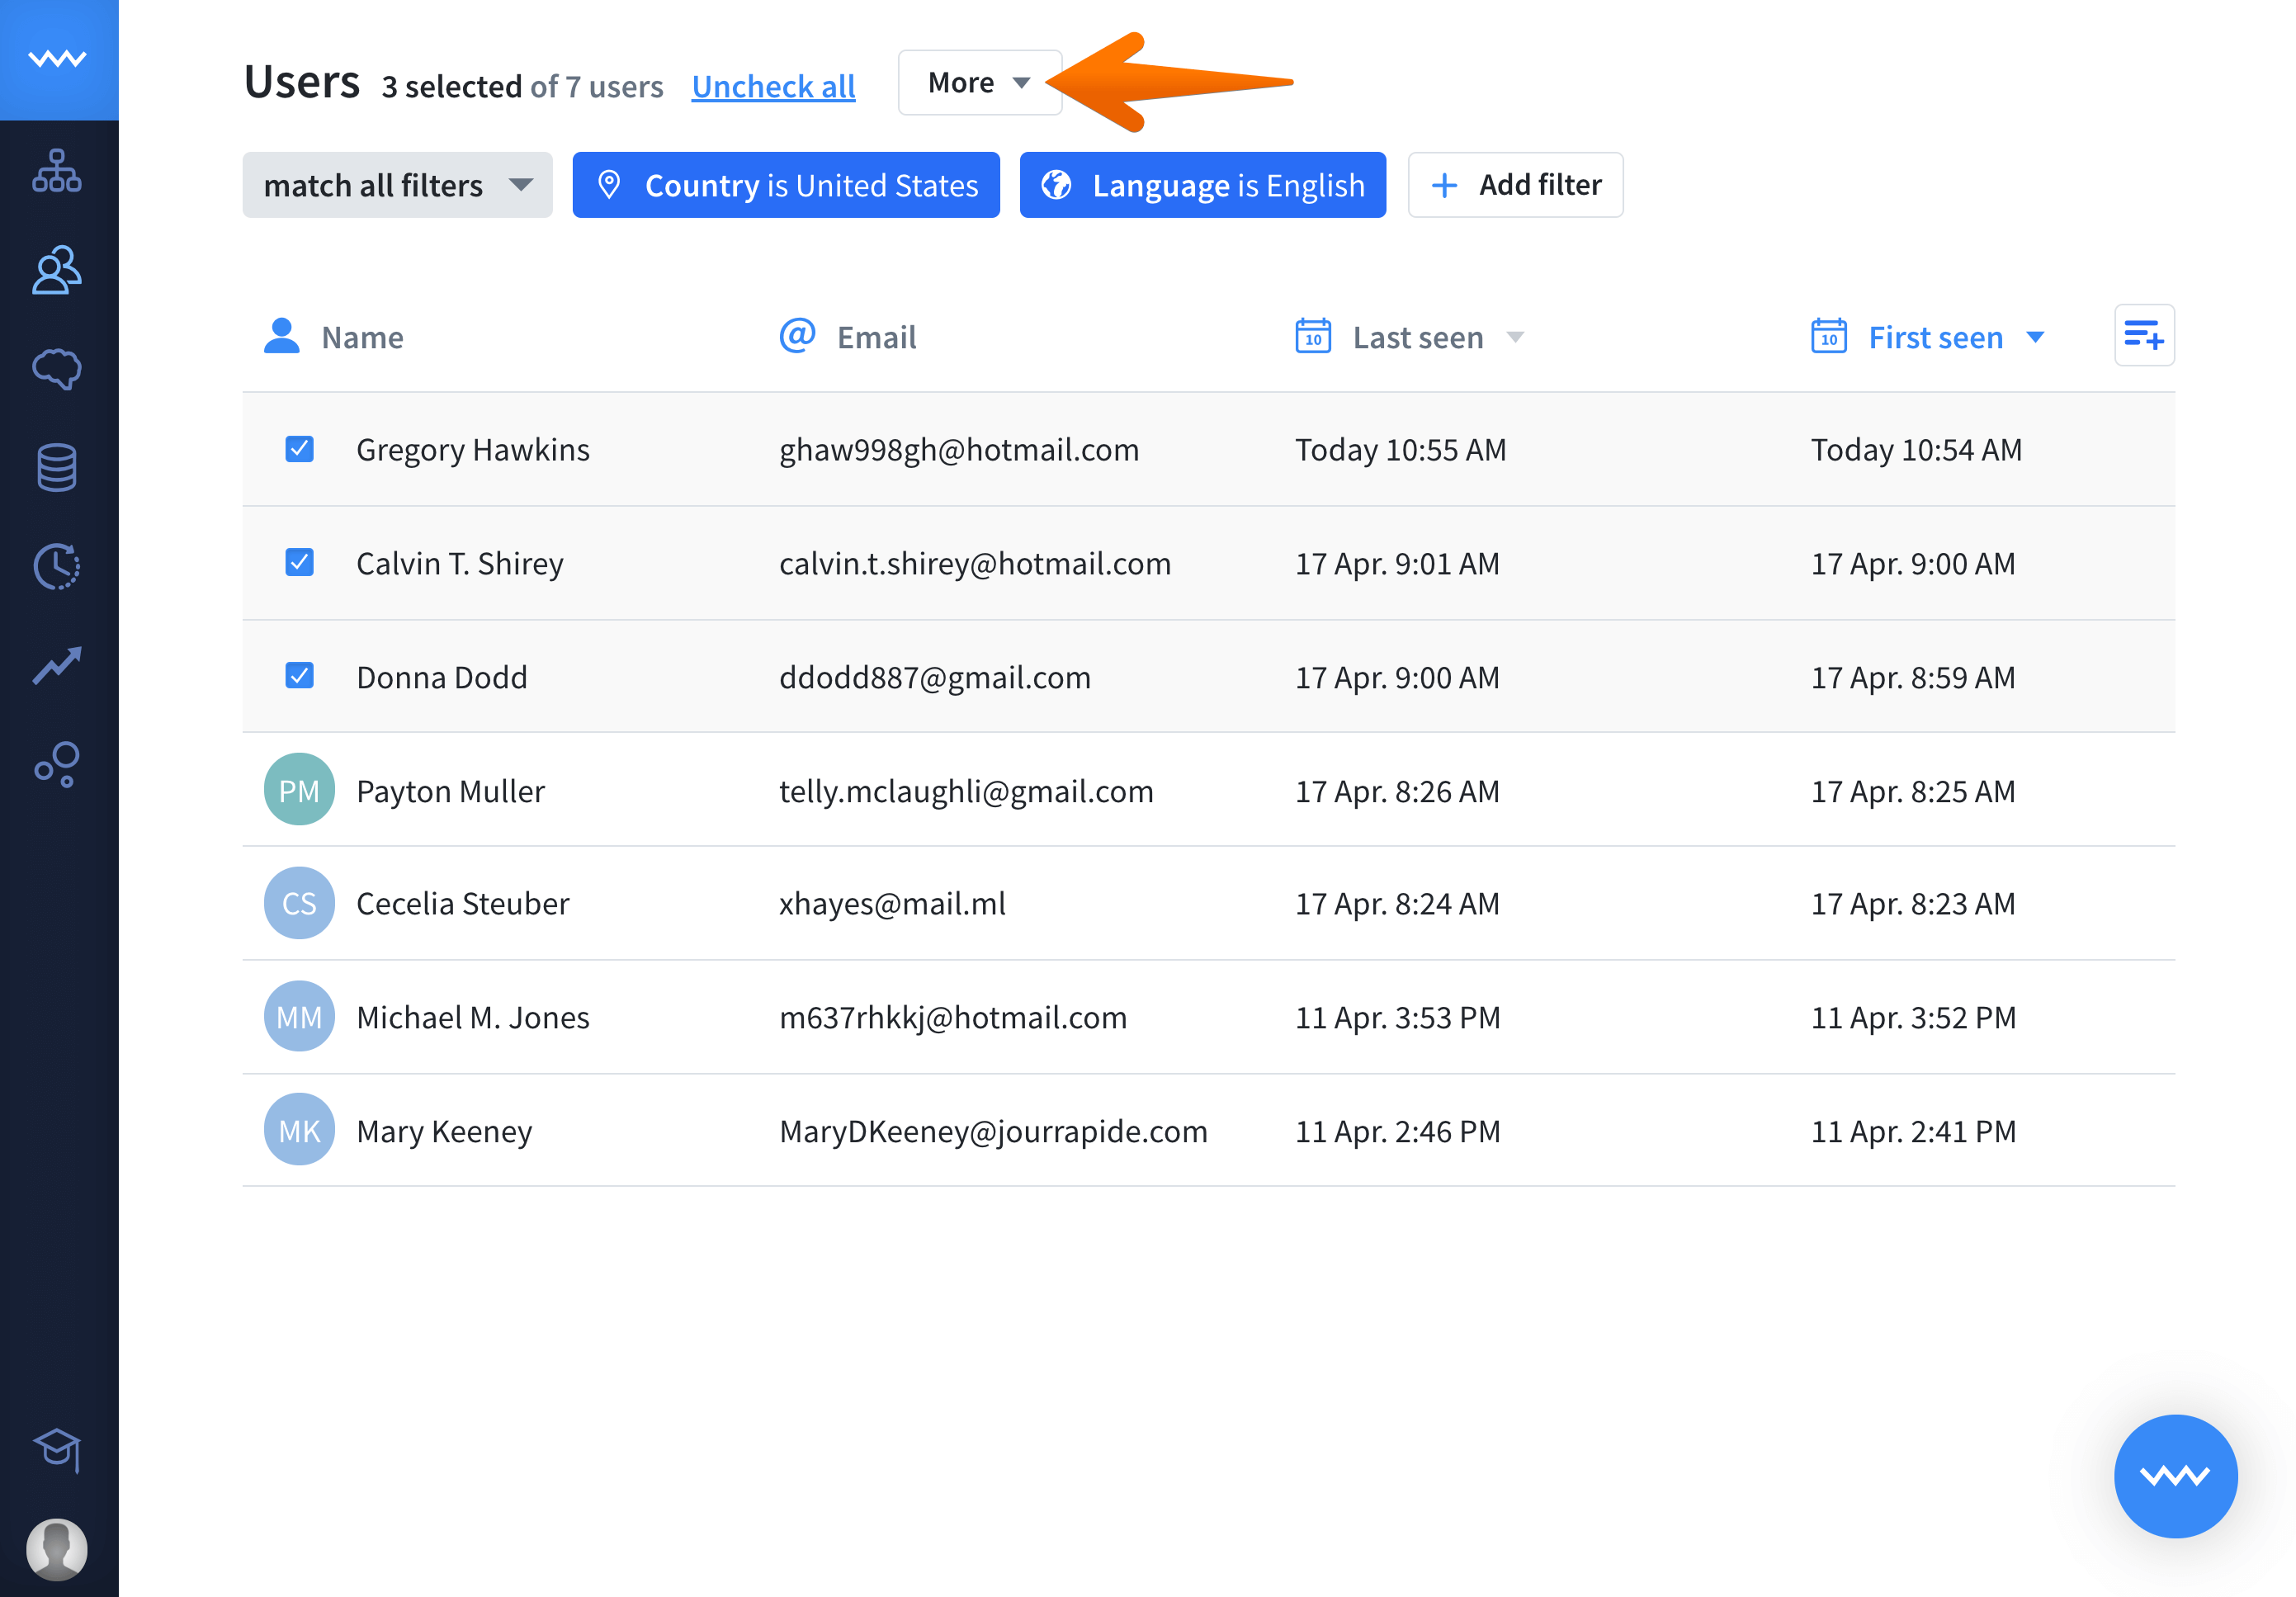
-
Choose
export selected usersoption.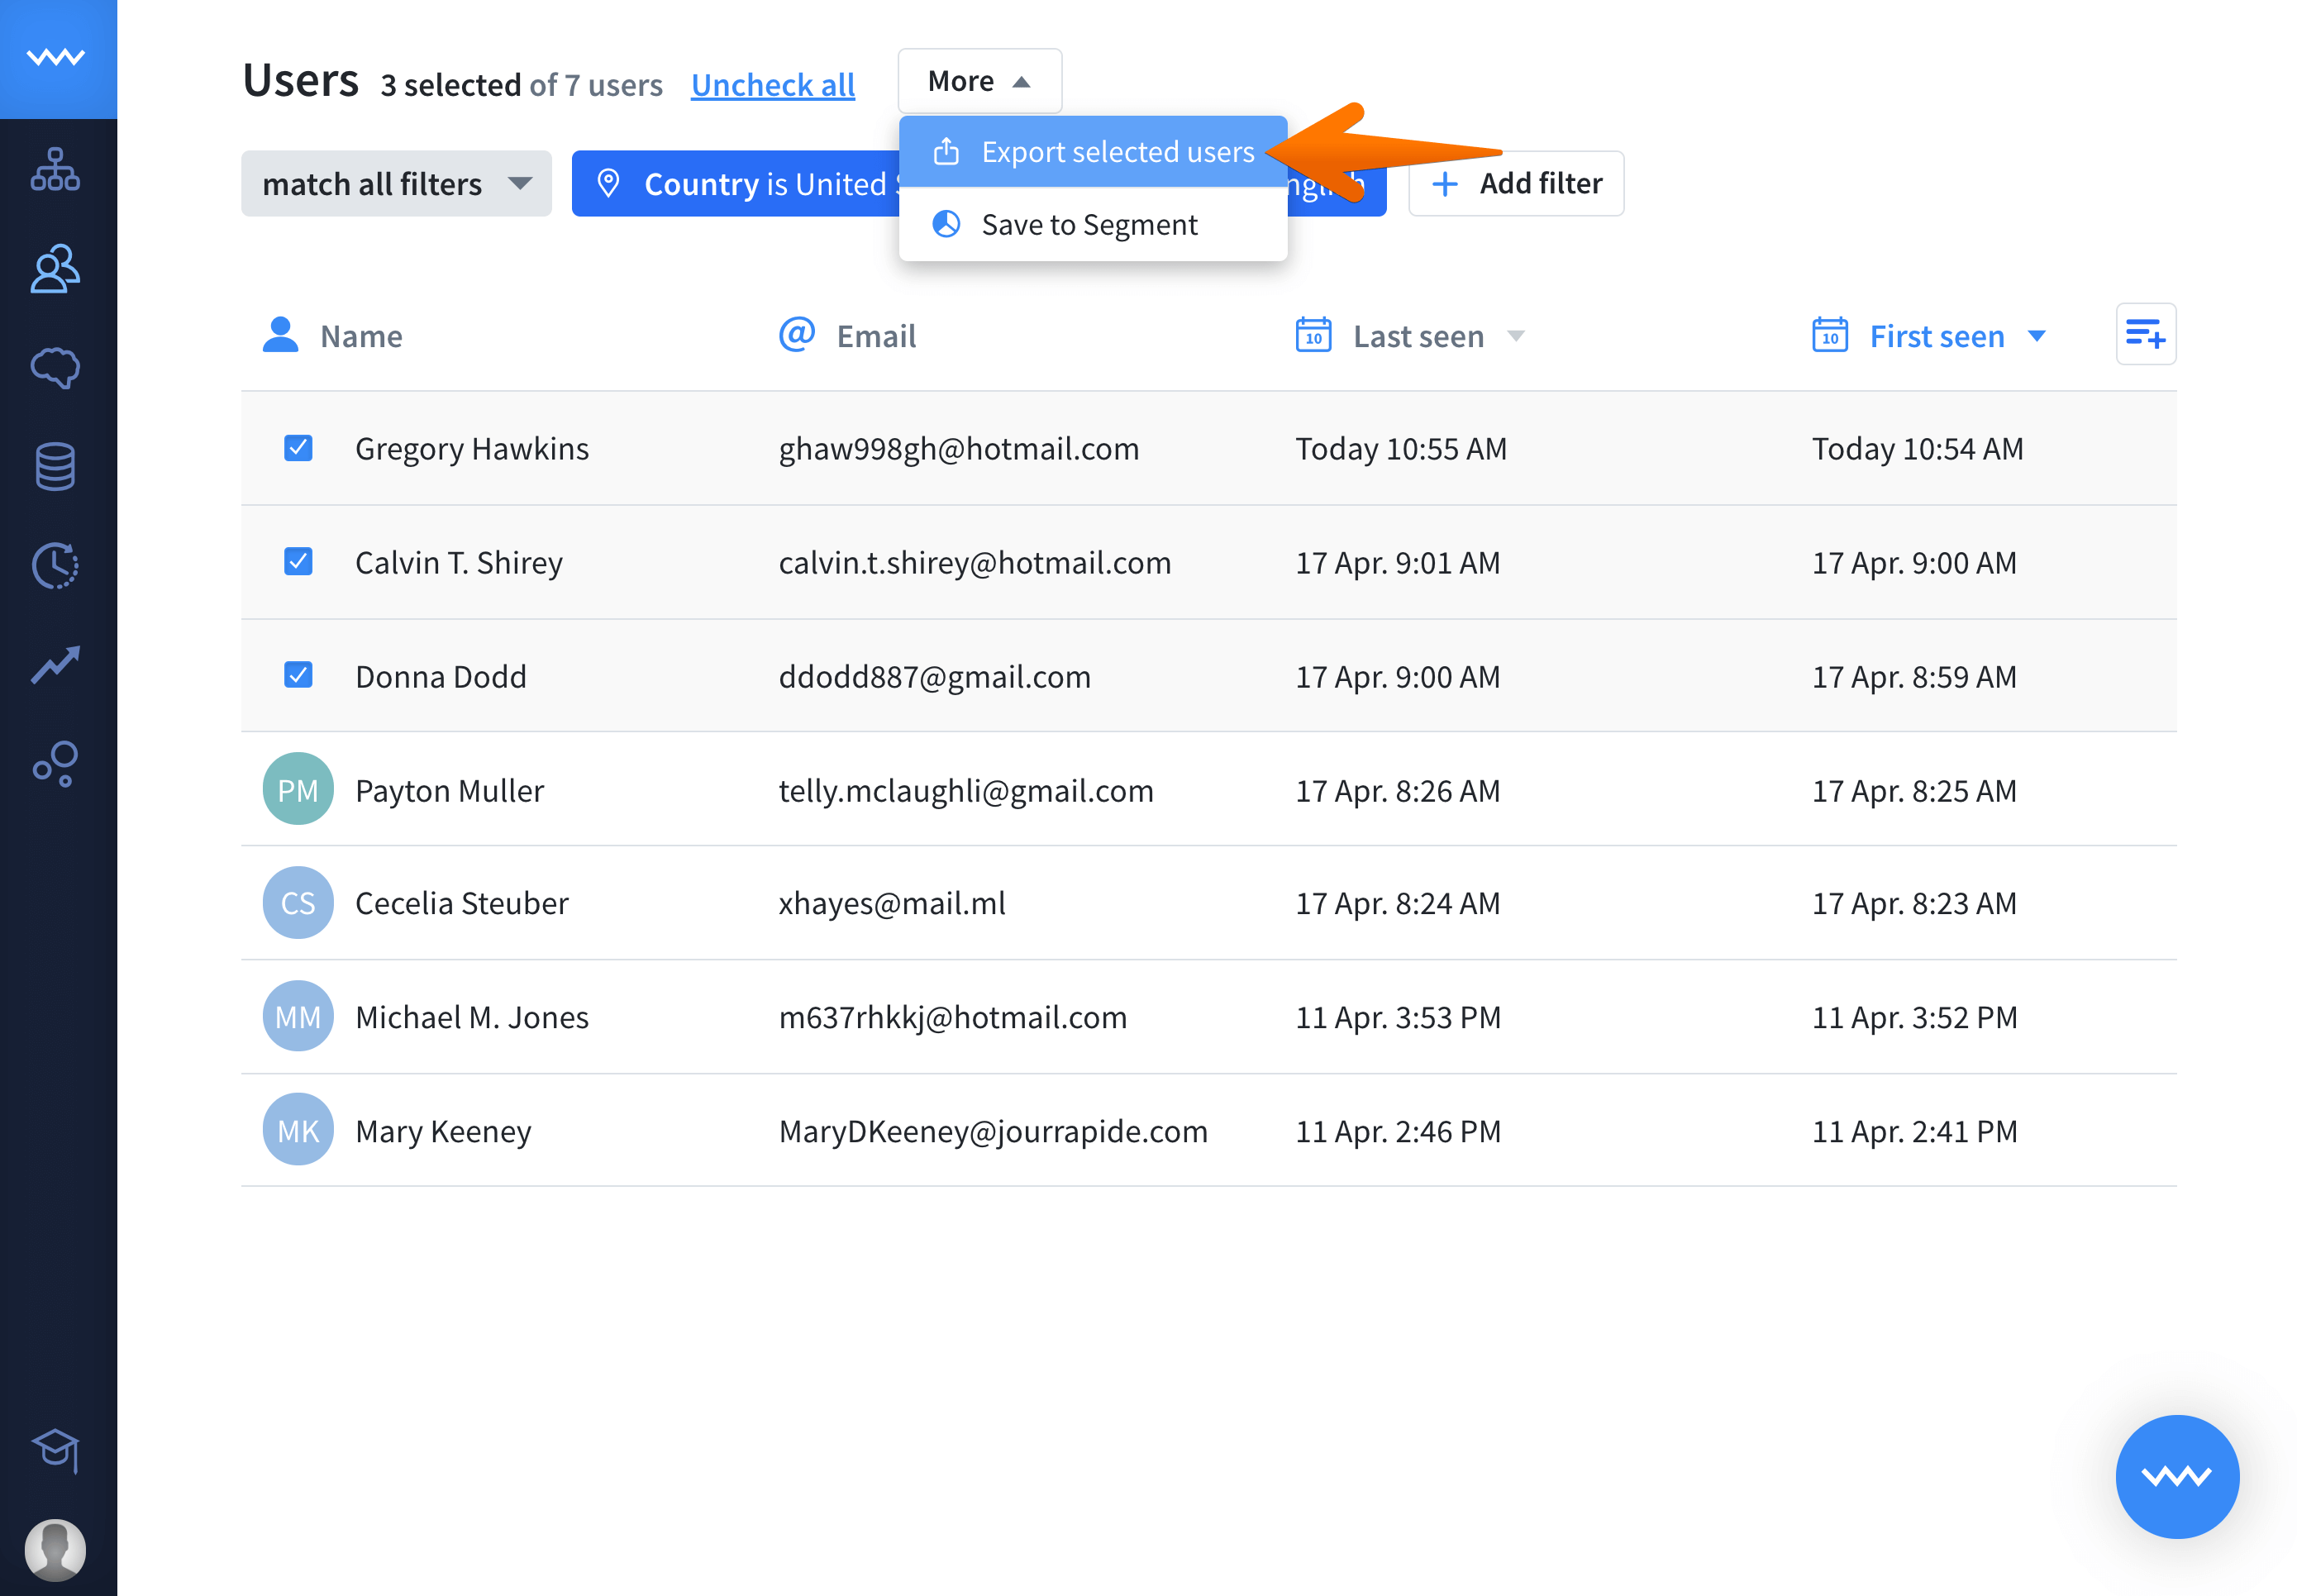
-
Save the
.CSVfile on your hard drive.
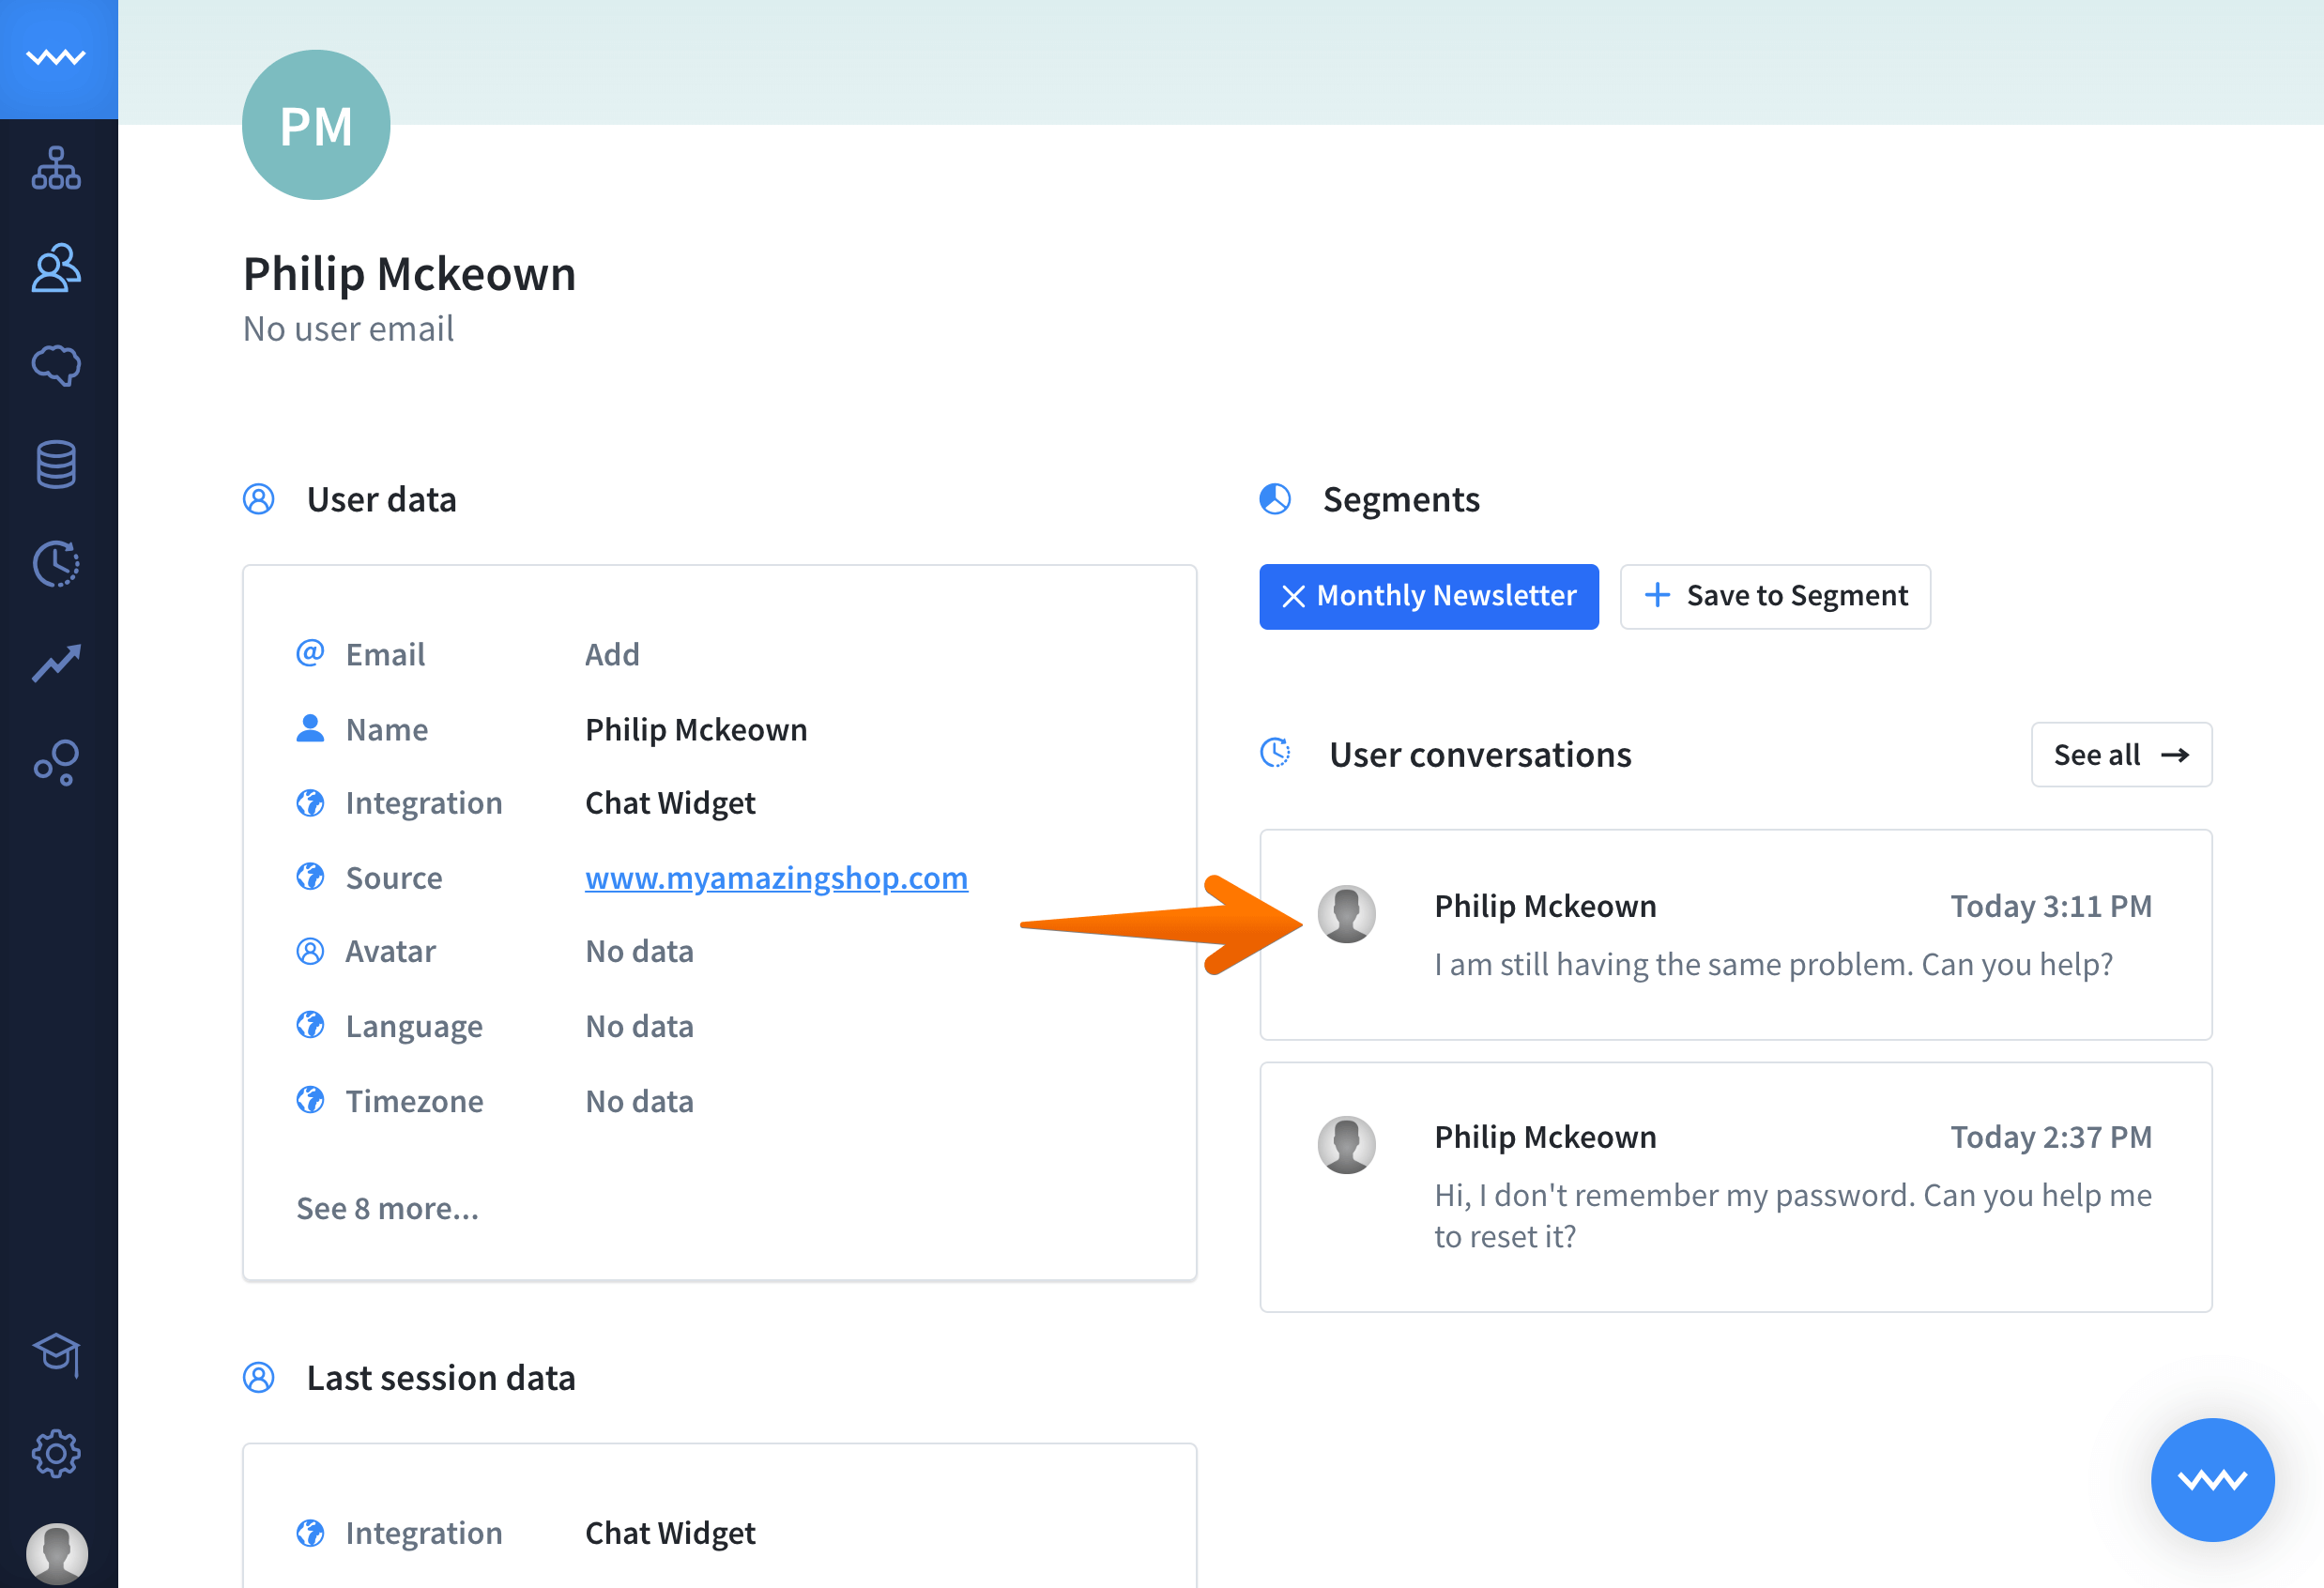
See user details
Click any user to see the detailed view. On the top of the screen you’ll find the name and the main address of the user. Moreover you can view user data, last session data, segments and user chats.
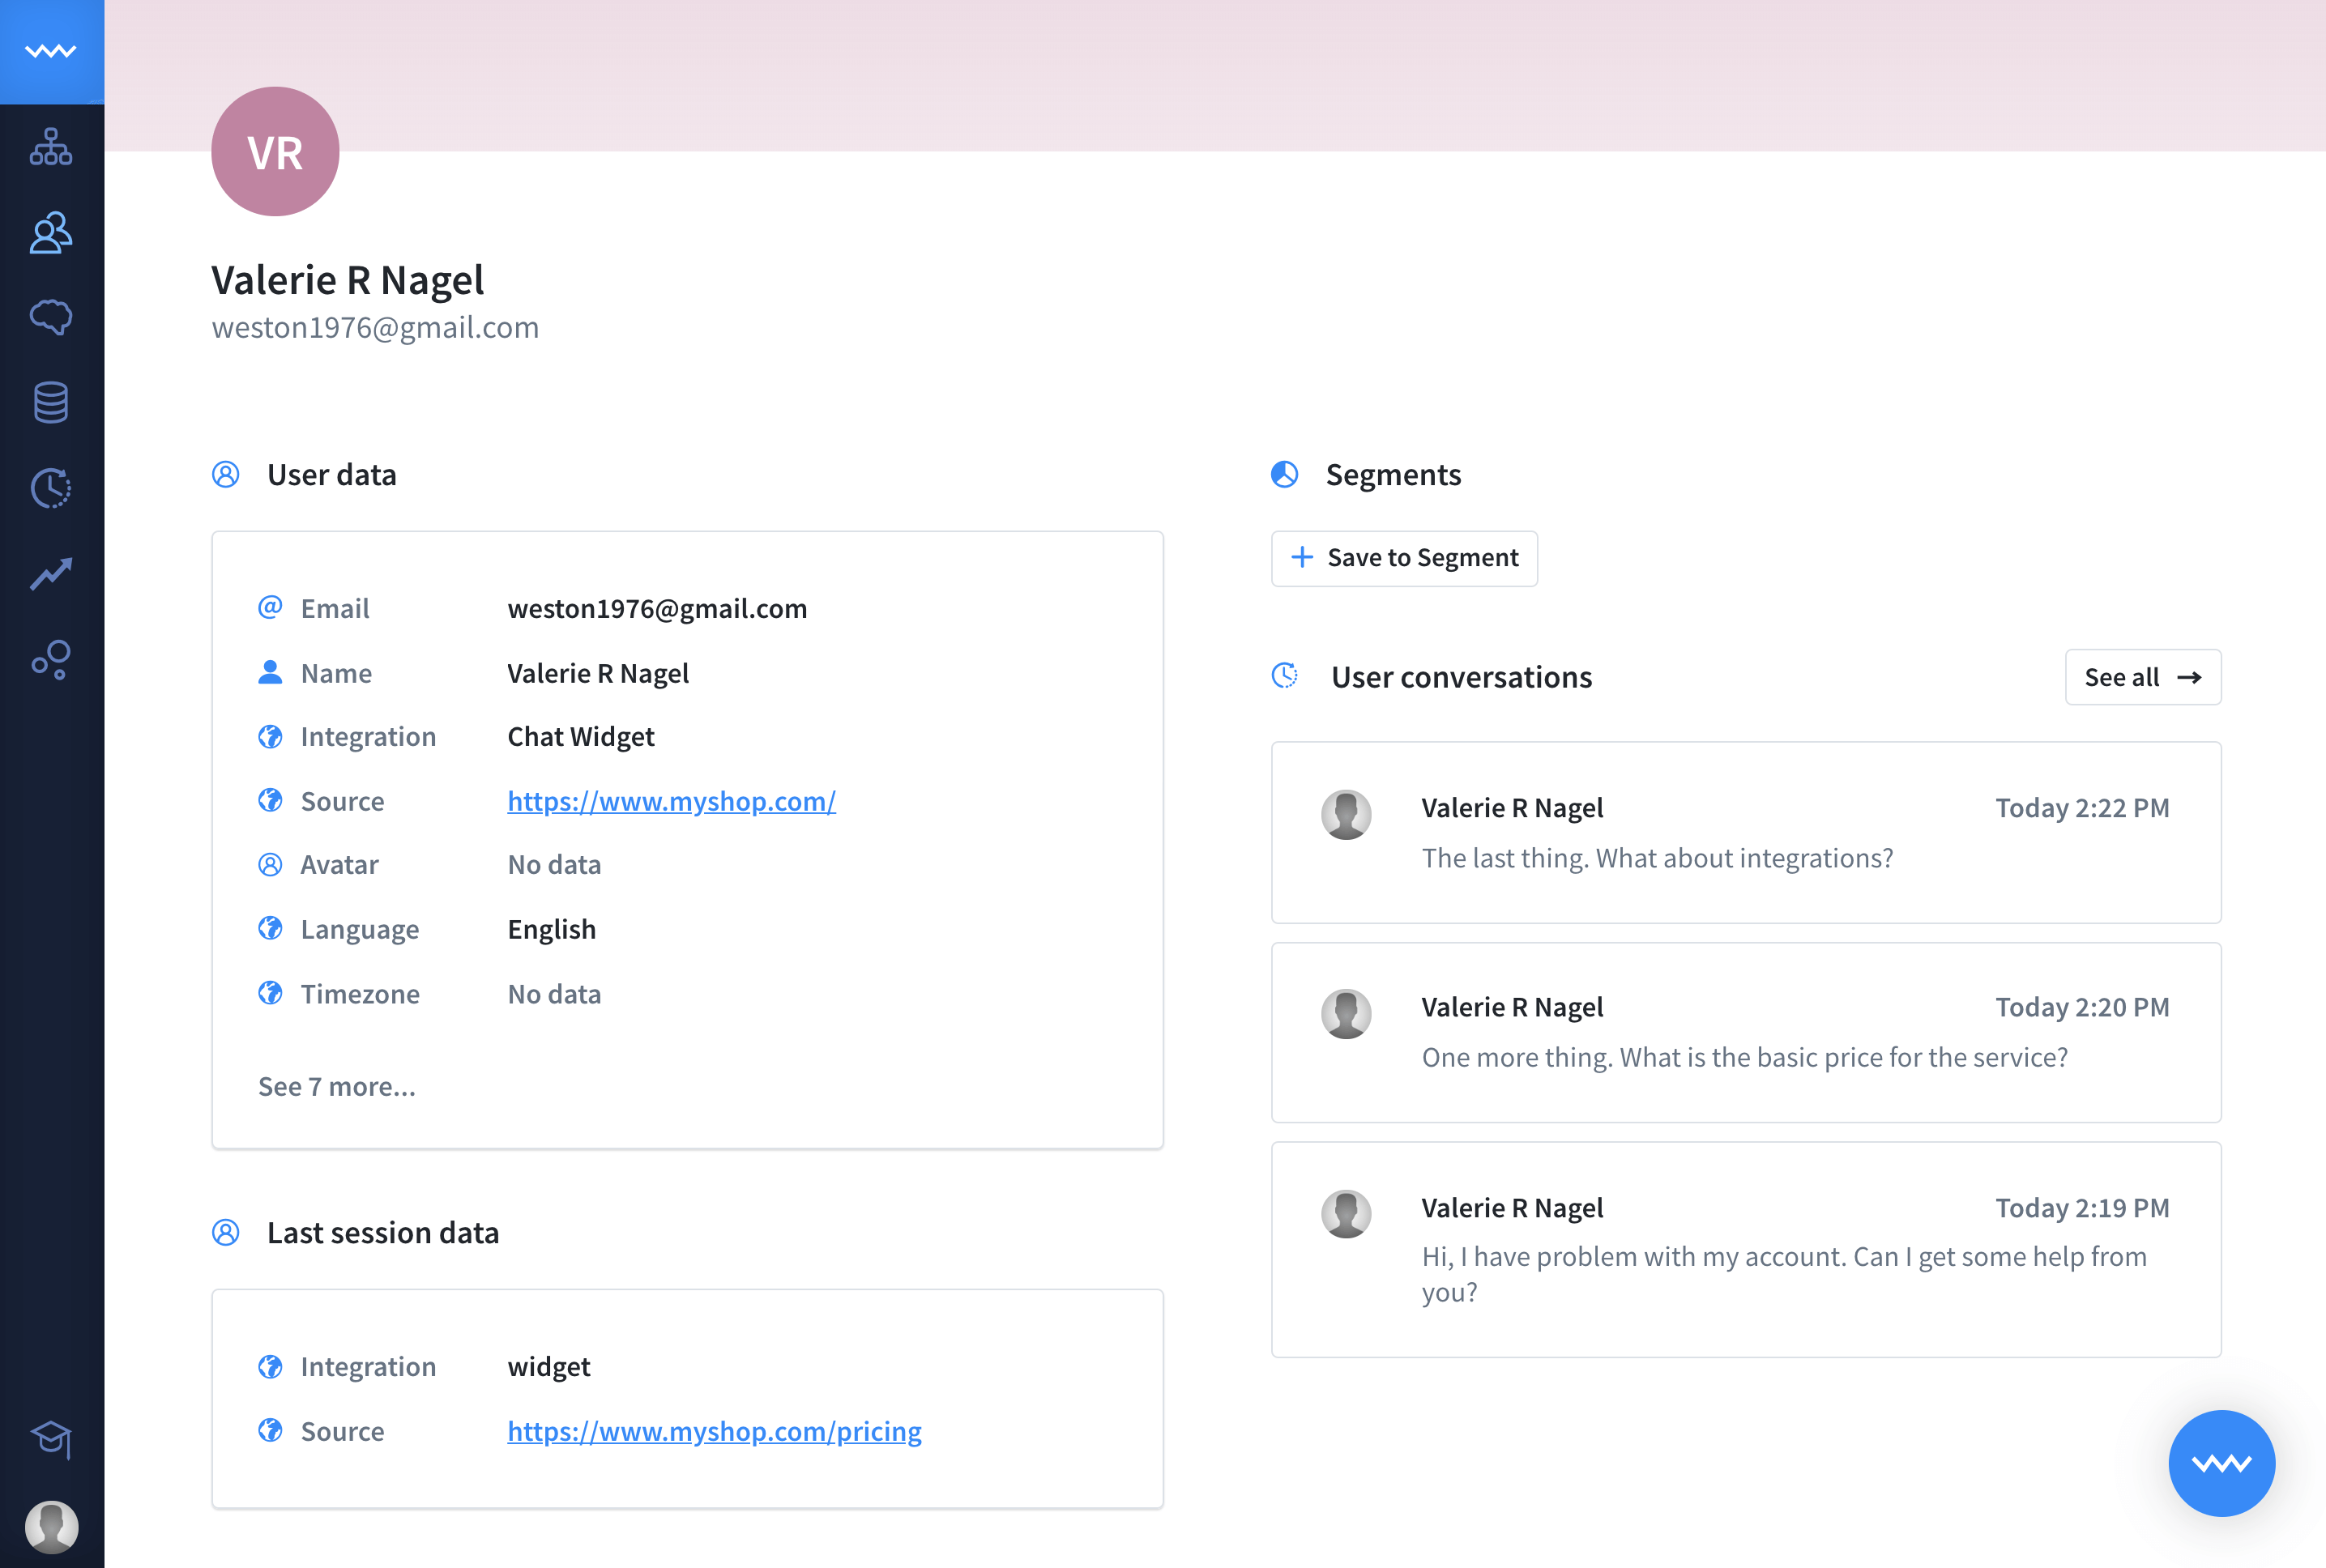
User data
User data is the full list of all default data collected. Some of the user details, such as name and email can be modified or removed, if necessary. In the main view, you will see the main user details such as:
-
Email
-
Name
-
Integration
-
Source
-
Avatar
-
Language
-
Timezone
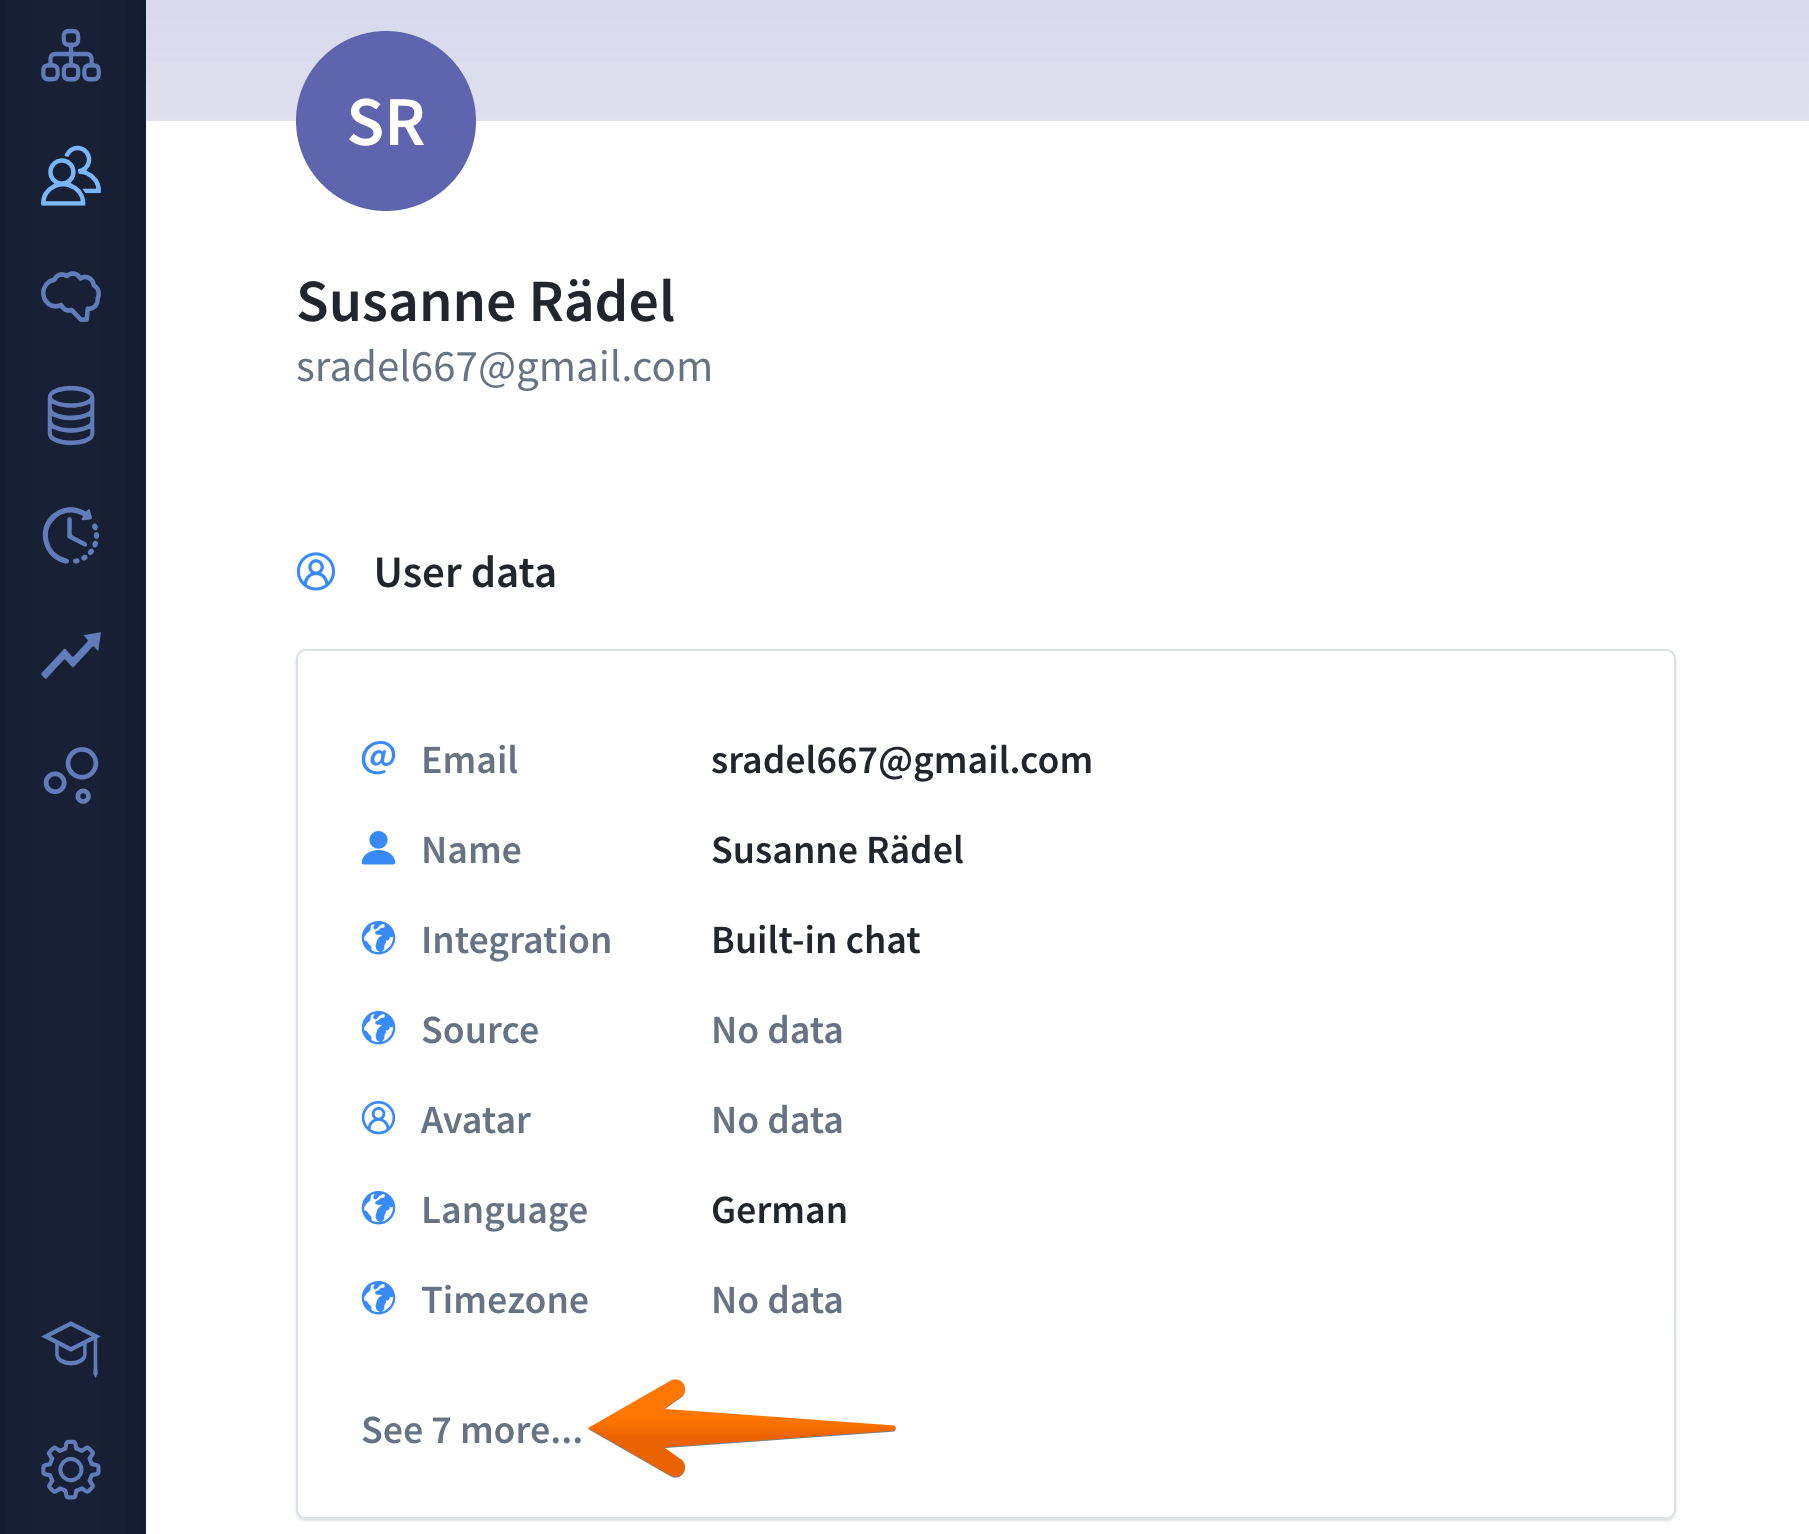
To open the full list of the user details, click see more. Now you will be able to see all information collected about this person by the bot.
Last session data
Below user data, you can data collected during the last session. In this section, you can see what has changed or happened most recently. E.g., if you have a sales bot, having a quick look at this section can help you to see if what was the last purchase of a client without checking the archives.
You can easily update and remove some of the user data. To do so, hover over the data that you want to change and double click. Now you should be able to edit the value. Update it and hit enter to save it. Easy, right?
Segments
Segments allow organizing users into exportable lists. That will help you to find groups of clients that you want to address in your future marketing campaigns or actions.
In this section, you can add users to existing segments or remove them from the lists by clicking the x.
User chats
Check user chats to see transcripts of all past chats between the bot and the user. When you click a chat, it will automatically redirect you to the Archives section.