Zapier doesn’t require any coding skills and allows you to build your own customized integrations in just a few minutes.
With Zapier you can connect your chatbot with apps such as Gmail, Facebook, Trello and to automate repetitive tasks such as sending email, updating spreadsheets and more. The installation process takes just a few minutes so let’s get started!
In this example scenario, we’ll be creating a Zap that sends user information: name, email and phone number to an email after registration is successful. First, we need a bot scenario that collects this data. To gather information from users, it is recommended to use the [Ask a Question] (/help/bot-responses/ask-a-question/) Bot action. To send the email, we’ll use a ready to use Email Action App created by Zapier.
To complete this tutorial you need to have Zapier and ChatBot accounts:
Configuration
-
Go to www.zapier.com and log in to your account. Click on
Make a Zapbutton to start to create a new Zap.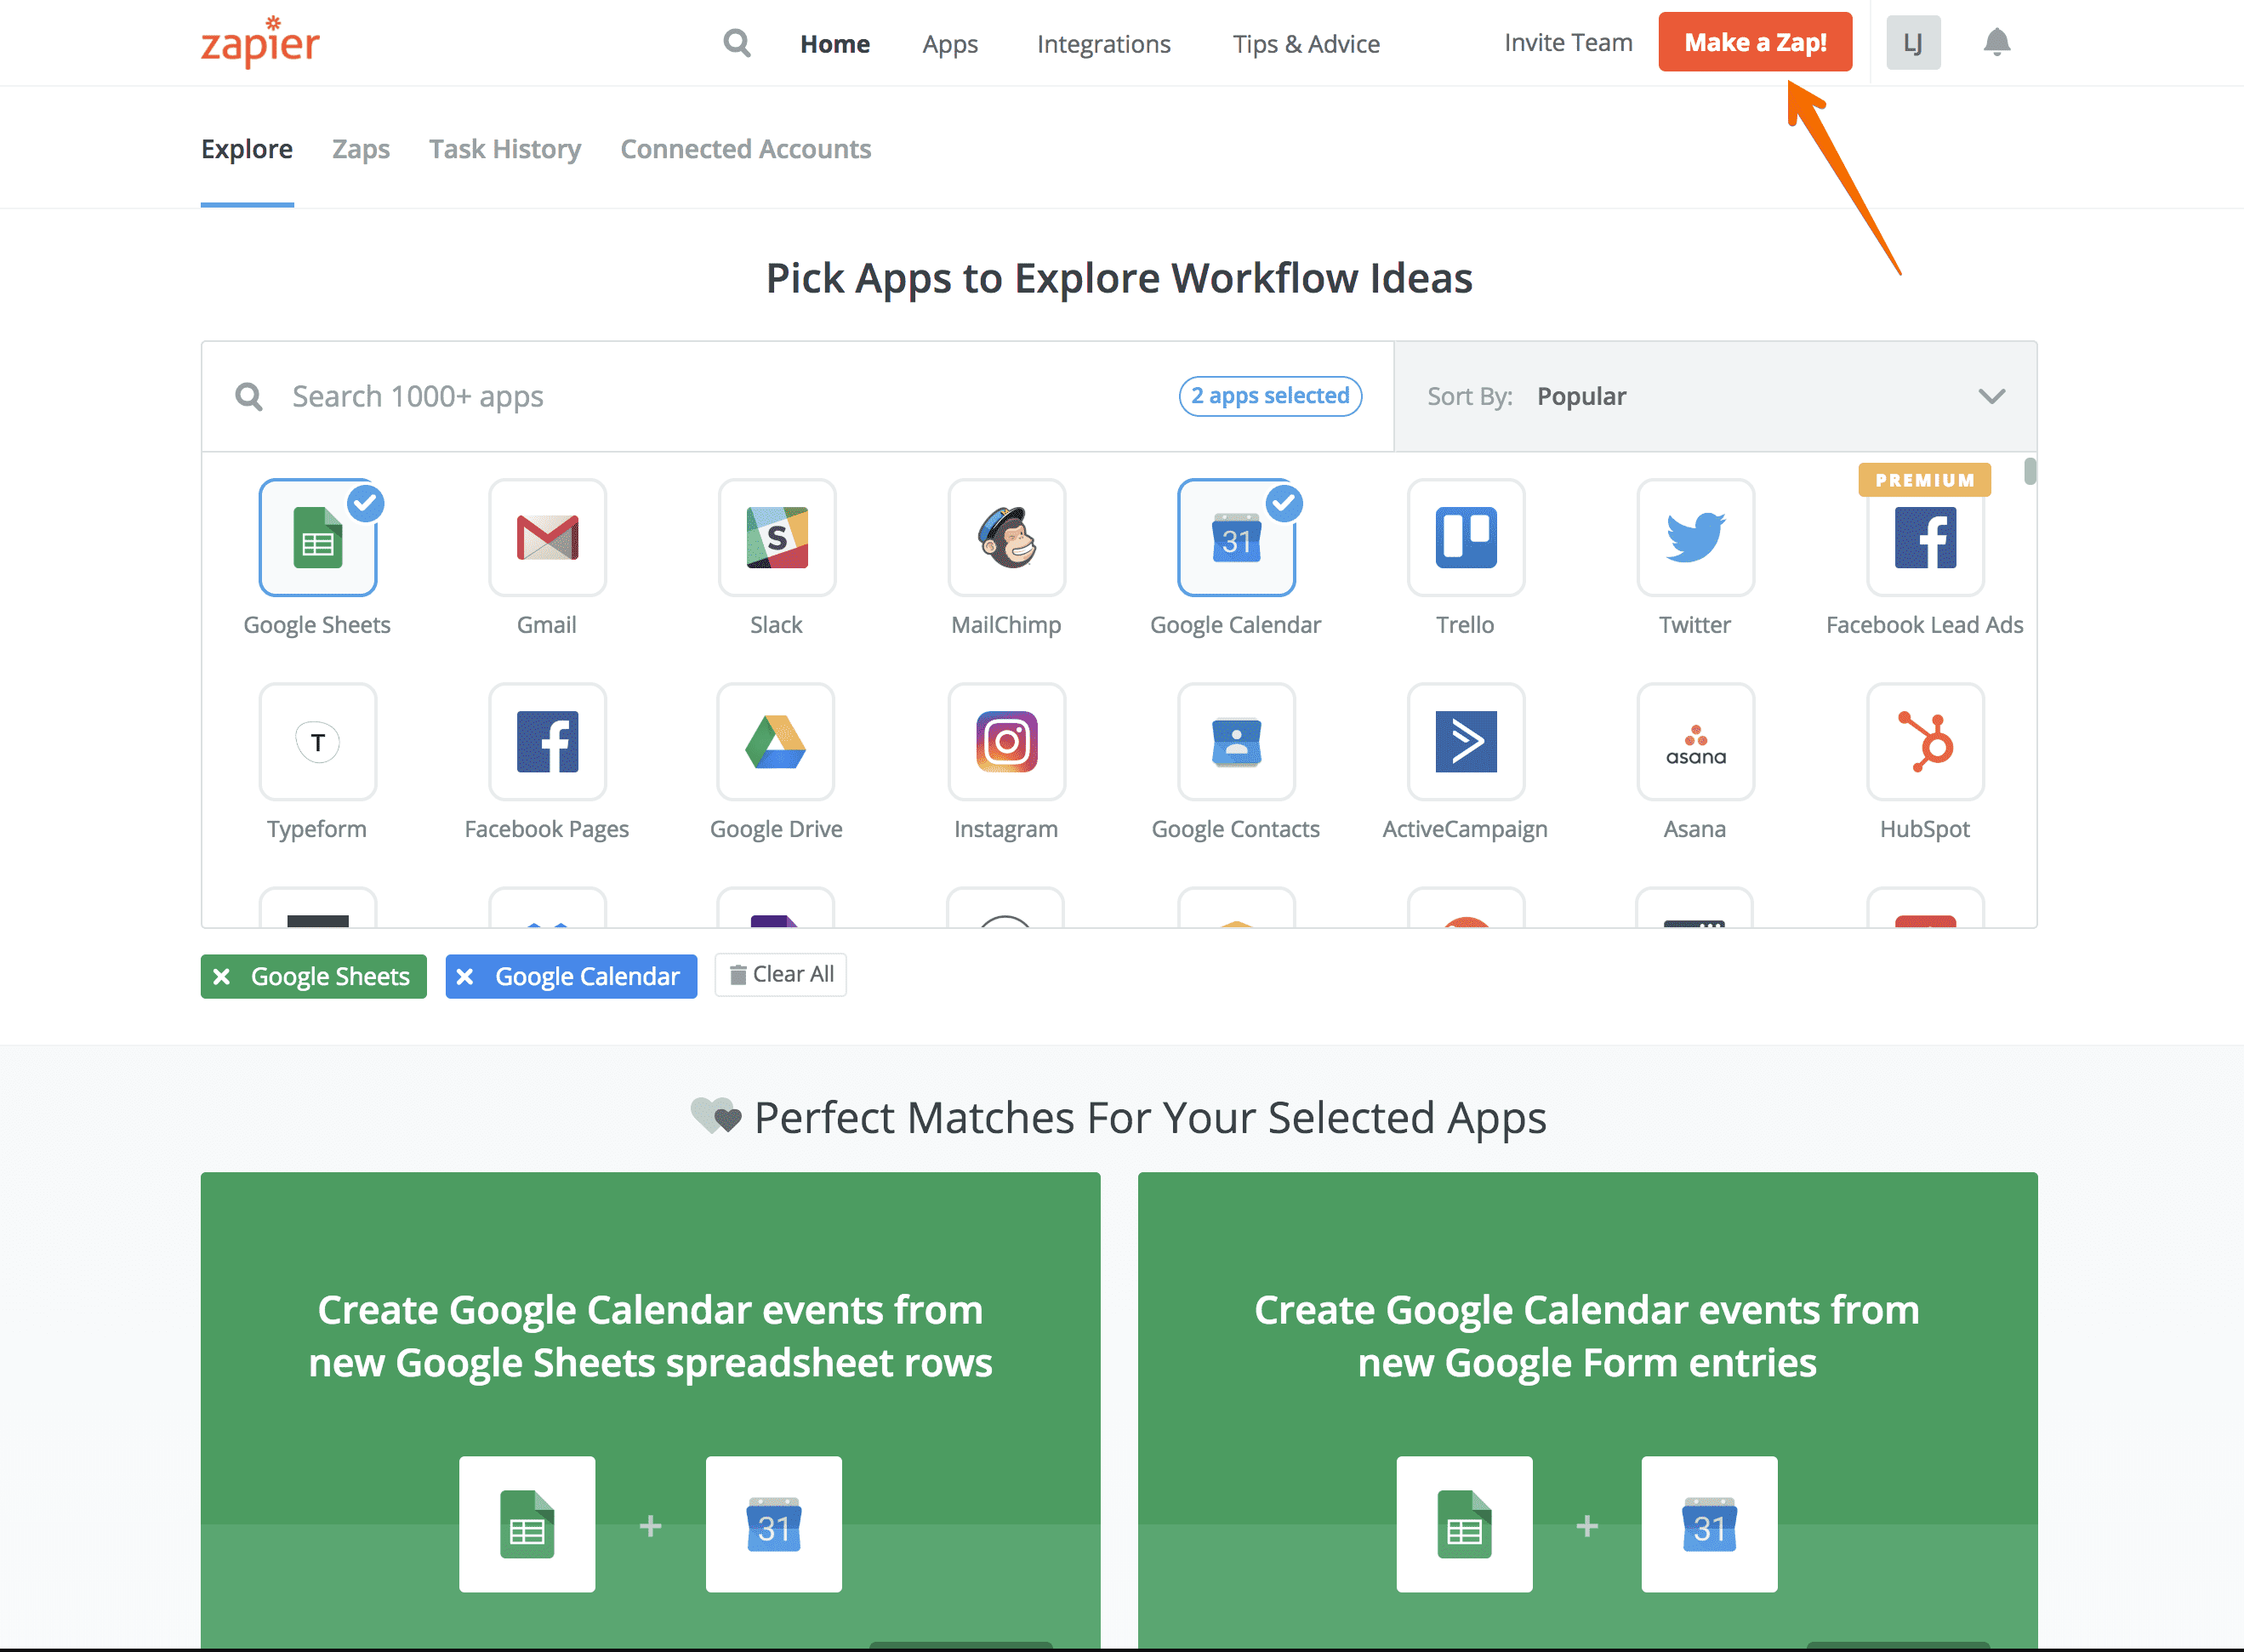
-
First, we need to choose a trigger app. Click on
Webhooks.
-
Select
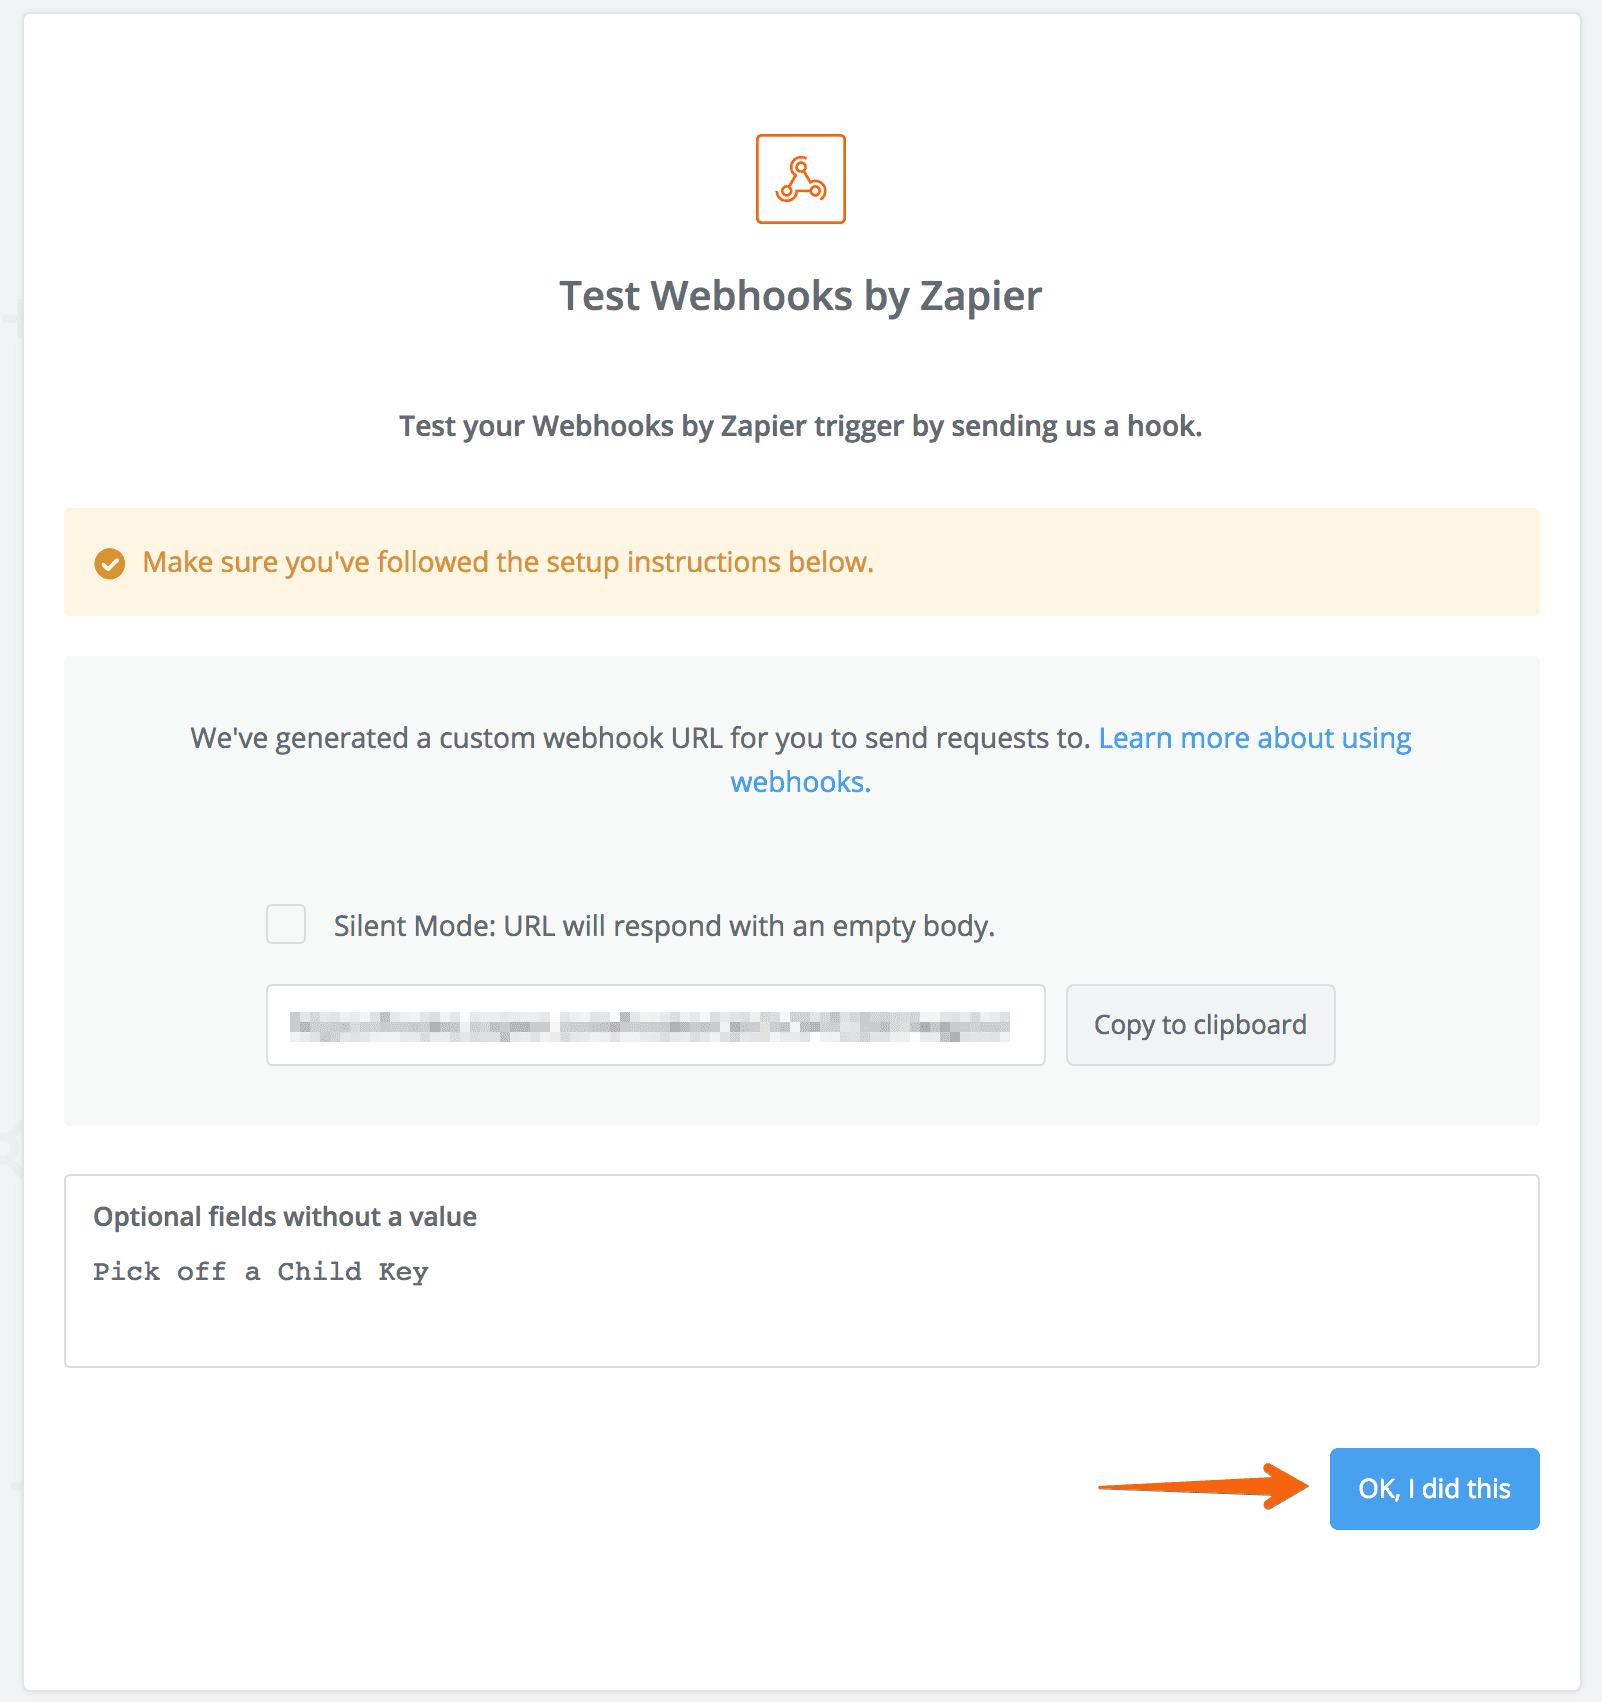
Catch Hookand clickSave + Continueto go to next steps.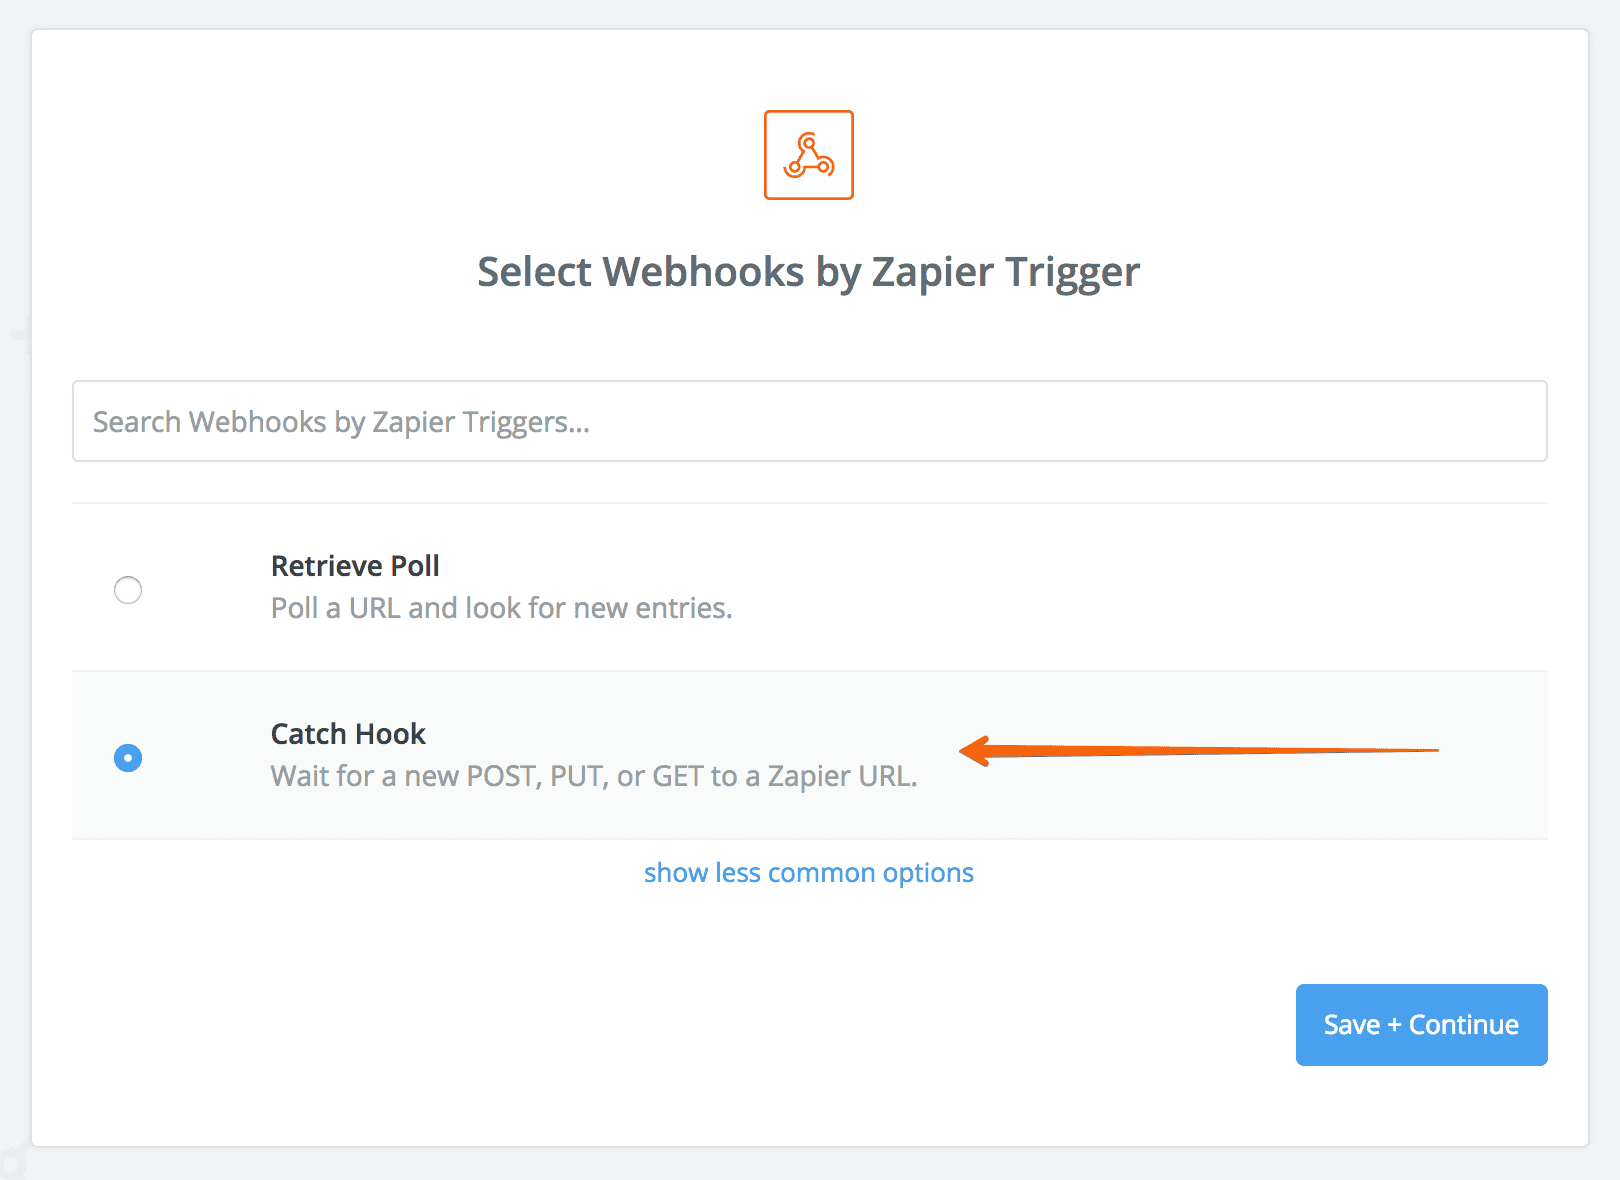
-
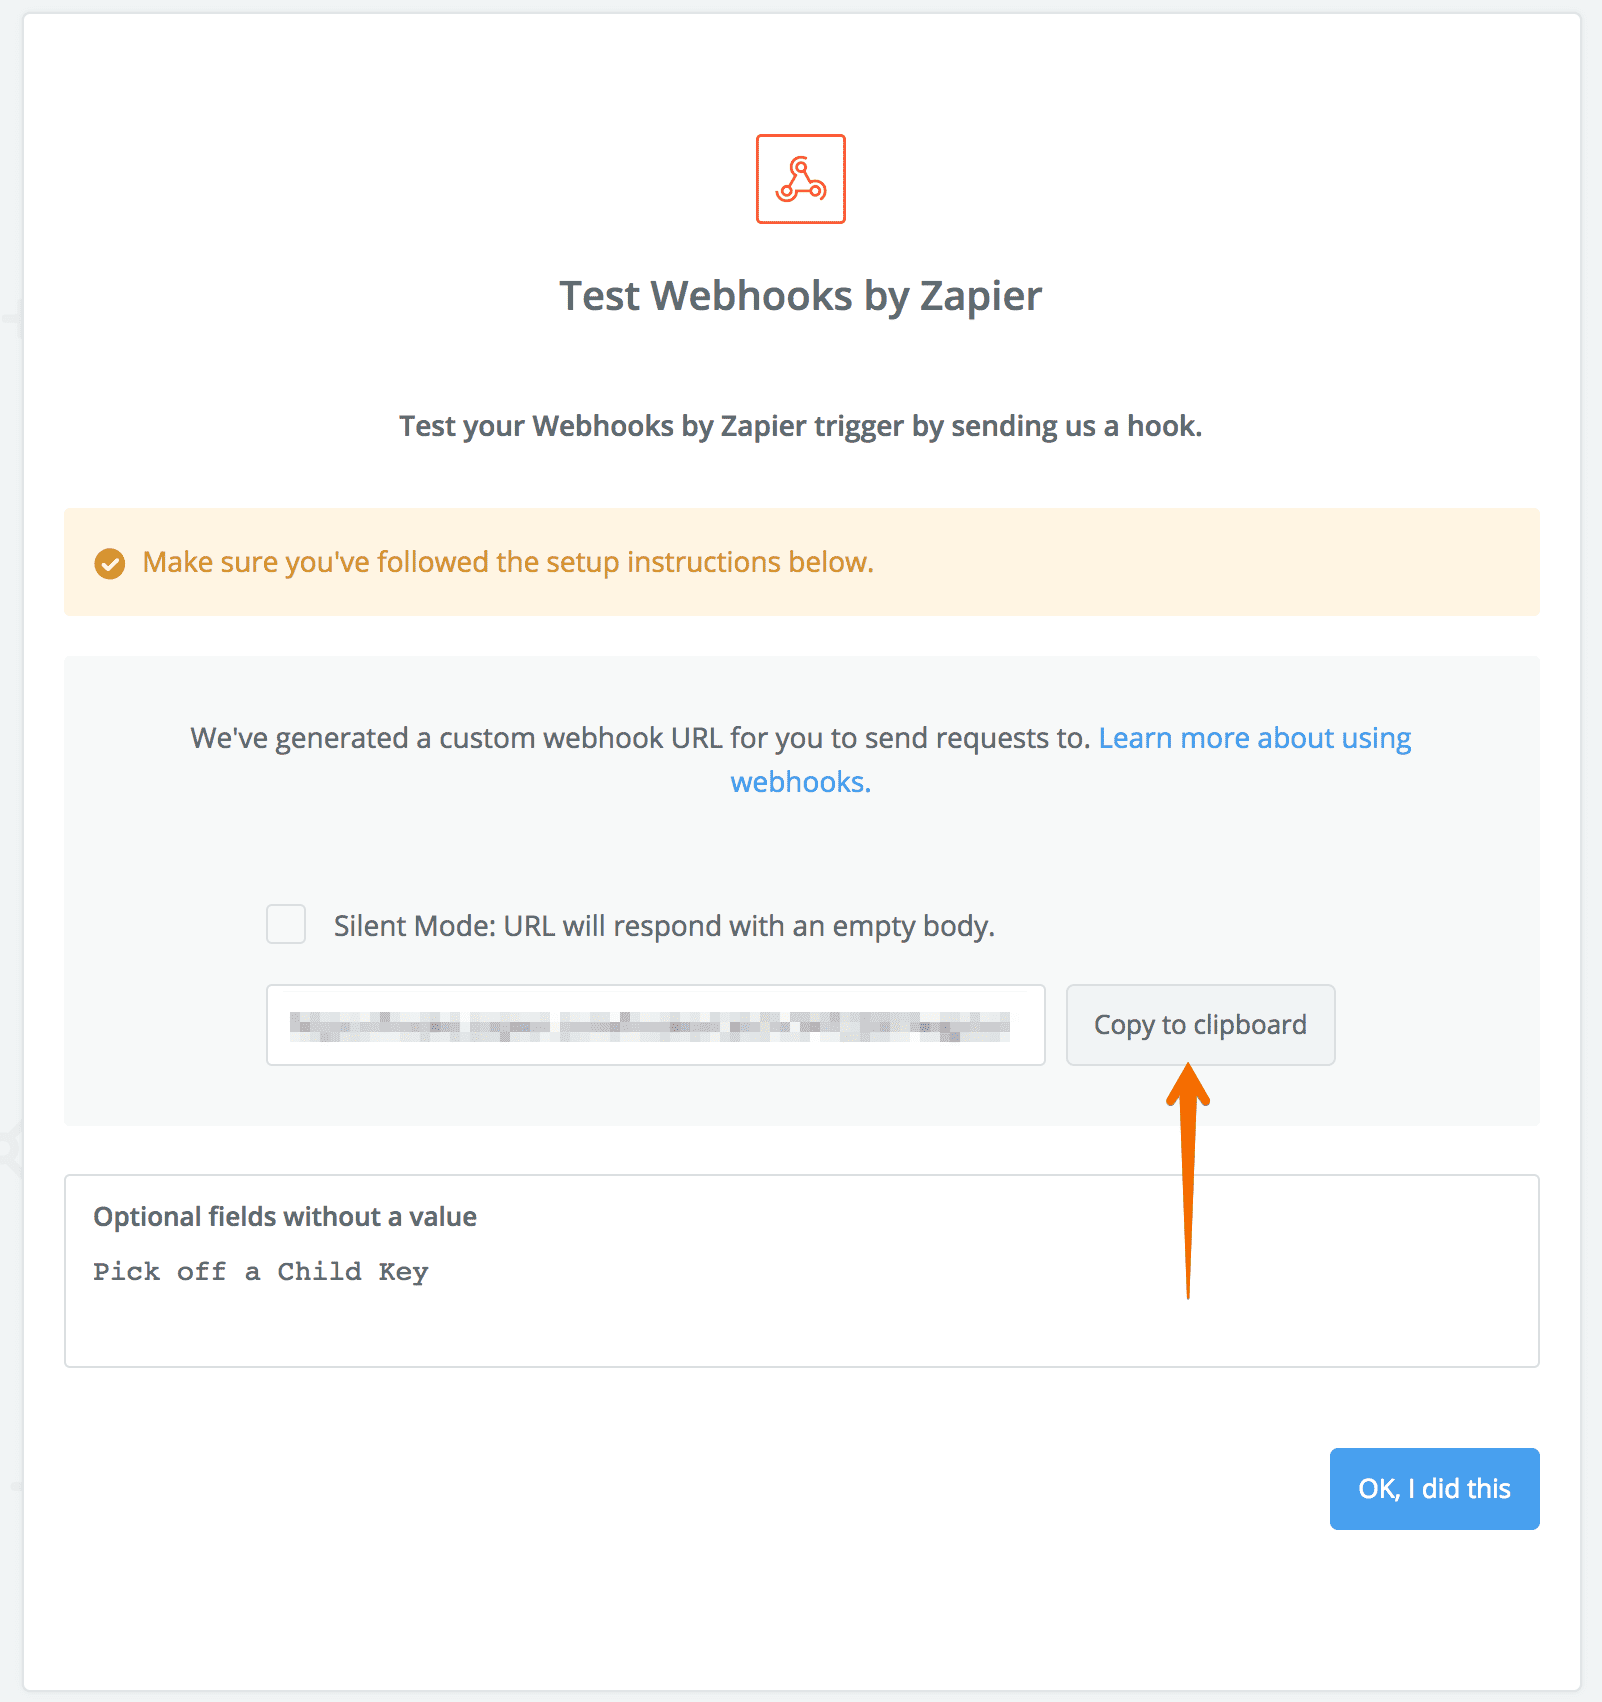
Pick off a Child Keyis an optional field. Leave it empty and clickContinue.In your future Zaps, you can decide the information to be grabbed.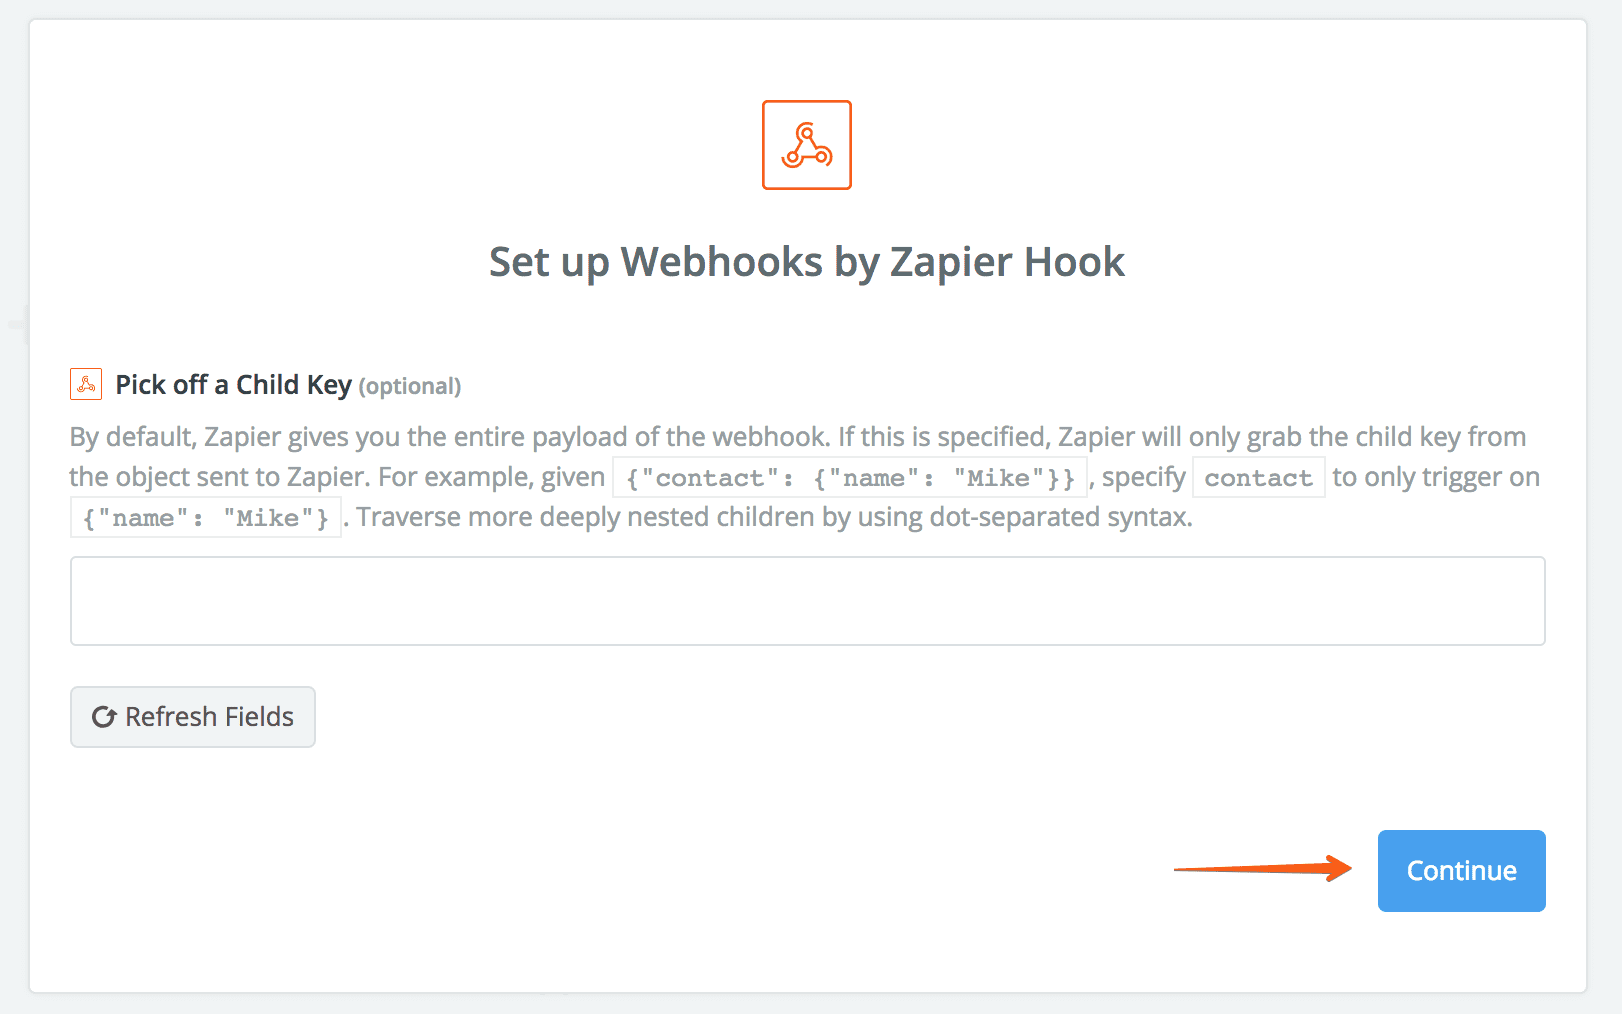
-
Copy the custom webhook URL generated by Zapier. We will paste it to the ChatBot webhook in next steps.
-
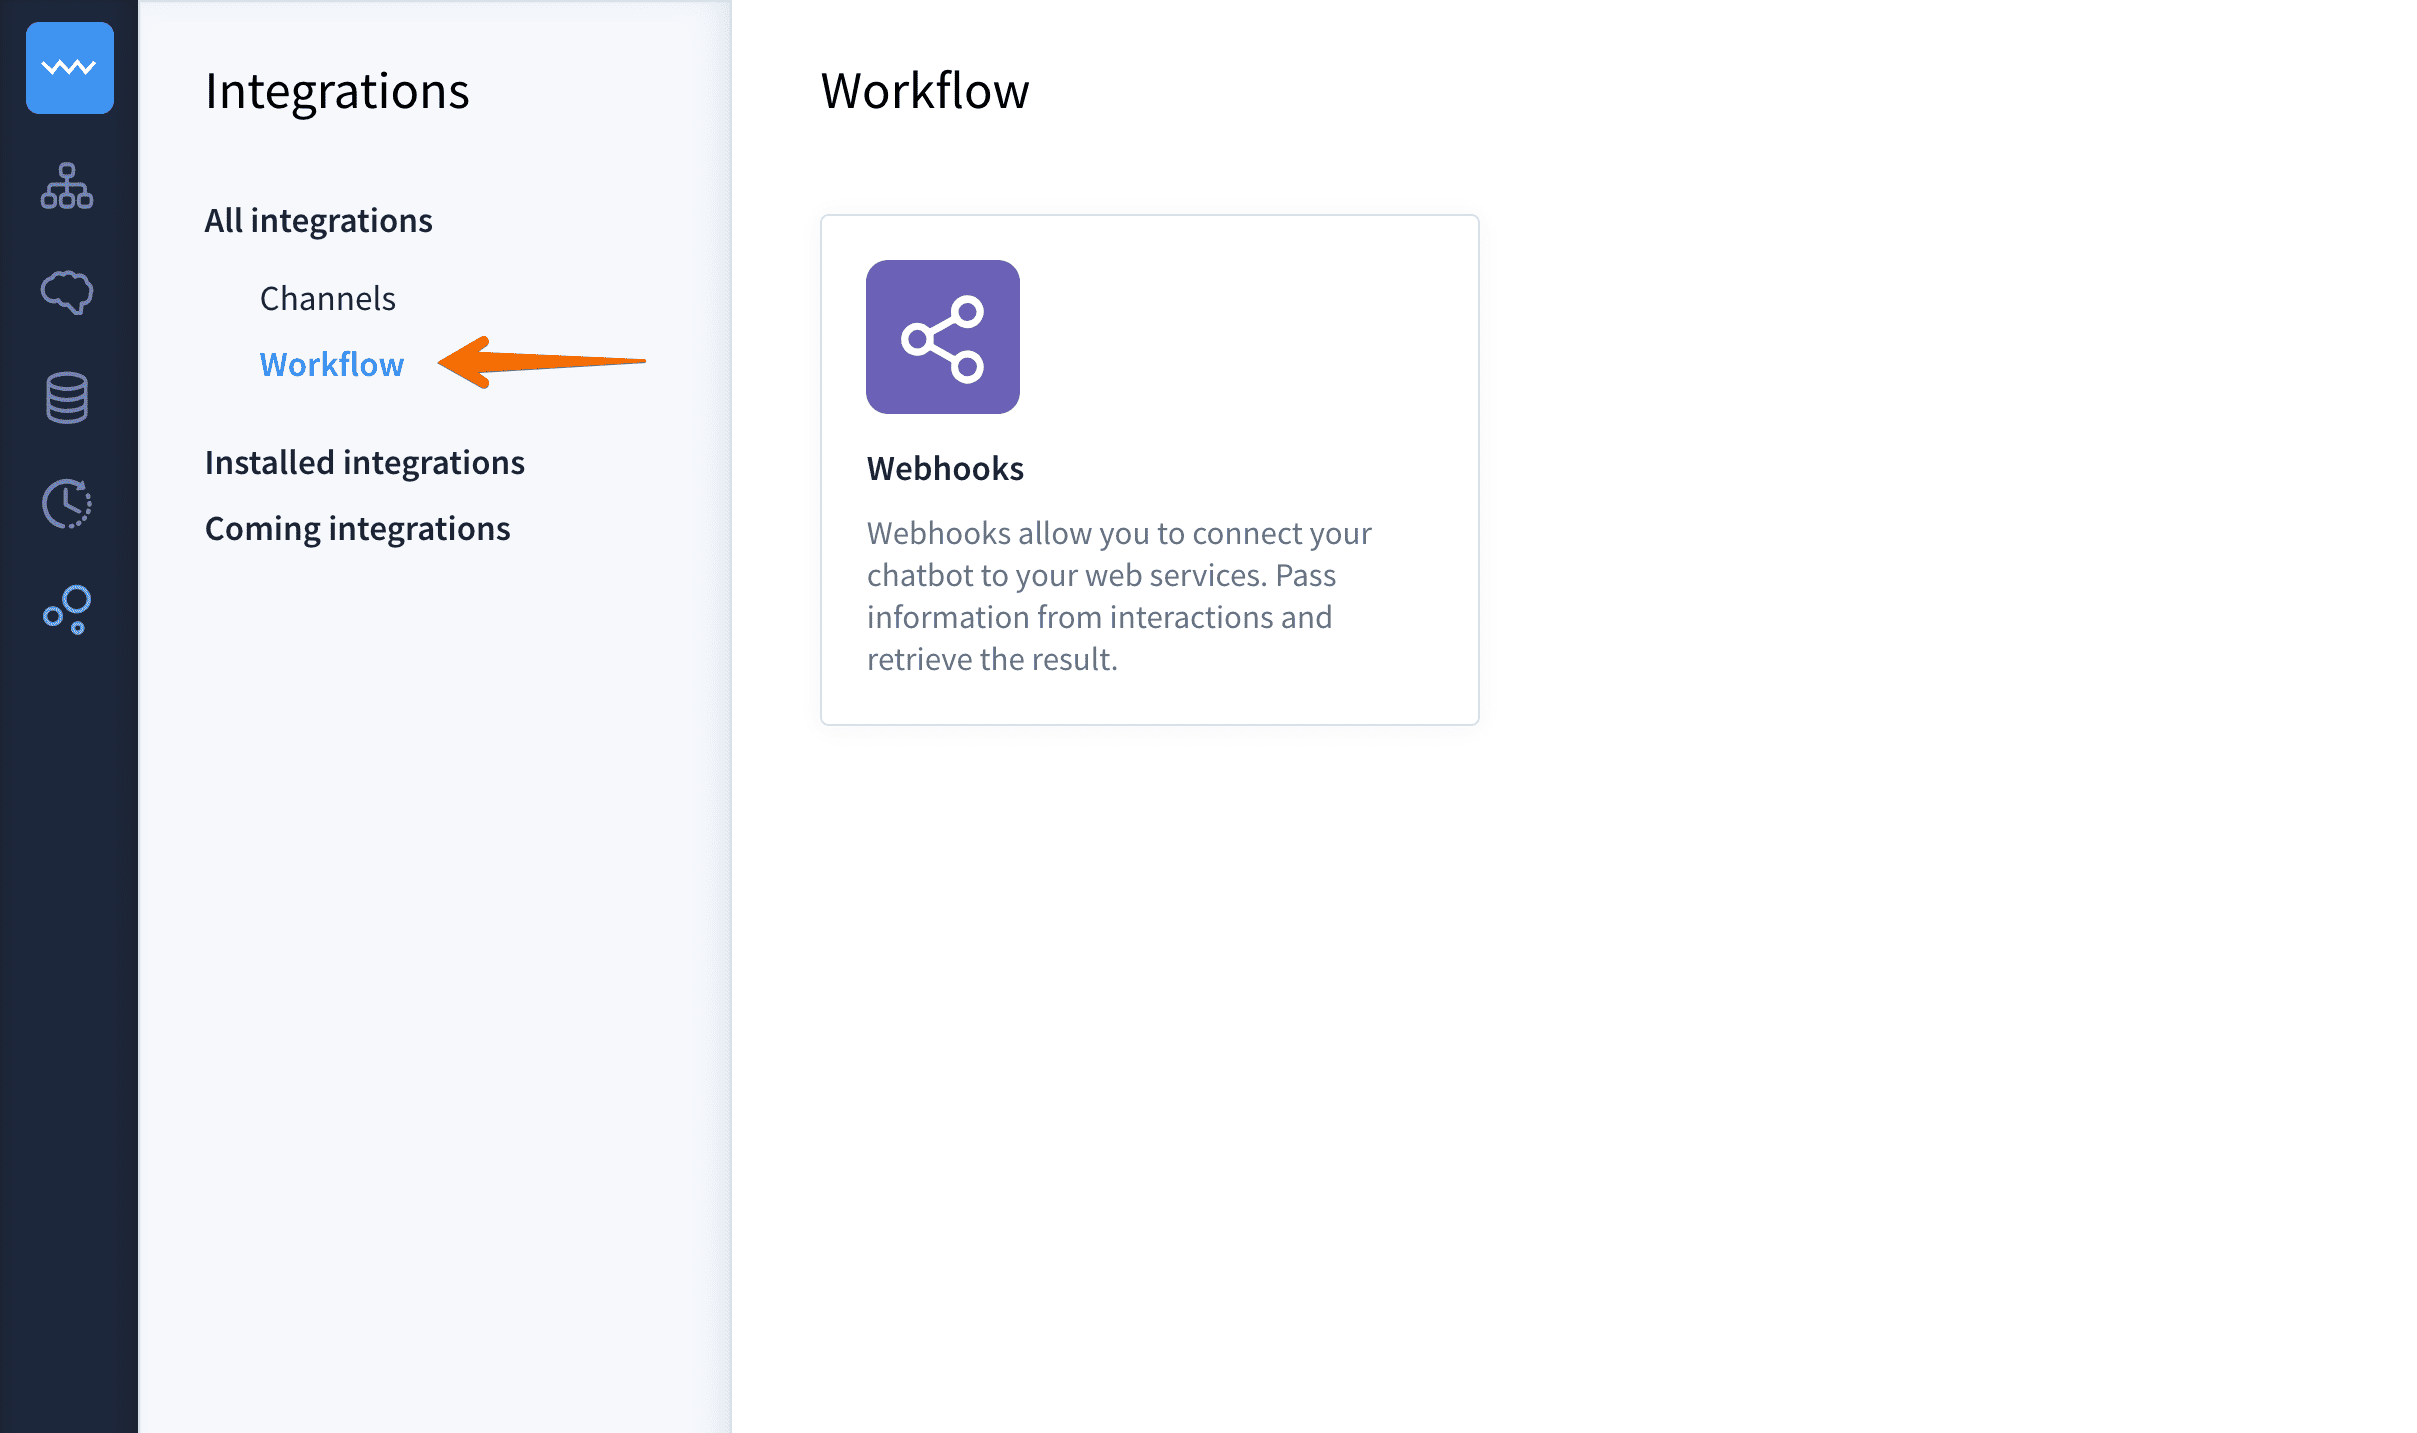
Now, log in to your ChatBot account and go to Integrations. Under All Integrations you’ll find Chanels and Workflow. Select the second option and click on Webhook icon.
-
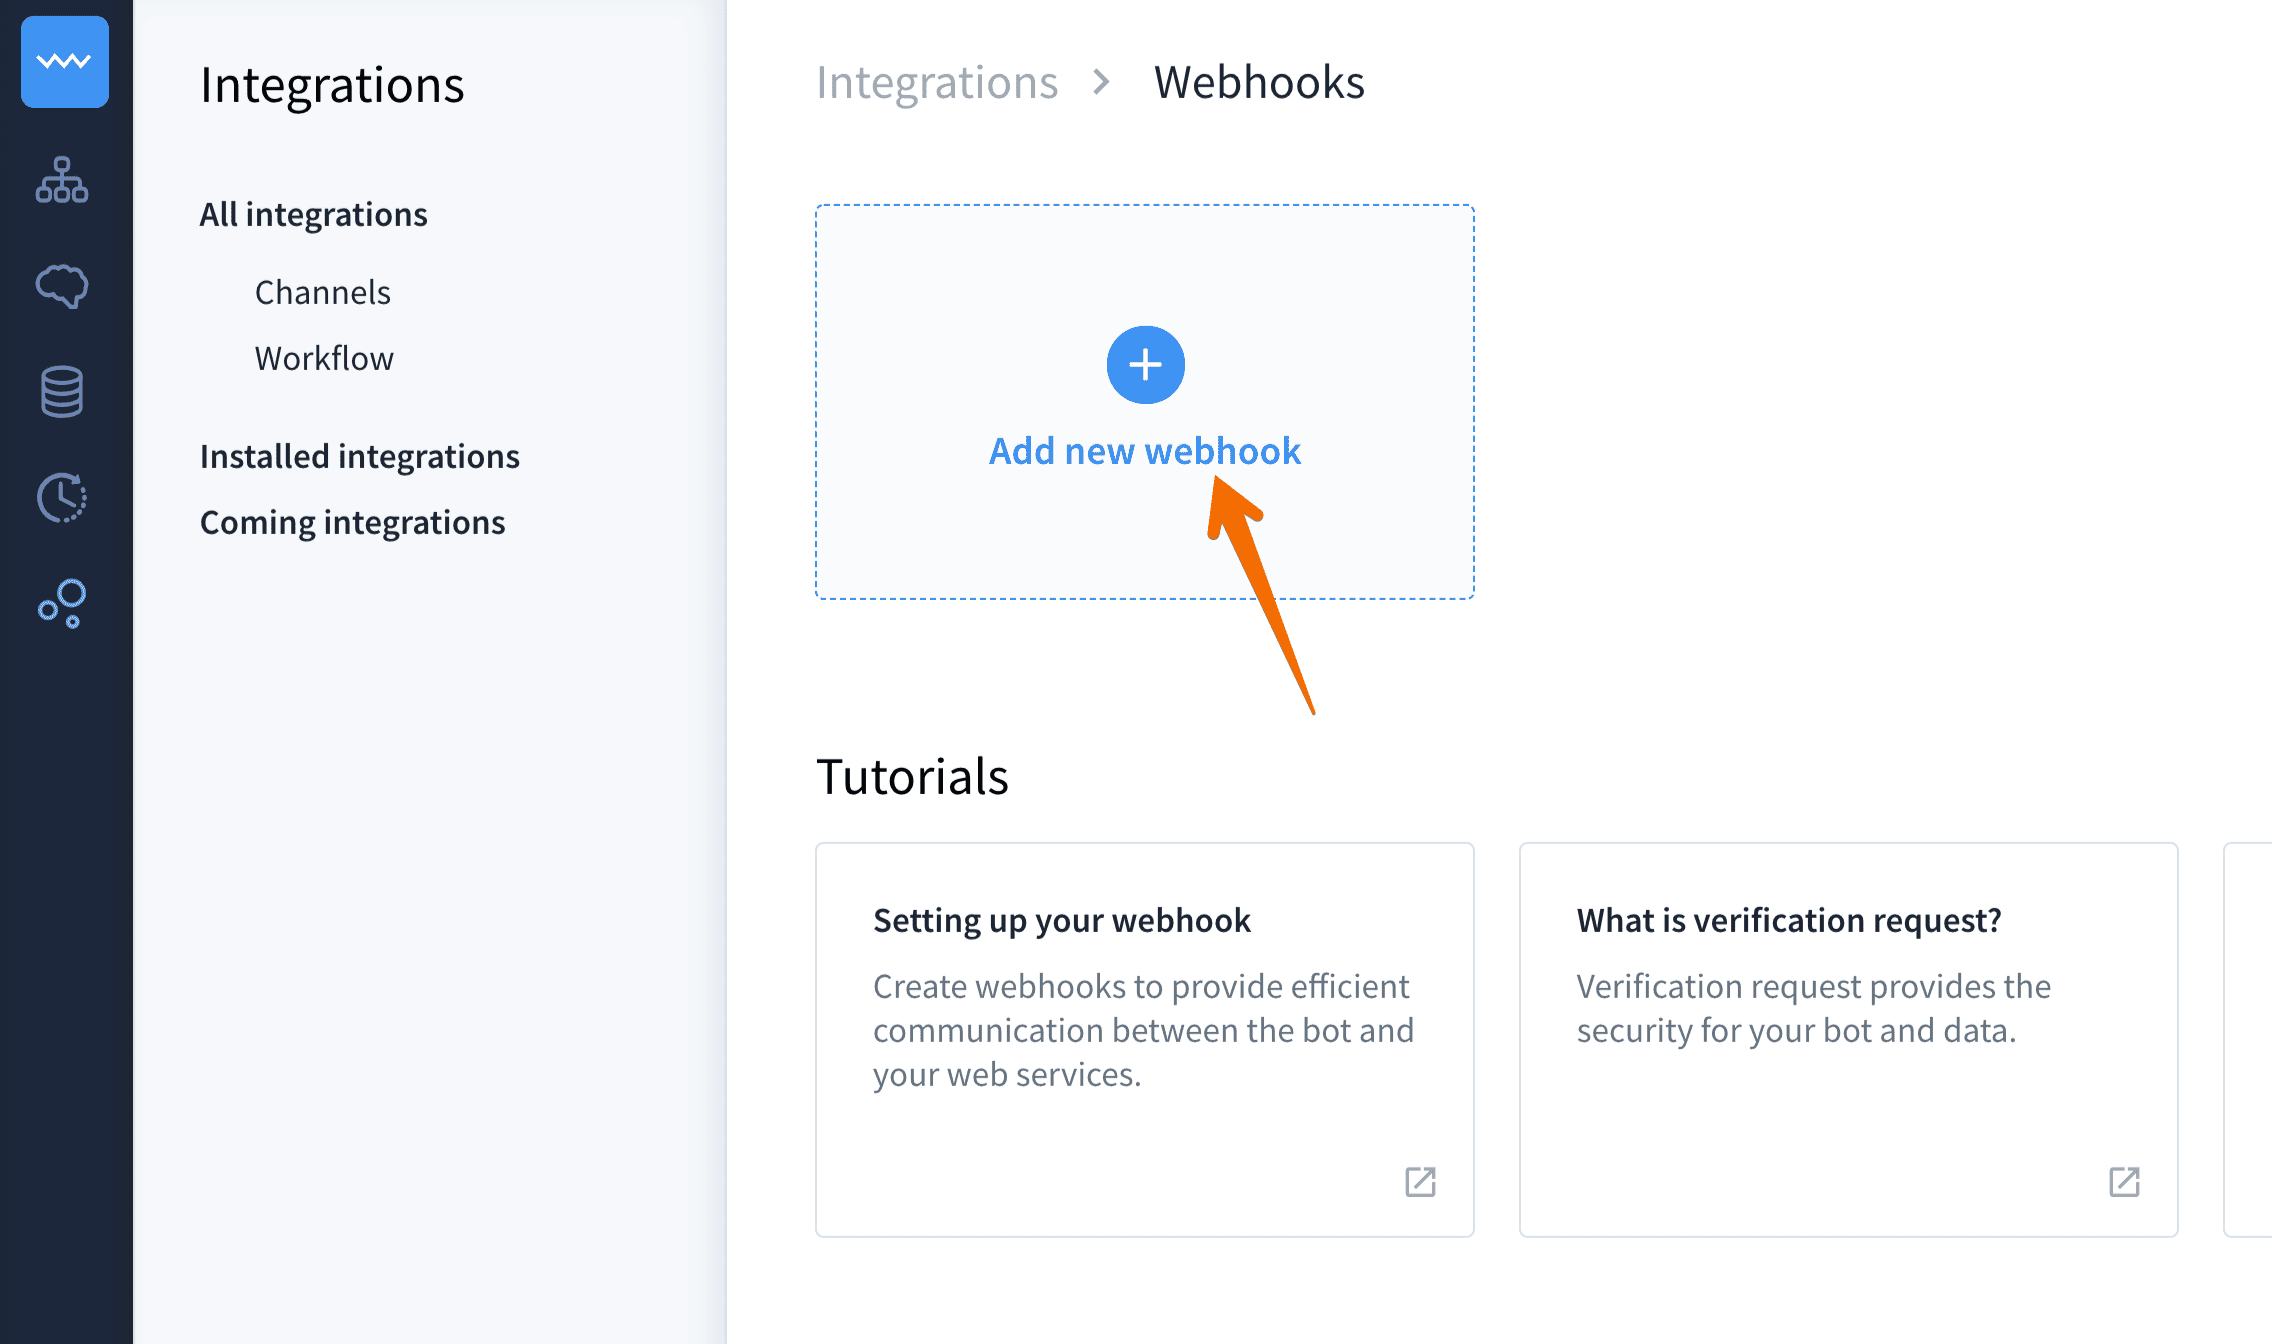
Create a new webhook by clicking Add a new webhook.
-
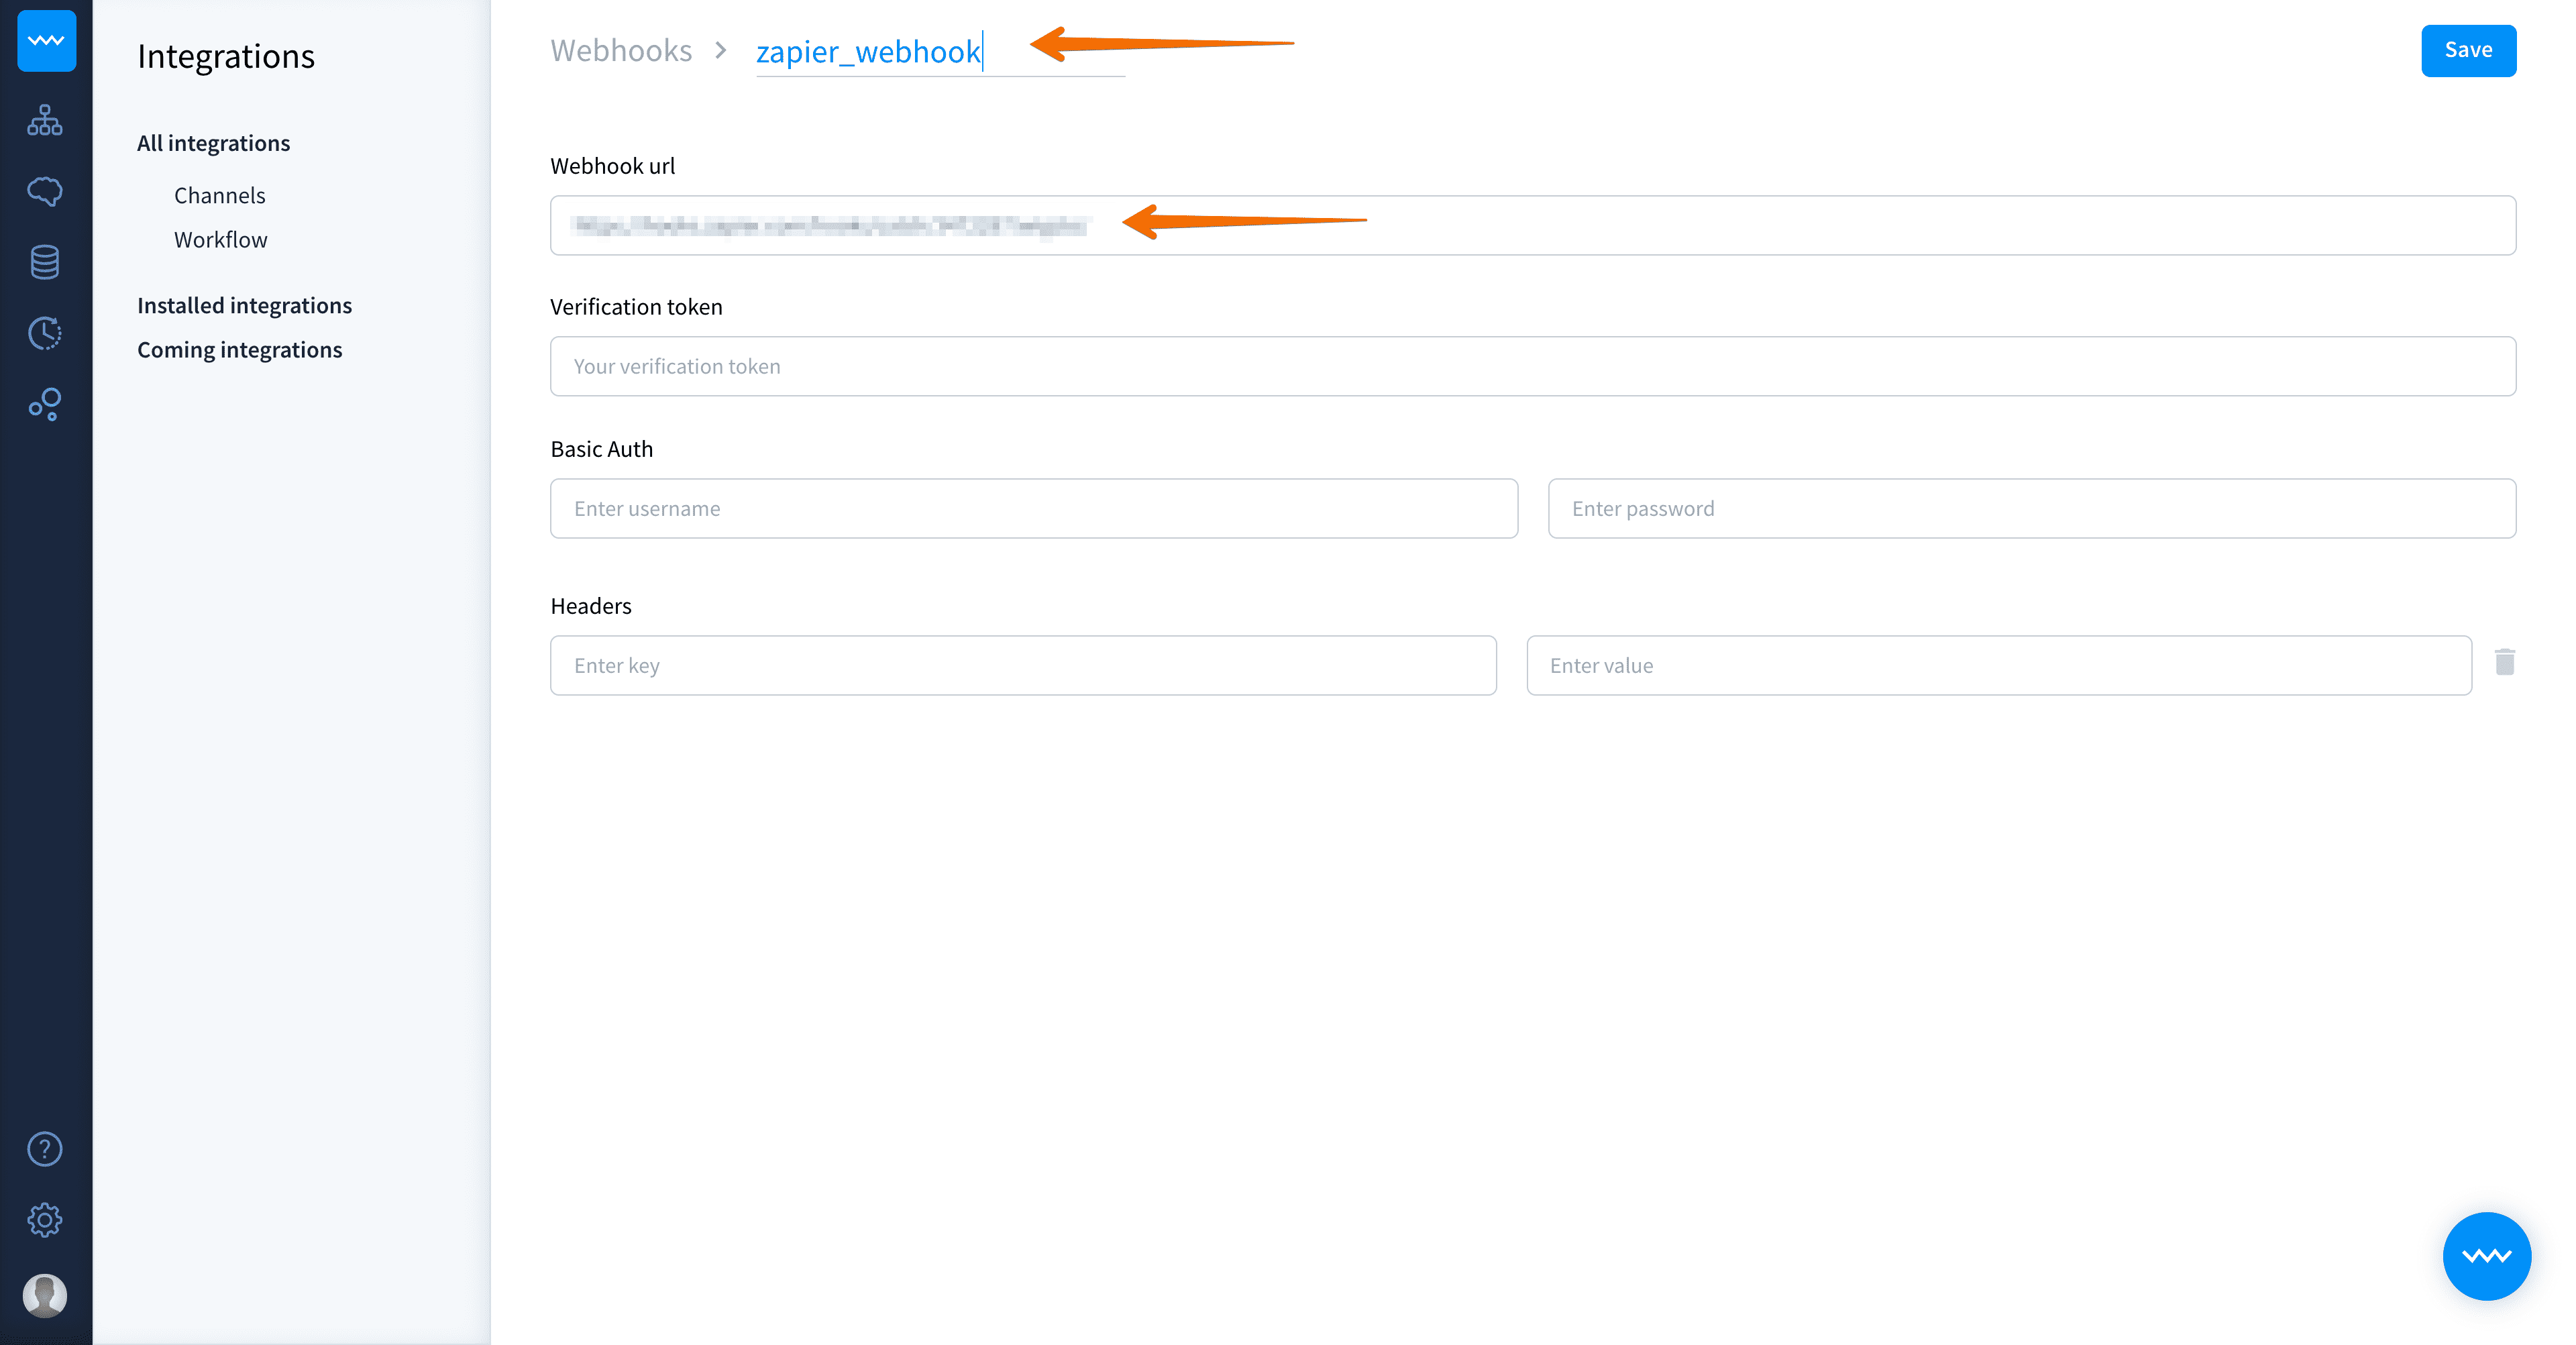
Paste the webhook URL that we grabbed from Zapier into the Webhook URL field. Don’t forget to name your webhook. Click Save.
-
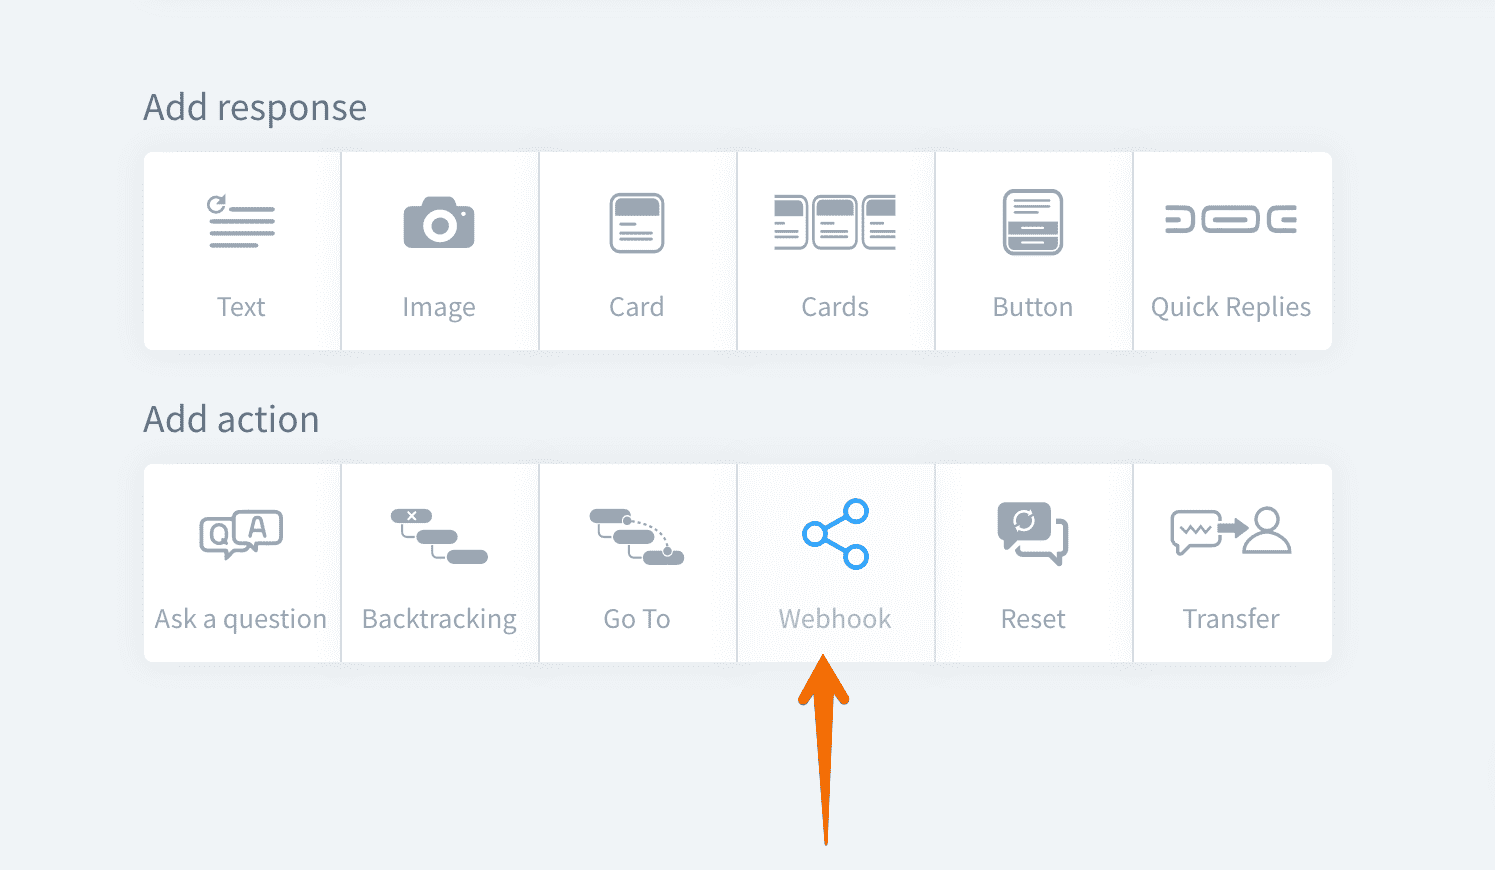
Go to your story and enter the interaction that will be sending the webhook. Click the webhook action icon. Note that the webhook must be executed after the data is collected; otherwise, it won’t be able to pass collected attributes.
-
Select the webhook we’ve just created and click Save.
-
Return to the Zapier page and click OK, I did it. Let’s see what will happen.
-
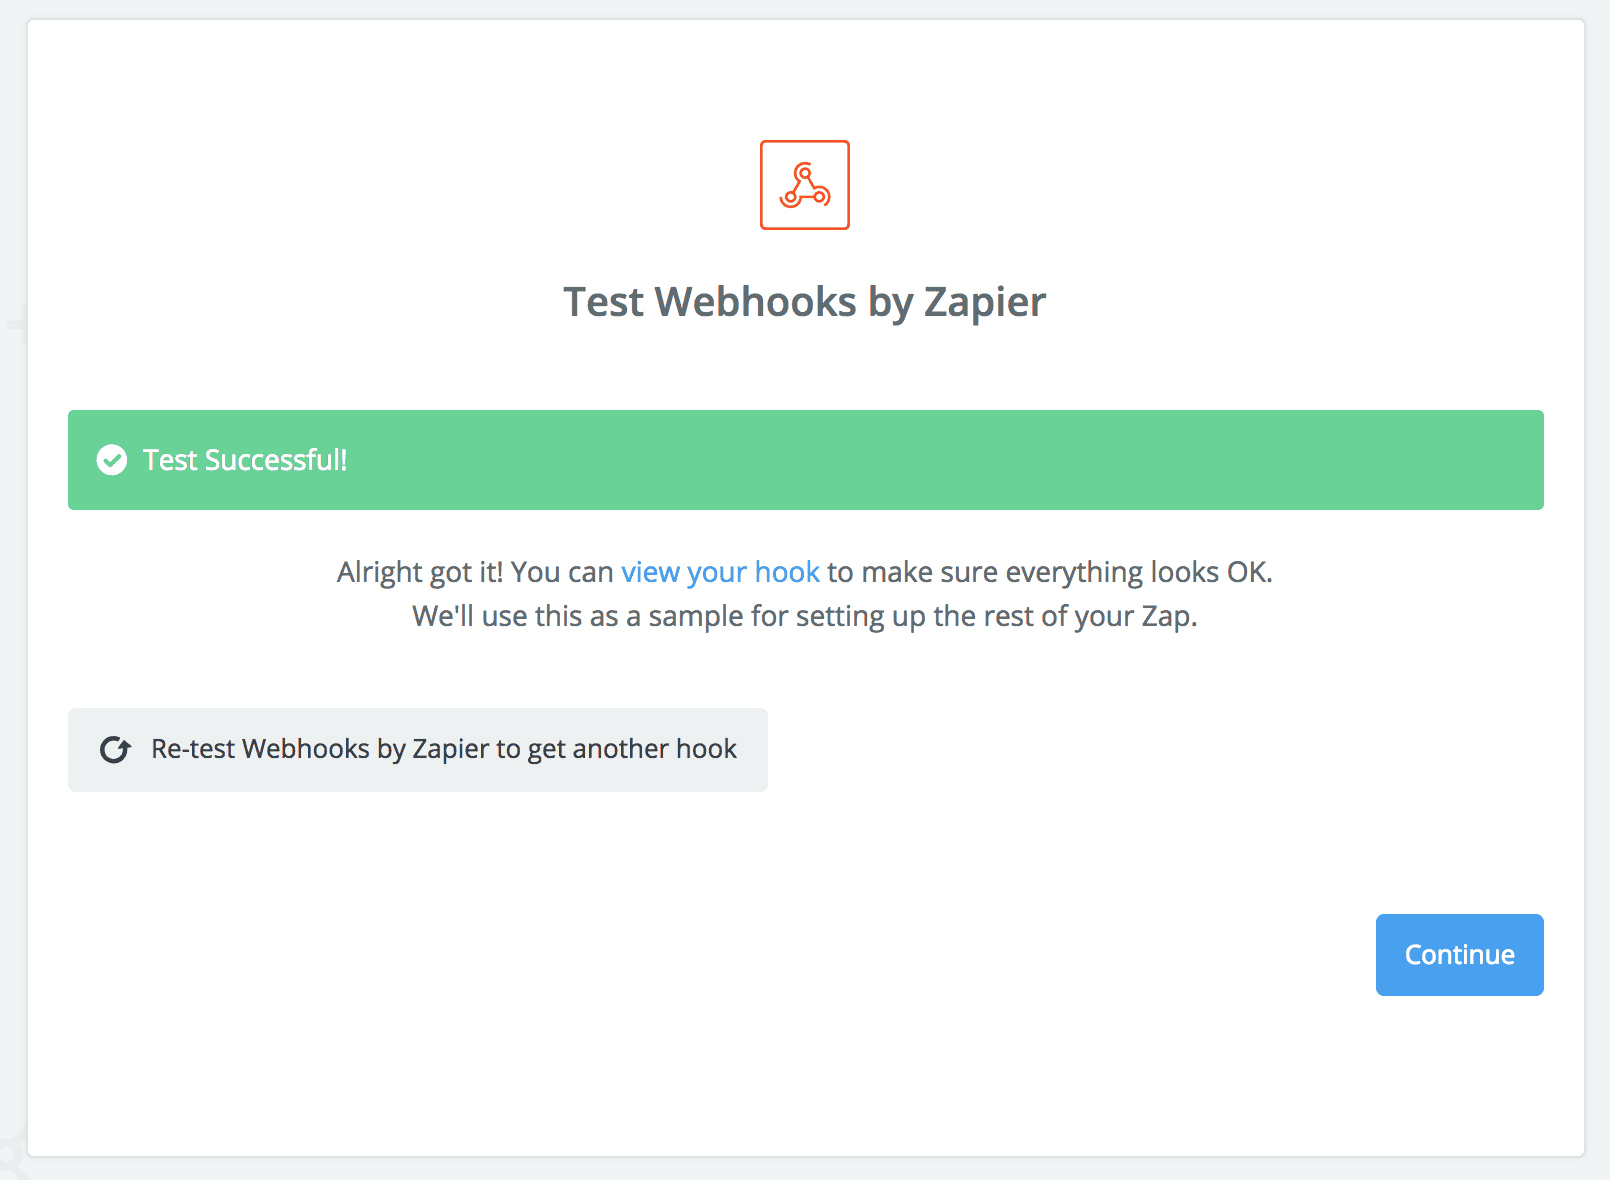
Test successful! It means that our new Zap has communicated with ChatBot.
-
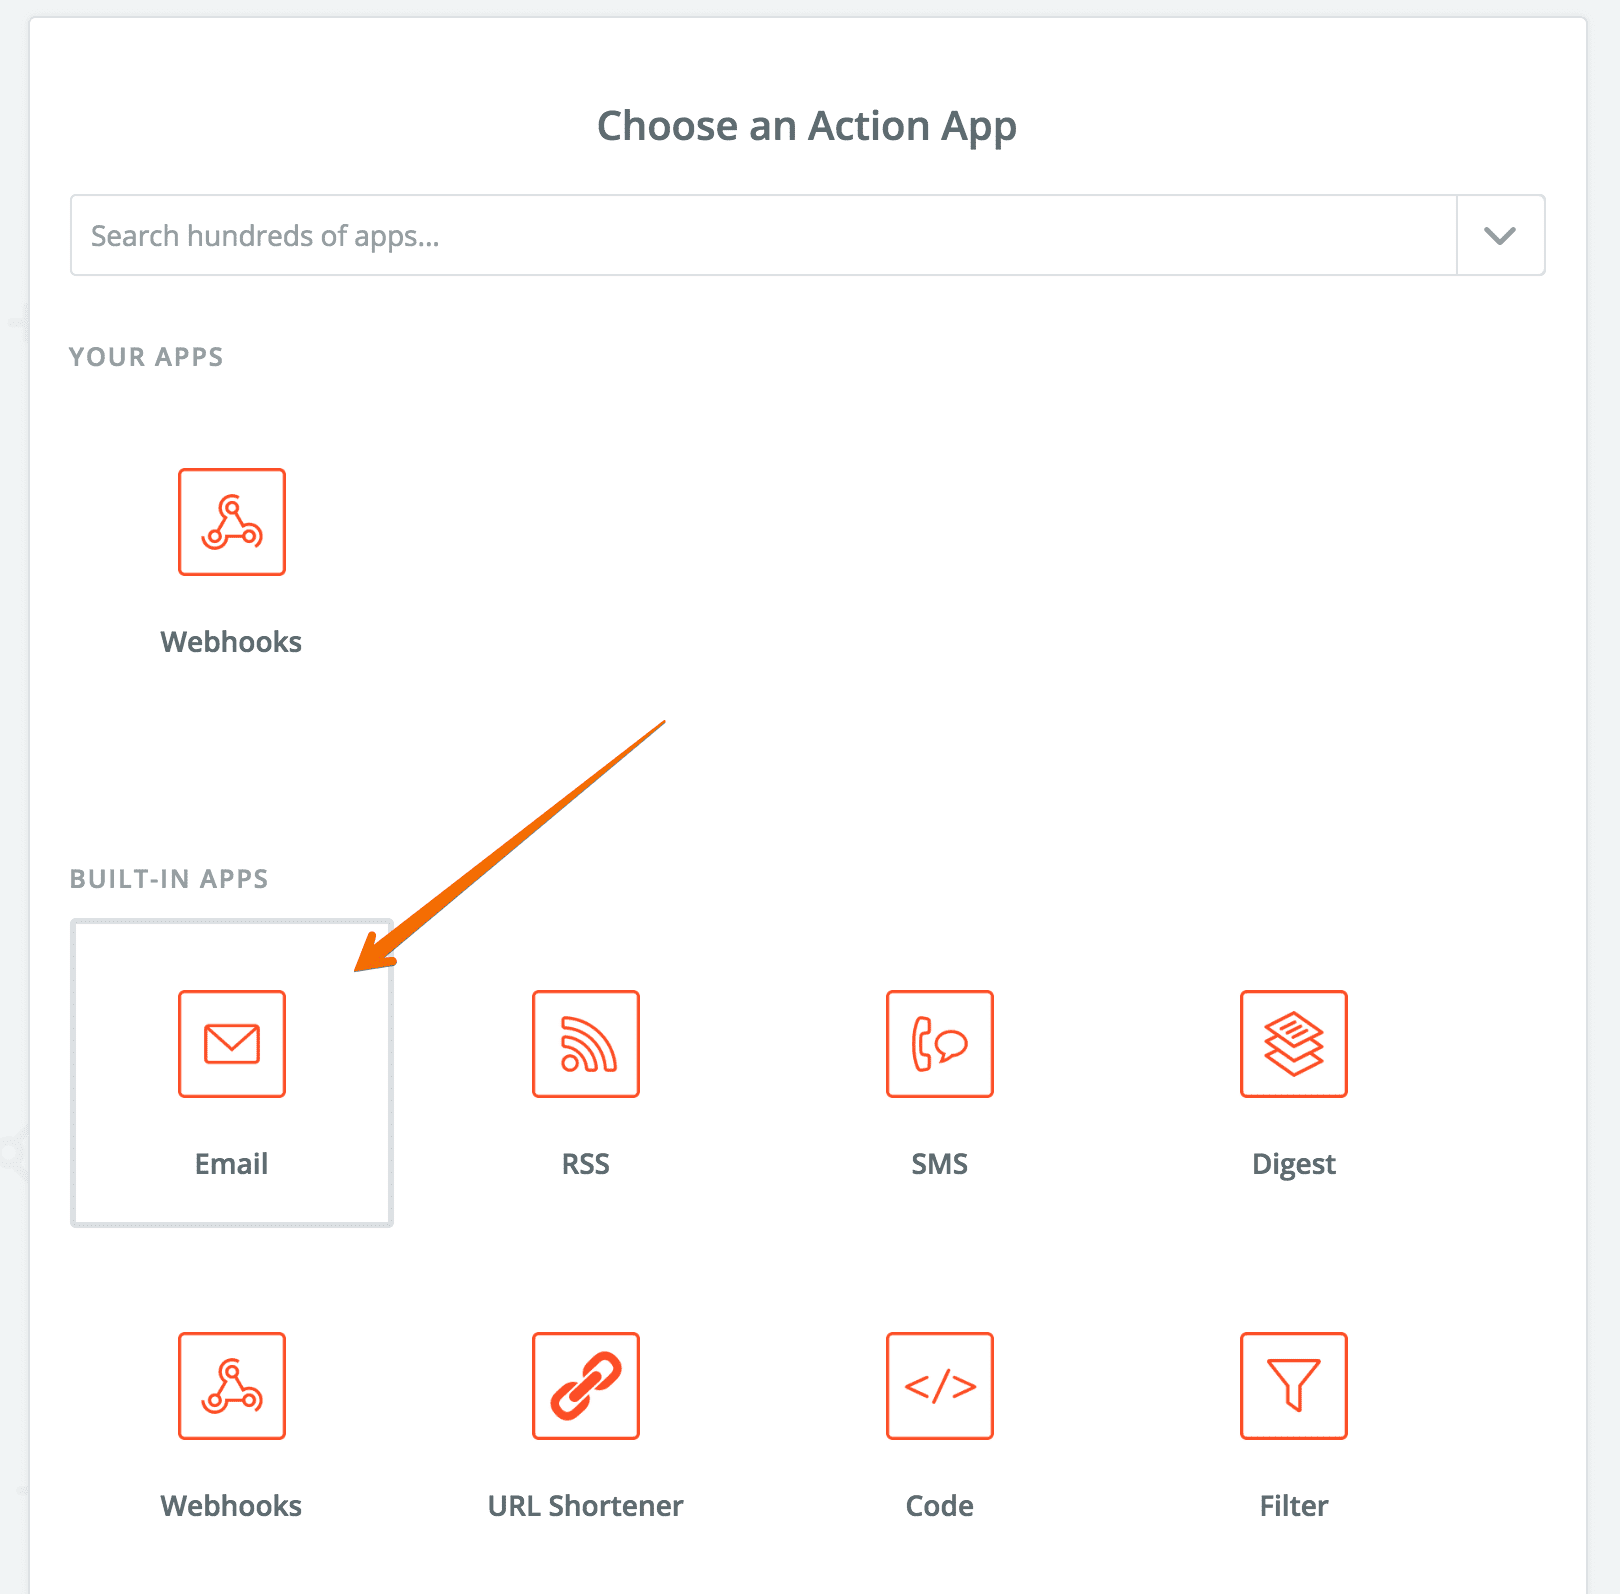
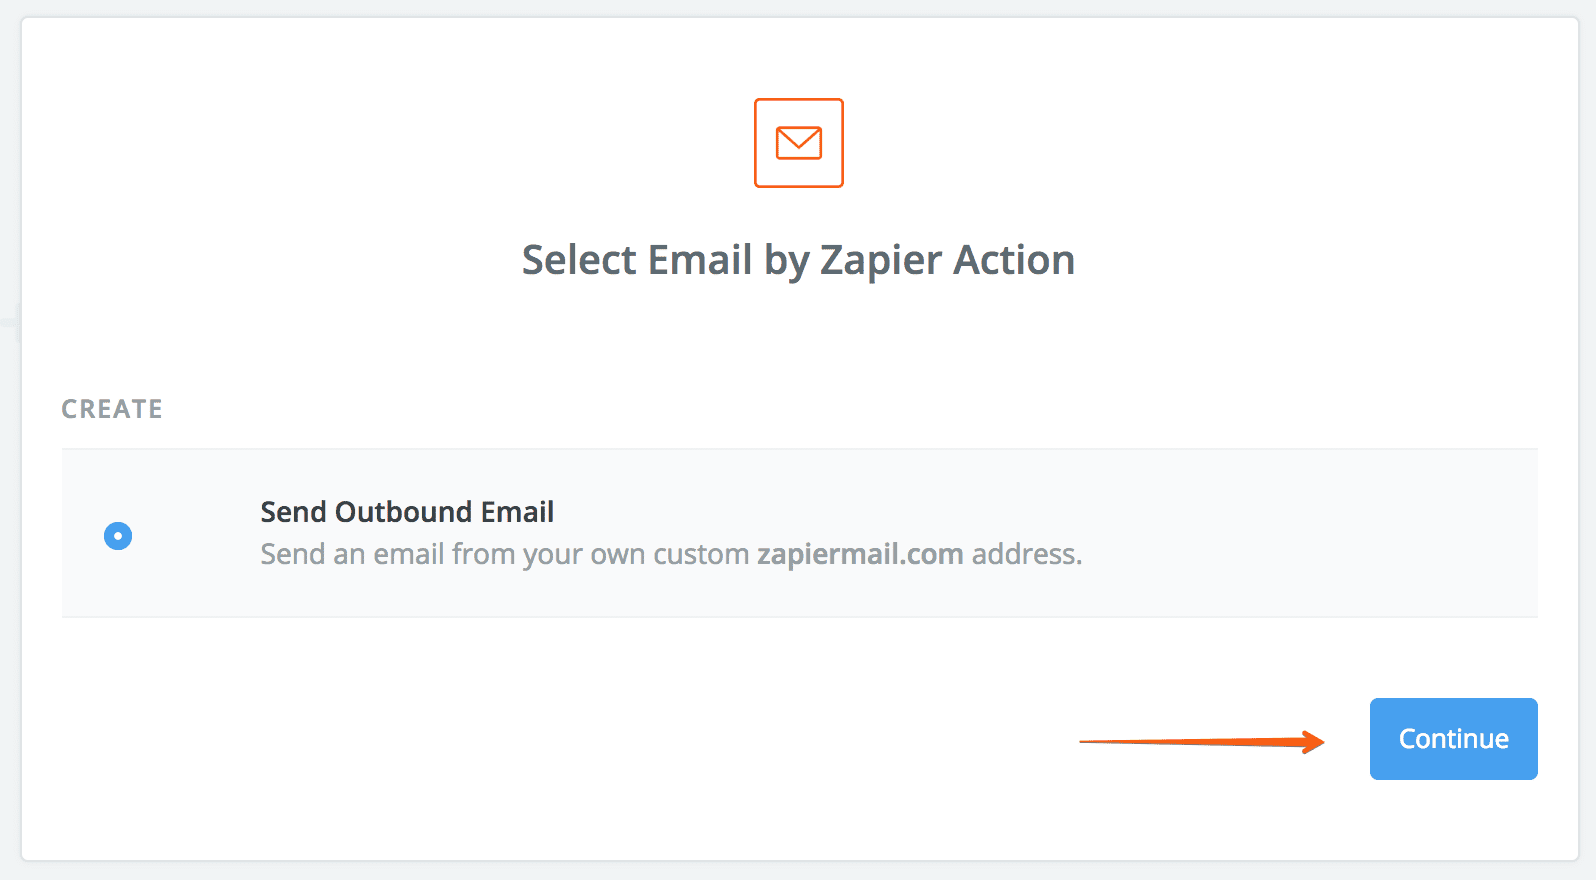
Select the Email Action App.
-
In the next screen the option Send Outbound Email should be already selected. Click Continue.
-
In this step, we have to decide the attributes that we want to display in the email. Before we continue with Set up Email by Zapier Outbound Email, we need to pull some data to our webhook. To do that, return to your chatbot and test your scenario. In this scenario we need to answer three questions so fill the following attributes:
new_user_name,new_user_emailandnew_user_phone_number. -
It’s time to compose the email. Complete the required fields,
To,SubjectandBodyand add attributes collected by out bot. To do so, click theInsert a Fieldsbutton. Click Continue when you finish.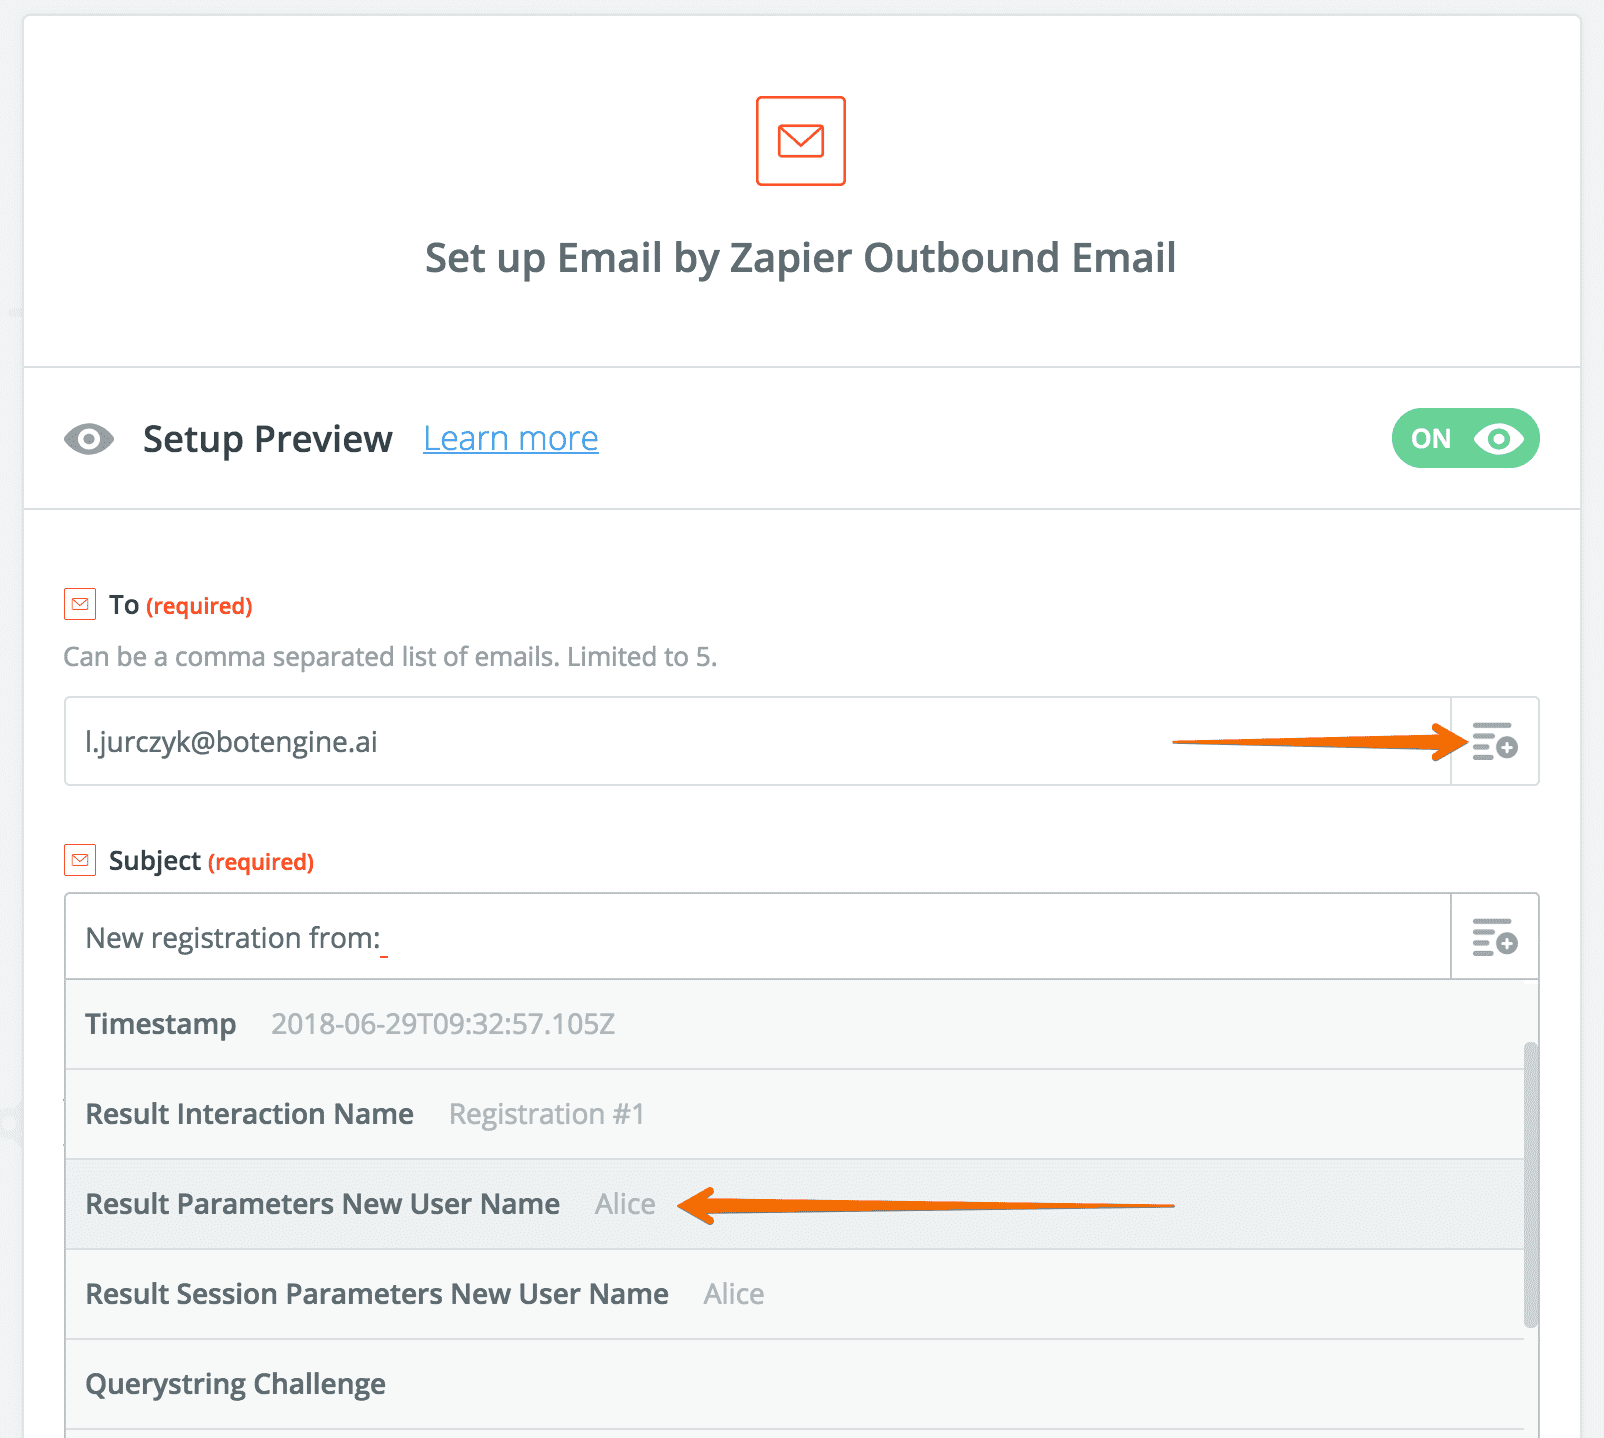
-
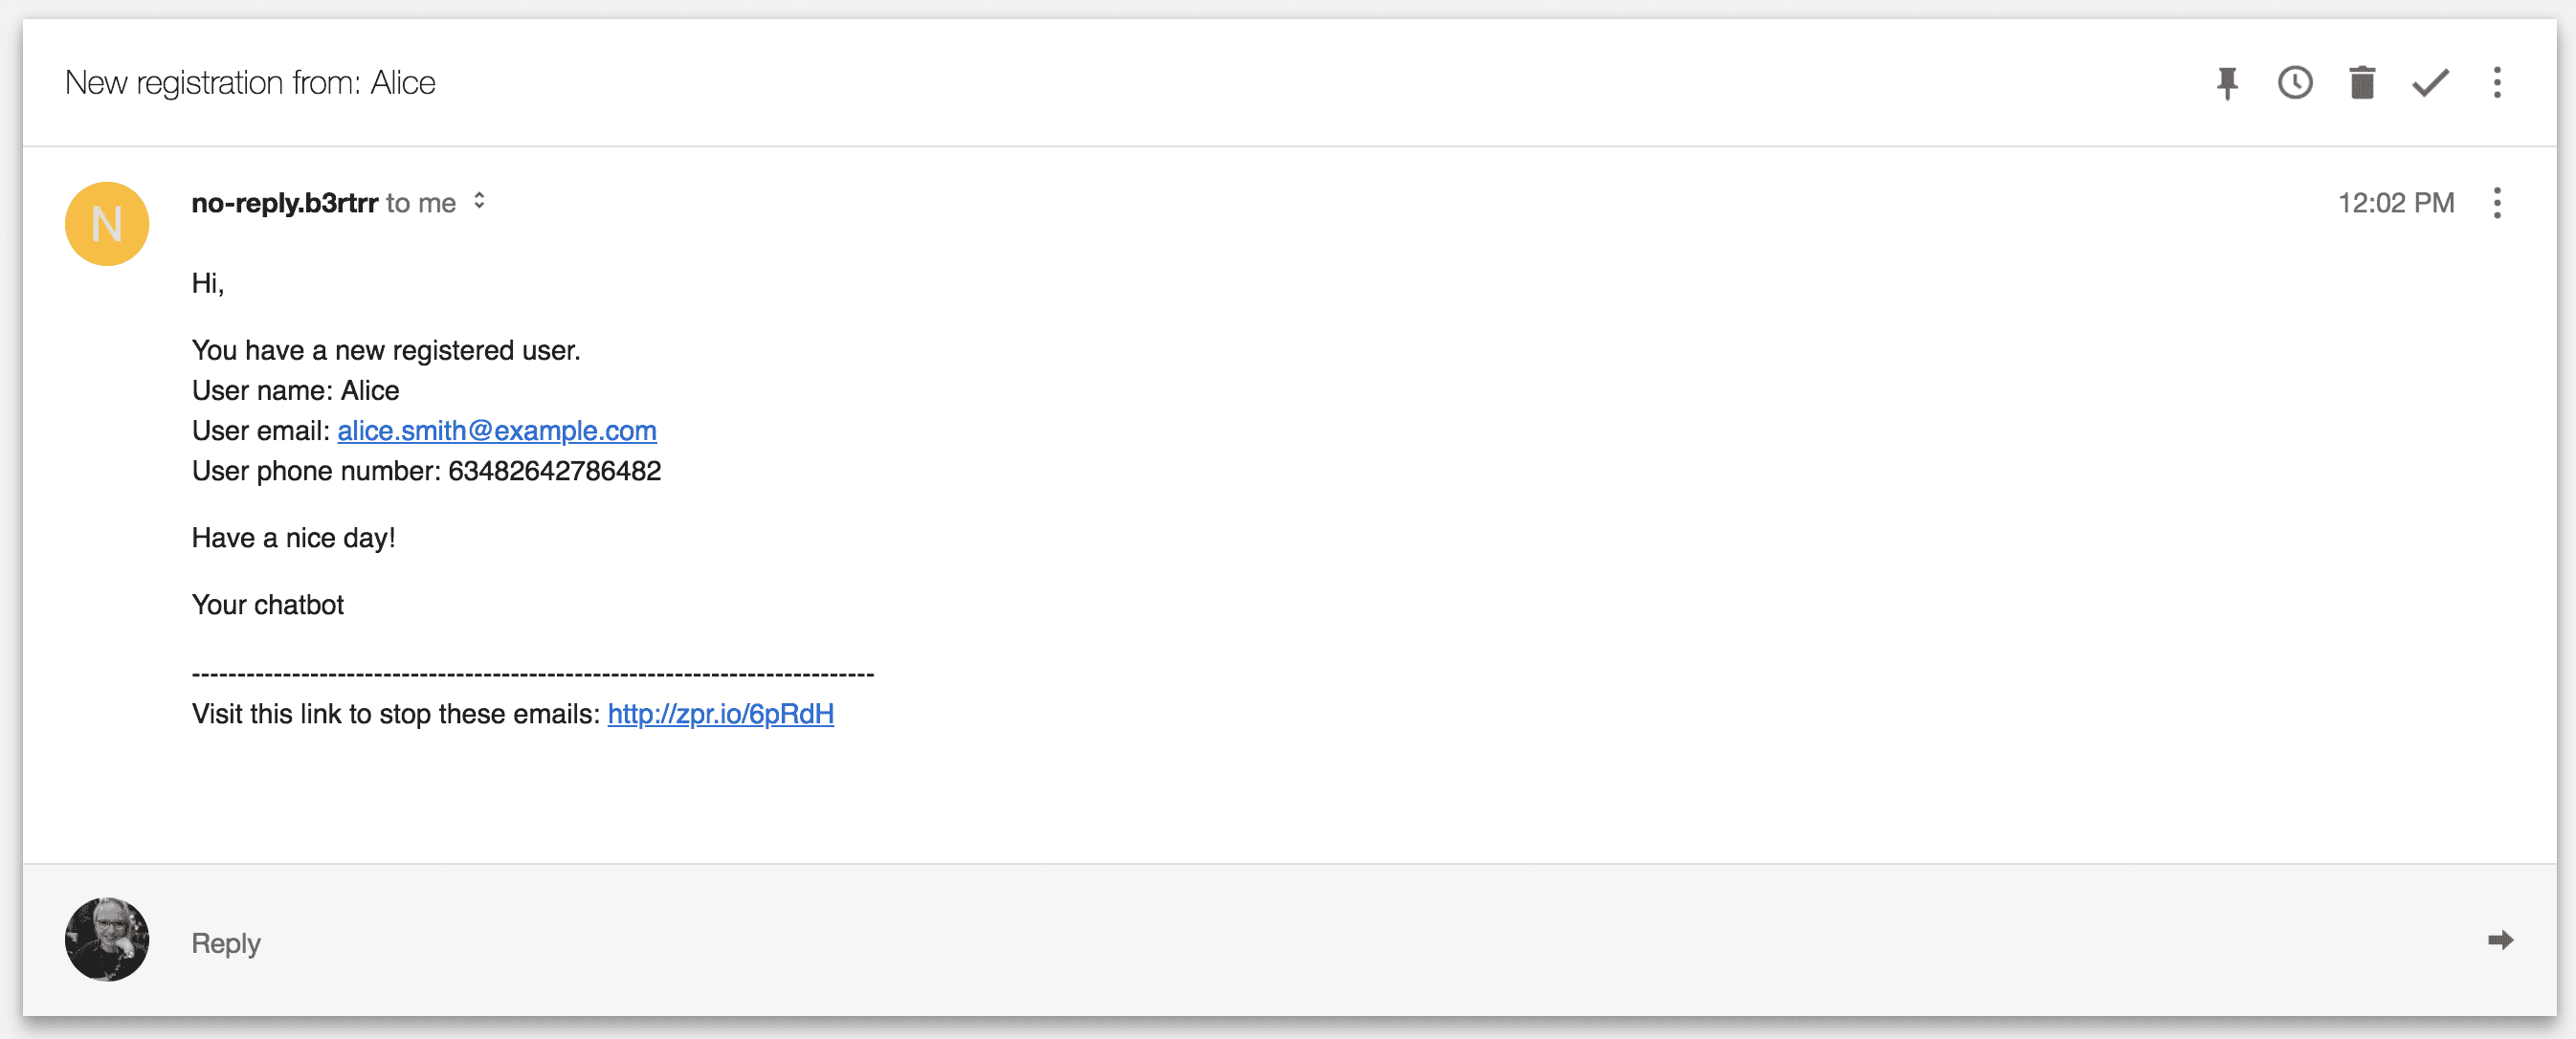
Review your new Zap and send yourself a test message. It works!
-
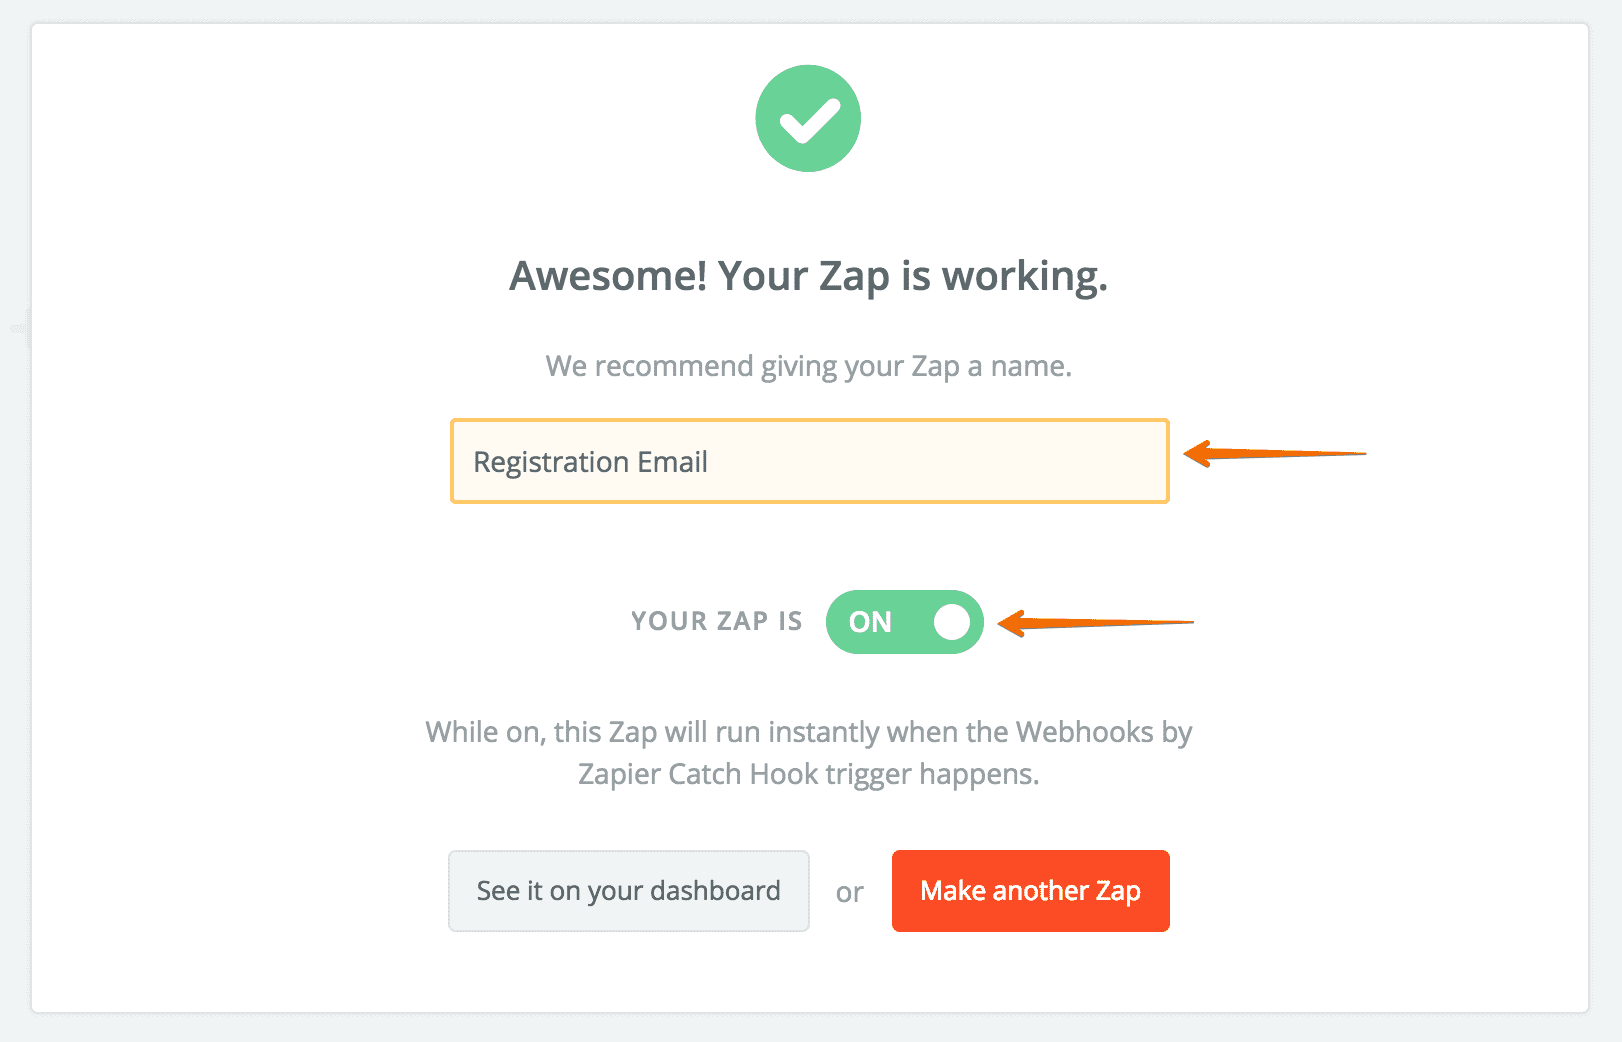
In the last step name your Zap and turn it on.