Connect ChatBot to your WordPress site in a few simple steps and open an additional communication channel.
Install ChatBot on your WordPress site
-
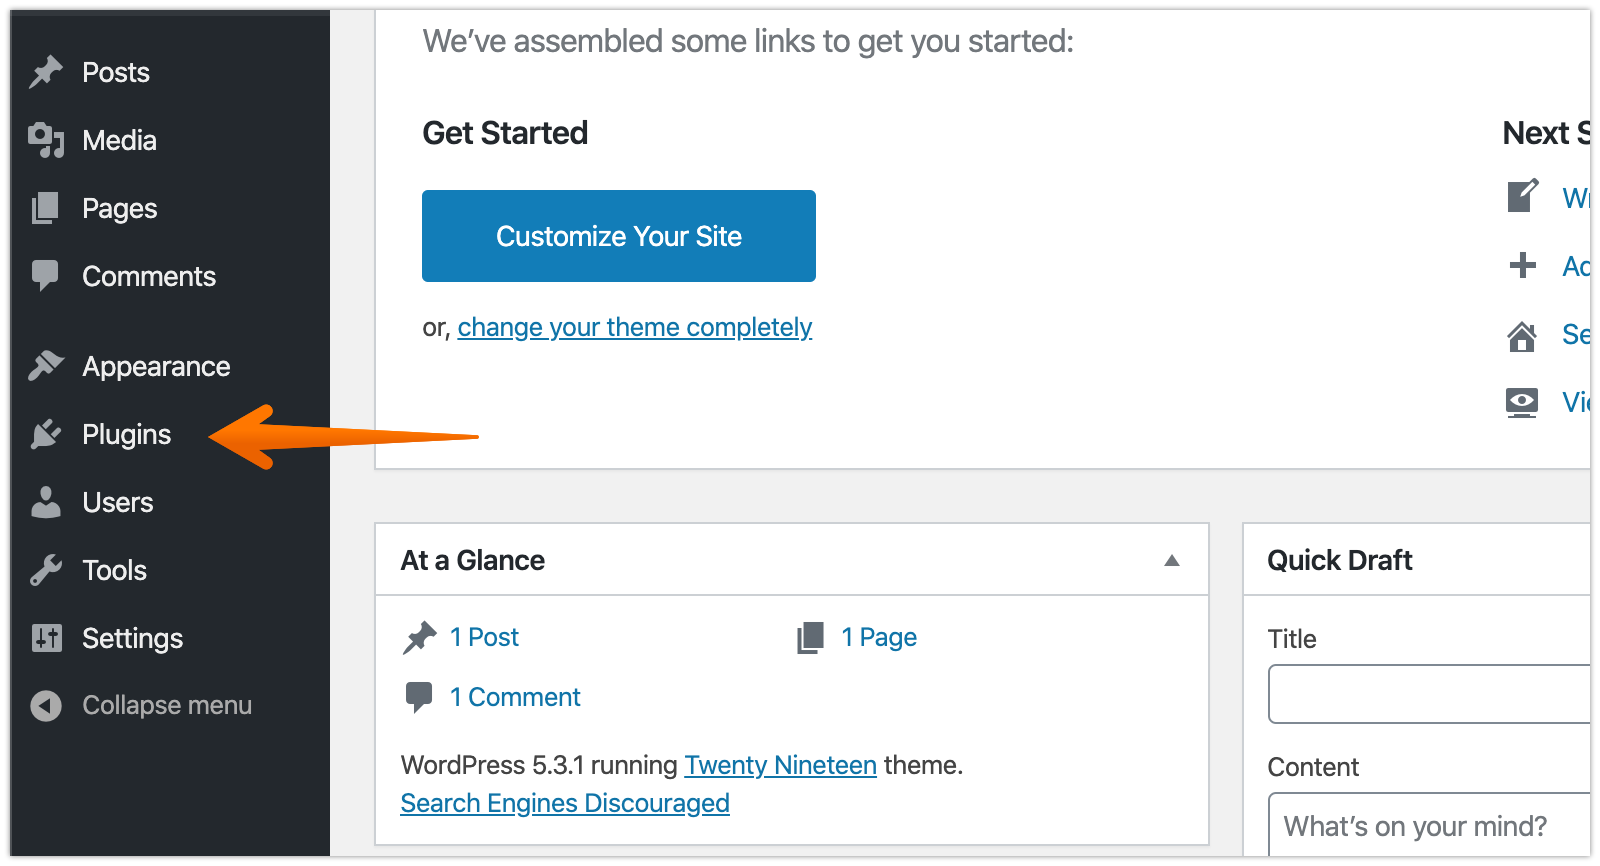
Go to the Plugins section in your WordPress dashboard.
-
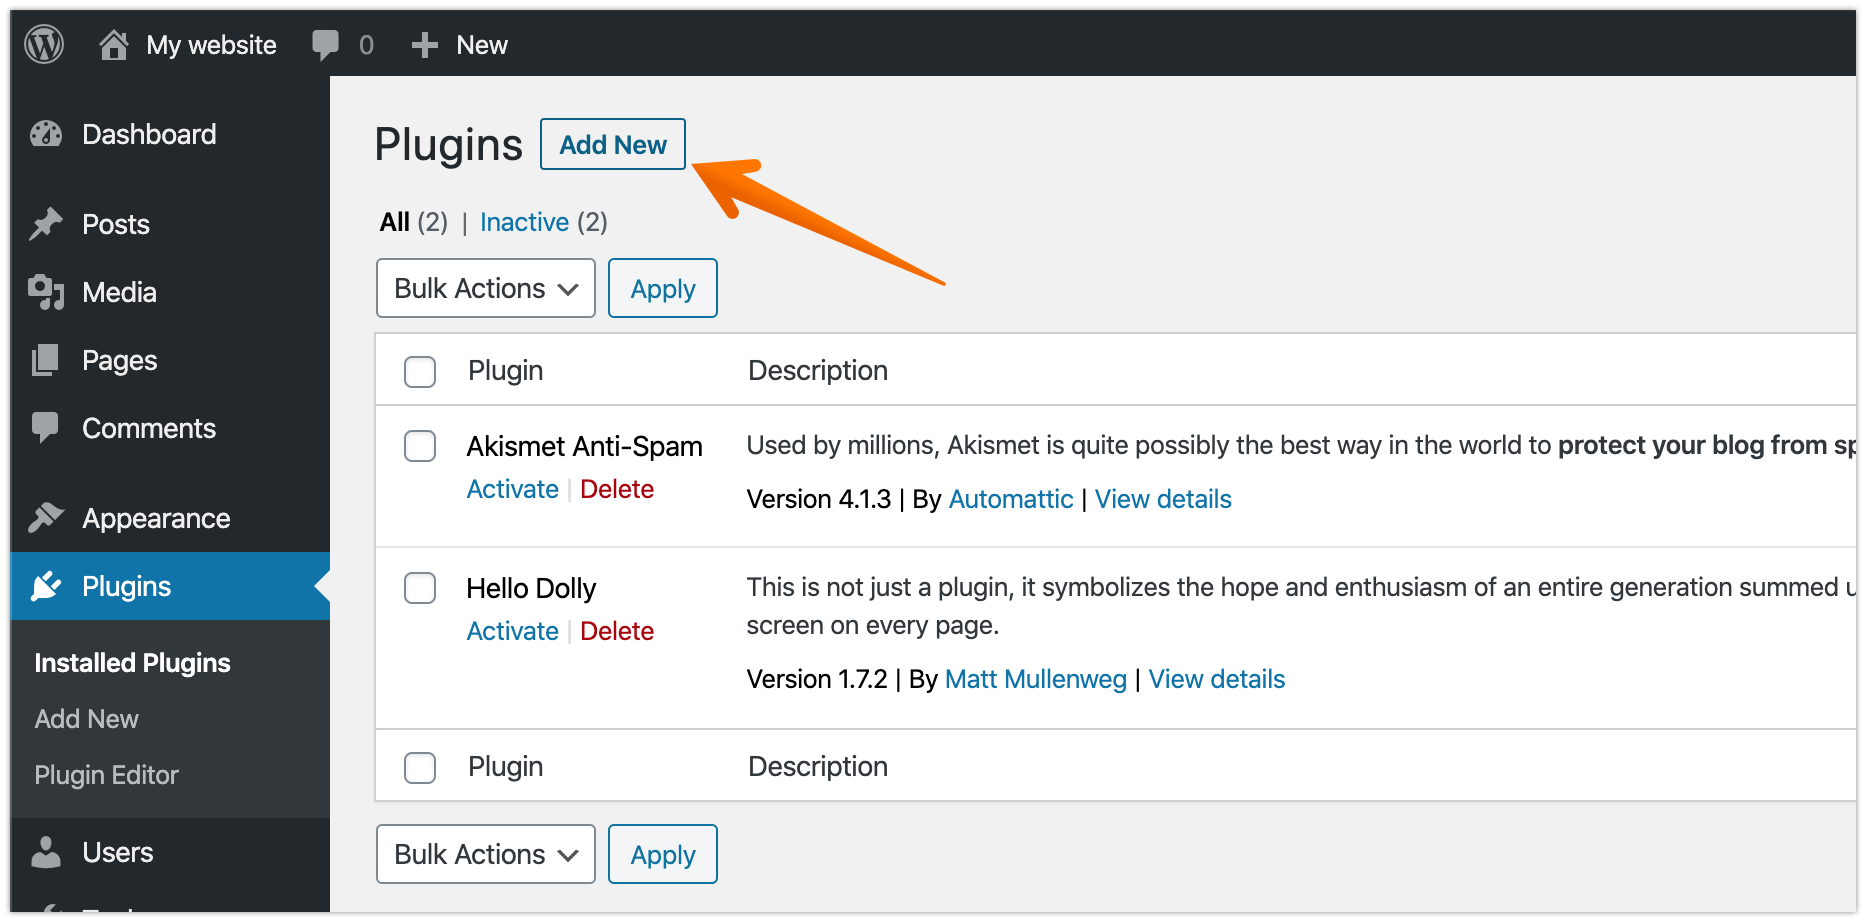
Click on the Add New button.
-
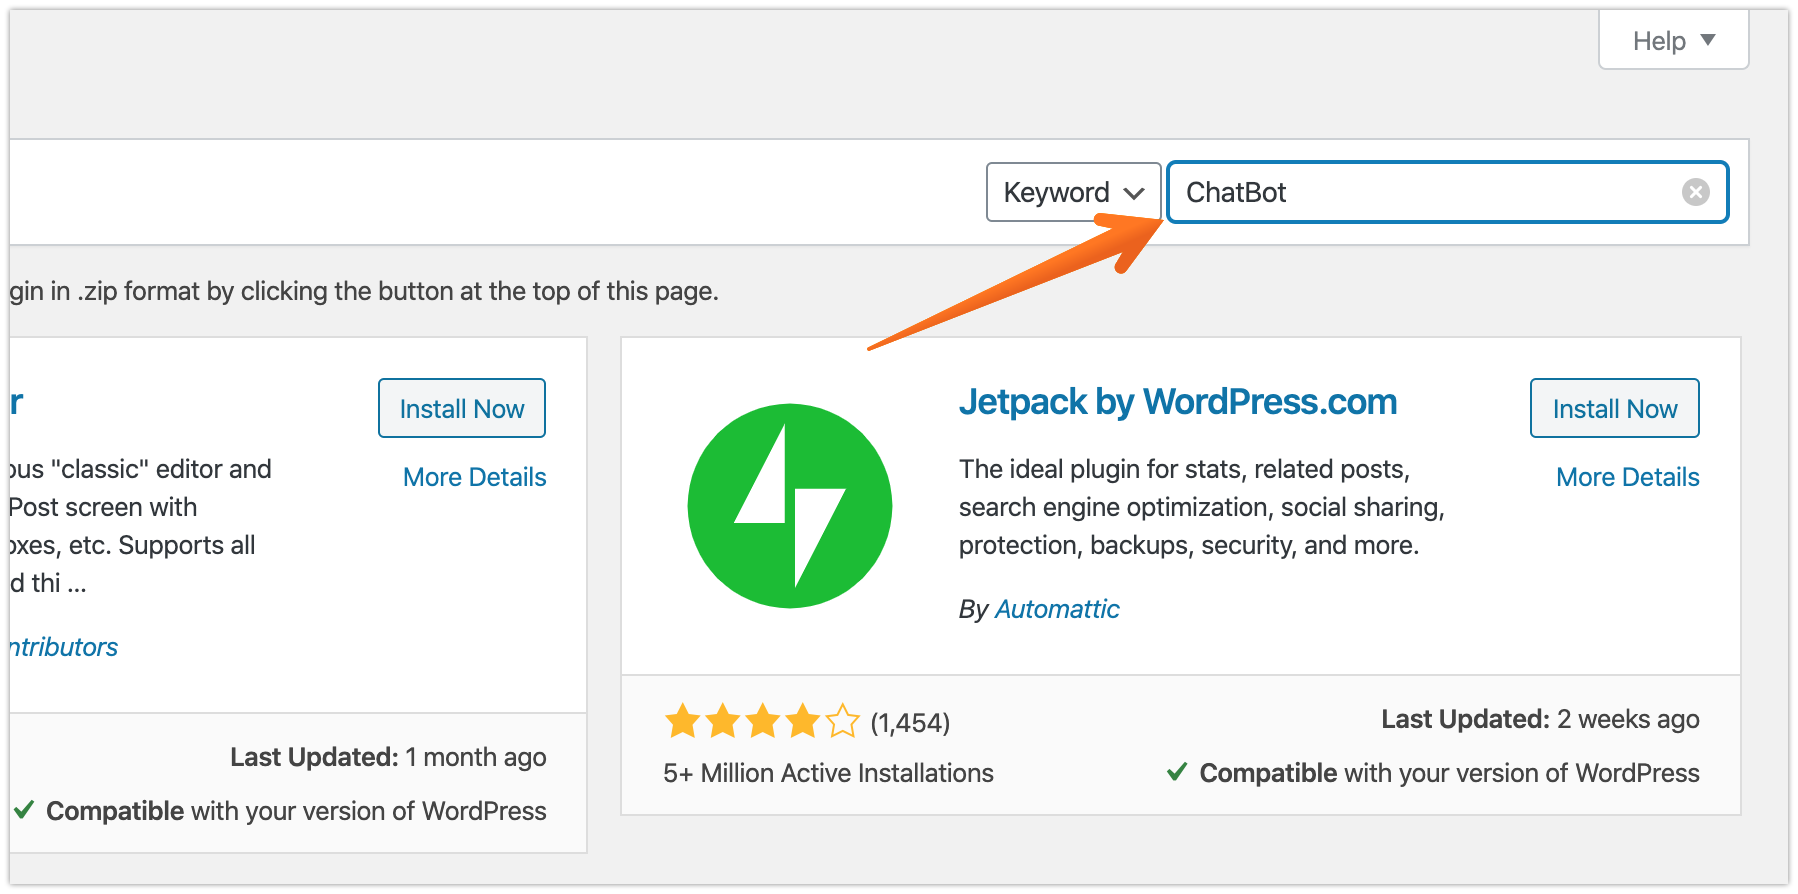
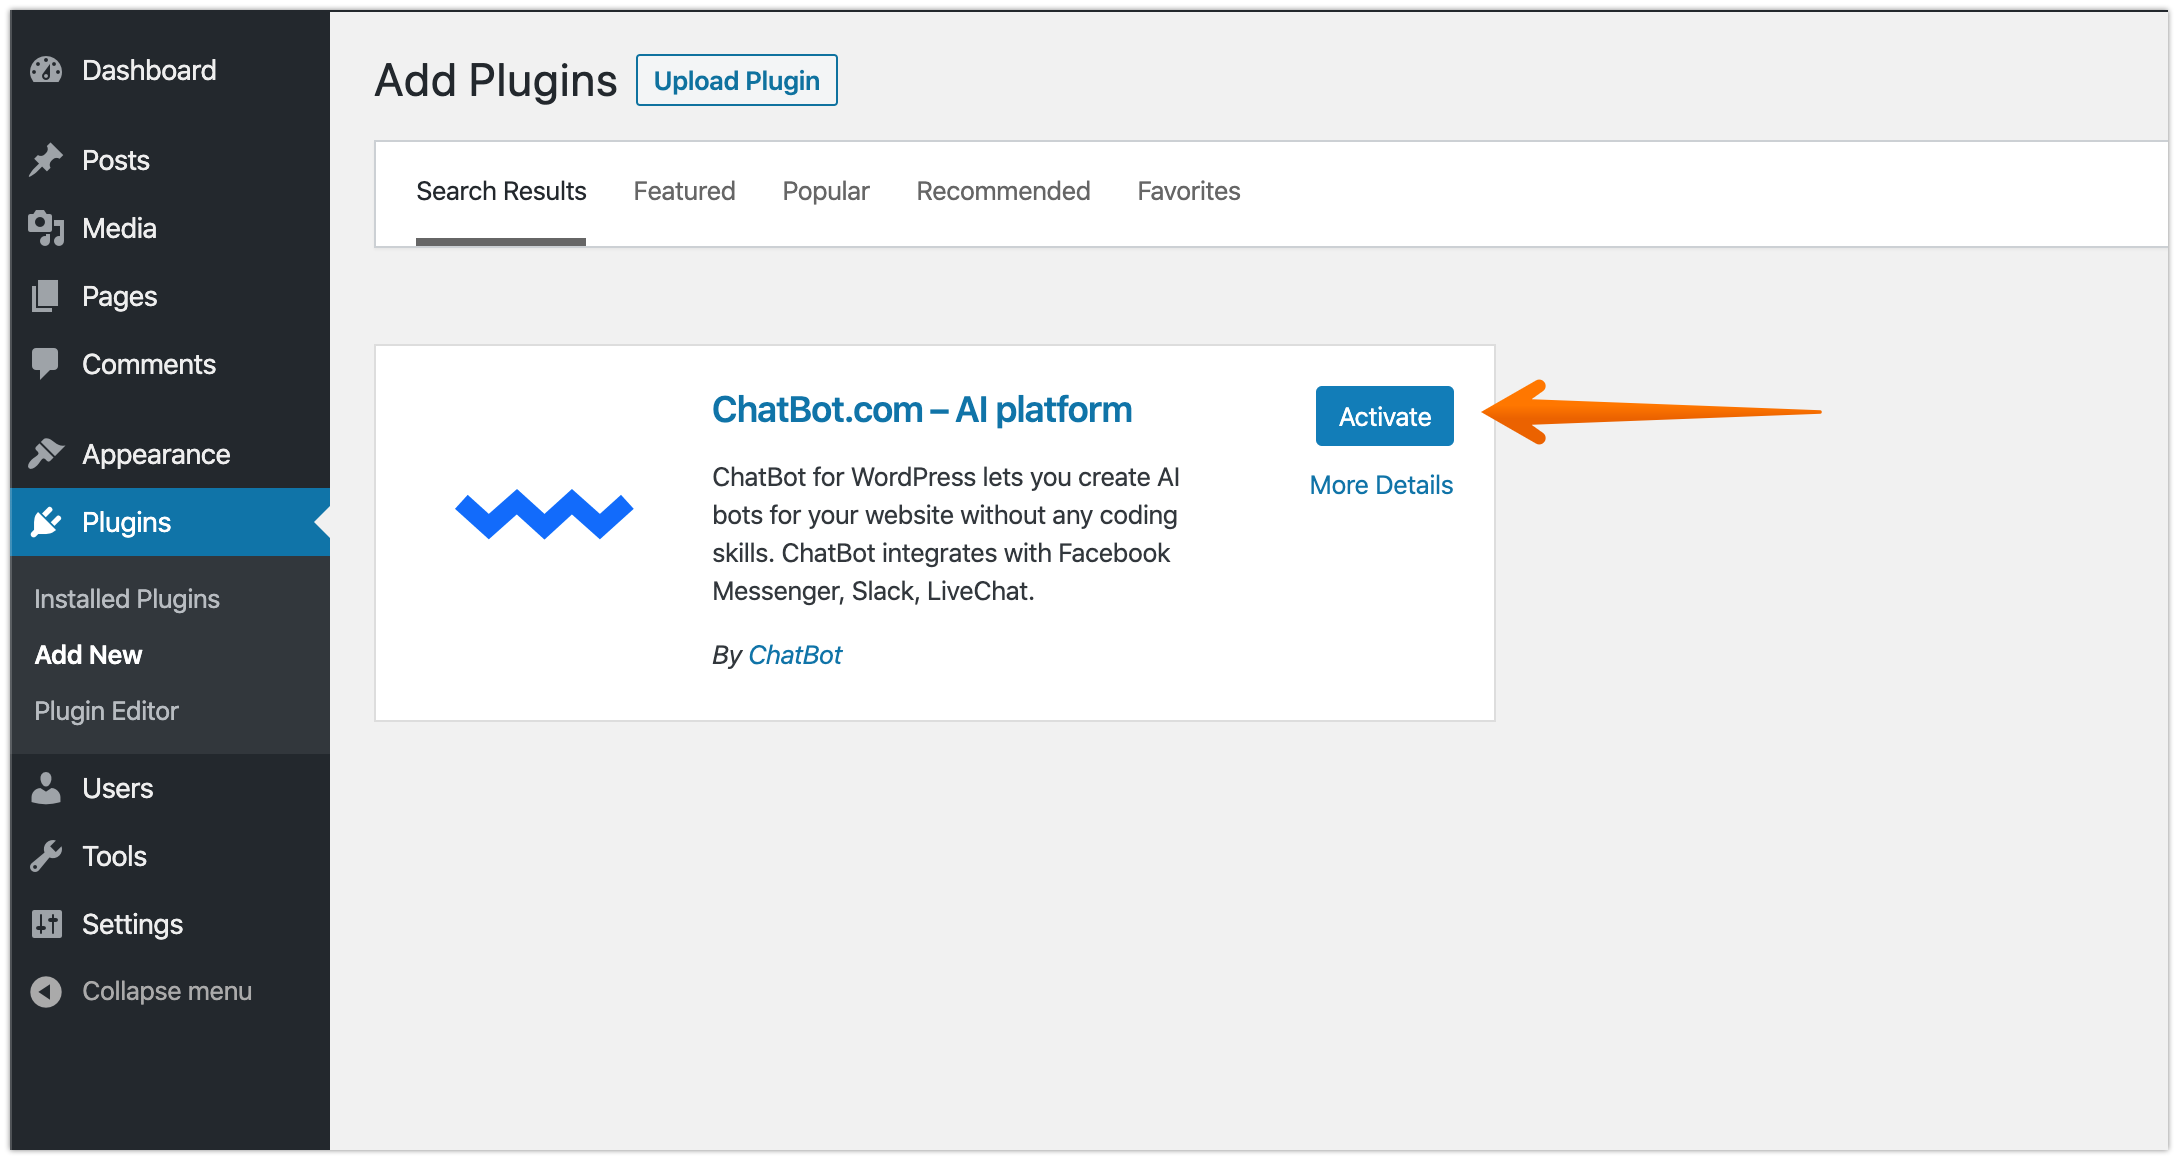
Type ChatBot in the Search Tool located on the right.
-
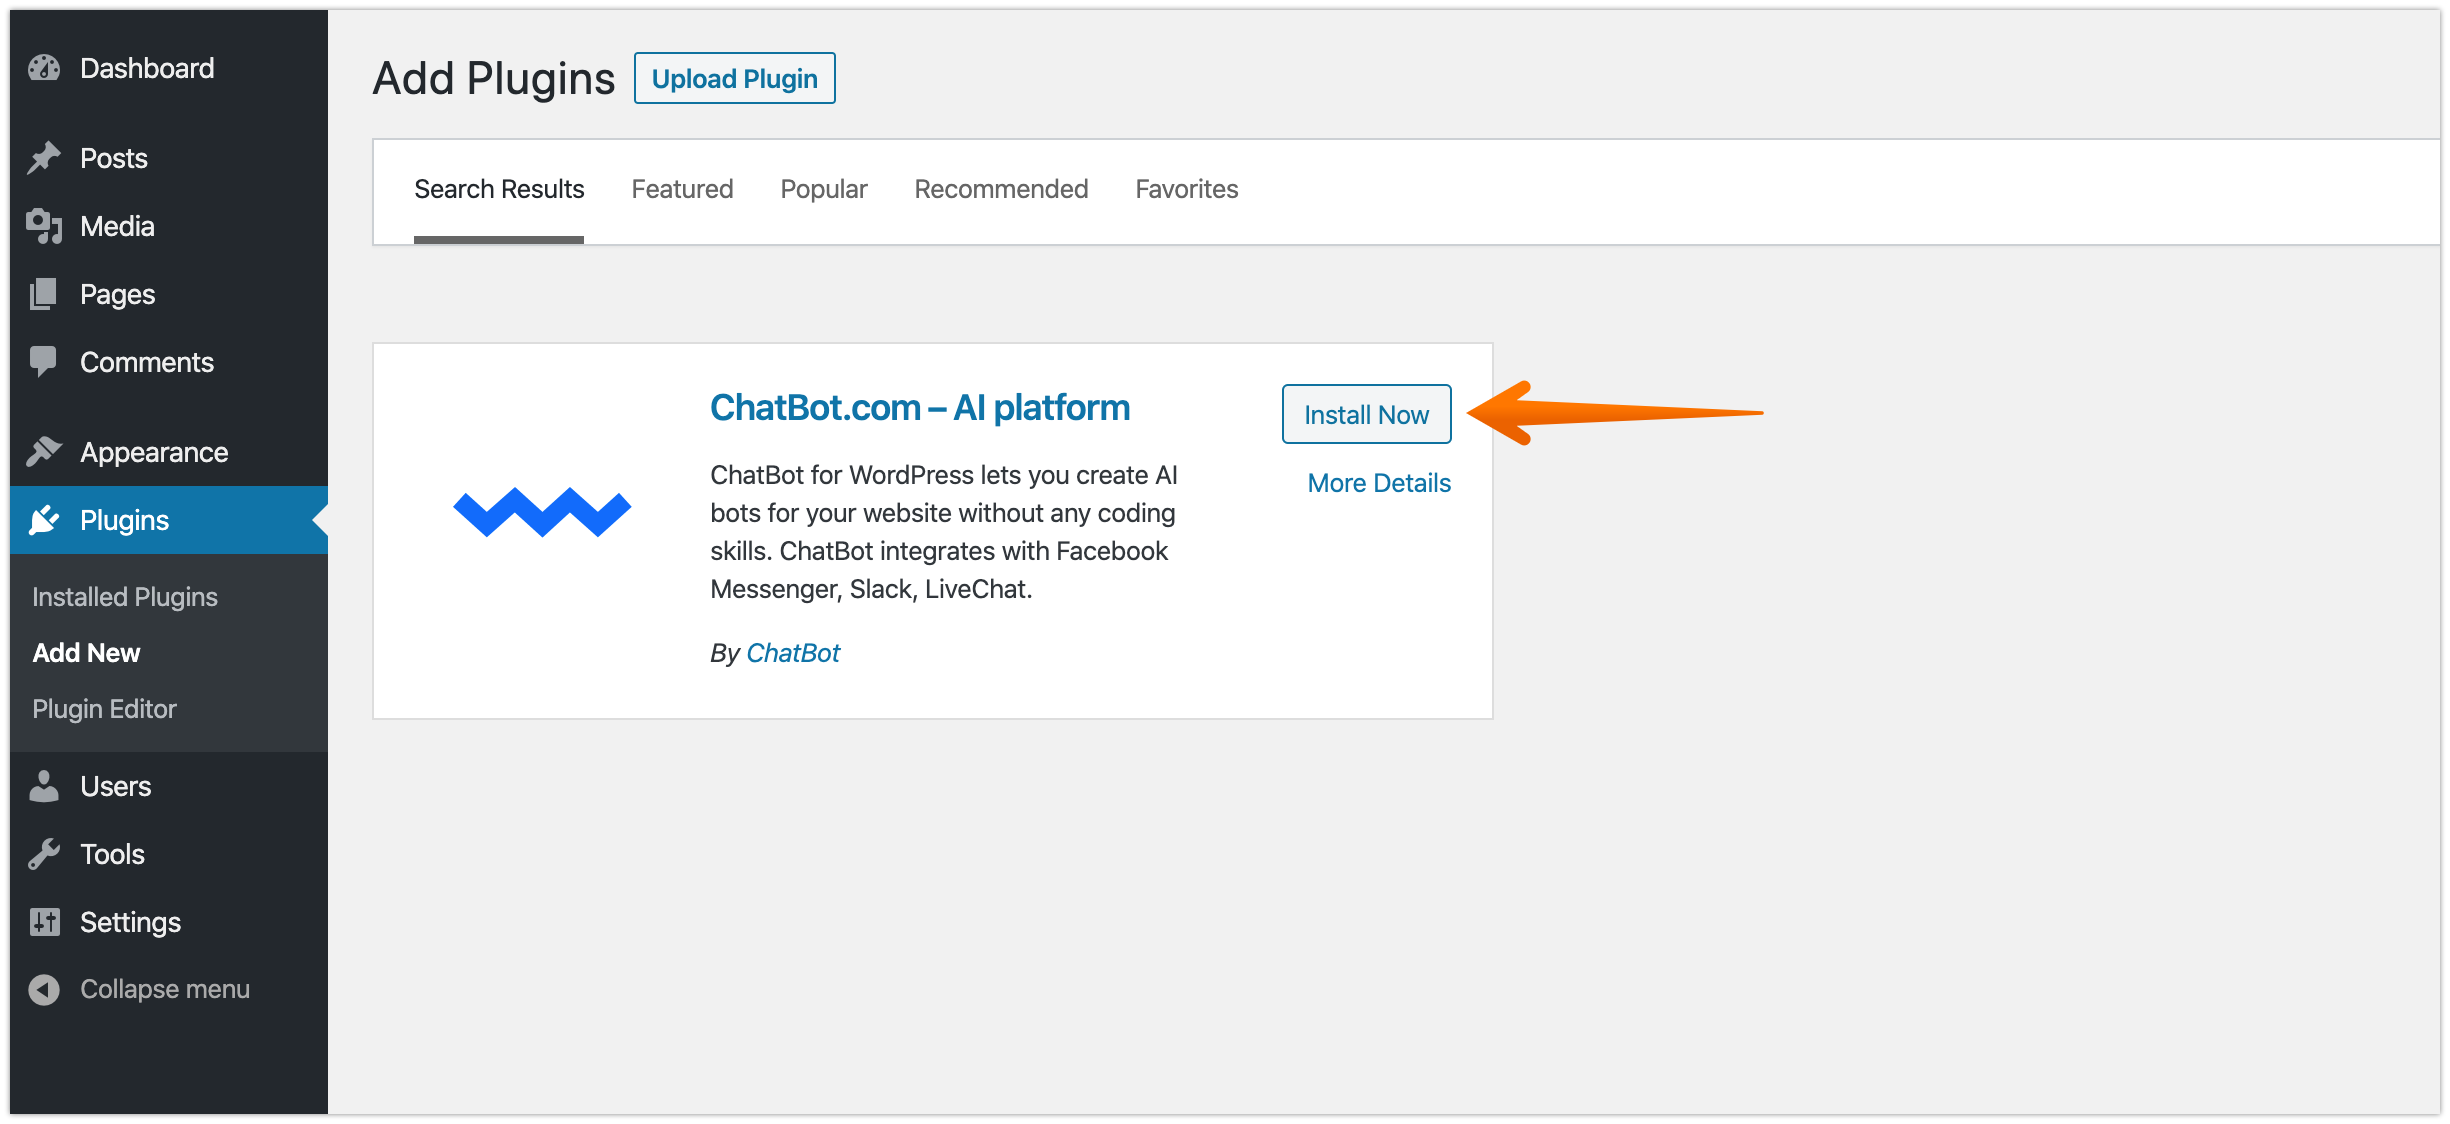
Find ChatBot on the list and click on Install Now to proceed.
-
Once the plugin is installed, click on the Activate button.
-
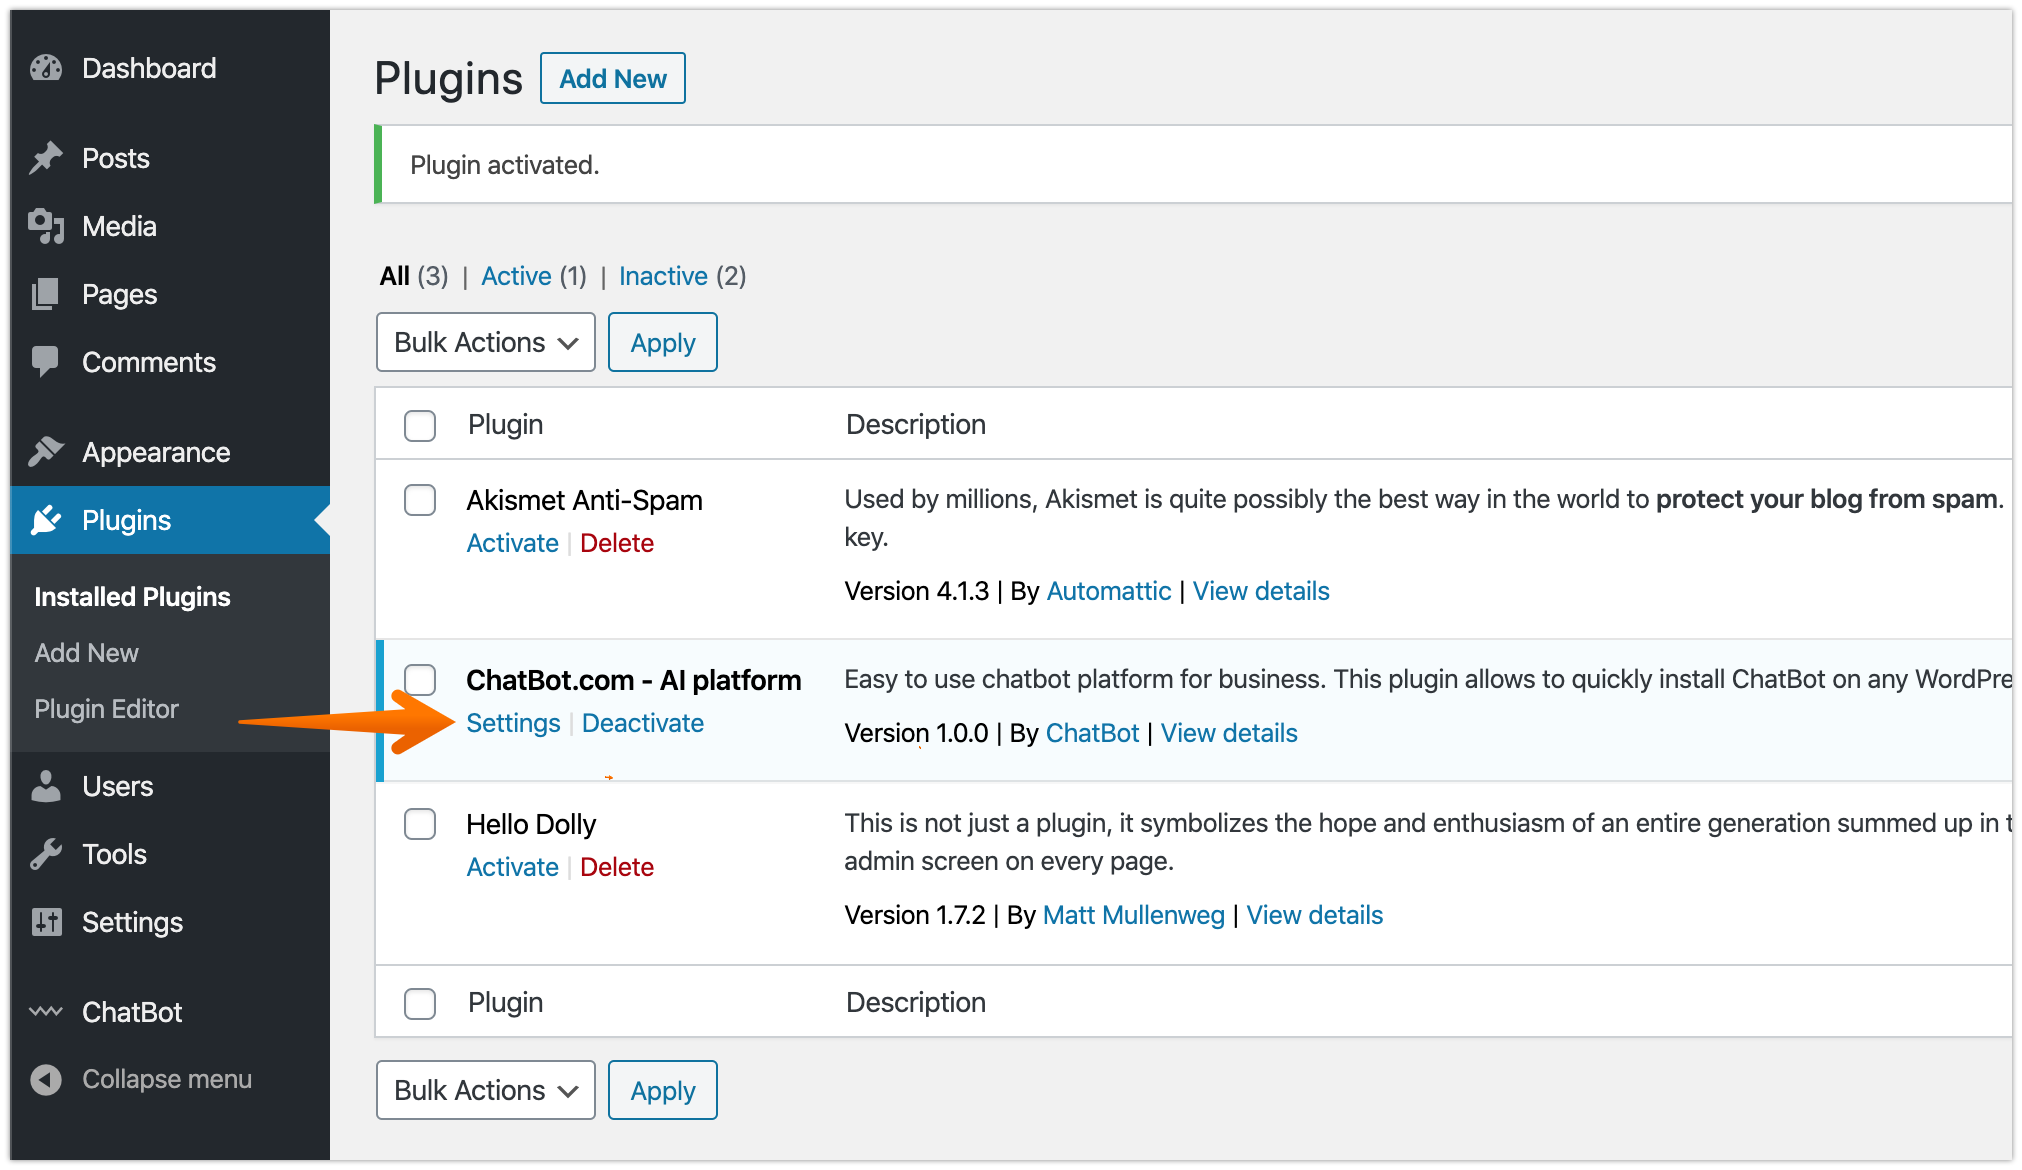
You will be redirected to the Plugins section in your WordPress. Click on the Settings button available under the ChatBot plugin.
-
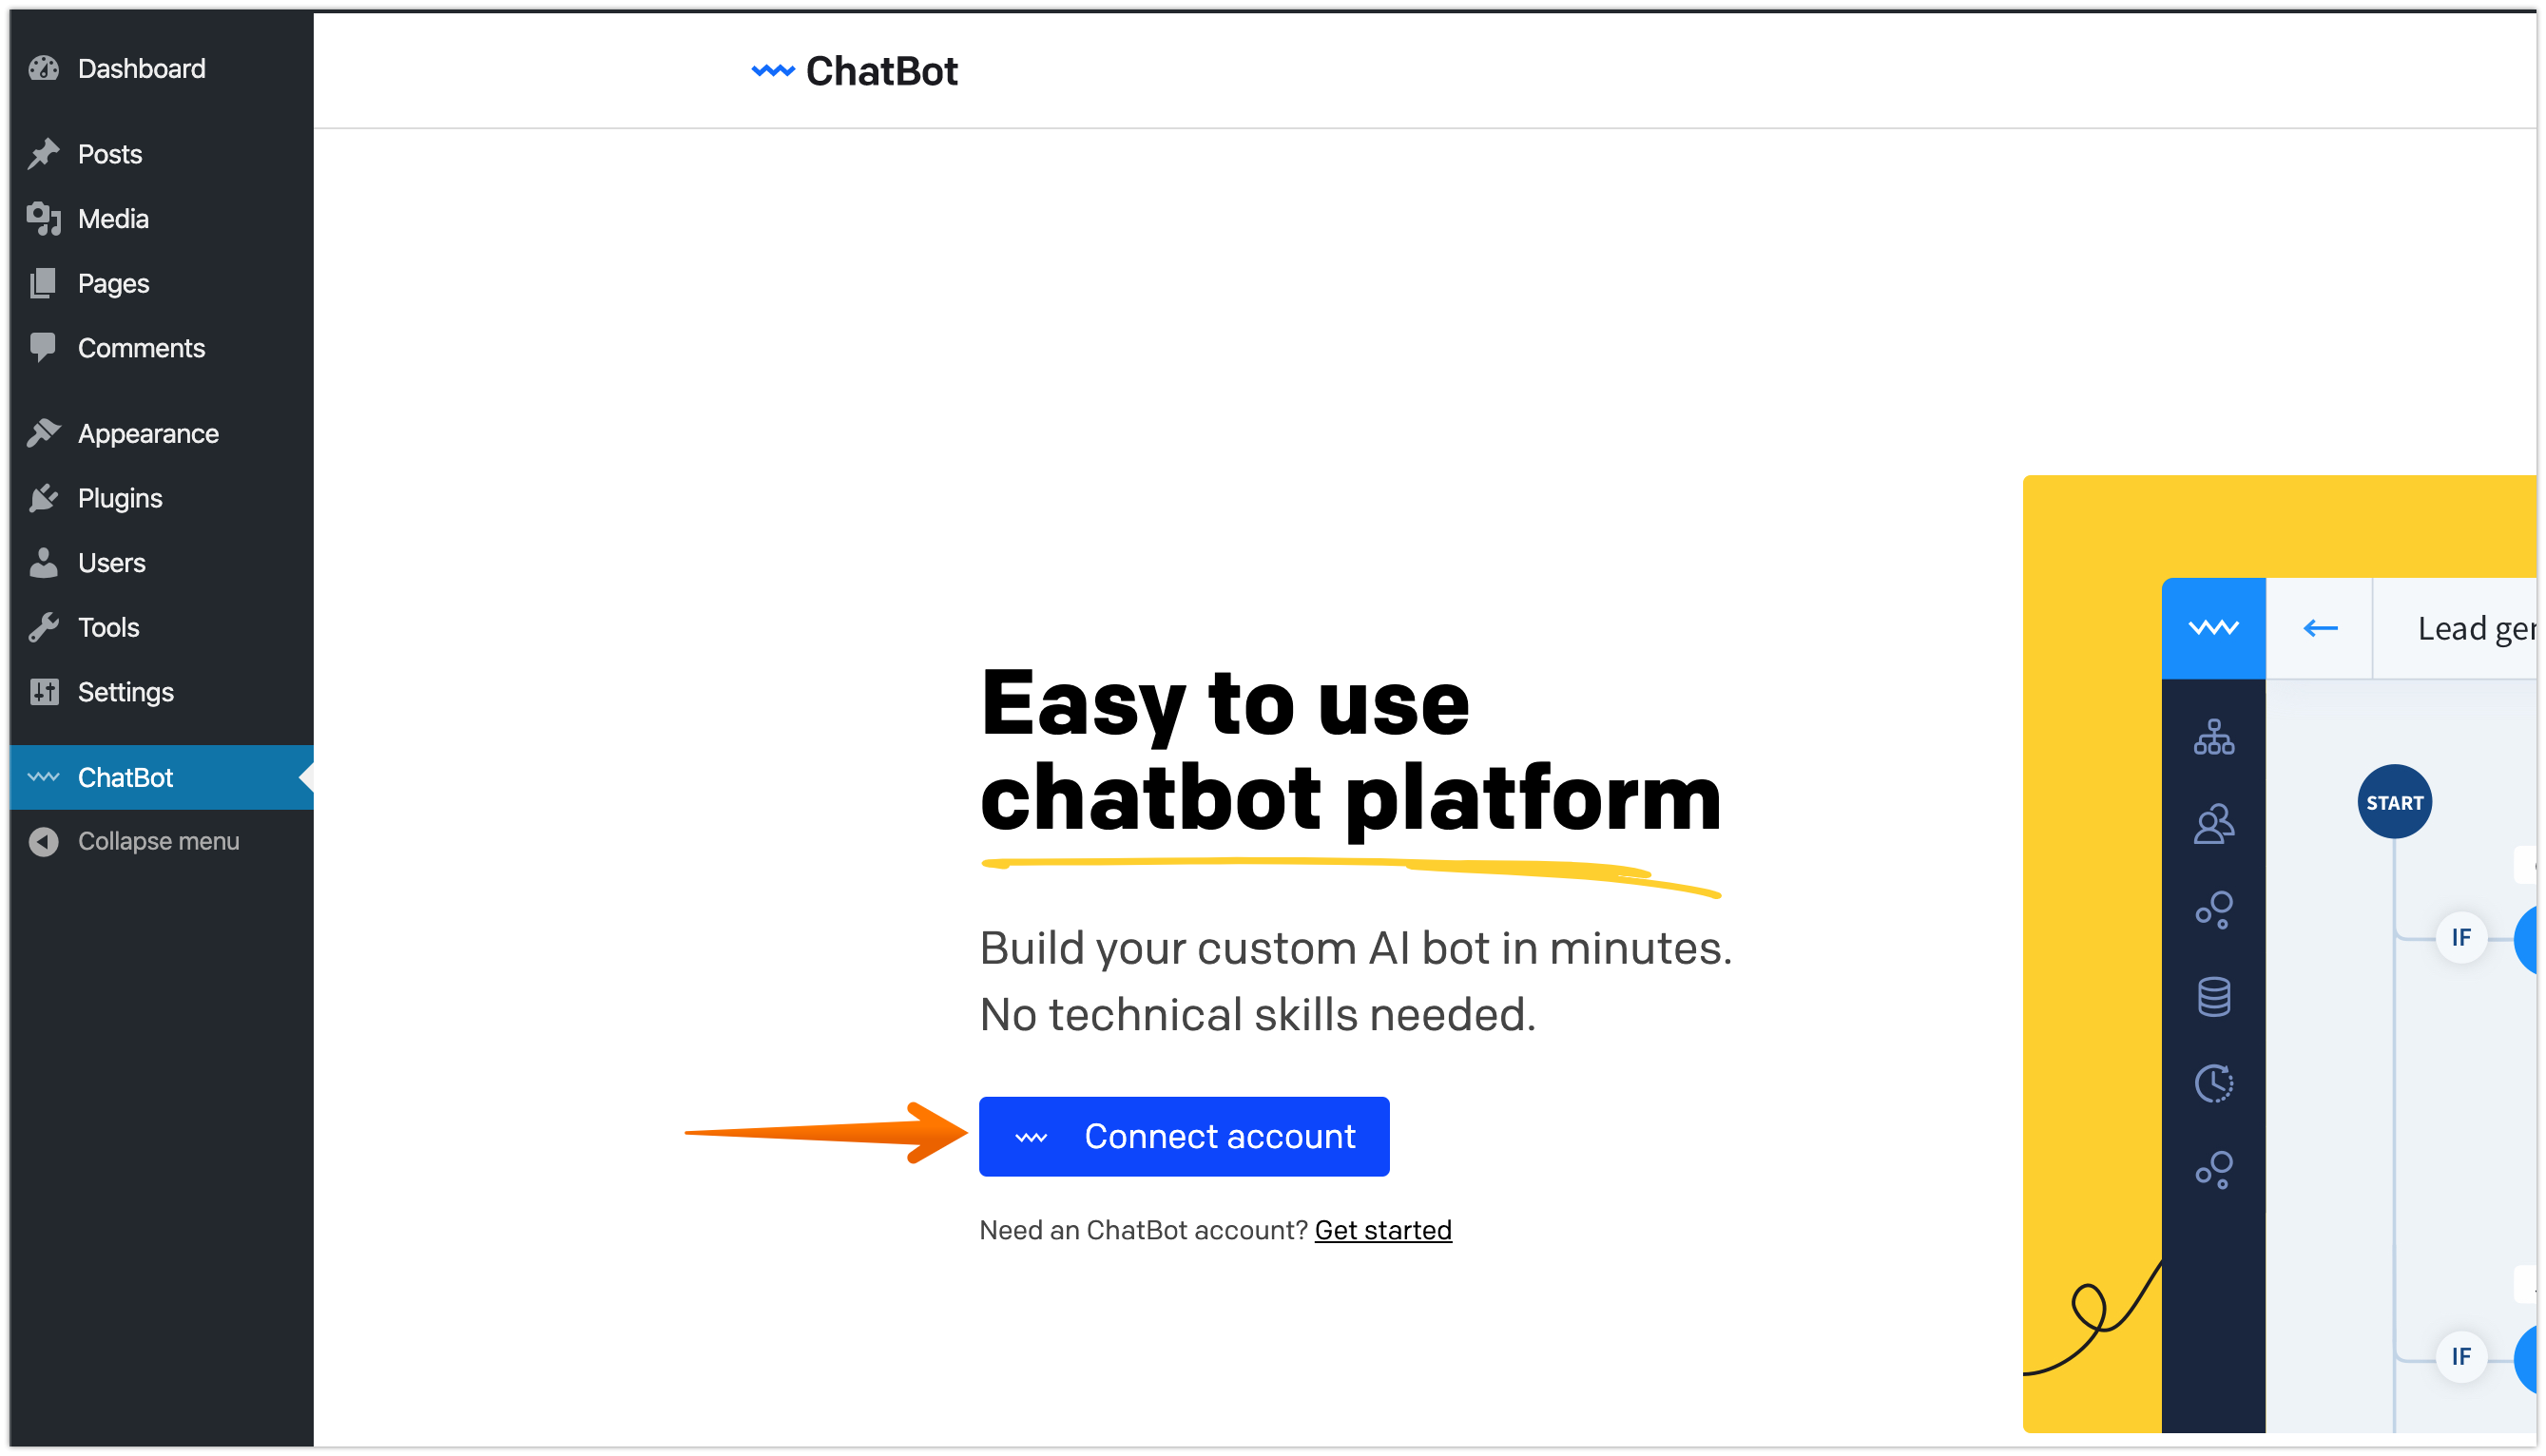
In Settings, click on Connect account.
-
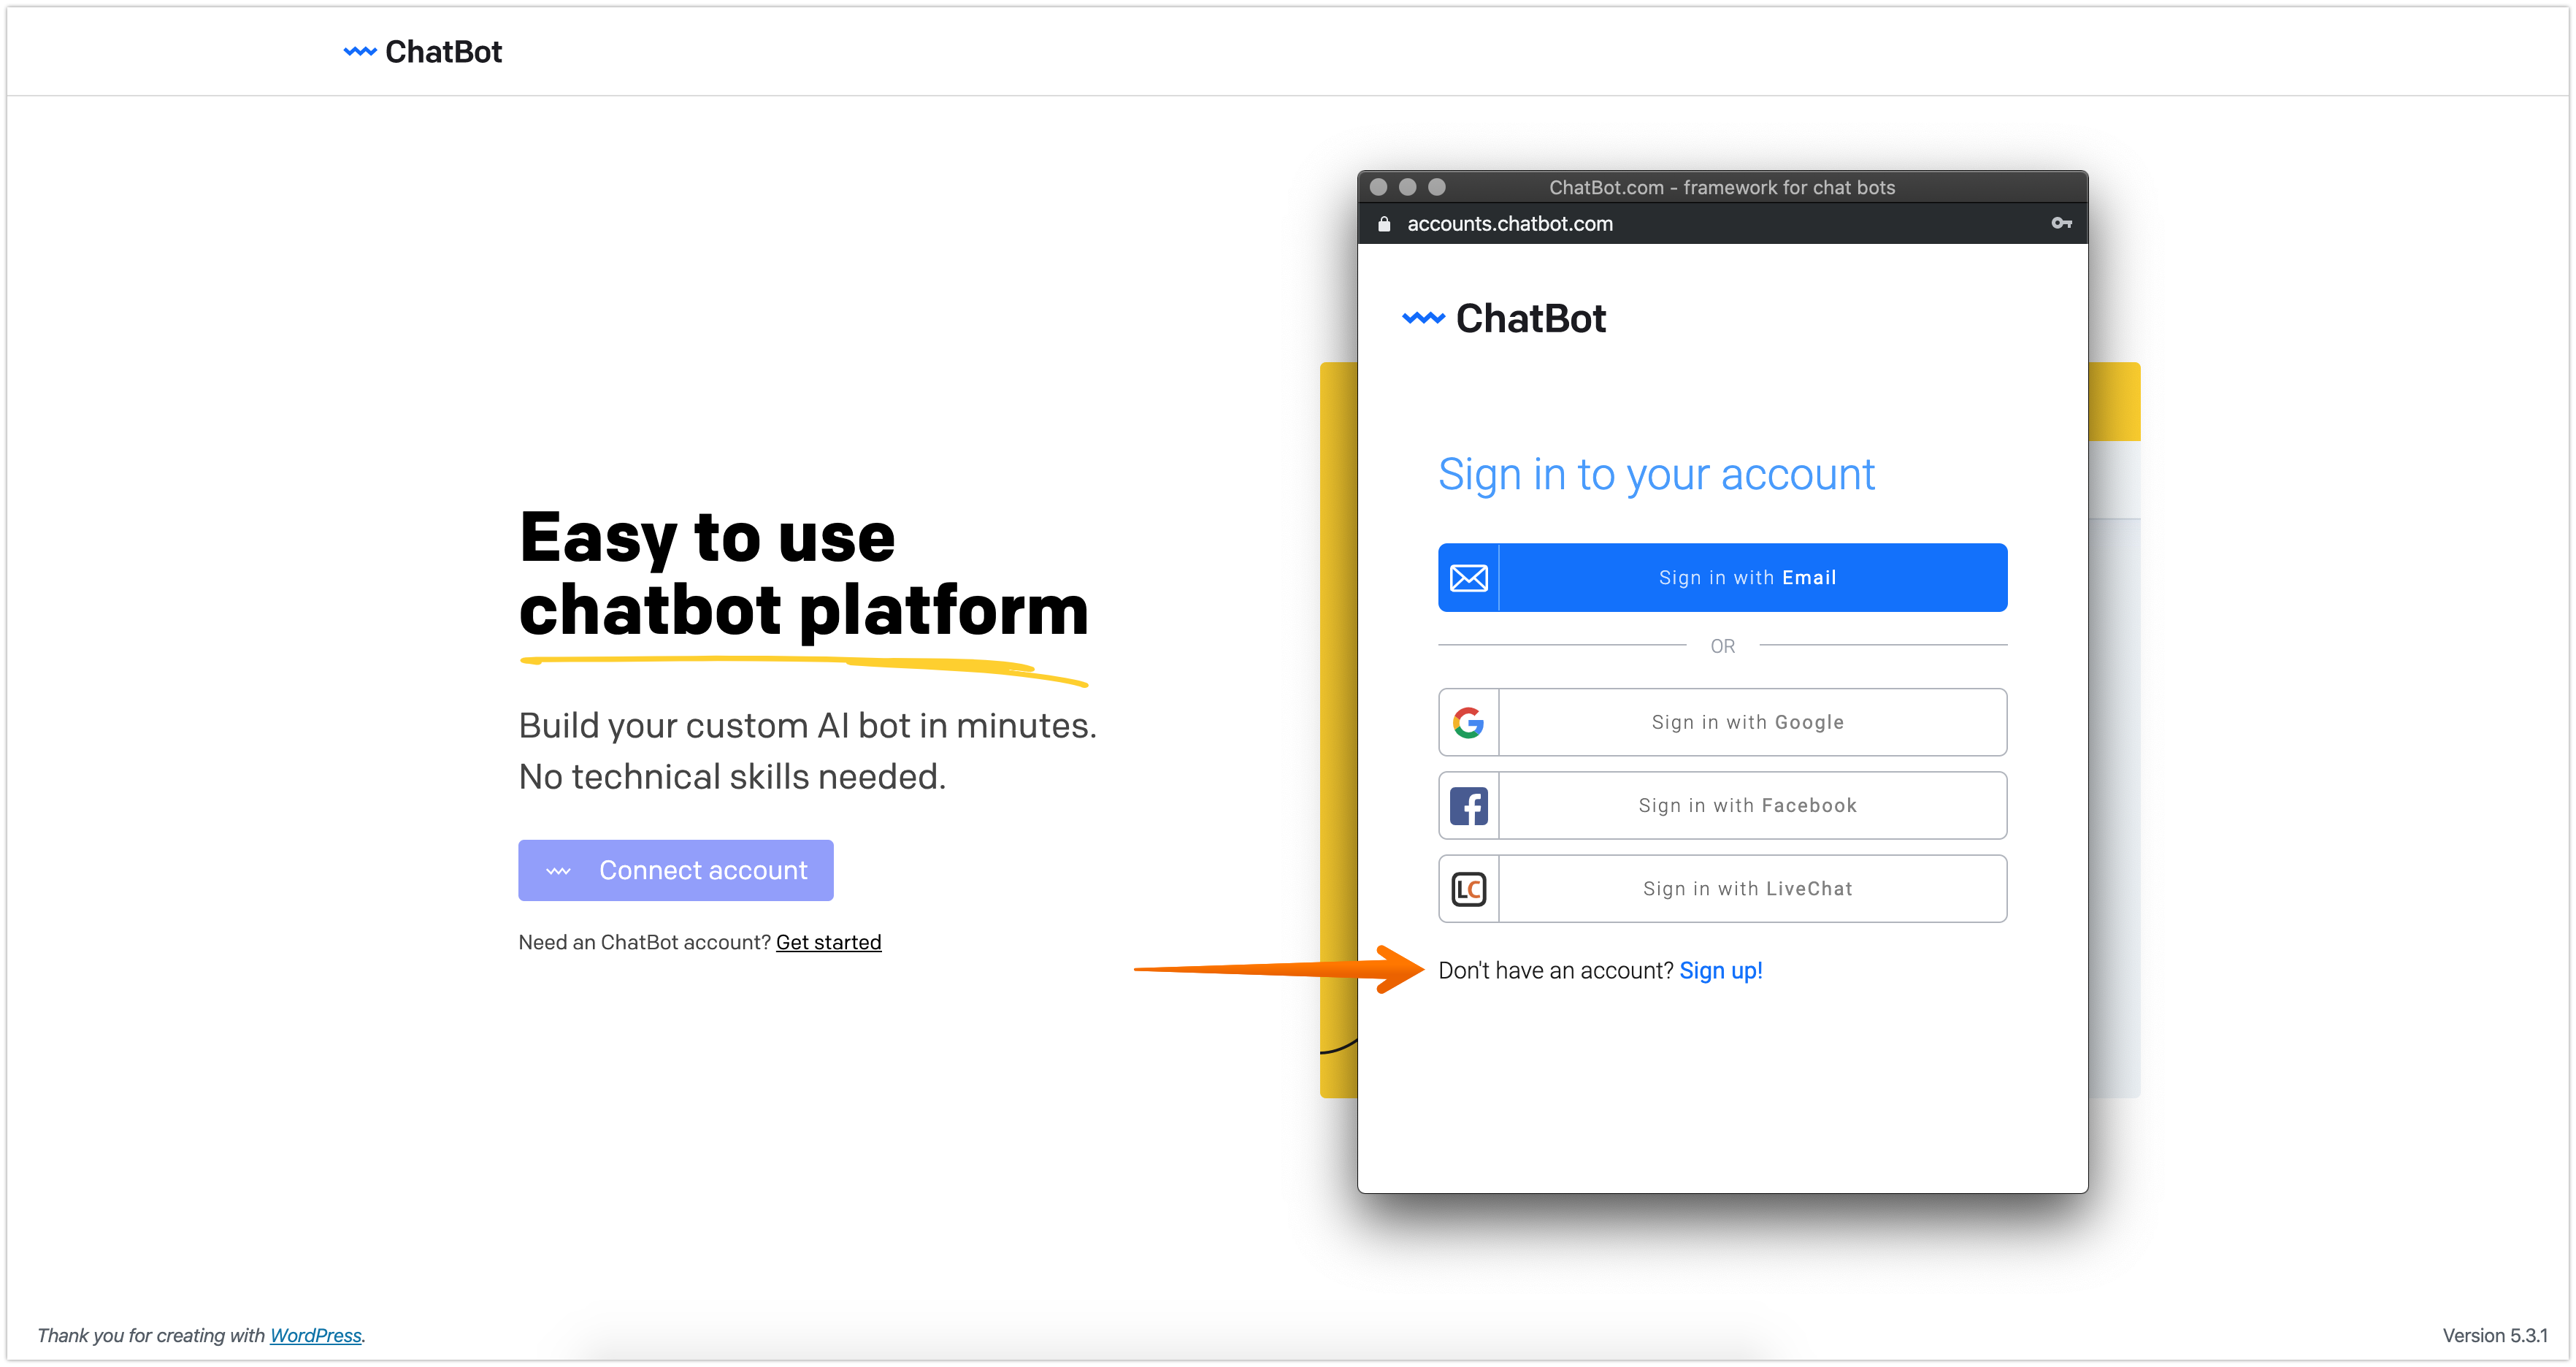
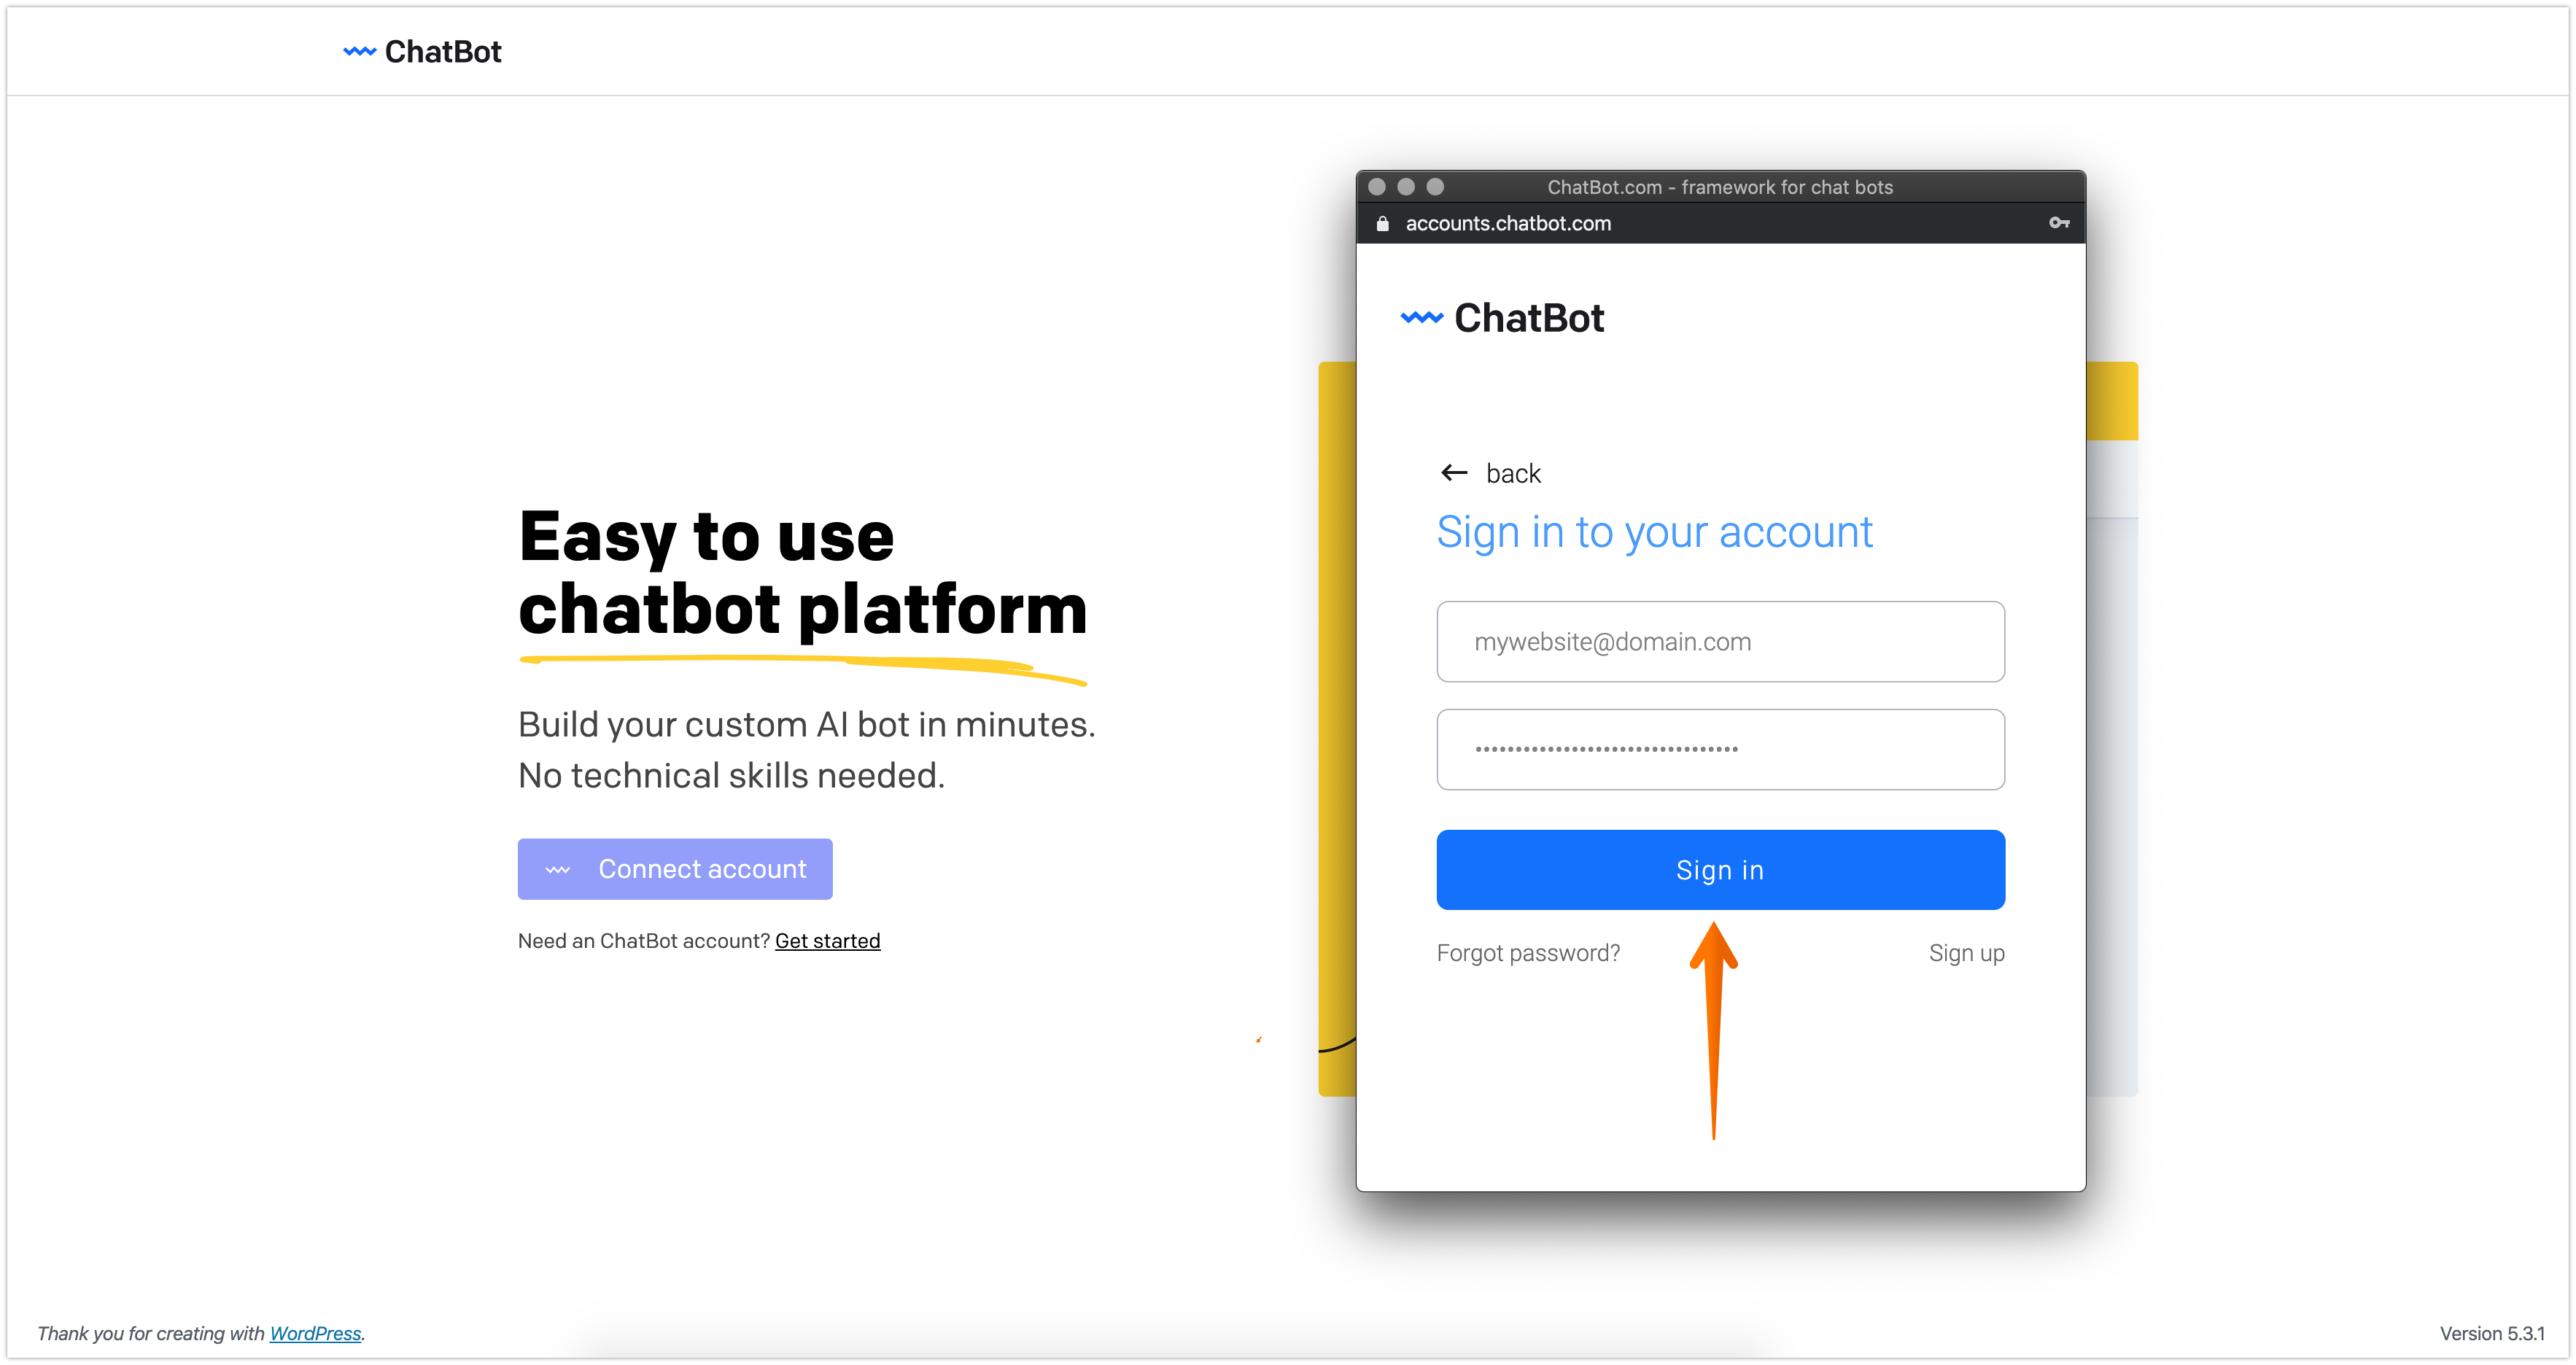
If you don’t have an account yet, create one by clicking Sign up. Otherwise, click on one of the available Sign in buttons.
-
Enter your e-mail and password and click Sign in.
-
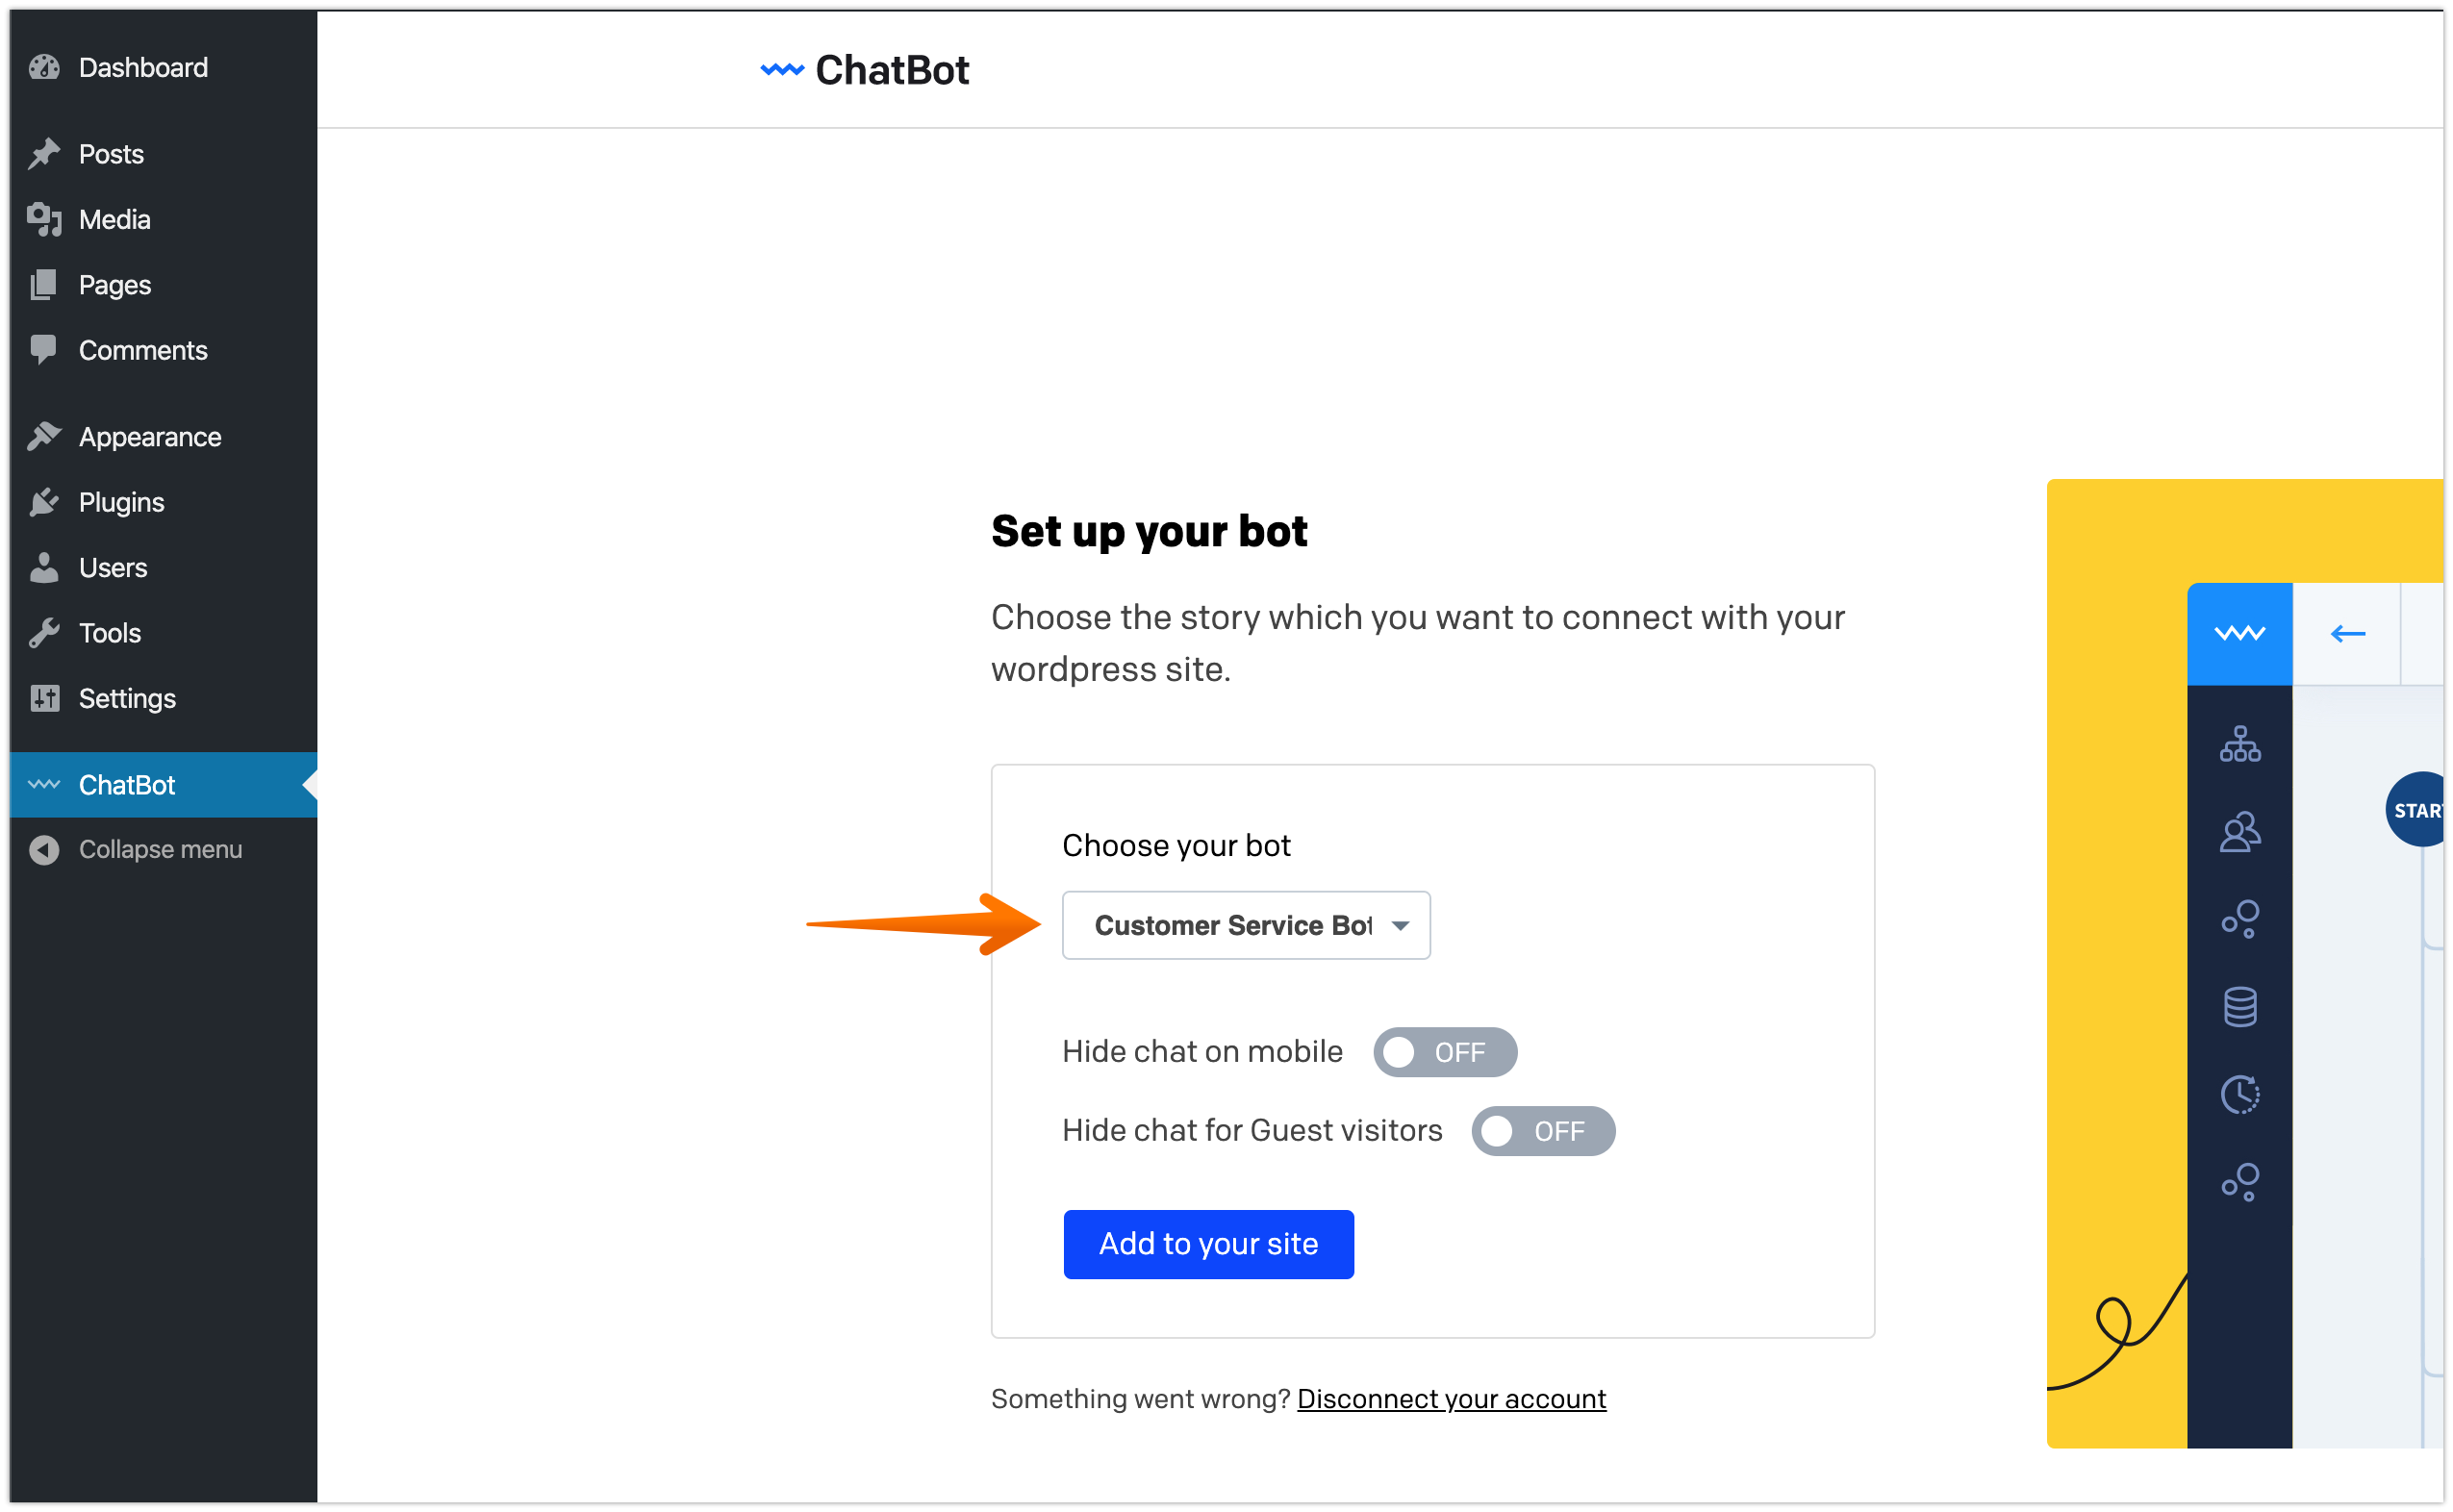
Almost ready! Now, select the bot that you want to use on your website. You can also decide if your widget should be hidden on mobile devices or for guest visitors.
-
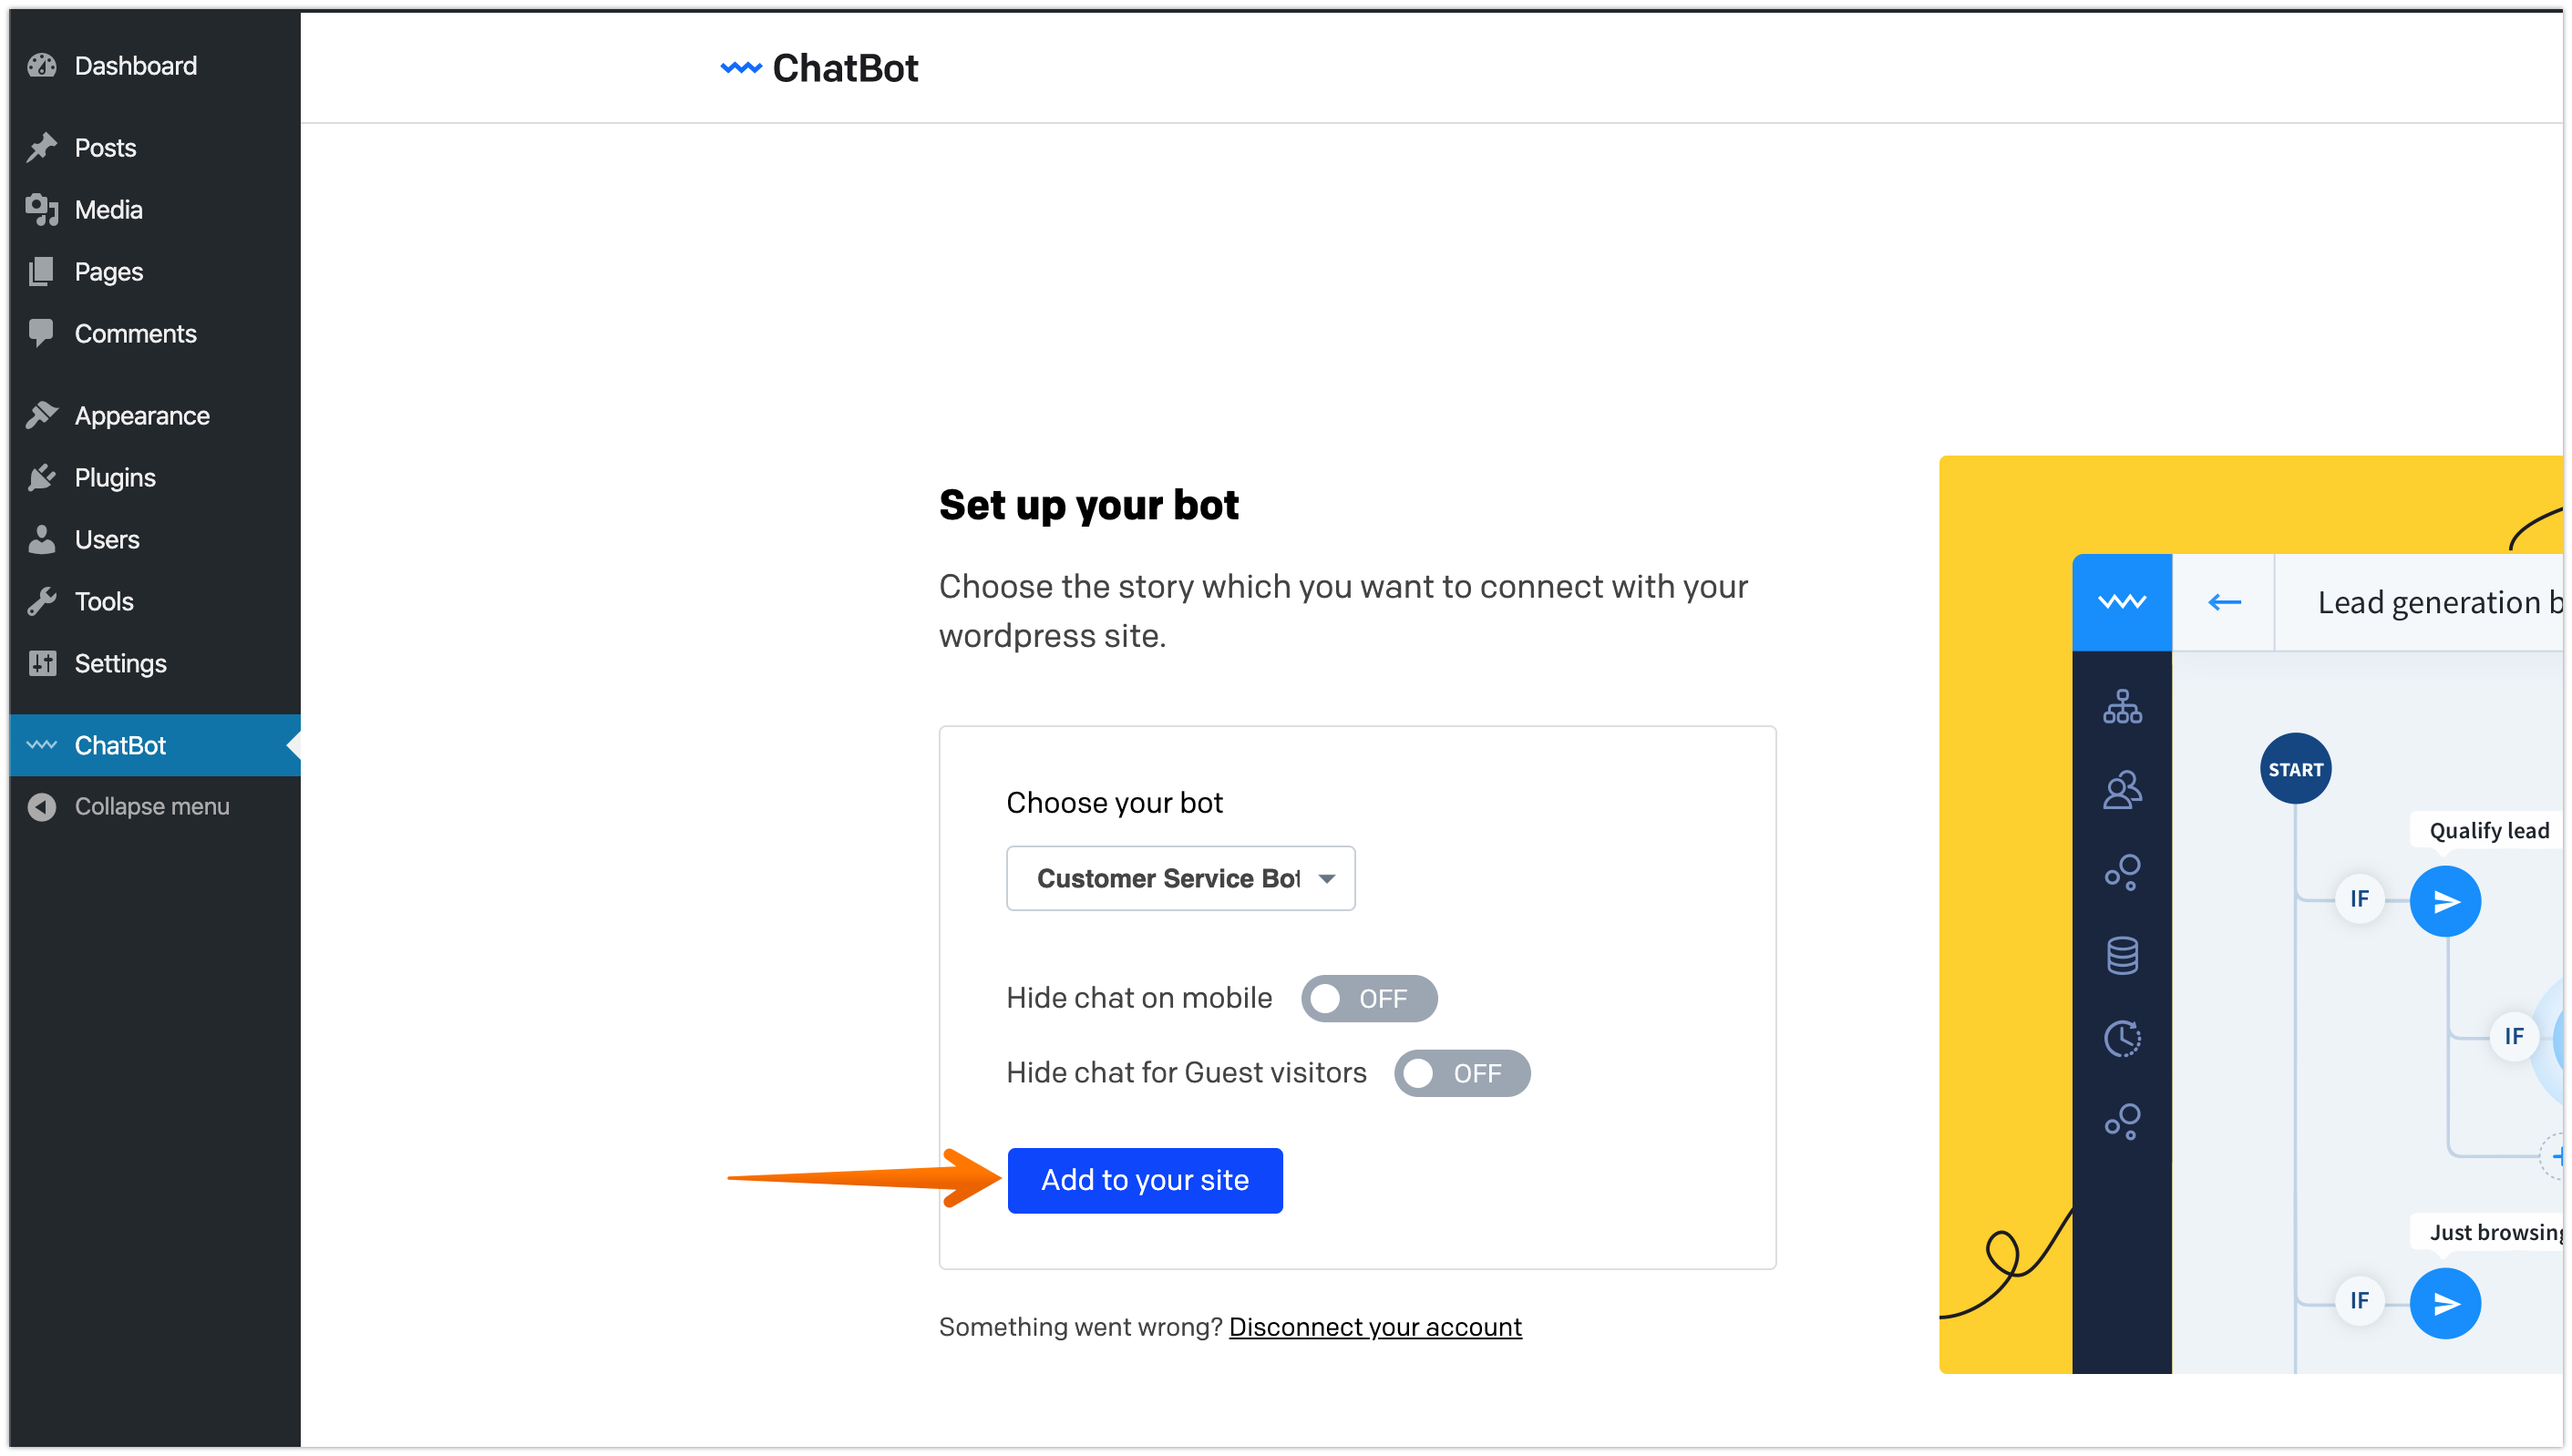
Click on the Add to your site button to finish the installation.
Well done! Your chatbot is now ready to chat with visitors. Remember that you can always change your bot settings and the display rules.
Having trouble setting up the integration? Chat with our support bot or leave us a message.
