Attributes can save user information and allow for reusing it in conversations. In ChatBot, we can distinguish default and custom attributes.
Default attributes
ChatBot automatically collects data about your users from integrated apps. Let’s use one of them to create a personalized welcome message. The following example uses the ChatBot and Messenger integration.
-
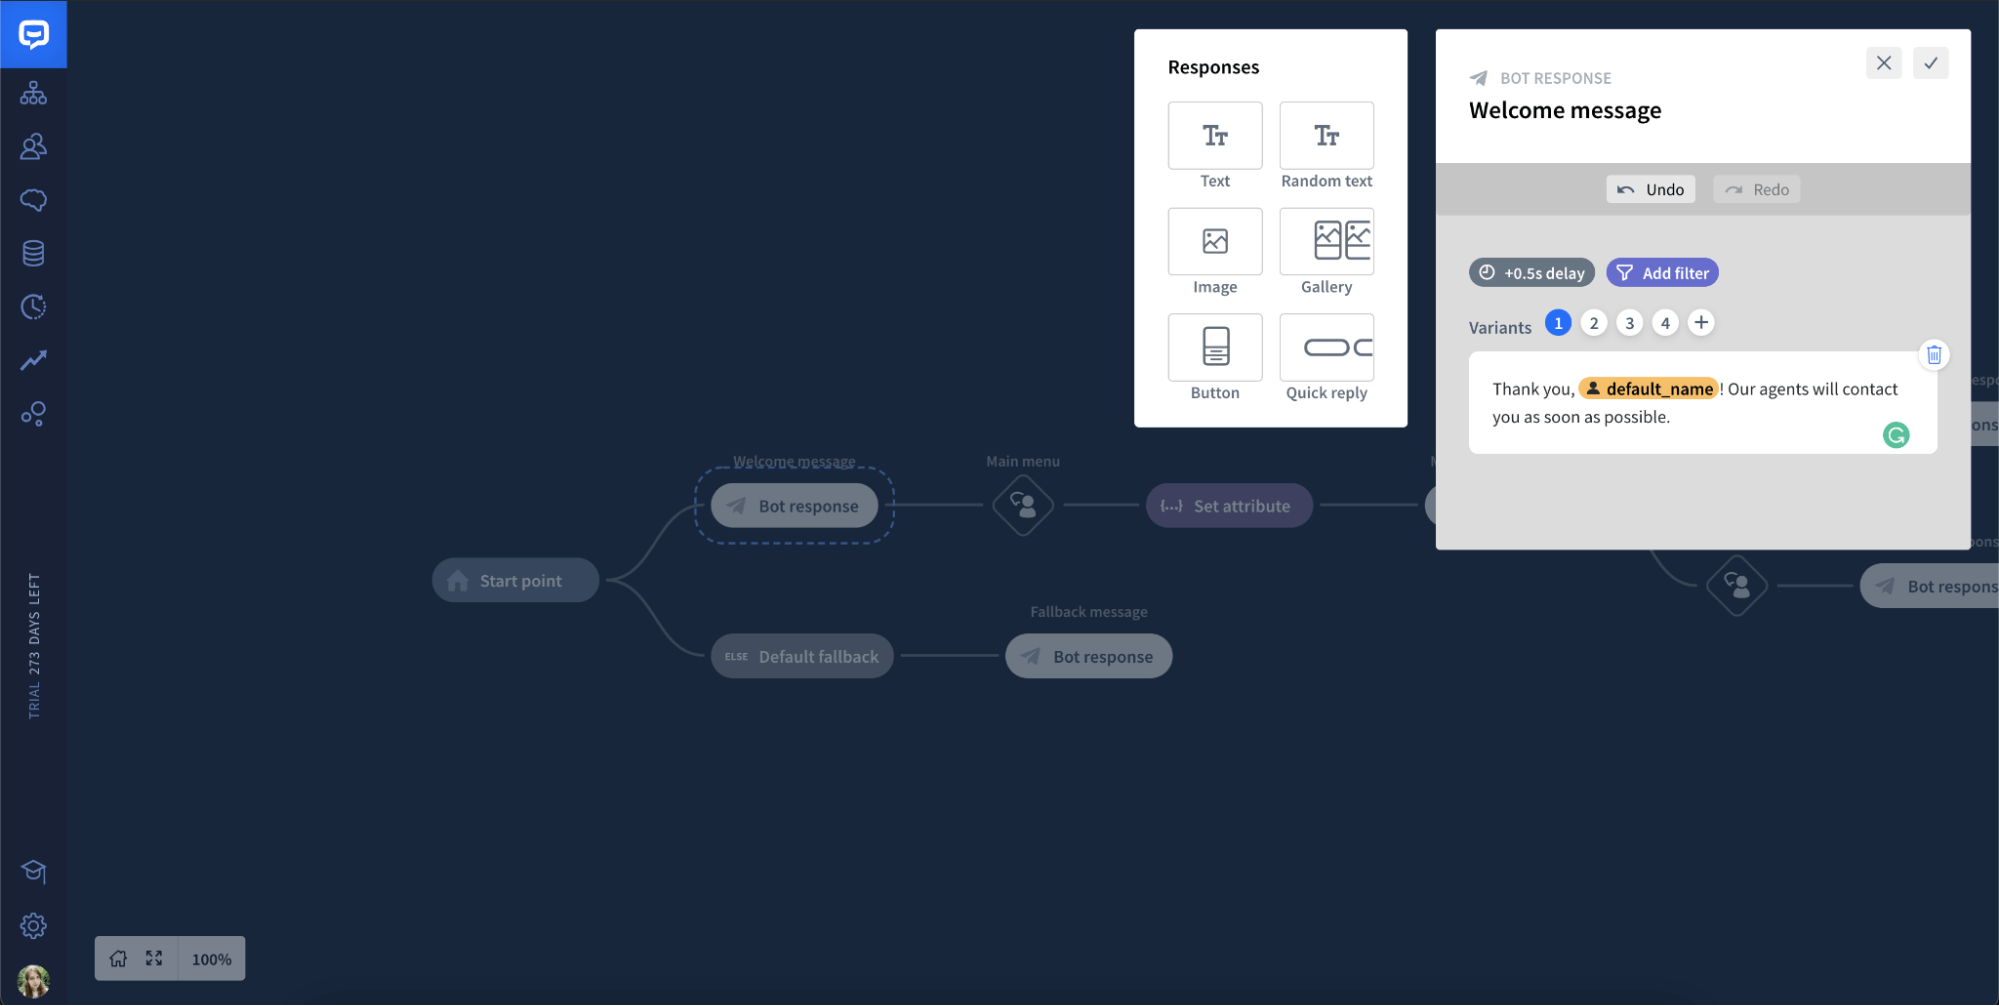
Create a new Story. Then, click on the Bot response block called Welcome message.

-
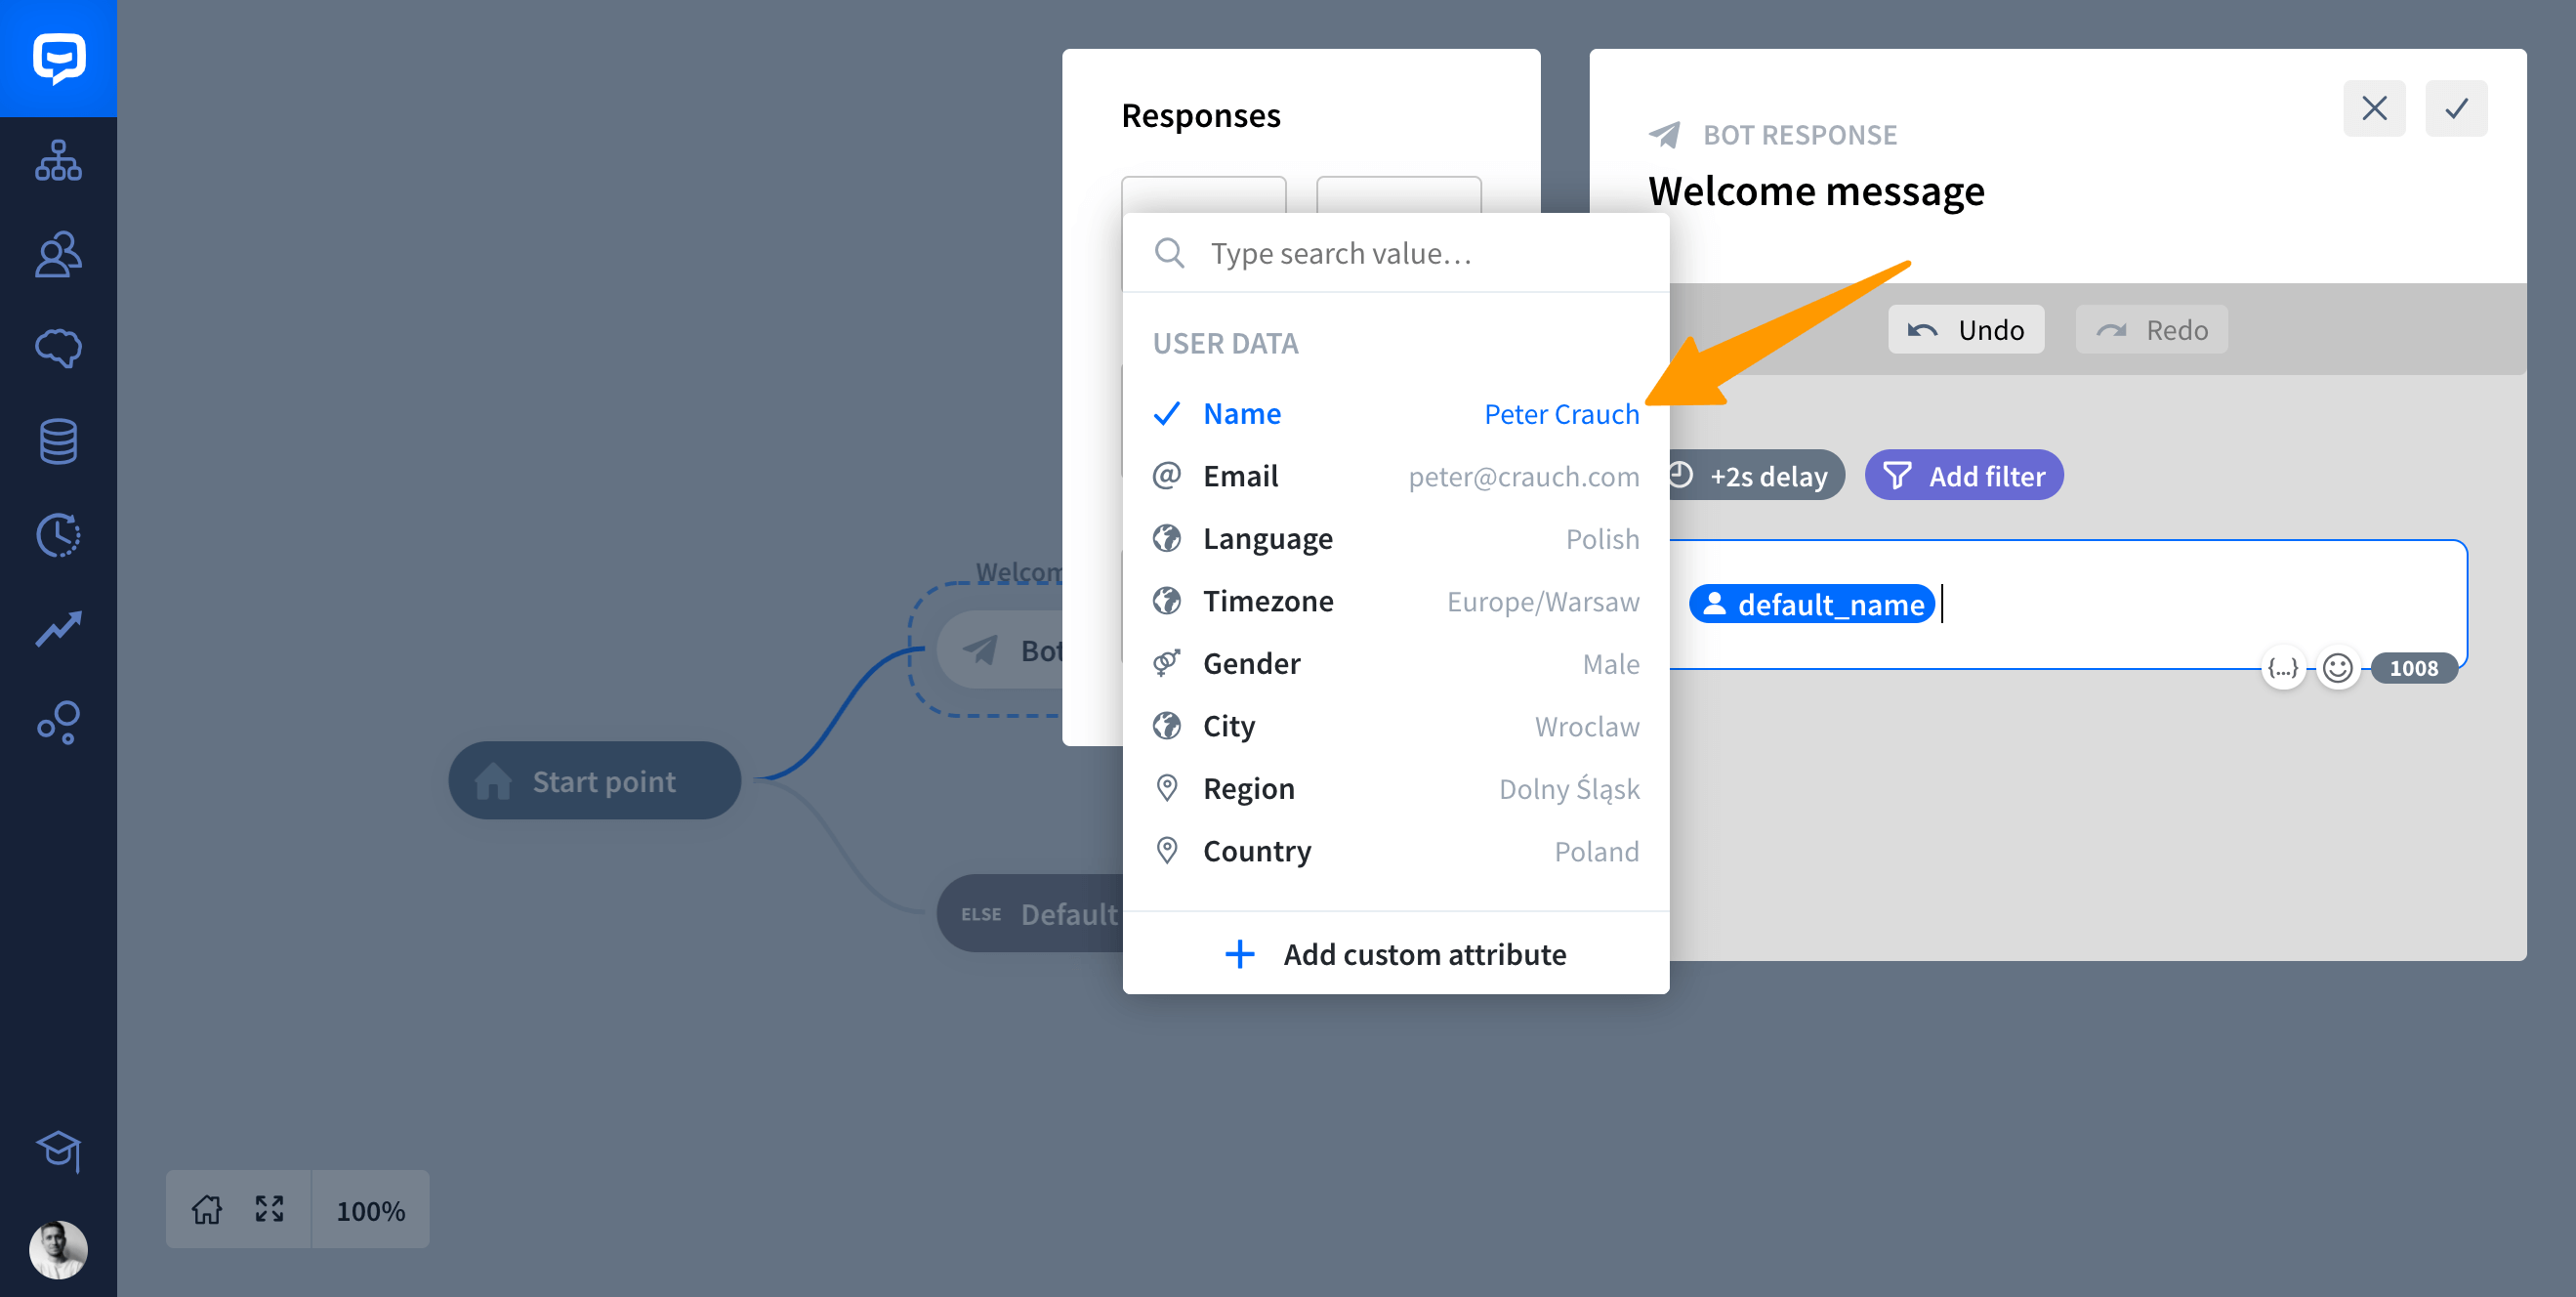
Remove the default message. Add a new text response and type double curly brackets to call the attributes
{{ ... }}.
-
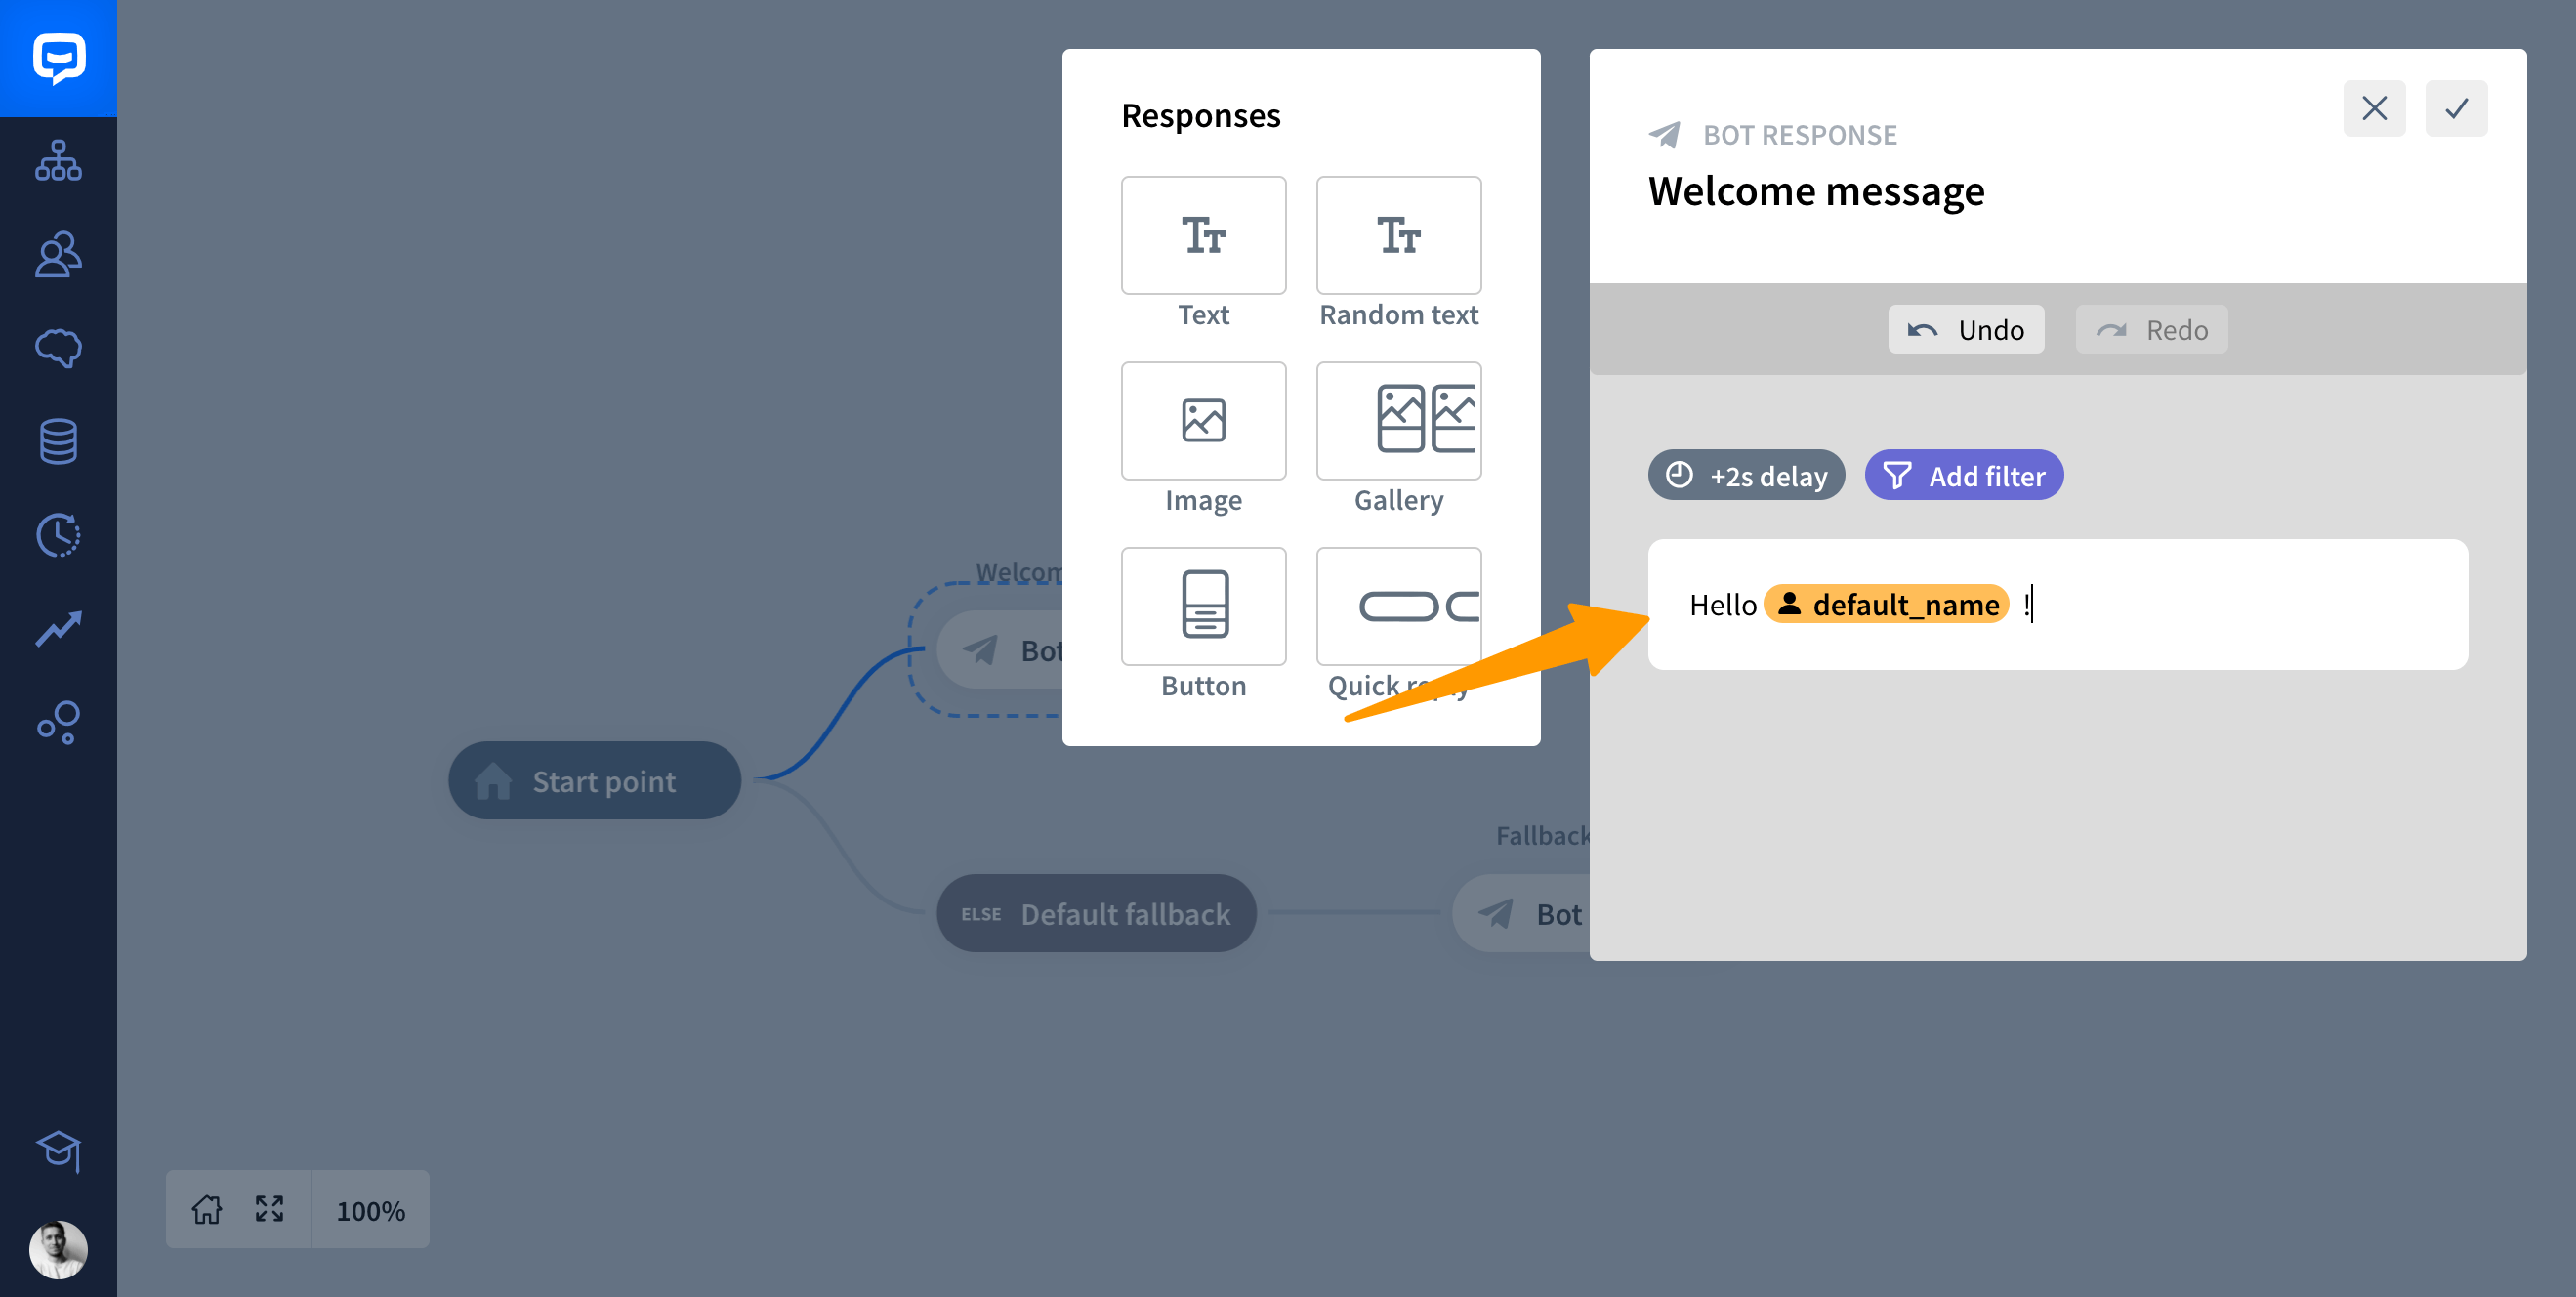
Click on the Name attribute to use it. Add some text and save the interaction.
-
The attribute is ready. The bot will pull the information from Messenger and display the user name in the place of the attribute.
Custom attributes
If you need to collect user data that isn’t listed in the default attributes list, you can create your own custom attributes.
-
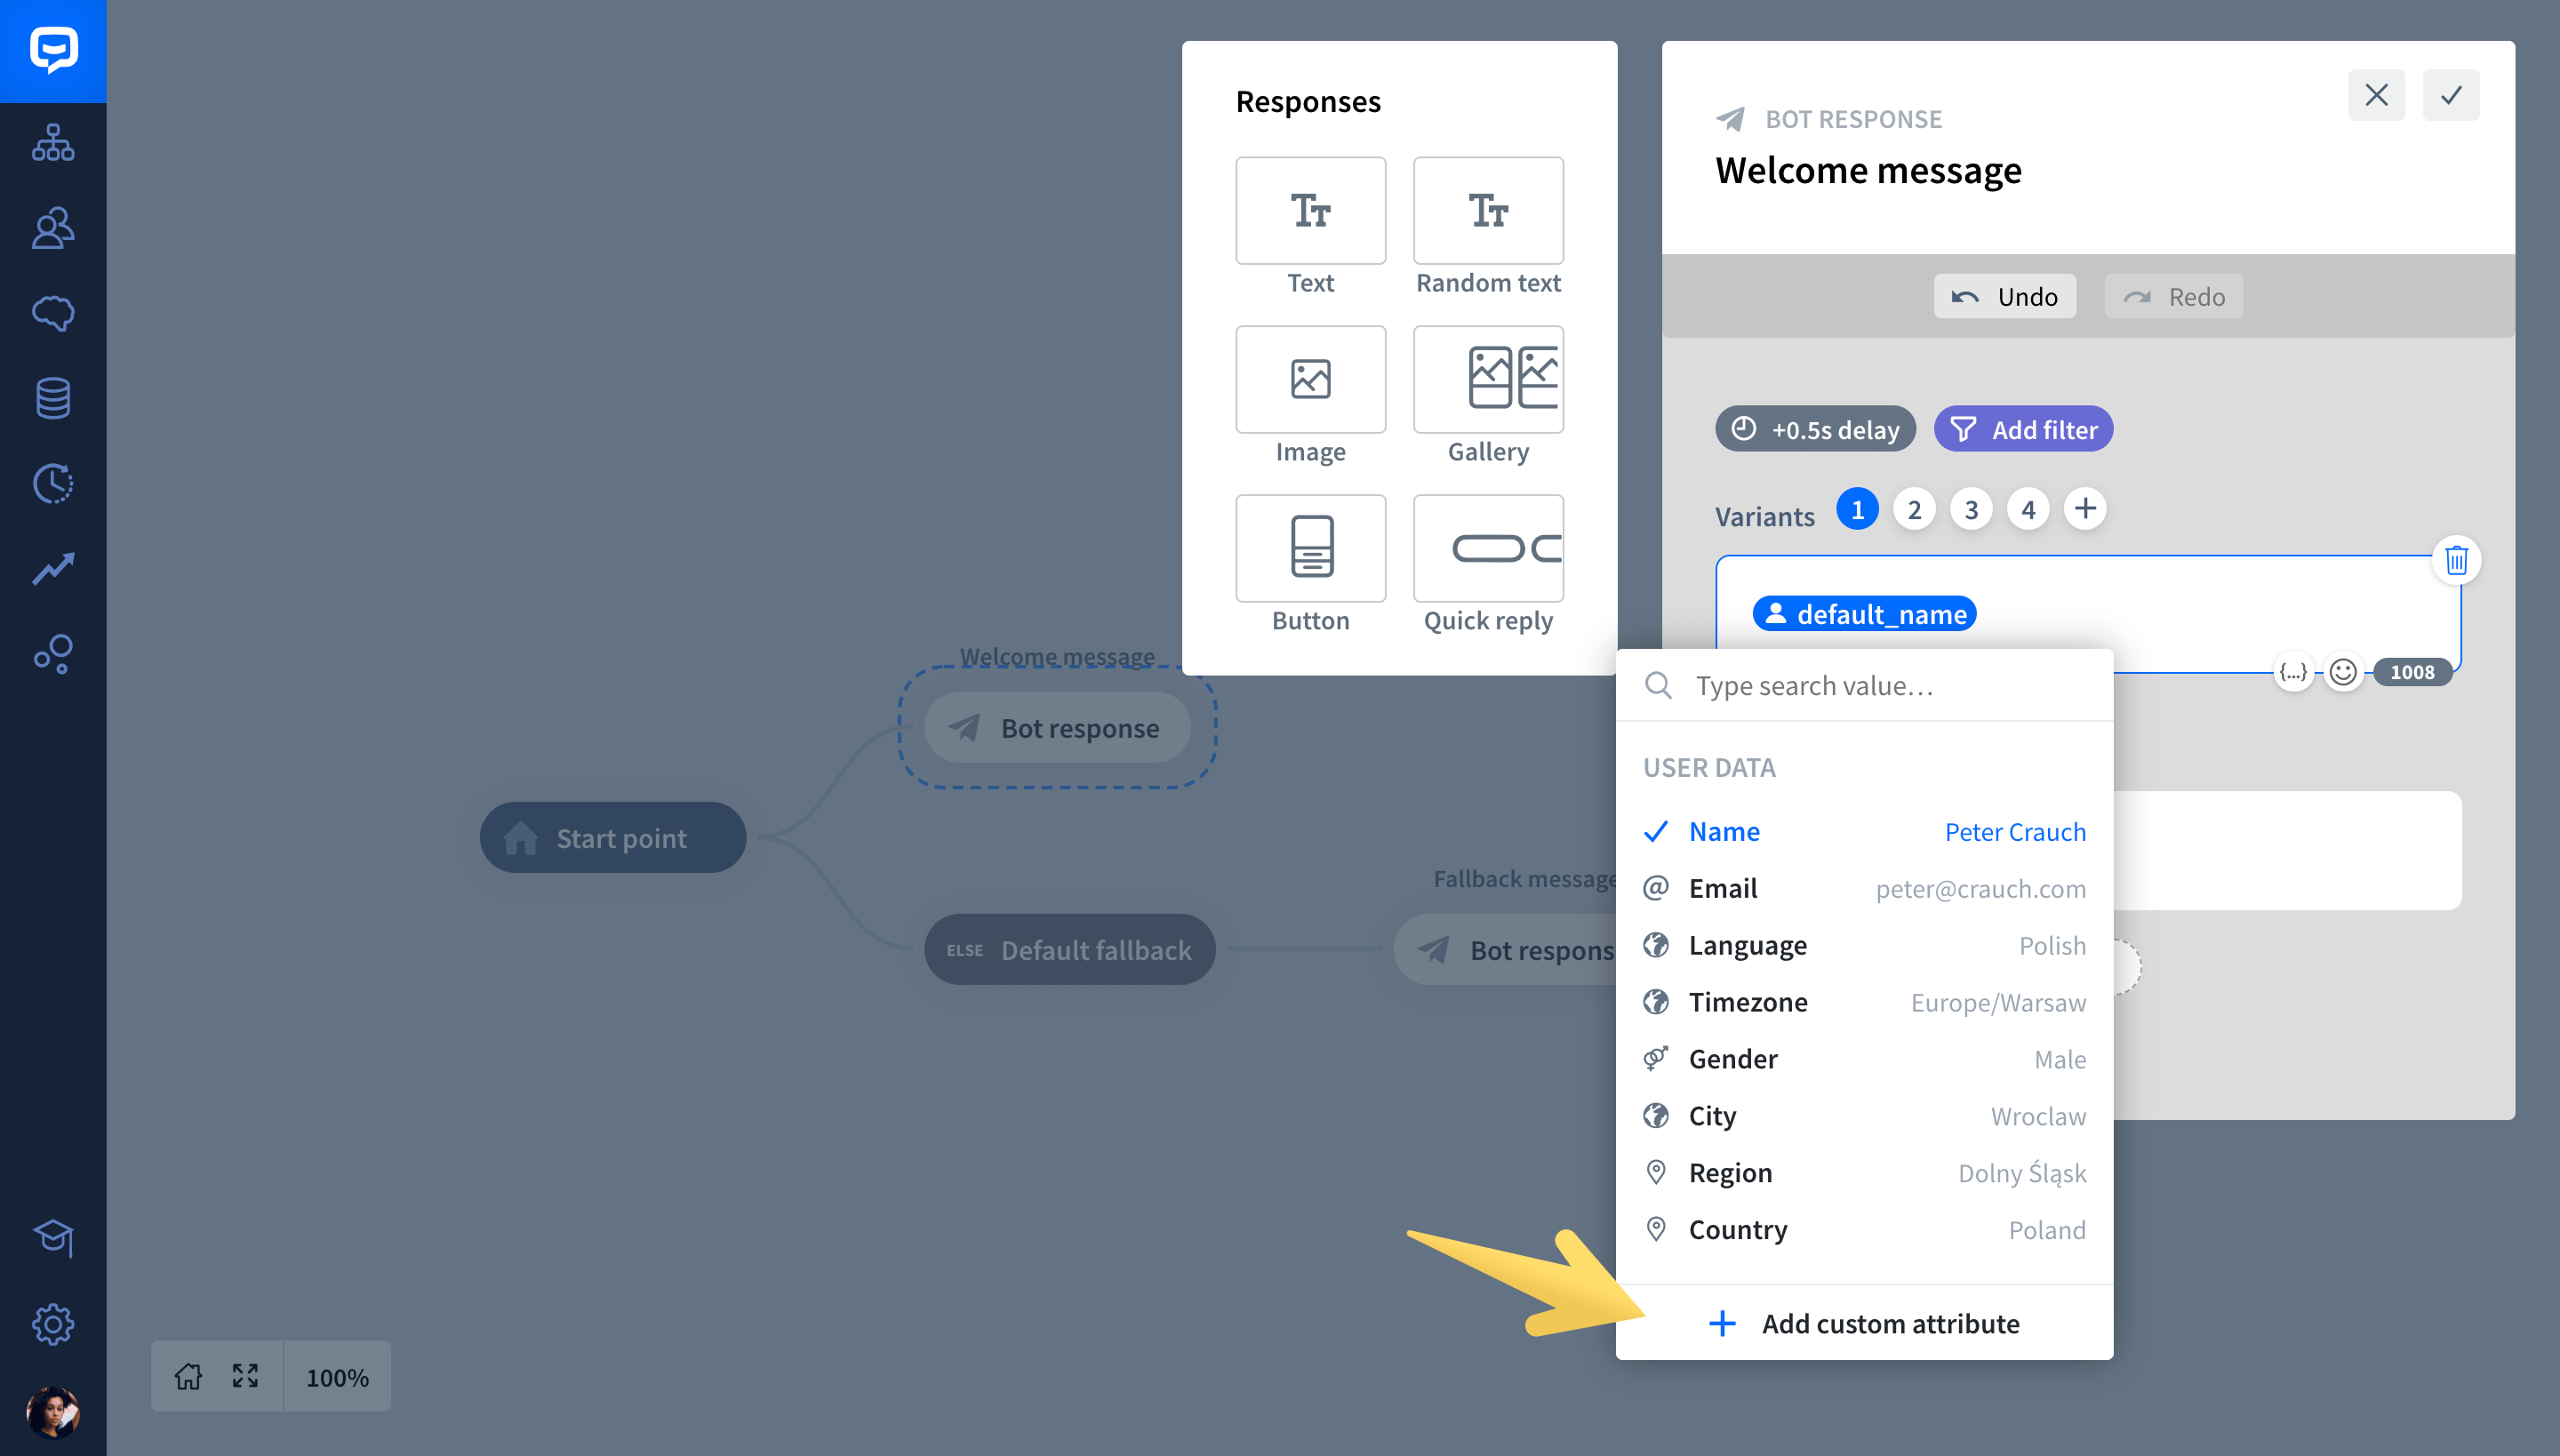
Type double curly brackets in the User input or Bot response
{{ ... }}.
-
Then, click on the Add custom attribute.
-
Here, you can name your customer attribute. The click Add attribute to save it.

Collecting user attributes
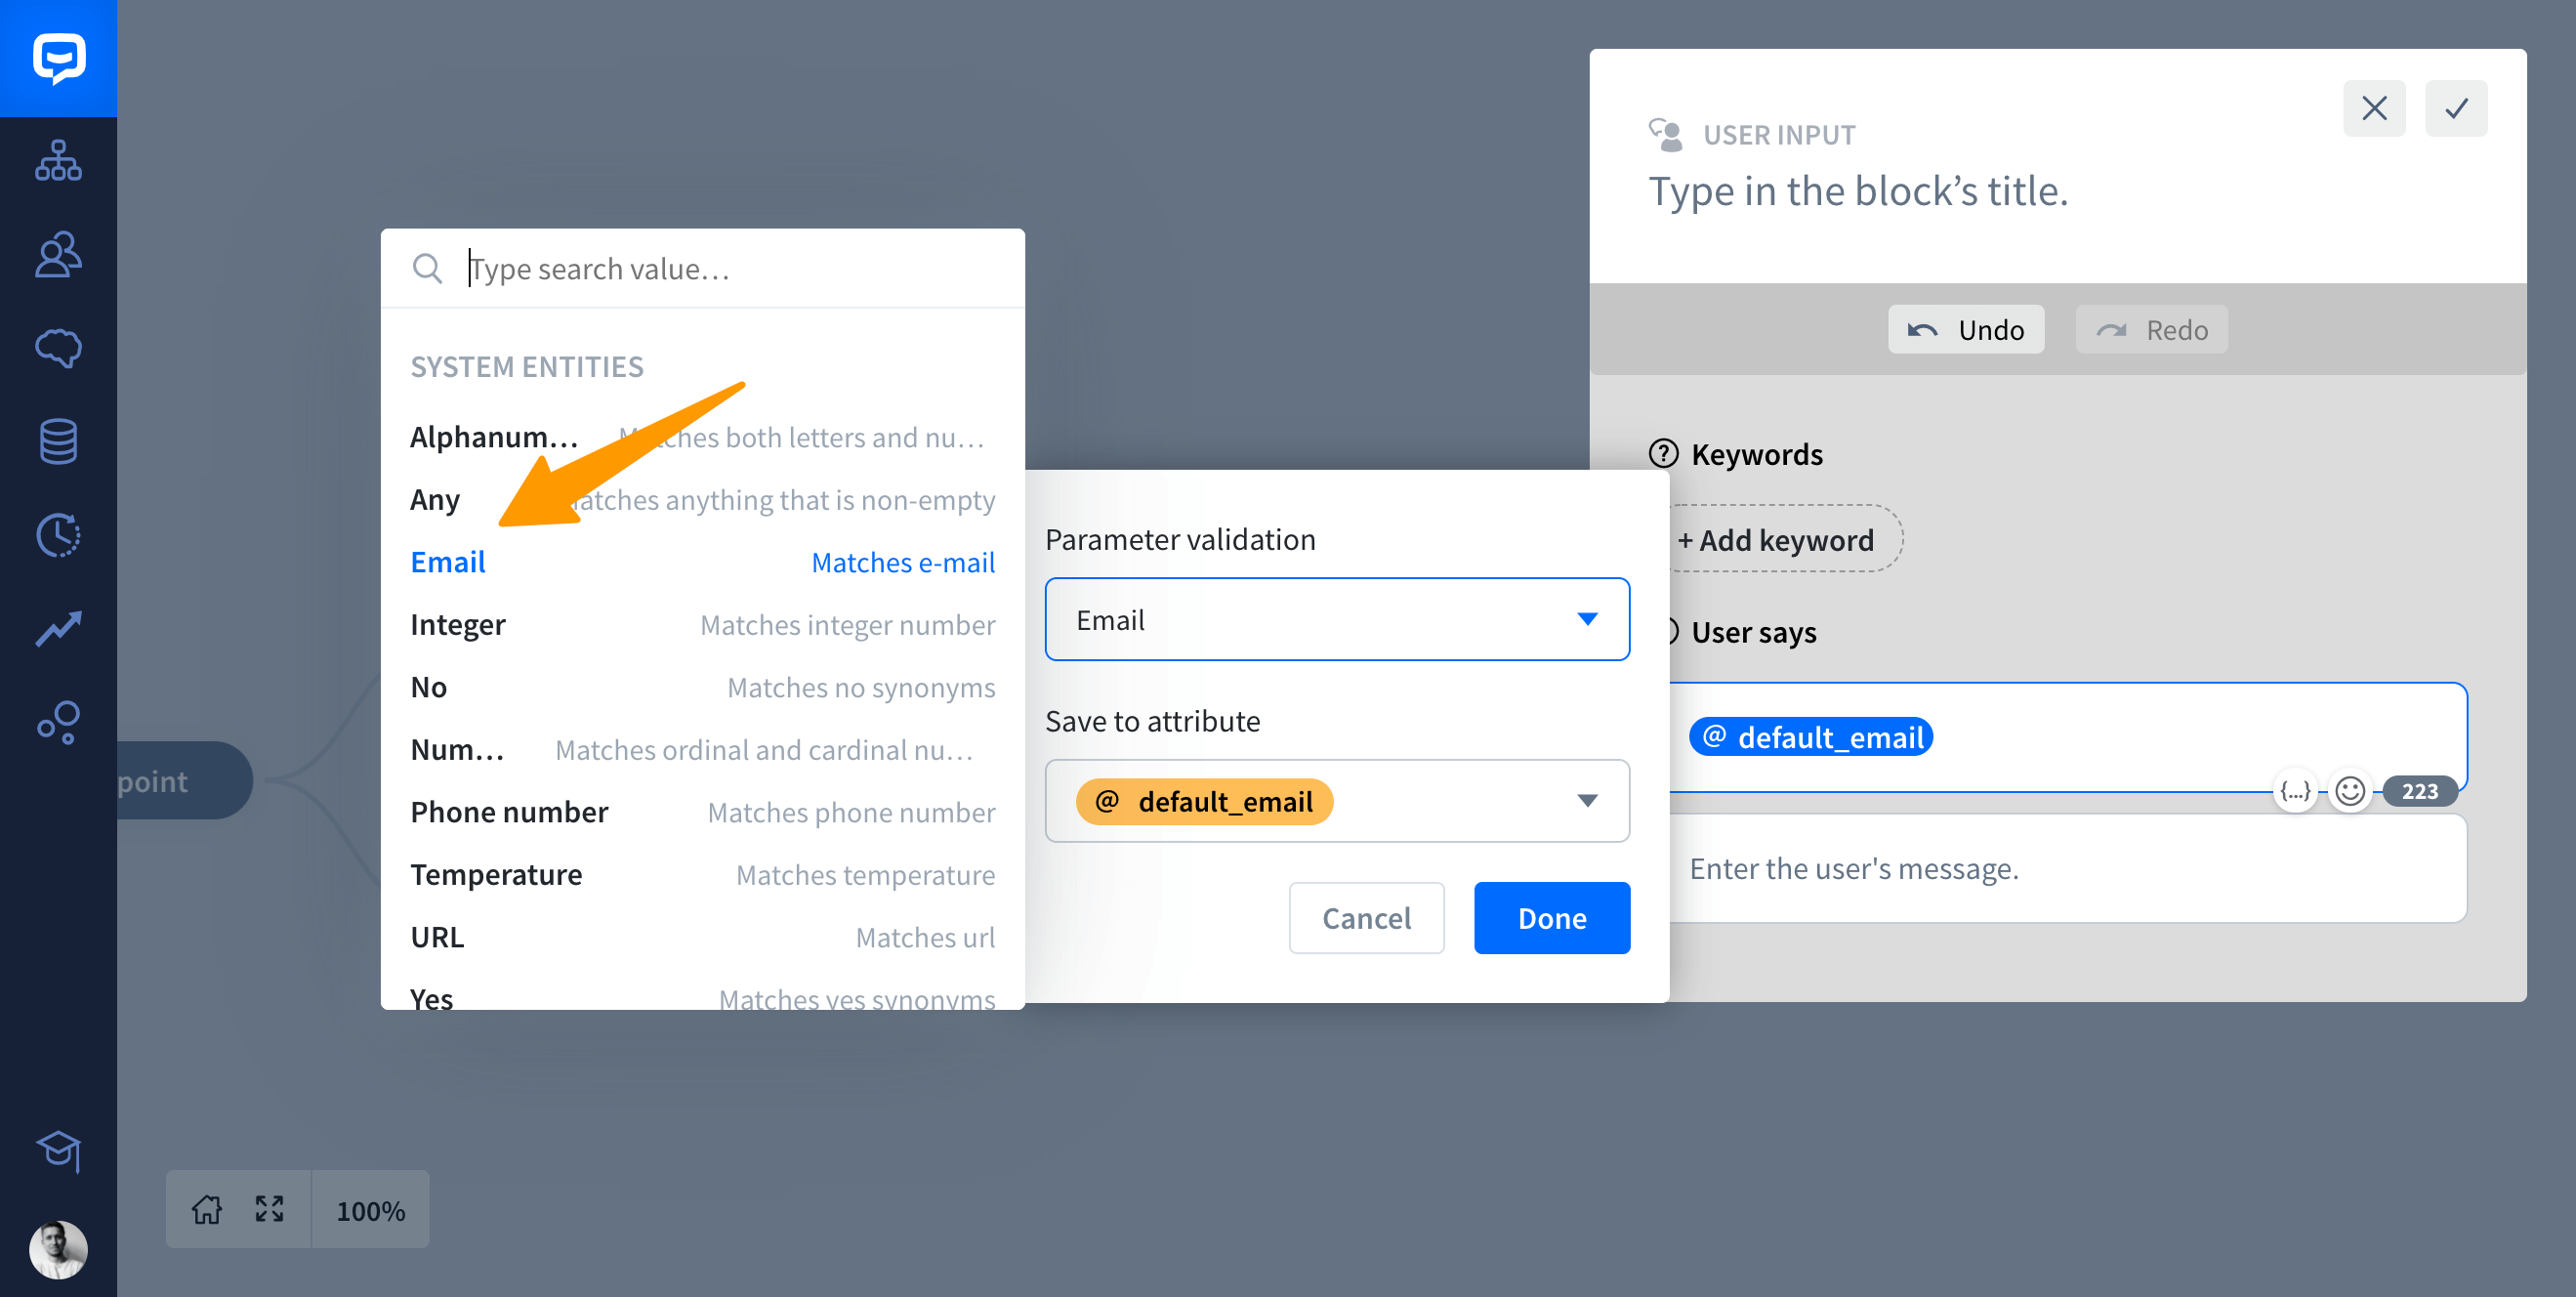
User attributes allow you to store any value you want. To get the data, you can use system entities or user entities. In the following example, we’ll be saving the email address using the email system entity.
-
Create a new Story.
-
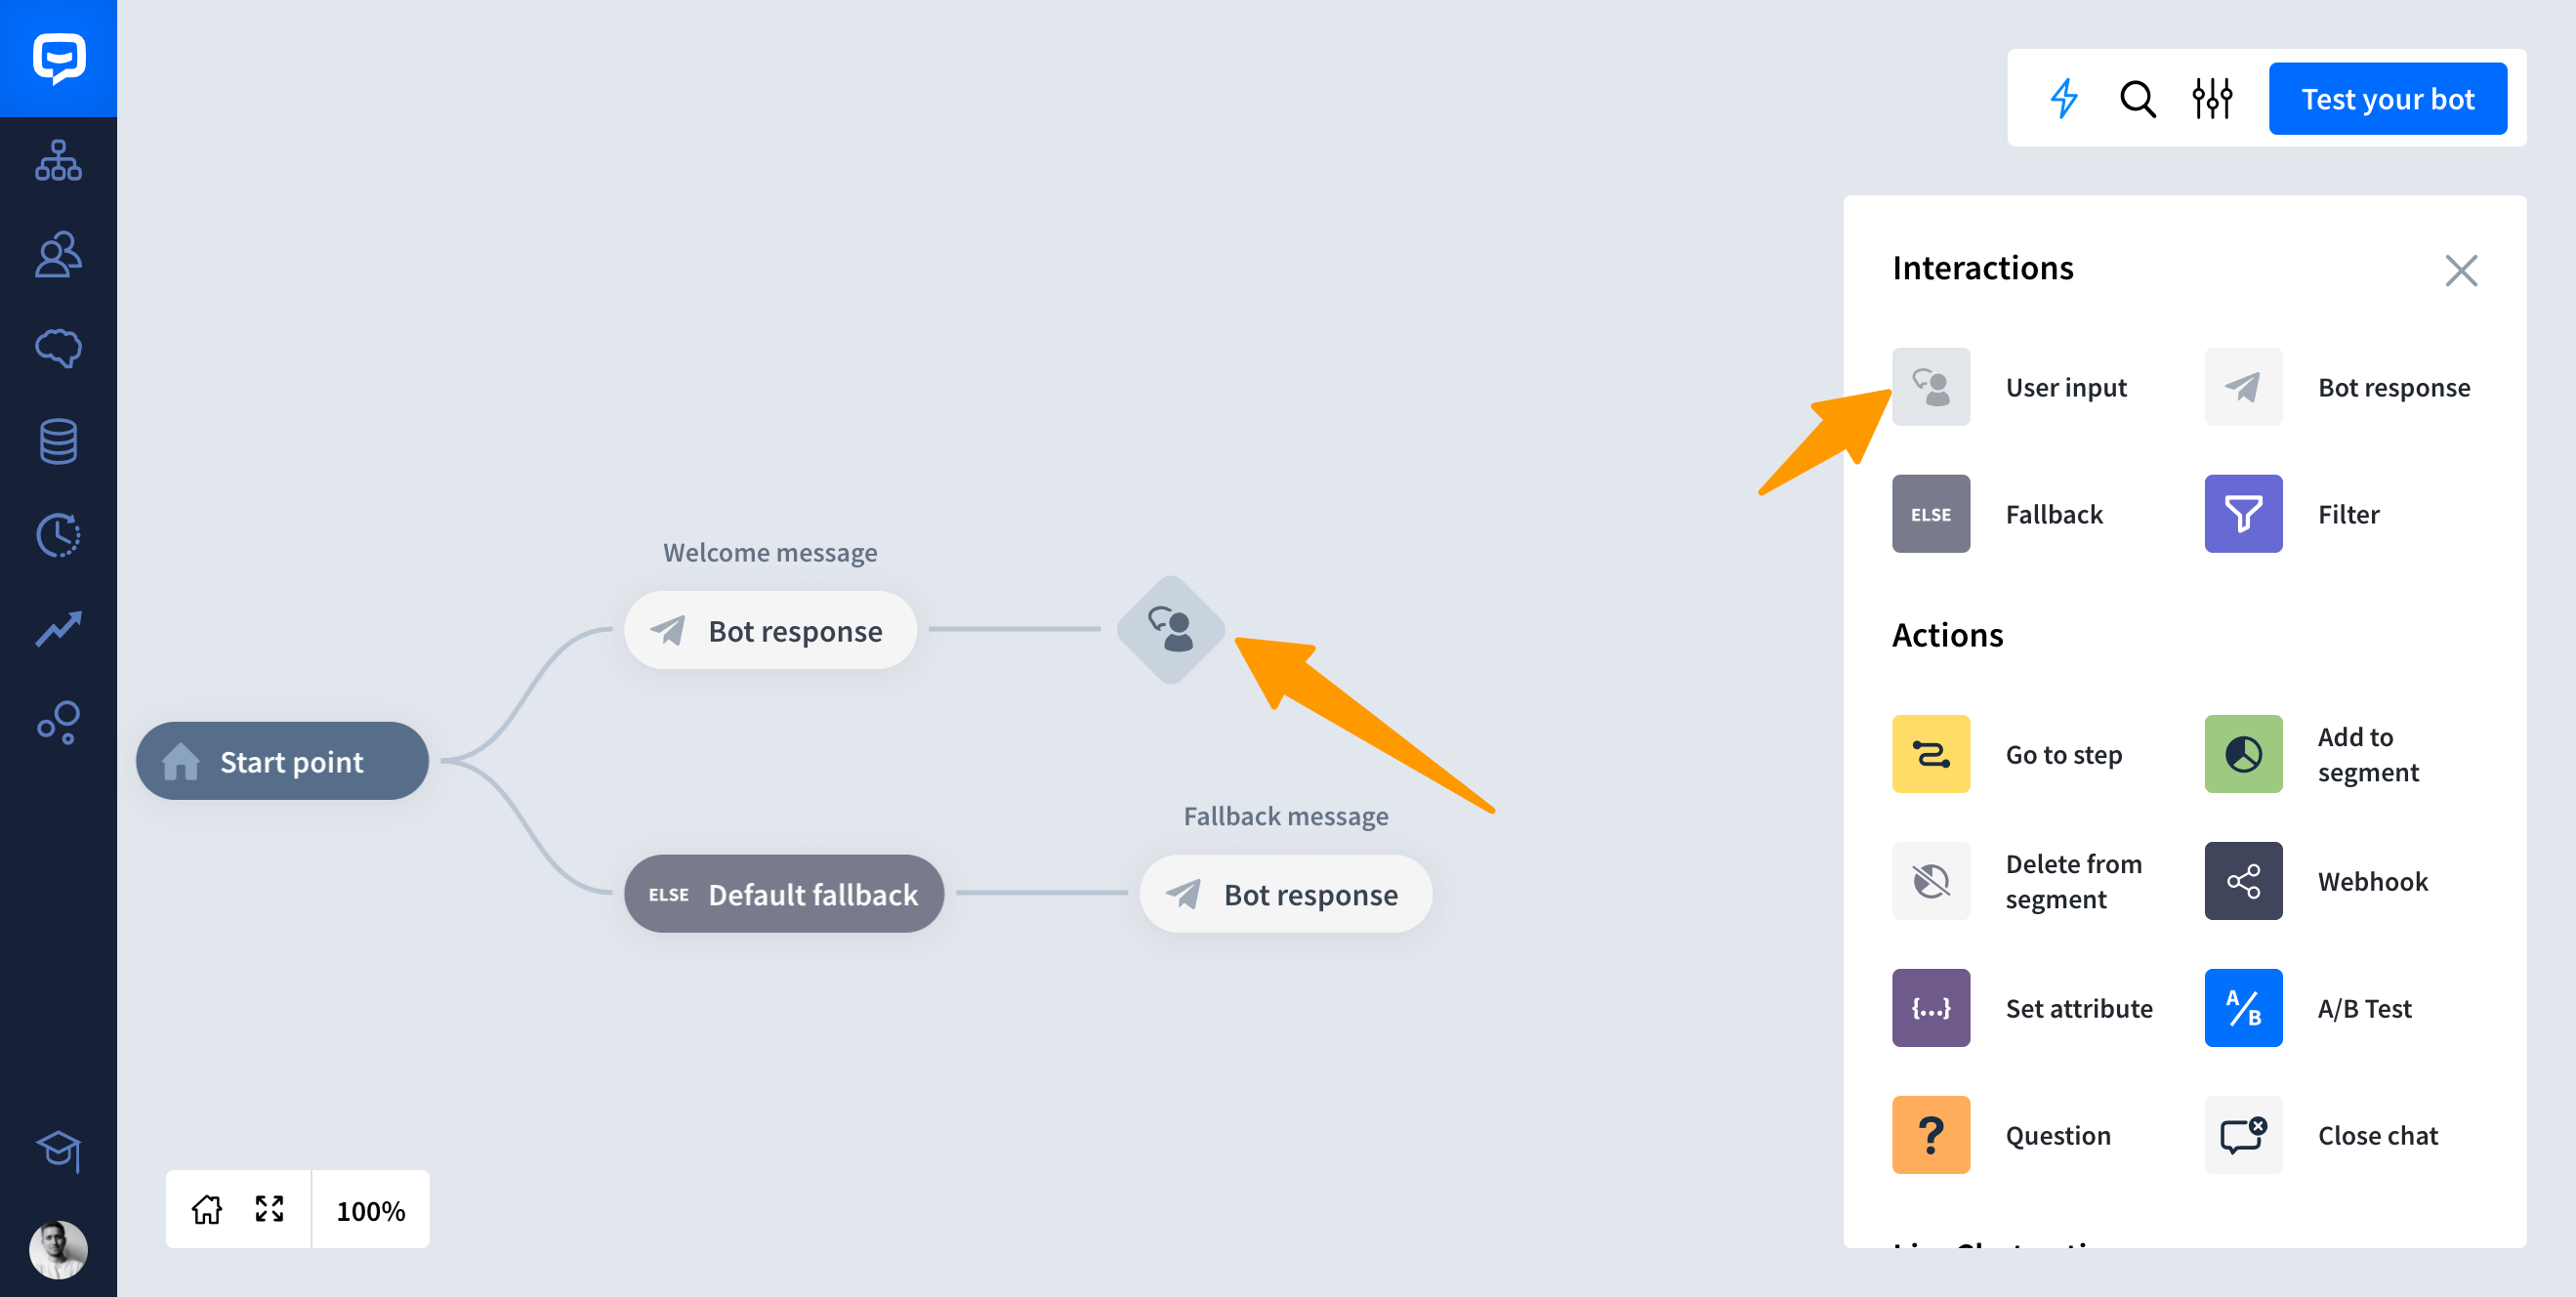
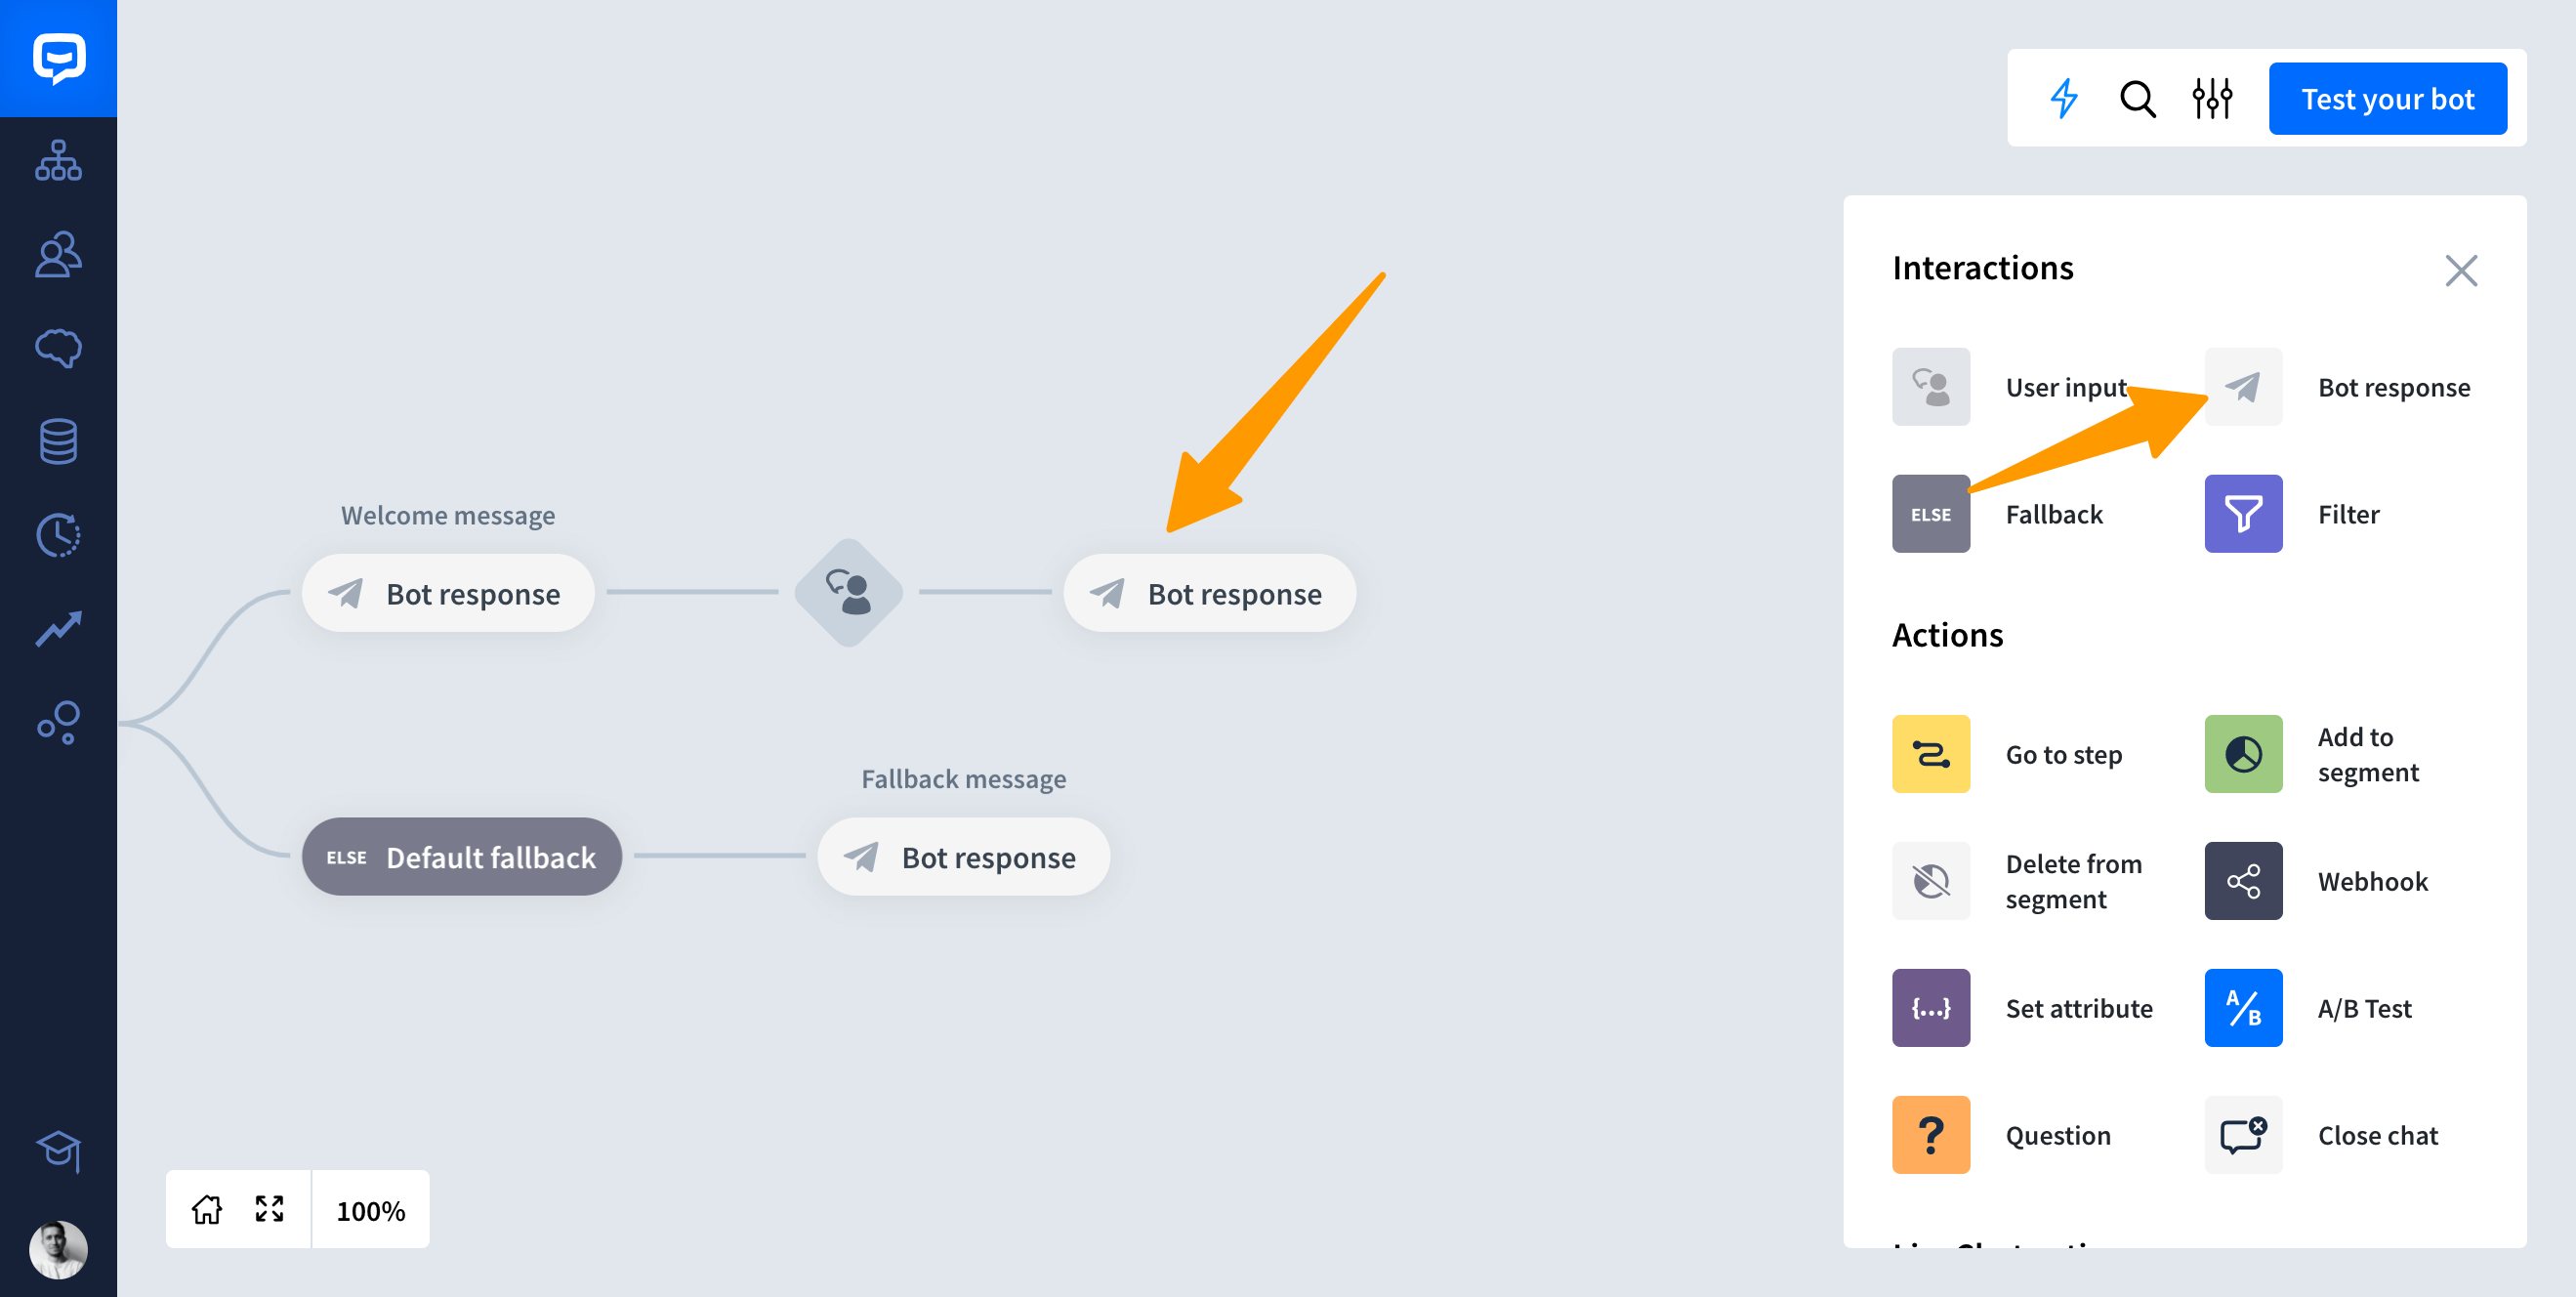
Add a new User input block to your Bot response.
-
Open the User input block. In the User says section, type two curly brackets or click the curly brackets symbol. Select the Email parameter validation. Then, click Done.
-
Close the User input block and add the Bot response block to it.
-
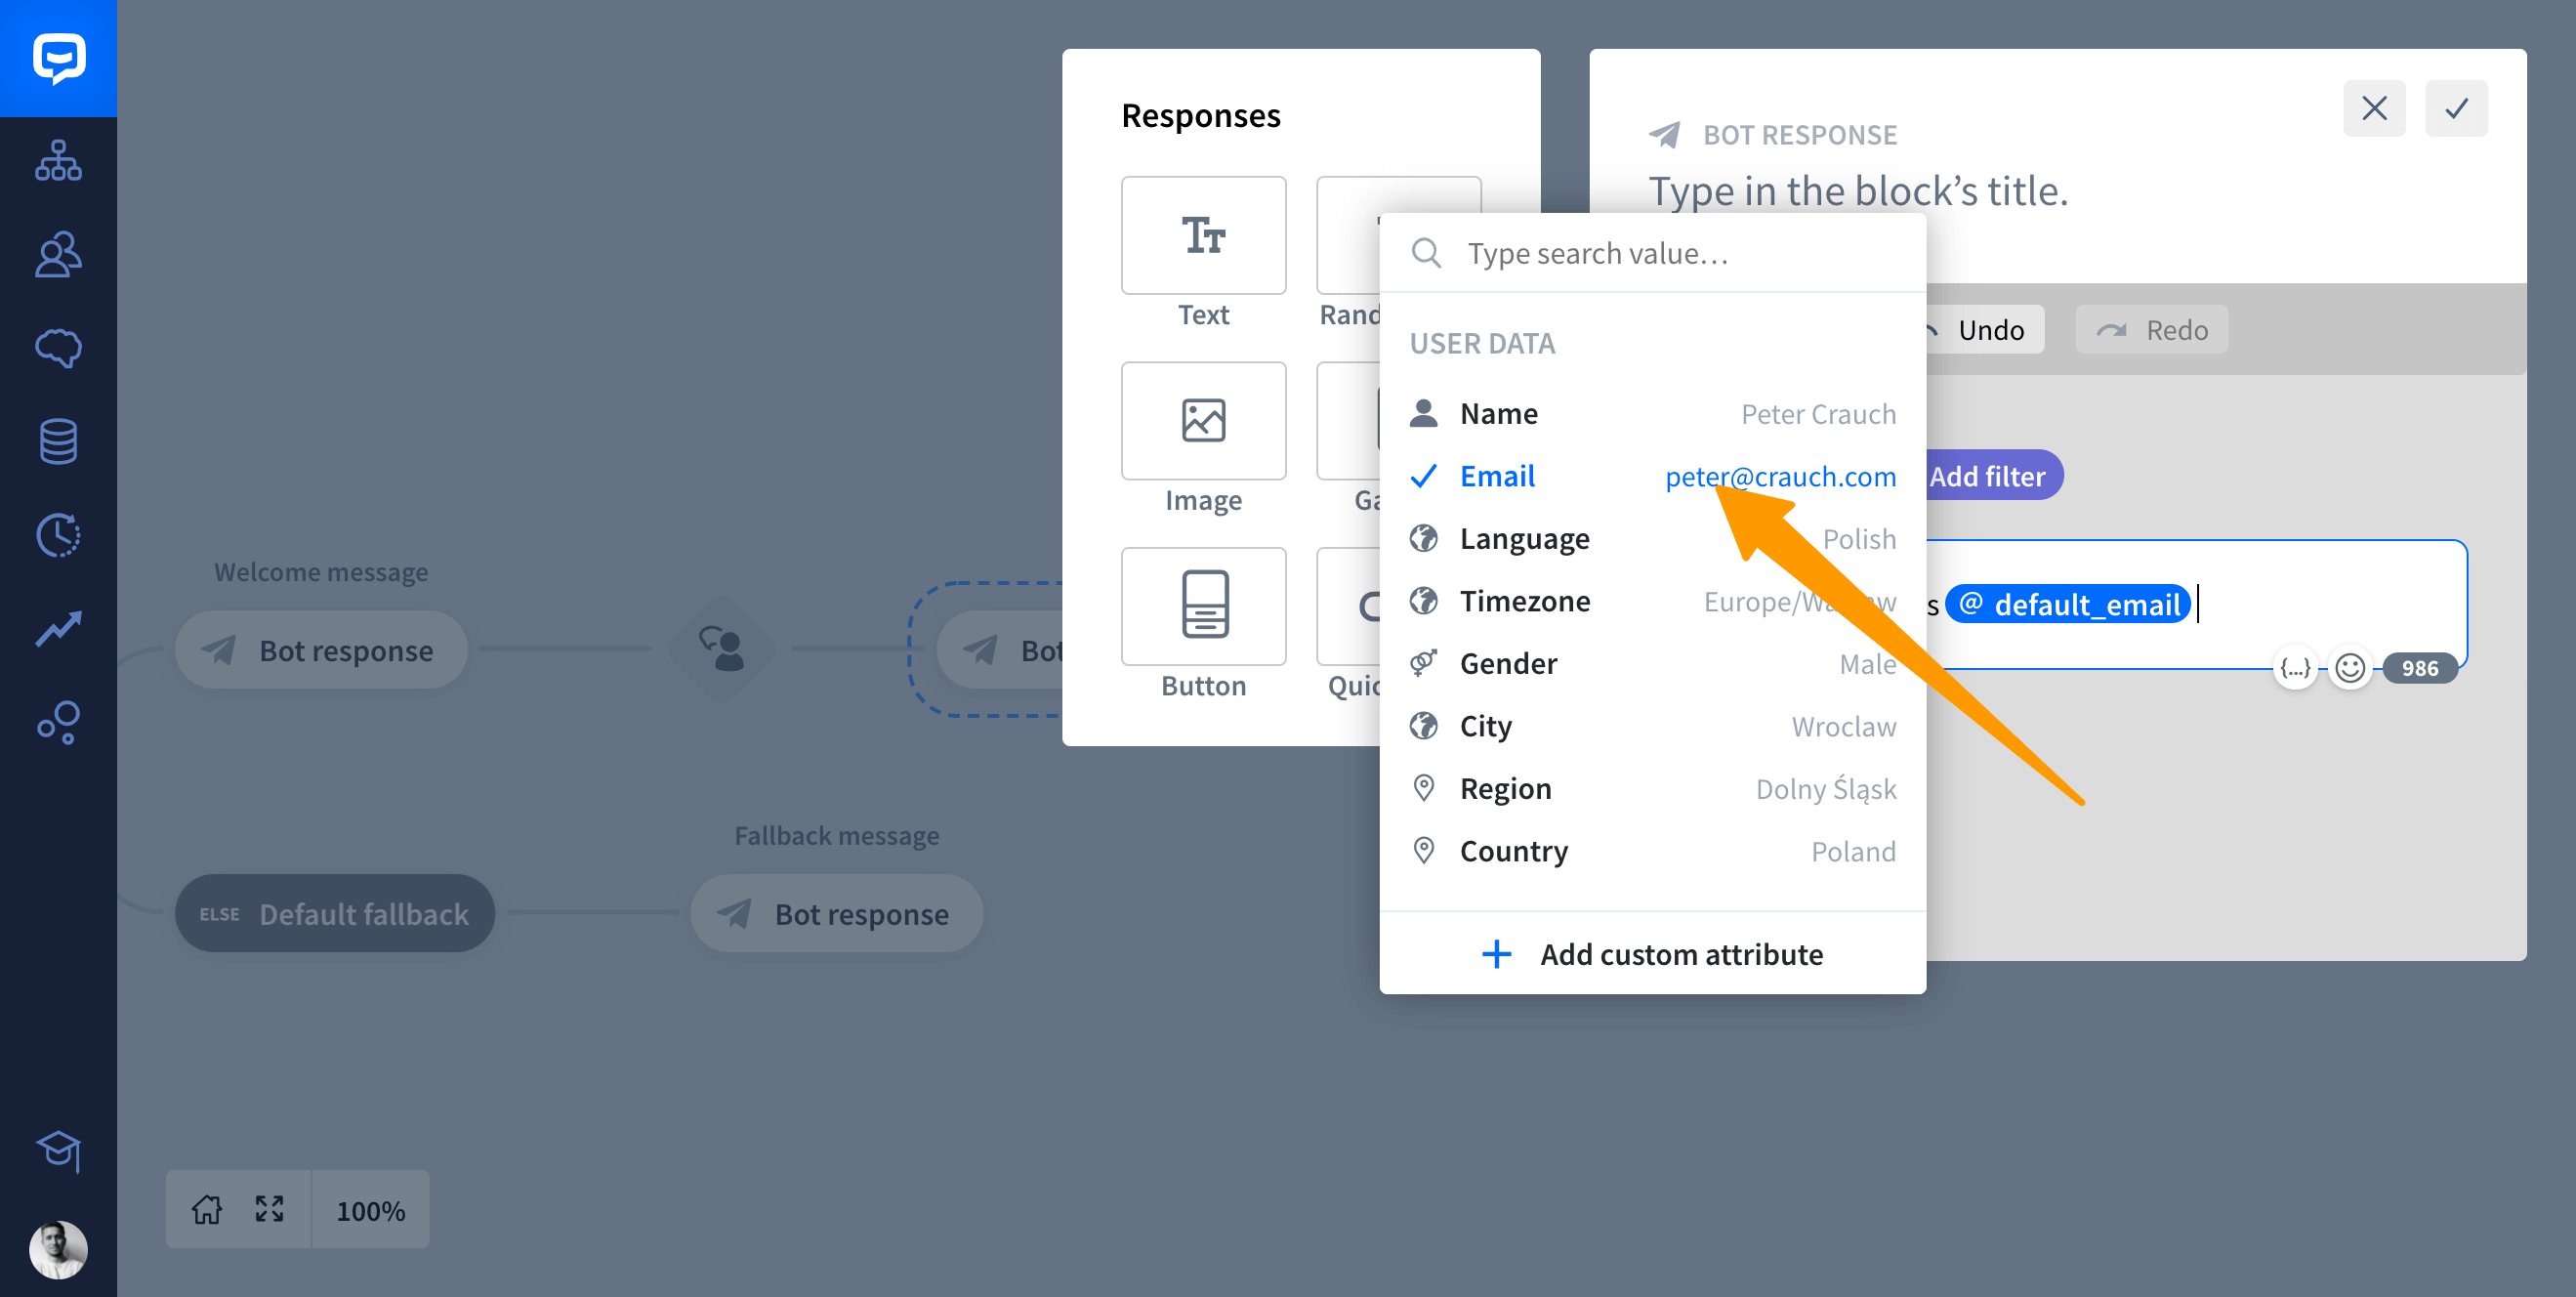
Open the added Bot response and add a new Text response. Once again, click on the curly brackets symbol to view available attributes. Select Email from the list.
-
Save your work. Your attribute is set and ready.
Use the Question action to collect attributes
You can encourage users to fill in the attributes using the Question action. Learn more about the Question action or see our Question Academy lesson.
If you ask the user their name by using the default_name attribute in Question, you can use that information in your bot responses later in the Story. If the user’s name has been collected successfully, you can add the default_name attribute in the bot’s message to make it sound more natural.
Use buttons to save attributes
Button actions allow you to add special events that are triggered when the button is clicked. For example, you can save an action the user made as an attribute. Button actions are invisible to end-users.
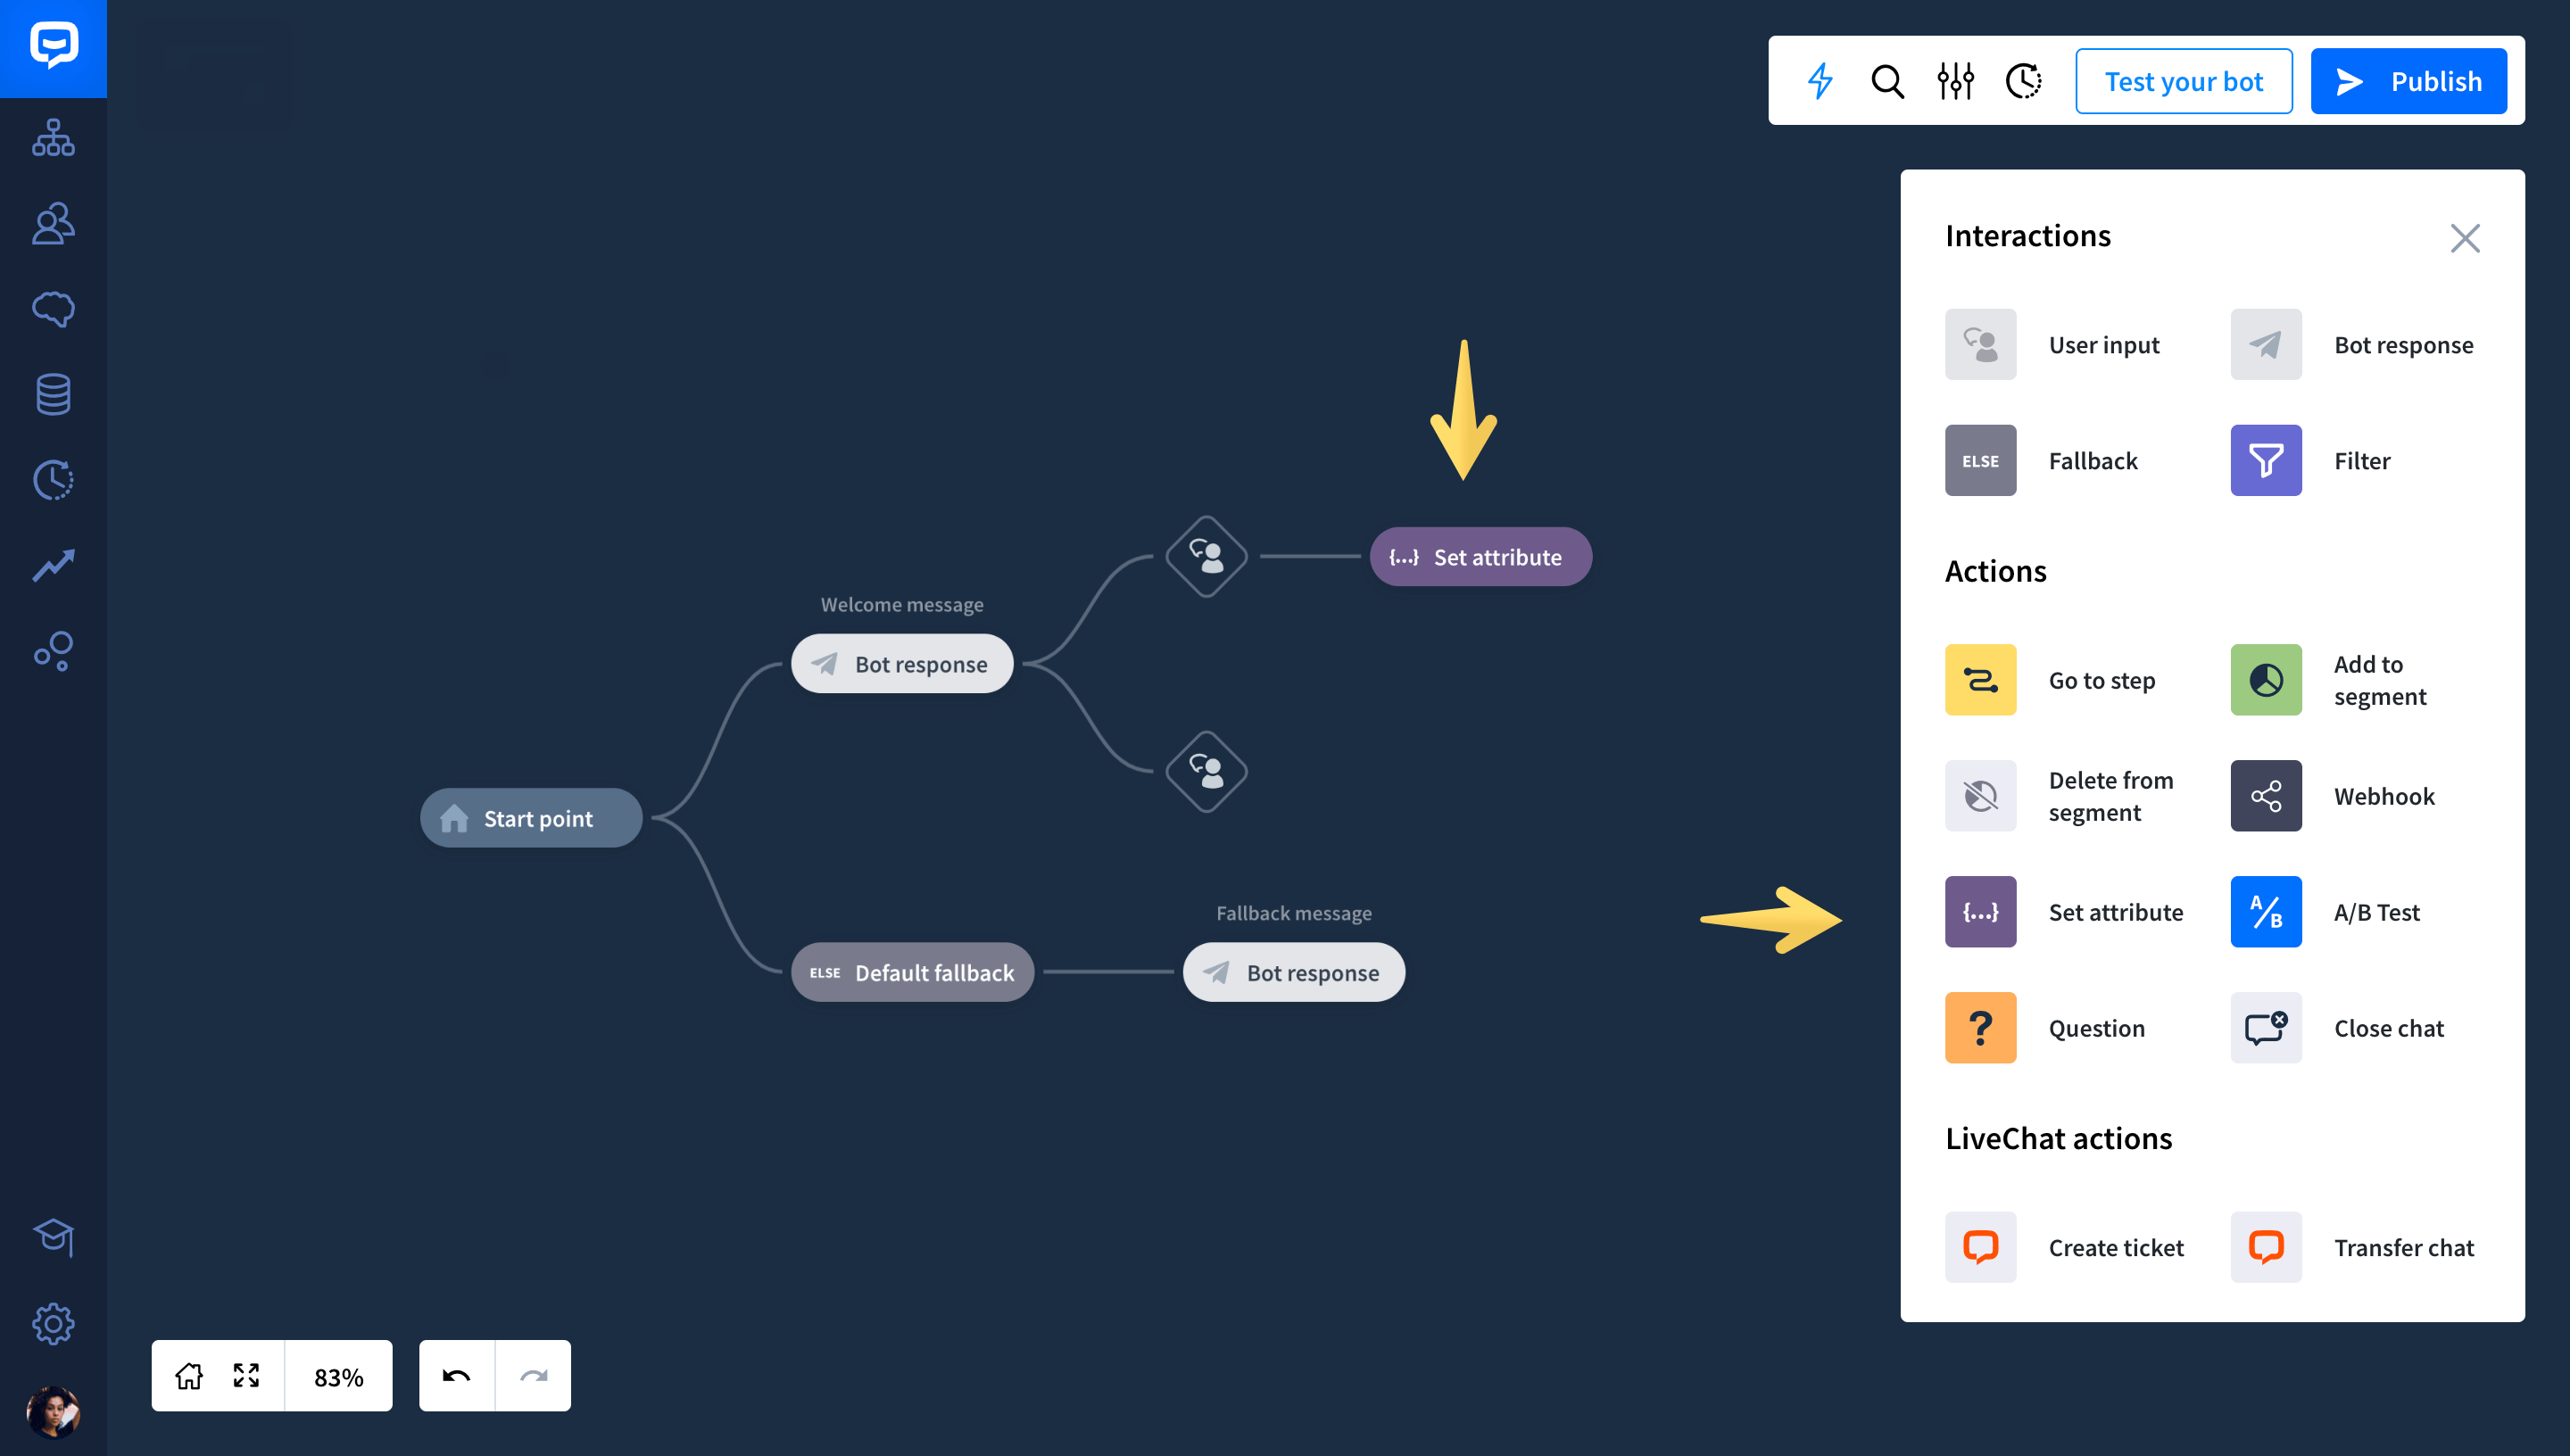
Use the Set attribute action
You can save attributes at any point in your Story by dragging the Set attribute block from the Actions menu.
-
Place the Set attribute block after the chosen User input to save it.
-
Click on the Set attribute block to edit it.
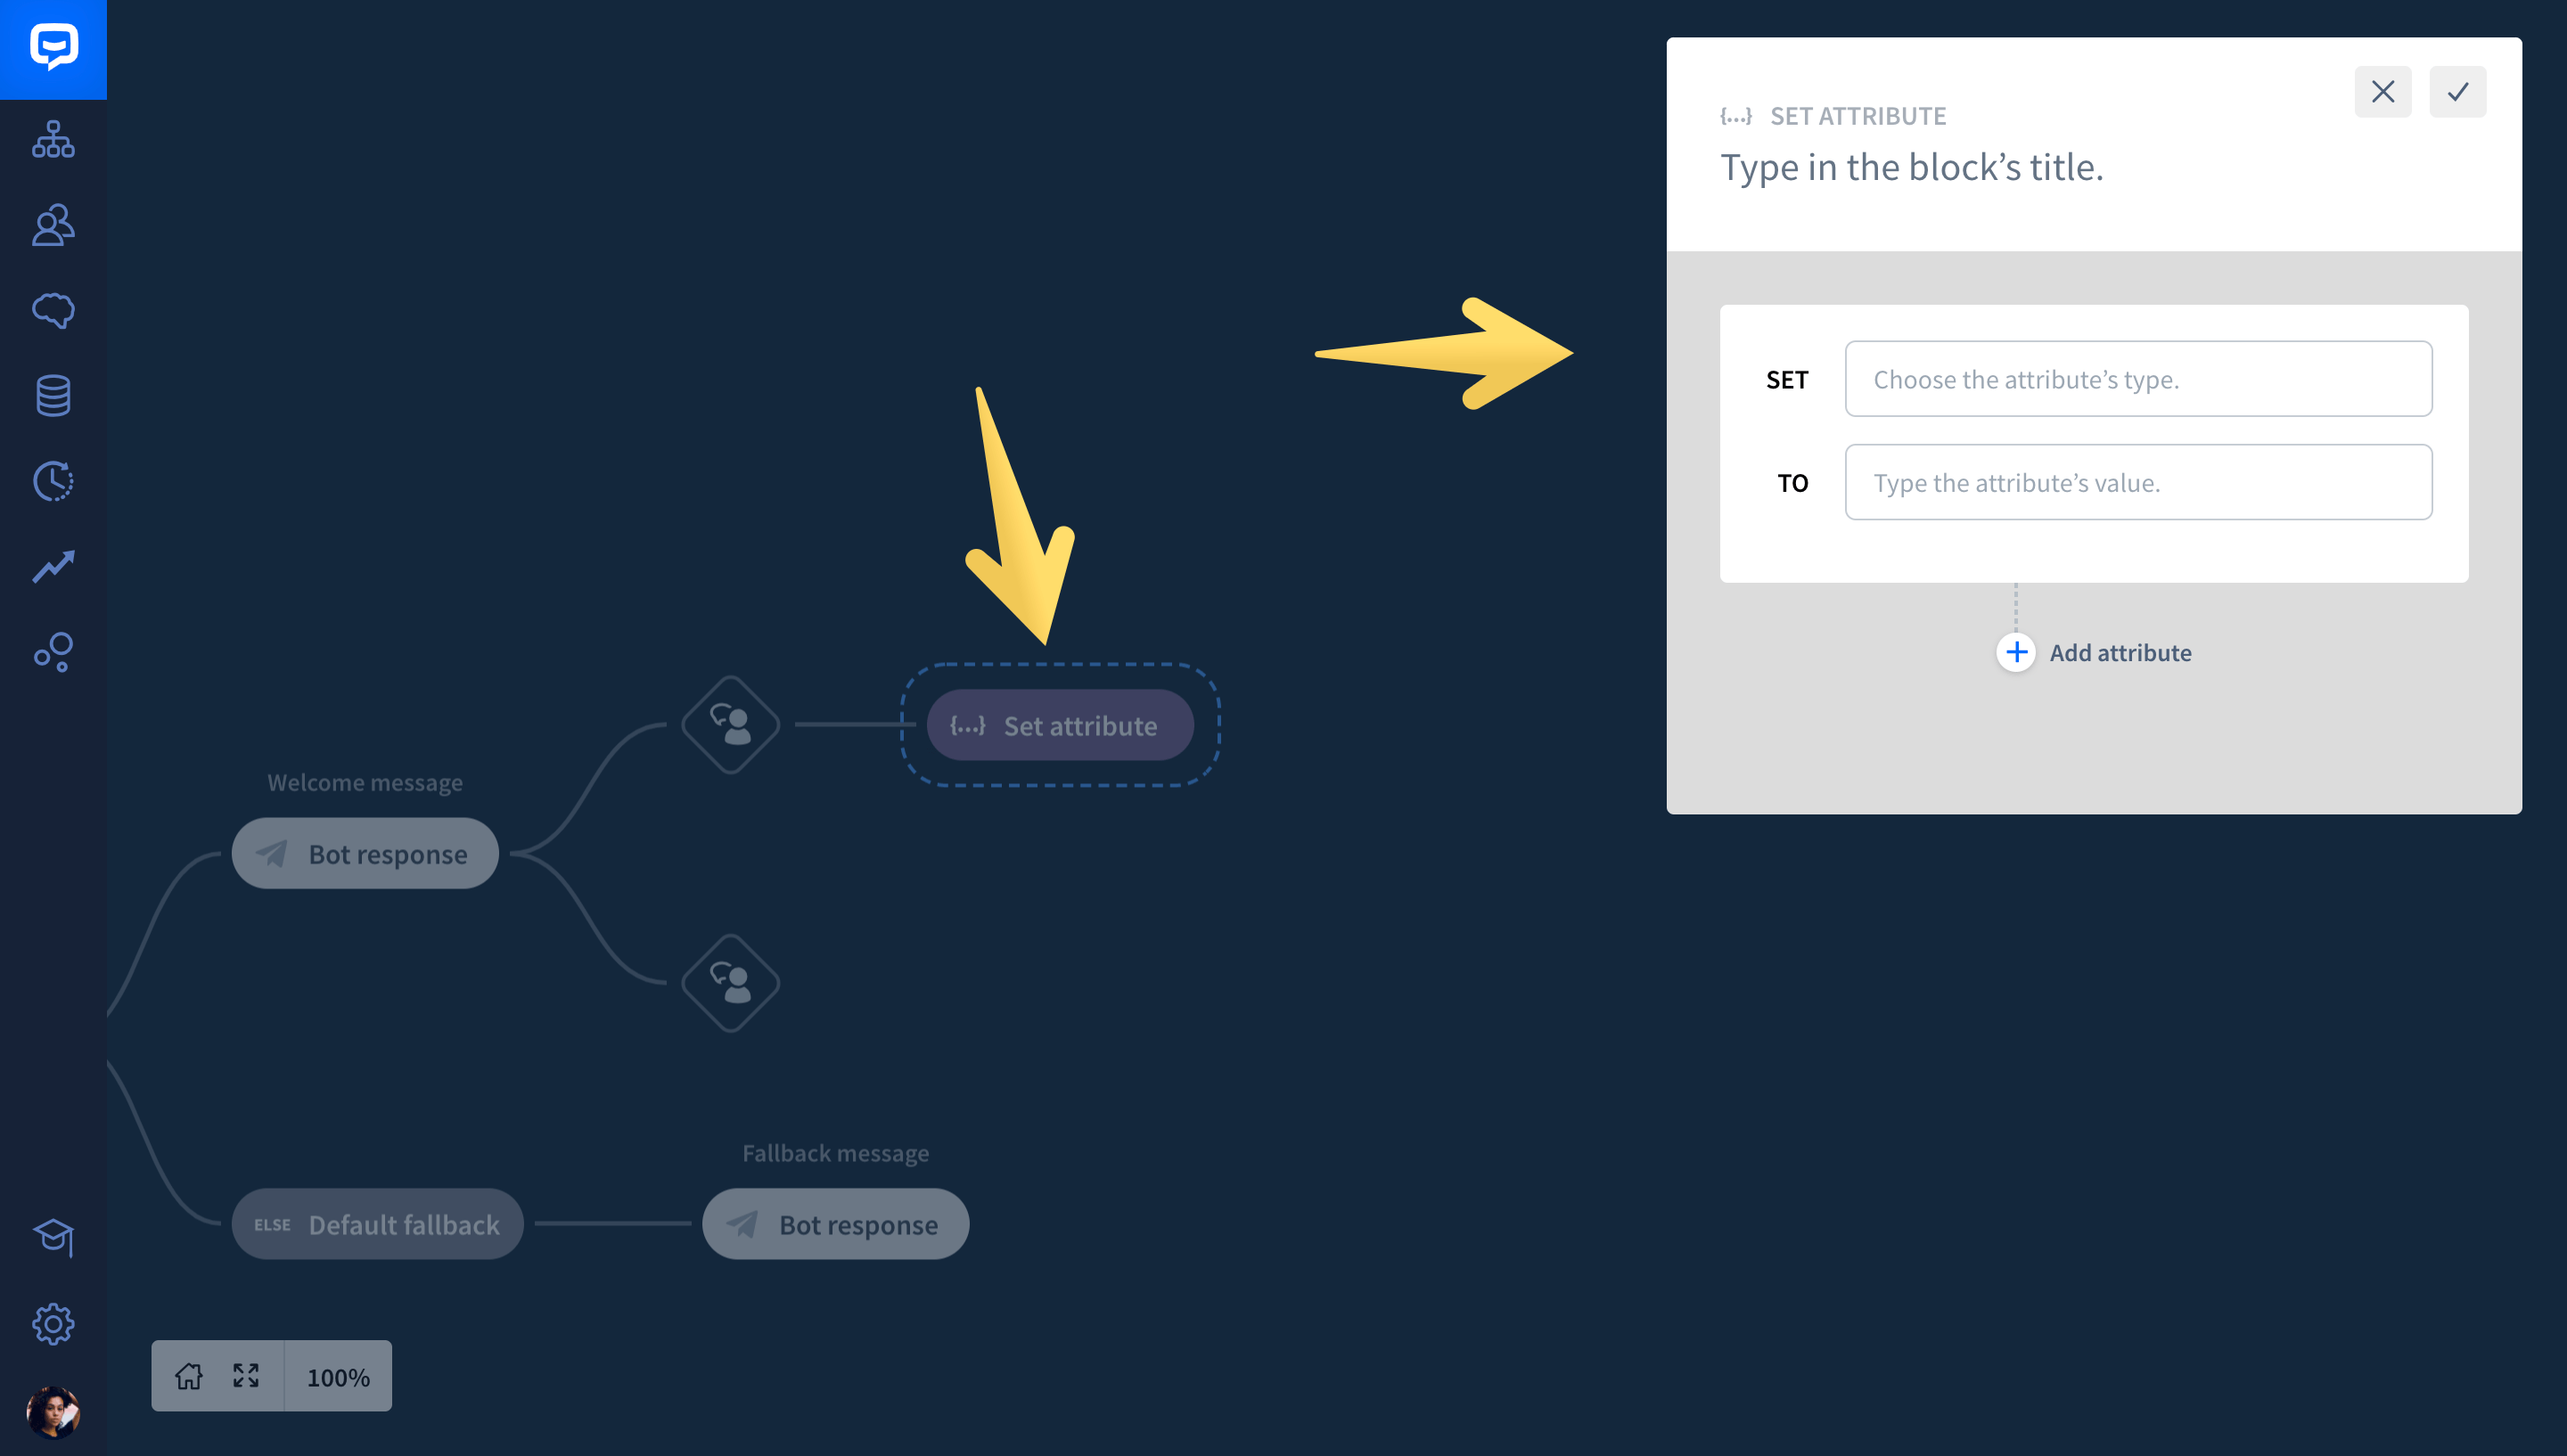
-
Choose a custom attribute or pick any from the list of default attributes.
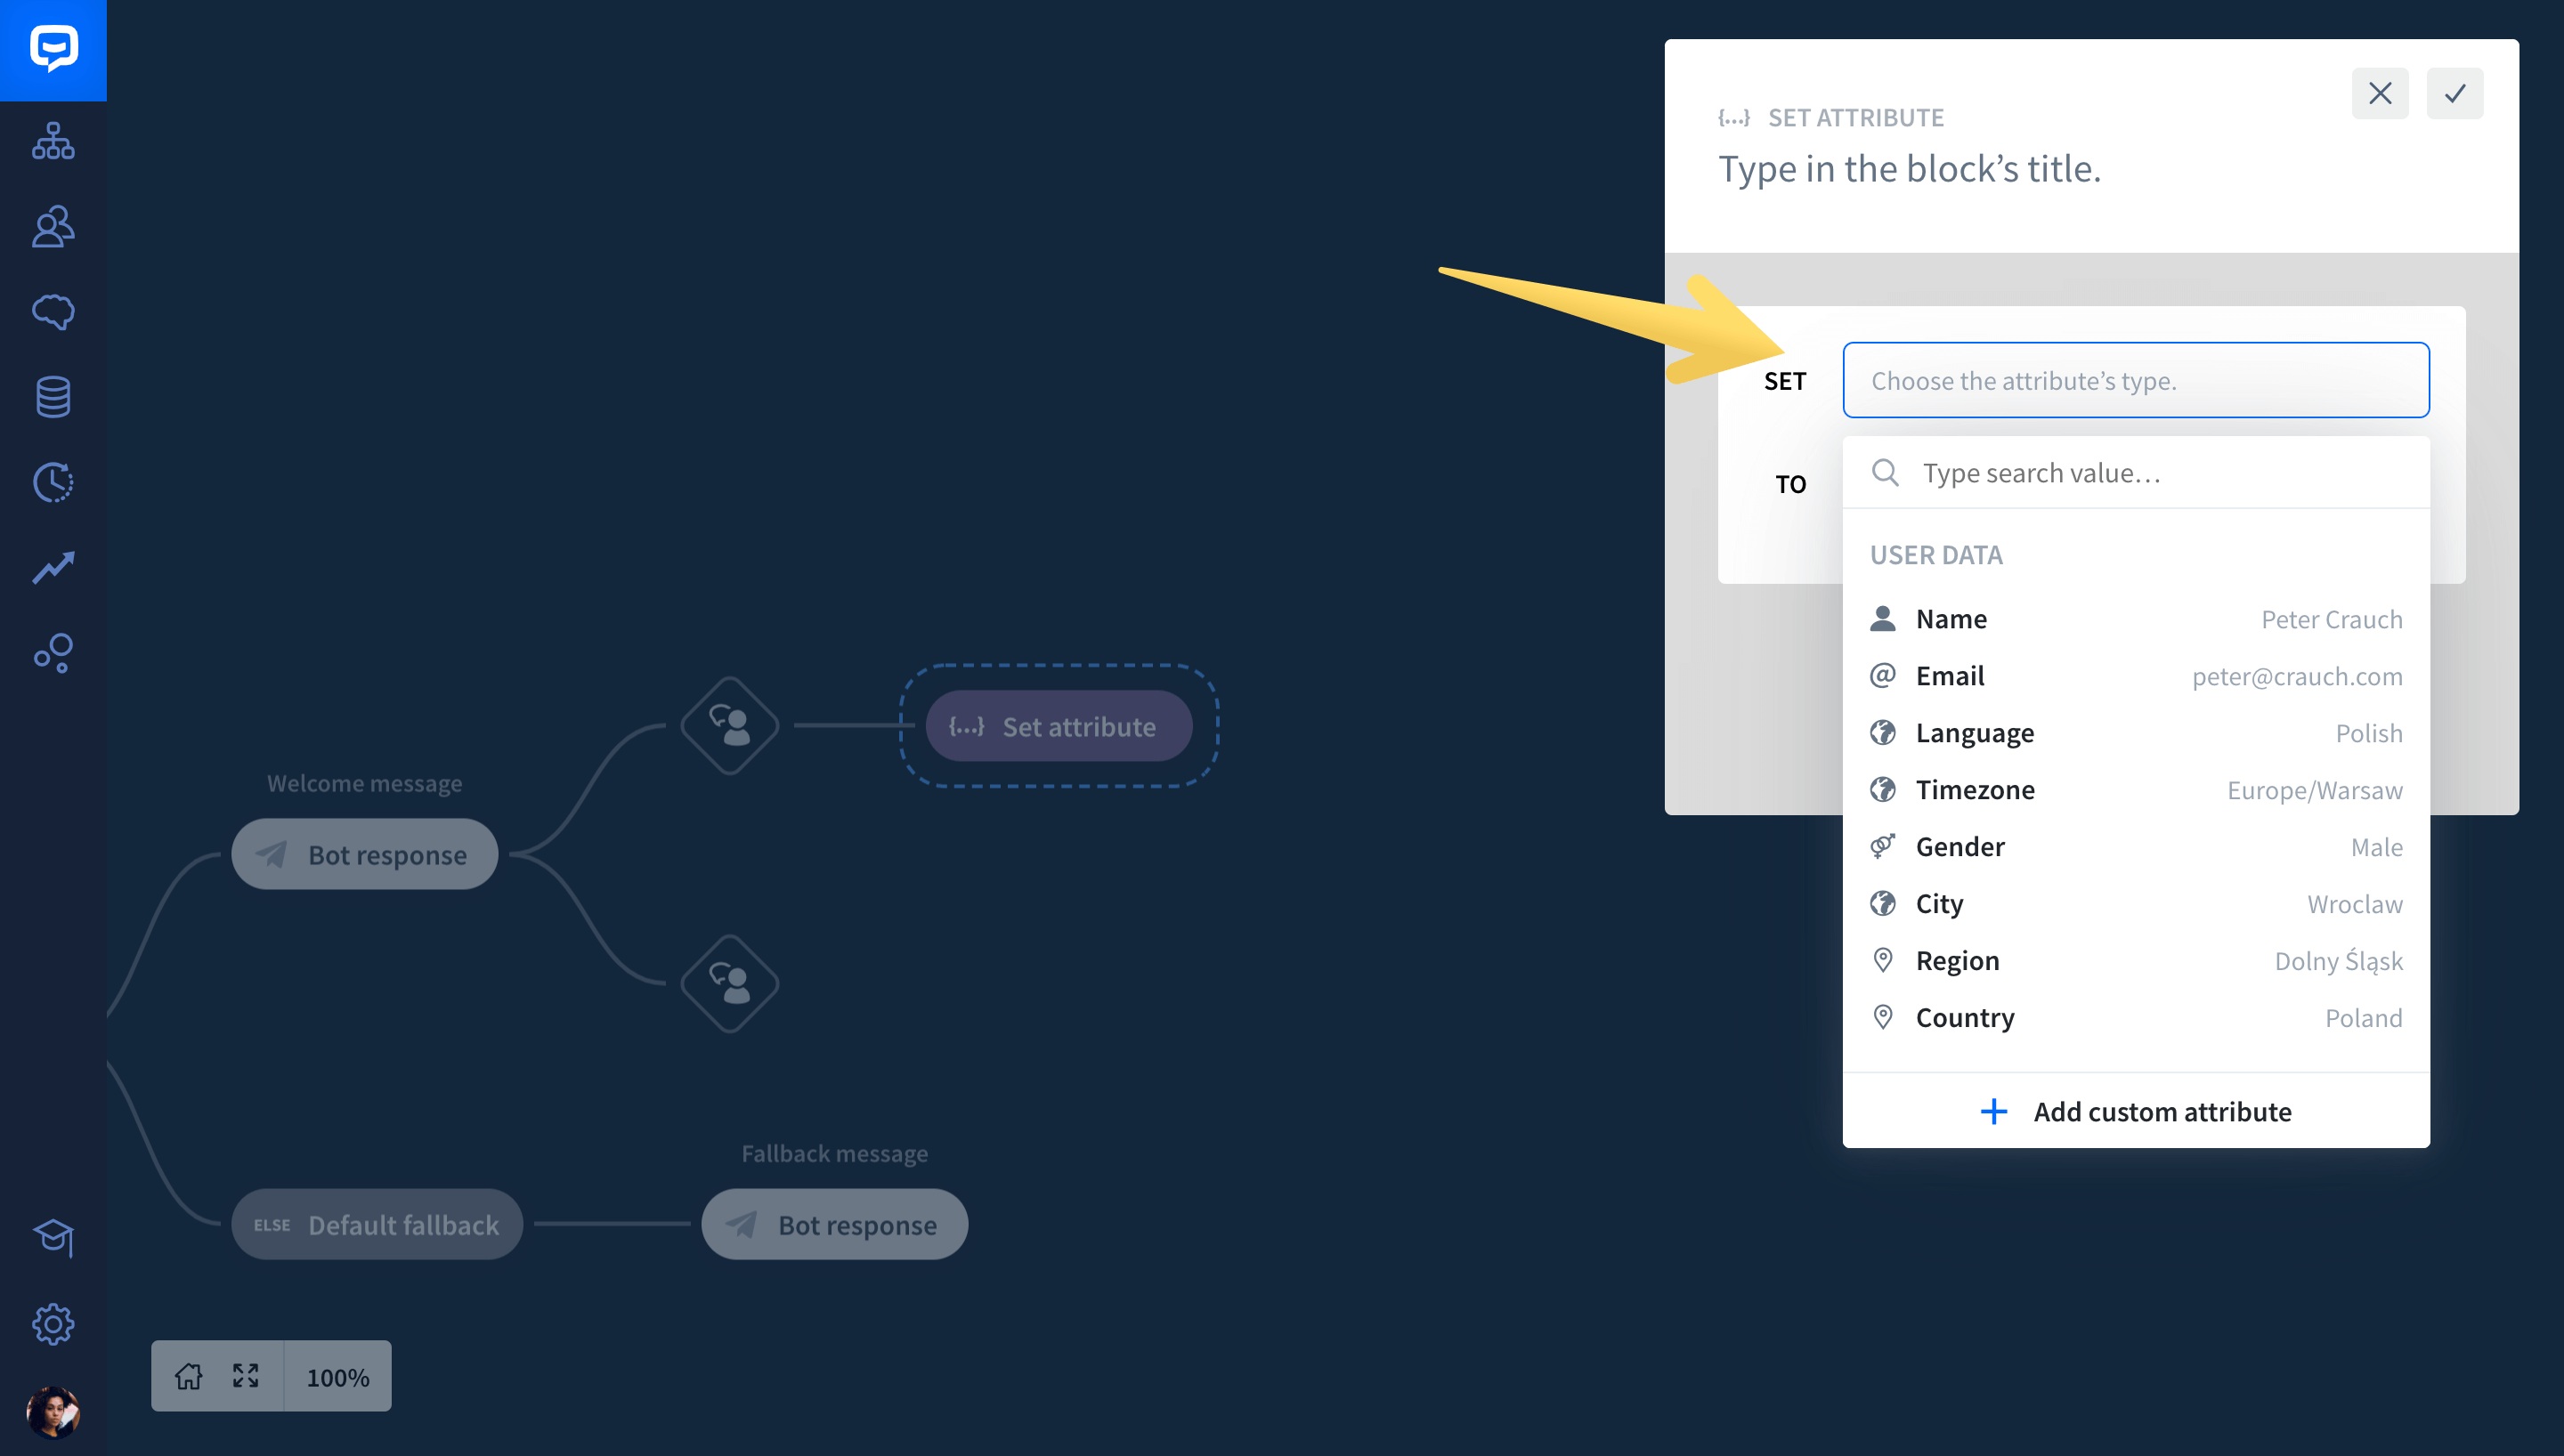
-
Name the attribute. This way, you will easily find it and can reuse it in your Story. Then click Add attribute.

